Set Up a Booth From Scratch
In this tutorial you will create a booth in the Pixture dashboard, assign print templates, choose the booth's screen design and filters, set a price or make photo sessions free, check the outputs, pair the booth computer and run a test session. Allow about 30 minutes, plus the time to install the Pix Desktop App.
Before You Start
- A Pixture account, with the dashboard open at pixture.io.
- The Pix Desktop App installed on the booth computer, with the camera and printer connected.
- On Pix Starter, one computer can be paired and every photo, print and GIF carries the Pixture watermark. Pix Pro removes the watermark and unlocks payments at the booth. See Plans & Pricing.
Step 1: Create the booth
- In the sidebar click Booths, then + New Booth.
- On the Single booth tab, type a Booth Name that tells you where the booth is or what it is for, and a Location if you like.
- Click Create.
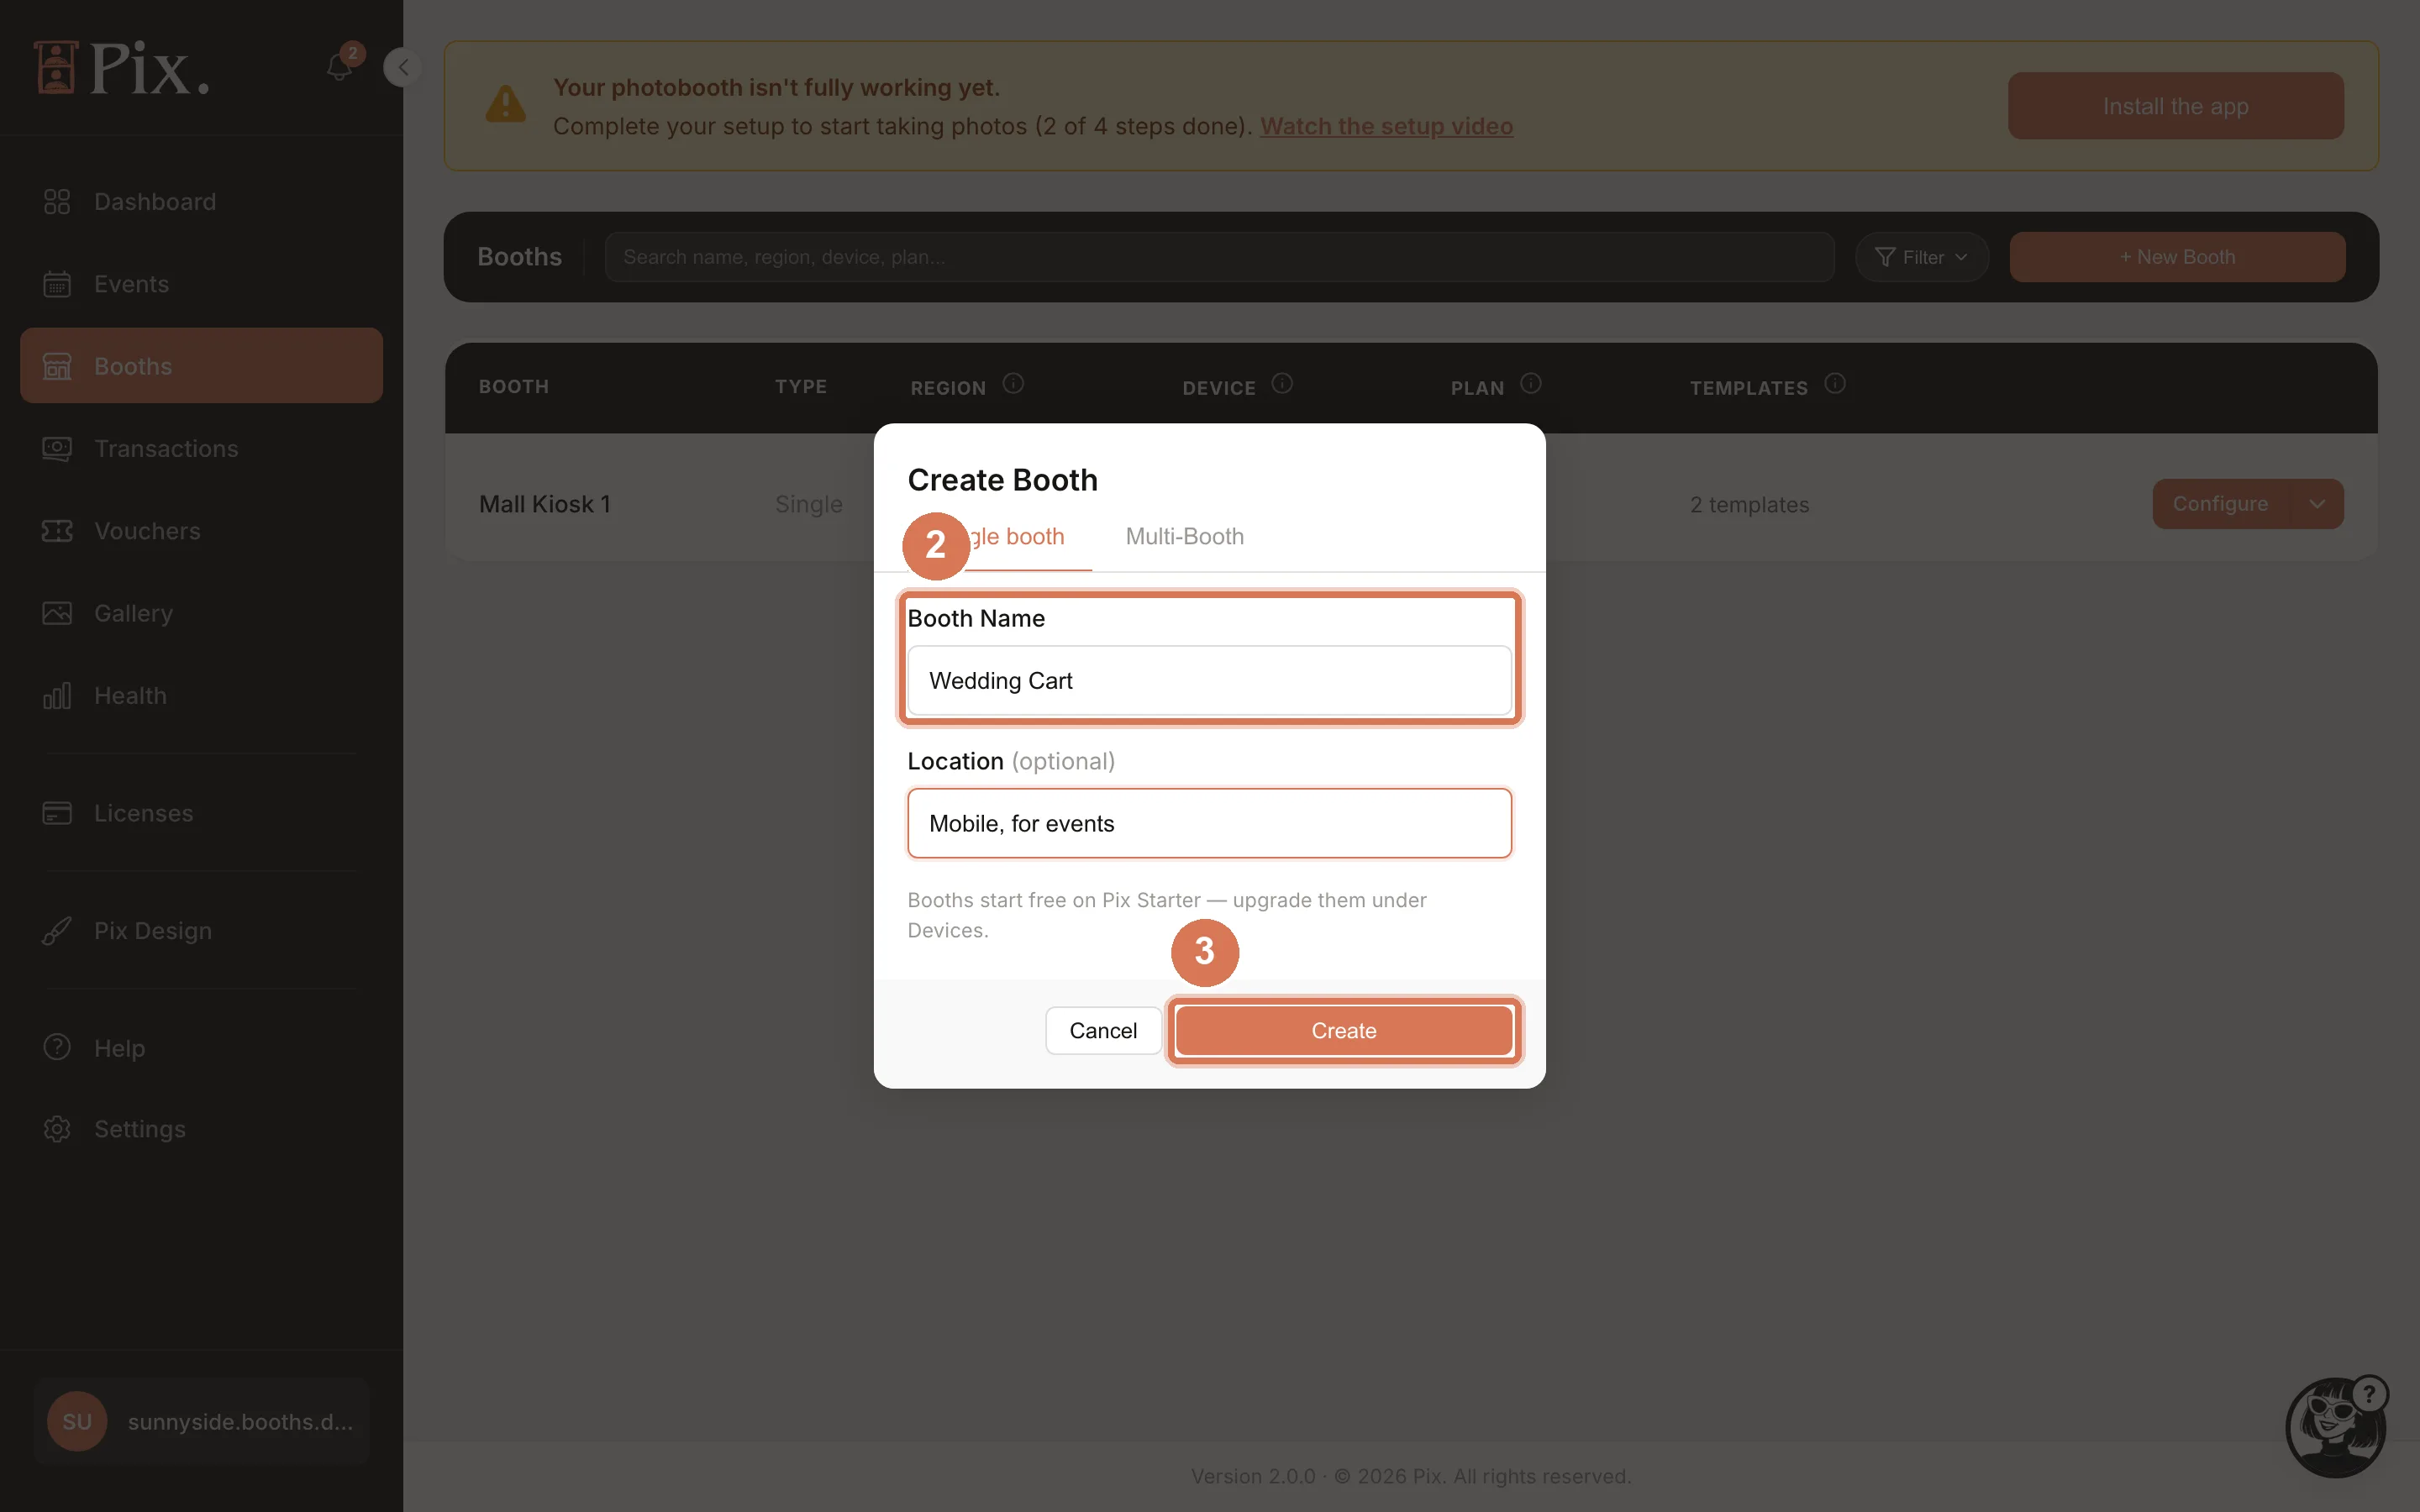
The new booth appears in the list with a dash under DEVICE and PLAN, because no computer is paired yet. Click Configure to open it. The first time it opens, the popup "Pair your booth first" offers Generate pairing code. Click Maybe later for now; you pair the computer in Step 7, once the booth is ready for guests.
Step 2: Assign print templates
- Open the Templates tab and click Manage Templates.
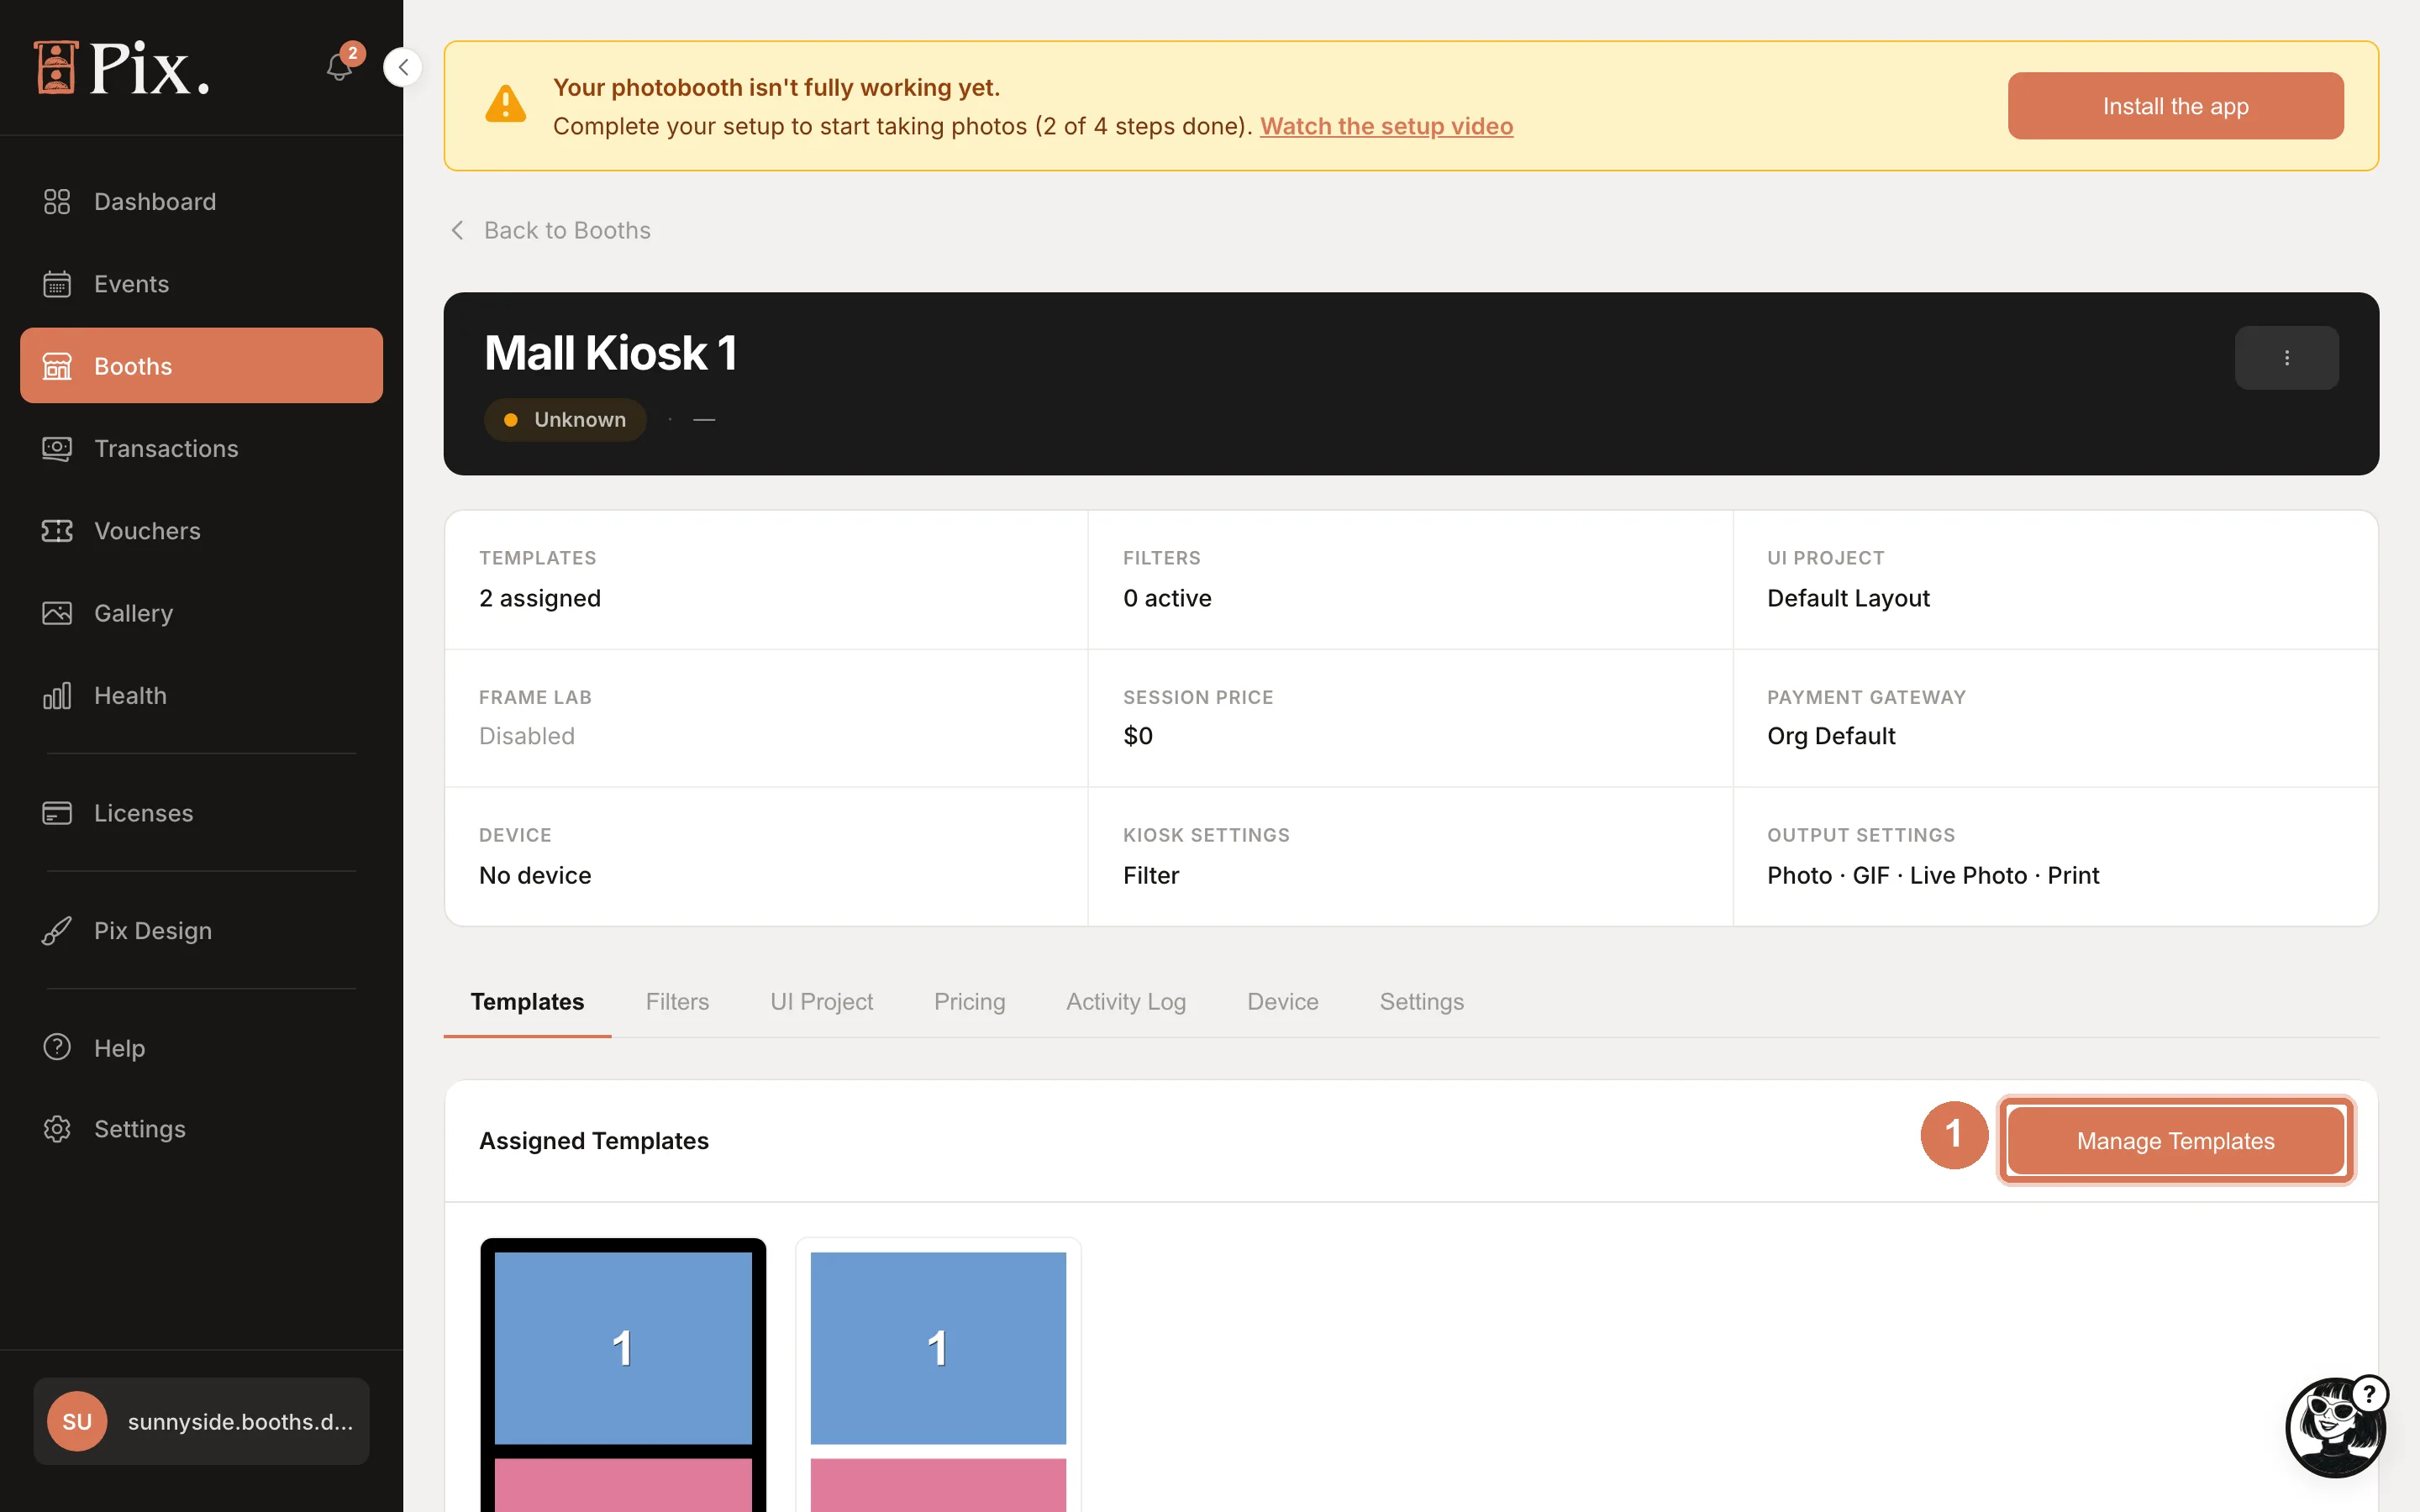
- Tick every template this booth should offer. The Assigned / Not Assigned, All Categories, All Sizes and All Media filters narrow the list.
- Click Save Templates.
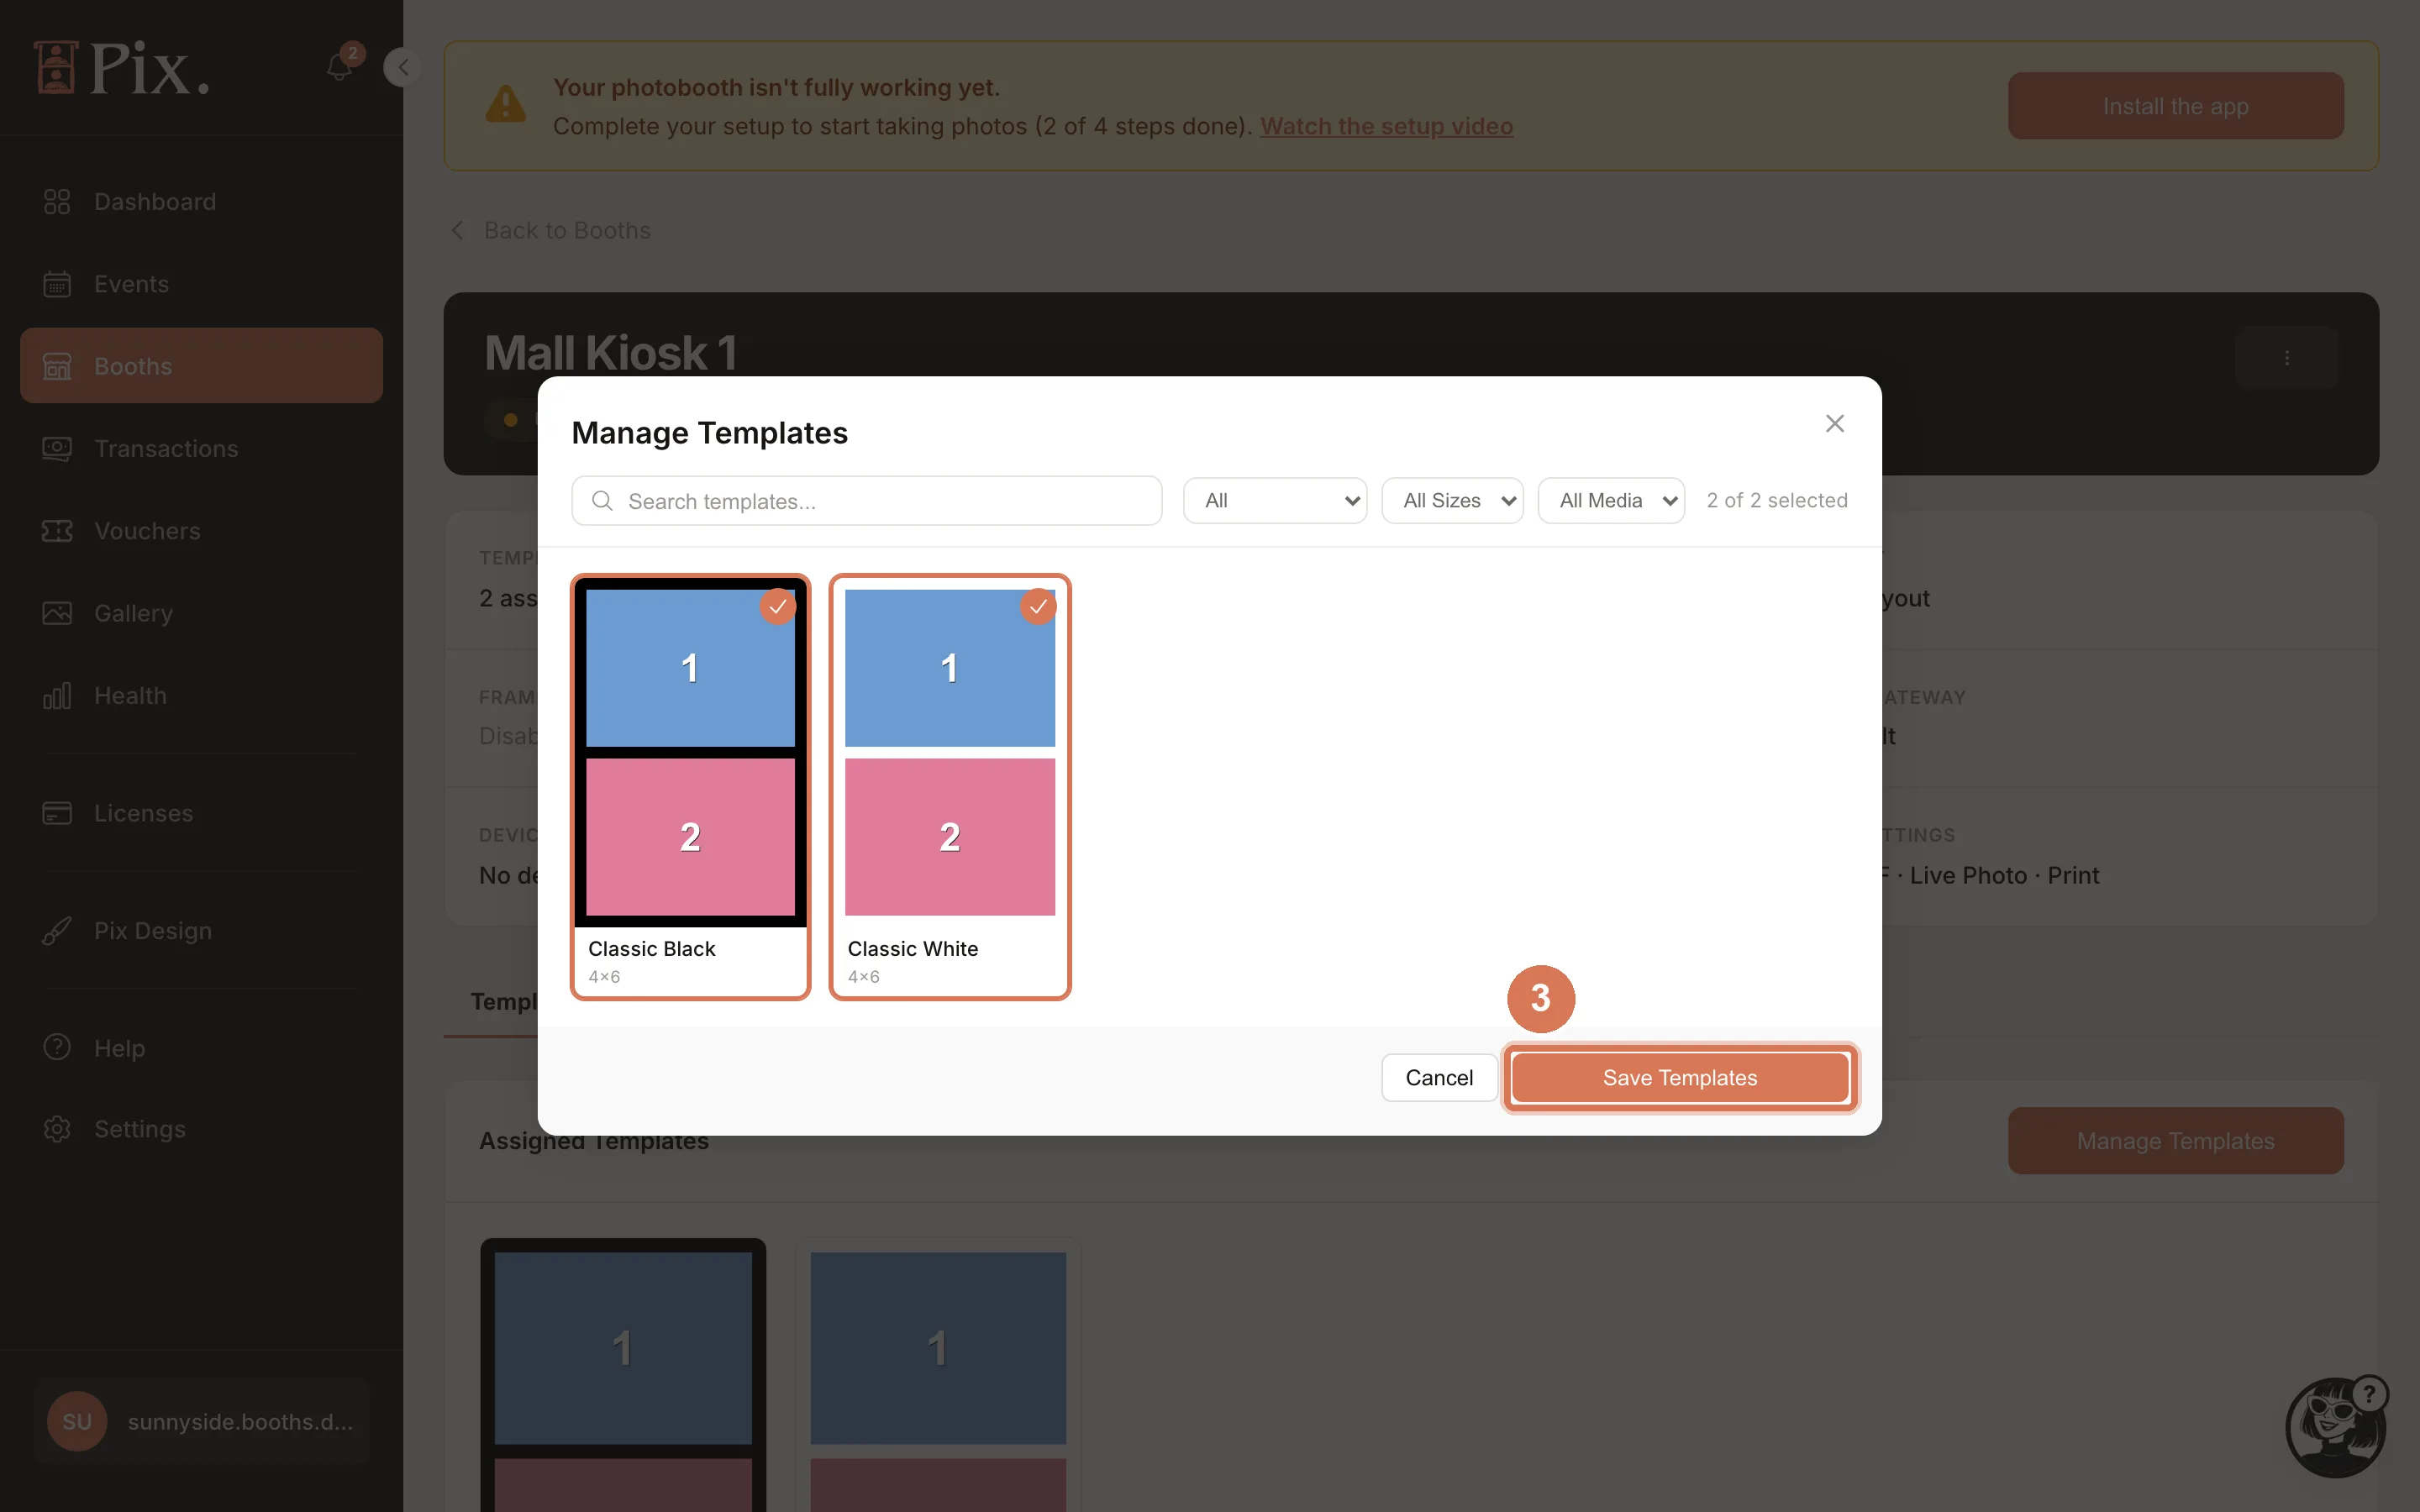
A new account comes with two ready-made 4x6 templates, Classic Black and Classic White. On Pix Starter these are the two templates you can use; Pix Pro lets you design as many as you like in Pix Design (see Design a Print Template). Assign at least one template, or guests have nothing to pick.
Step 3: Choose the booth's screen design
- Open the UI Project tab.
- Pick a design from the dropdown. It is grouped by Photobooth mode, Studio mode and Simple mode, and the tab shows the resulting Booth mode.
- Click Save.
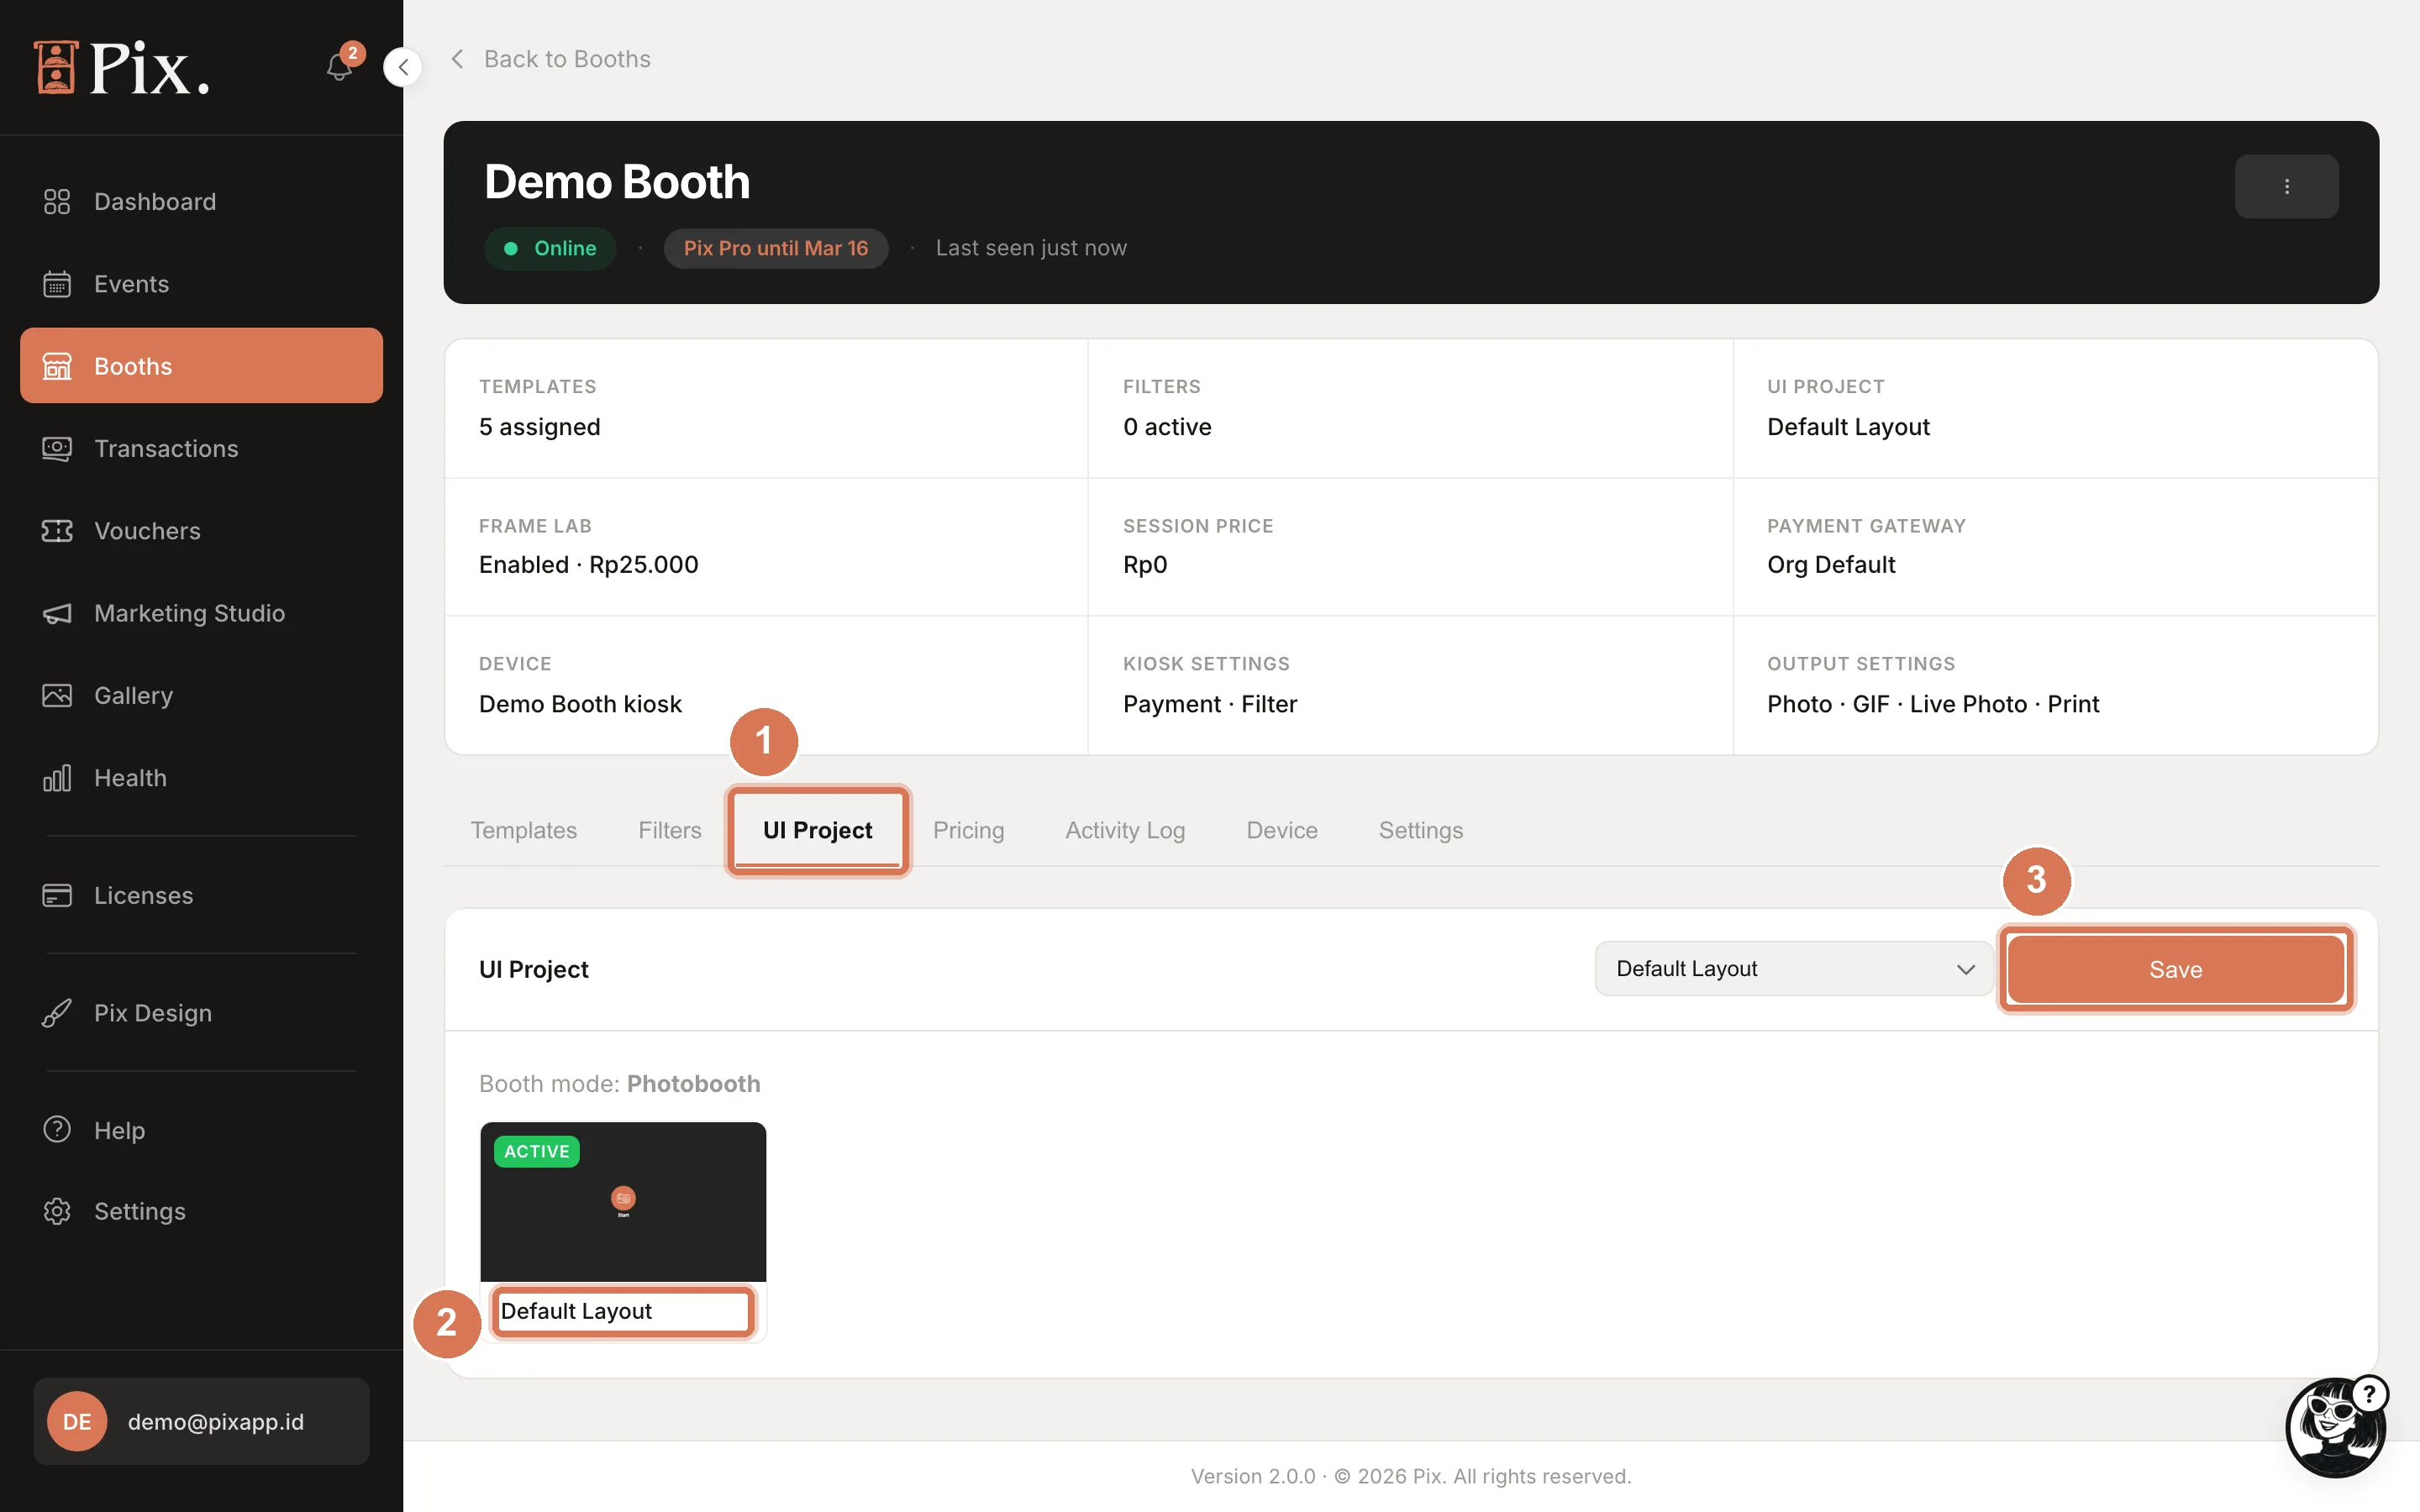
Every account starts with the default screen design, so you can leave this as it is and come back once you have built your own (see Customise the Booth Screens). Studio mode needs Pix Desktop App 1.1.98 or newer on the booth computer.
Step 4: Choose filters
- Open the Filters tab. With no explicit assignments, every filter is available on the booth by default, so you can skip this step.
- To offer only some filters, click Manage Filters, tick the ones you want (or Select all), and click Save Filter Assignments.
Pixture ships 14 built-in filters. Pix Design > Photo Filters lets you upload your own .cube files, which then appear here under Custom.
Step 5: Set the price, or make sessions free
- Open the Pricing tab.
- Set the Payment on this booth switch. On, guests pay the prices below at the booth. Off, every session is free and the booth skips the Payment screen; your prices are kept for later.
- On Price & packages, enter the Session price. Pick the Print format that matches your paper (Standard, 2 inch cut or Triple strip), and turn on Double session price, Group session price or Additional session price if you offer packages.
- Click Save changes in the save bar.
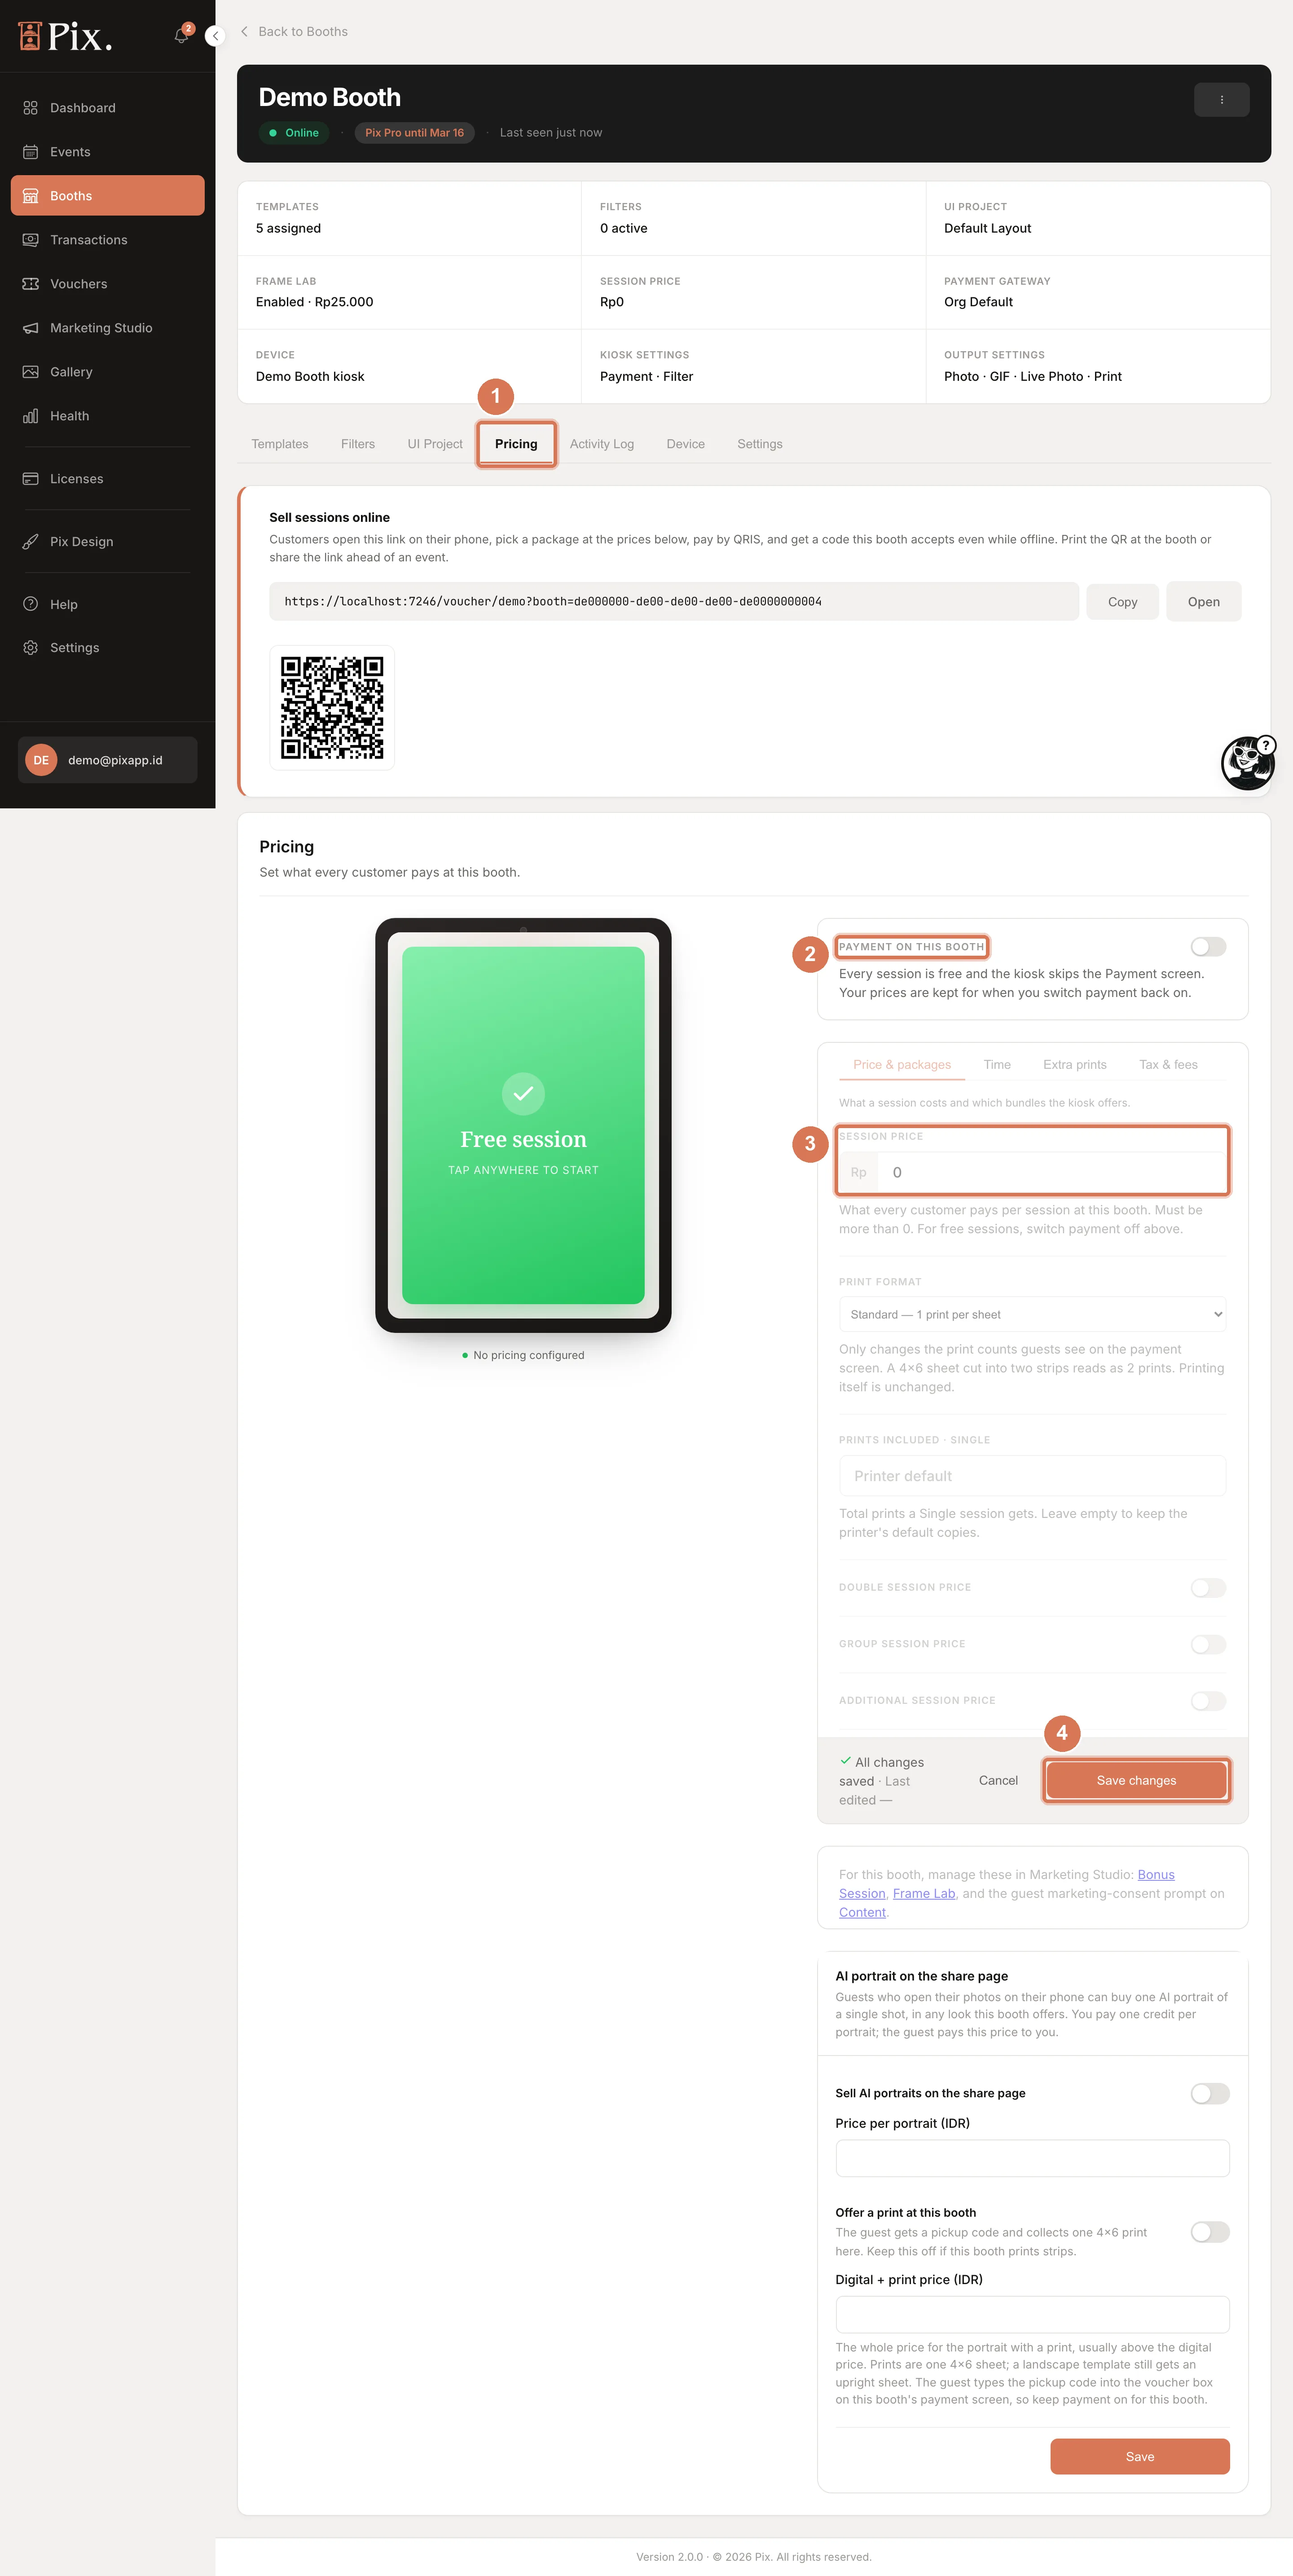
Taking payments at the booth needs a payment gateway under Settings > Payment Gateway, or a coin or card reader (see Connect a Coin Acceptor or Card Reader). On Pix Starter the booth skips the Payment screen, so sessions stay free until the computer runs Pix Pro. The other sub-tabs set the Payment timeout (Time), an Extra print price for the sharing screen (Extra prints) and Tax & fees. See Booth Pricing.
Step 6: Check outputs and the operator PIN
- Open the Settings tab.
- Under Output Settings, switch on what the booth should produce: Singles Upload, GIF Upload, Live Photo Upload and Print Output. Click Save Output Settings.
- Under Menu PIN, enter a PIN of 4 to 8 digits and click Set PIN, so guests cannot open the operator menu on the booth.
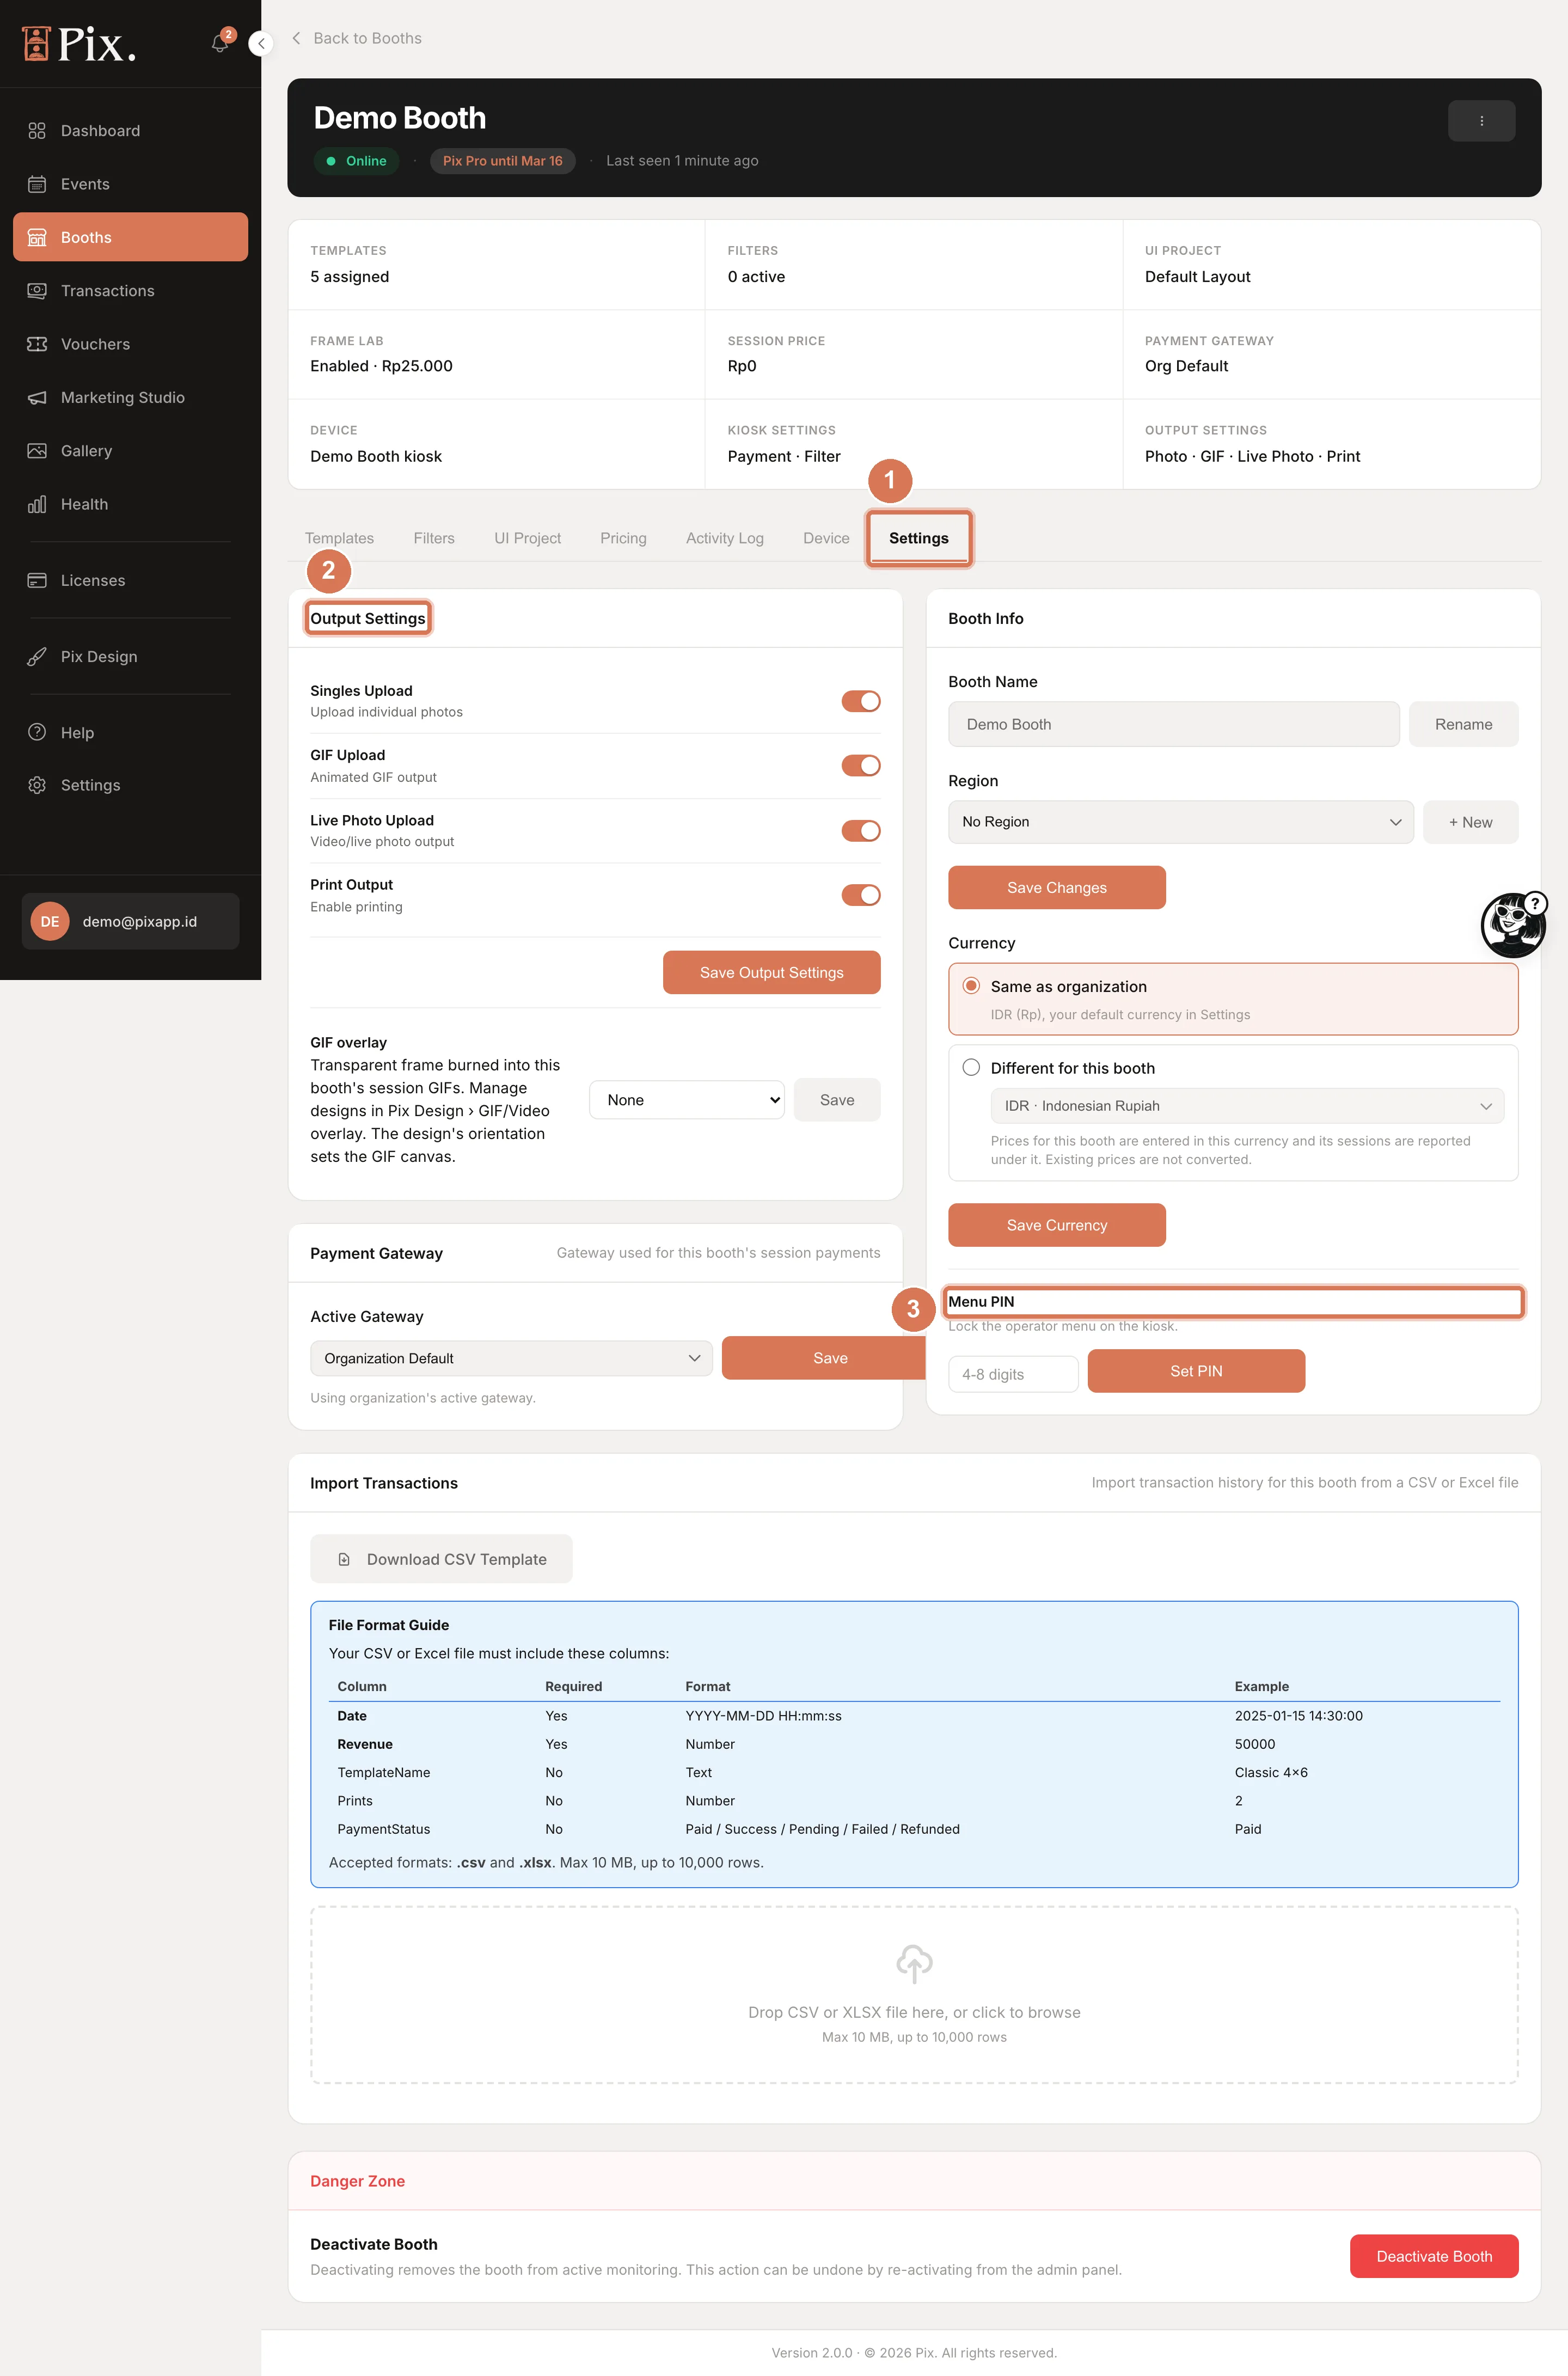
The same tab sets the booth's Active Gateway (Organization Default unless this booth needs a different one), its Region and its Currency.
Step 7: Pair the computer
- Open the Device tab and, under Pairing & access, click Generate code.
- The Pair Pixture App modal shows a 6-digit code that expires in 10 minutes. Copy Code puts it on the clipboard; Regenerate issues a fresh one.
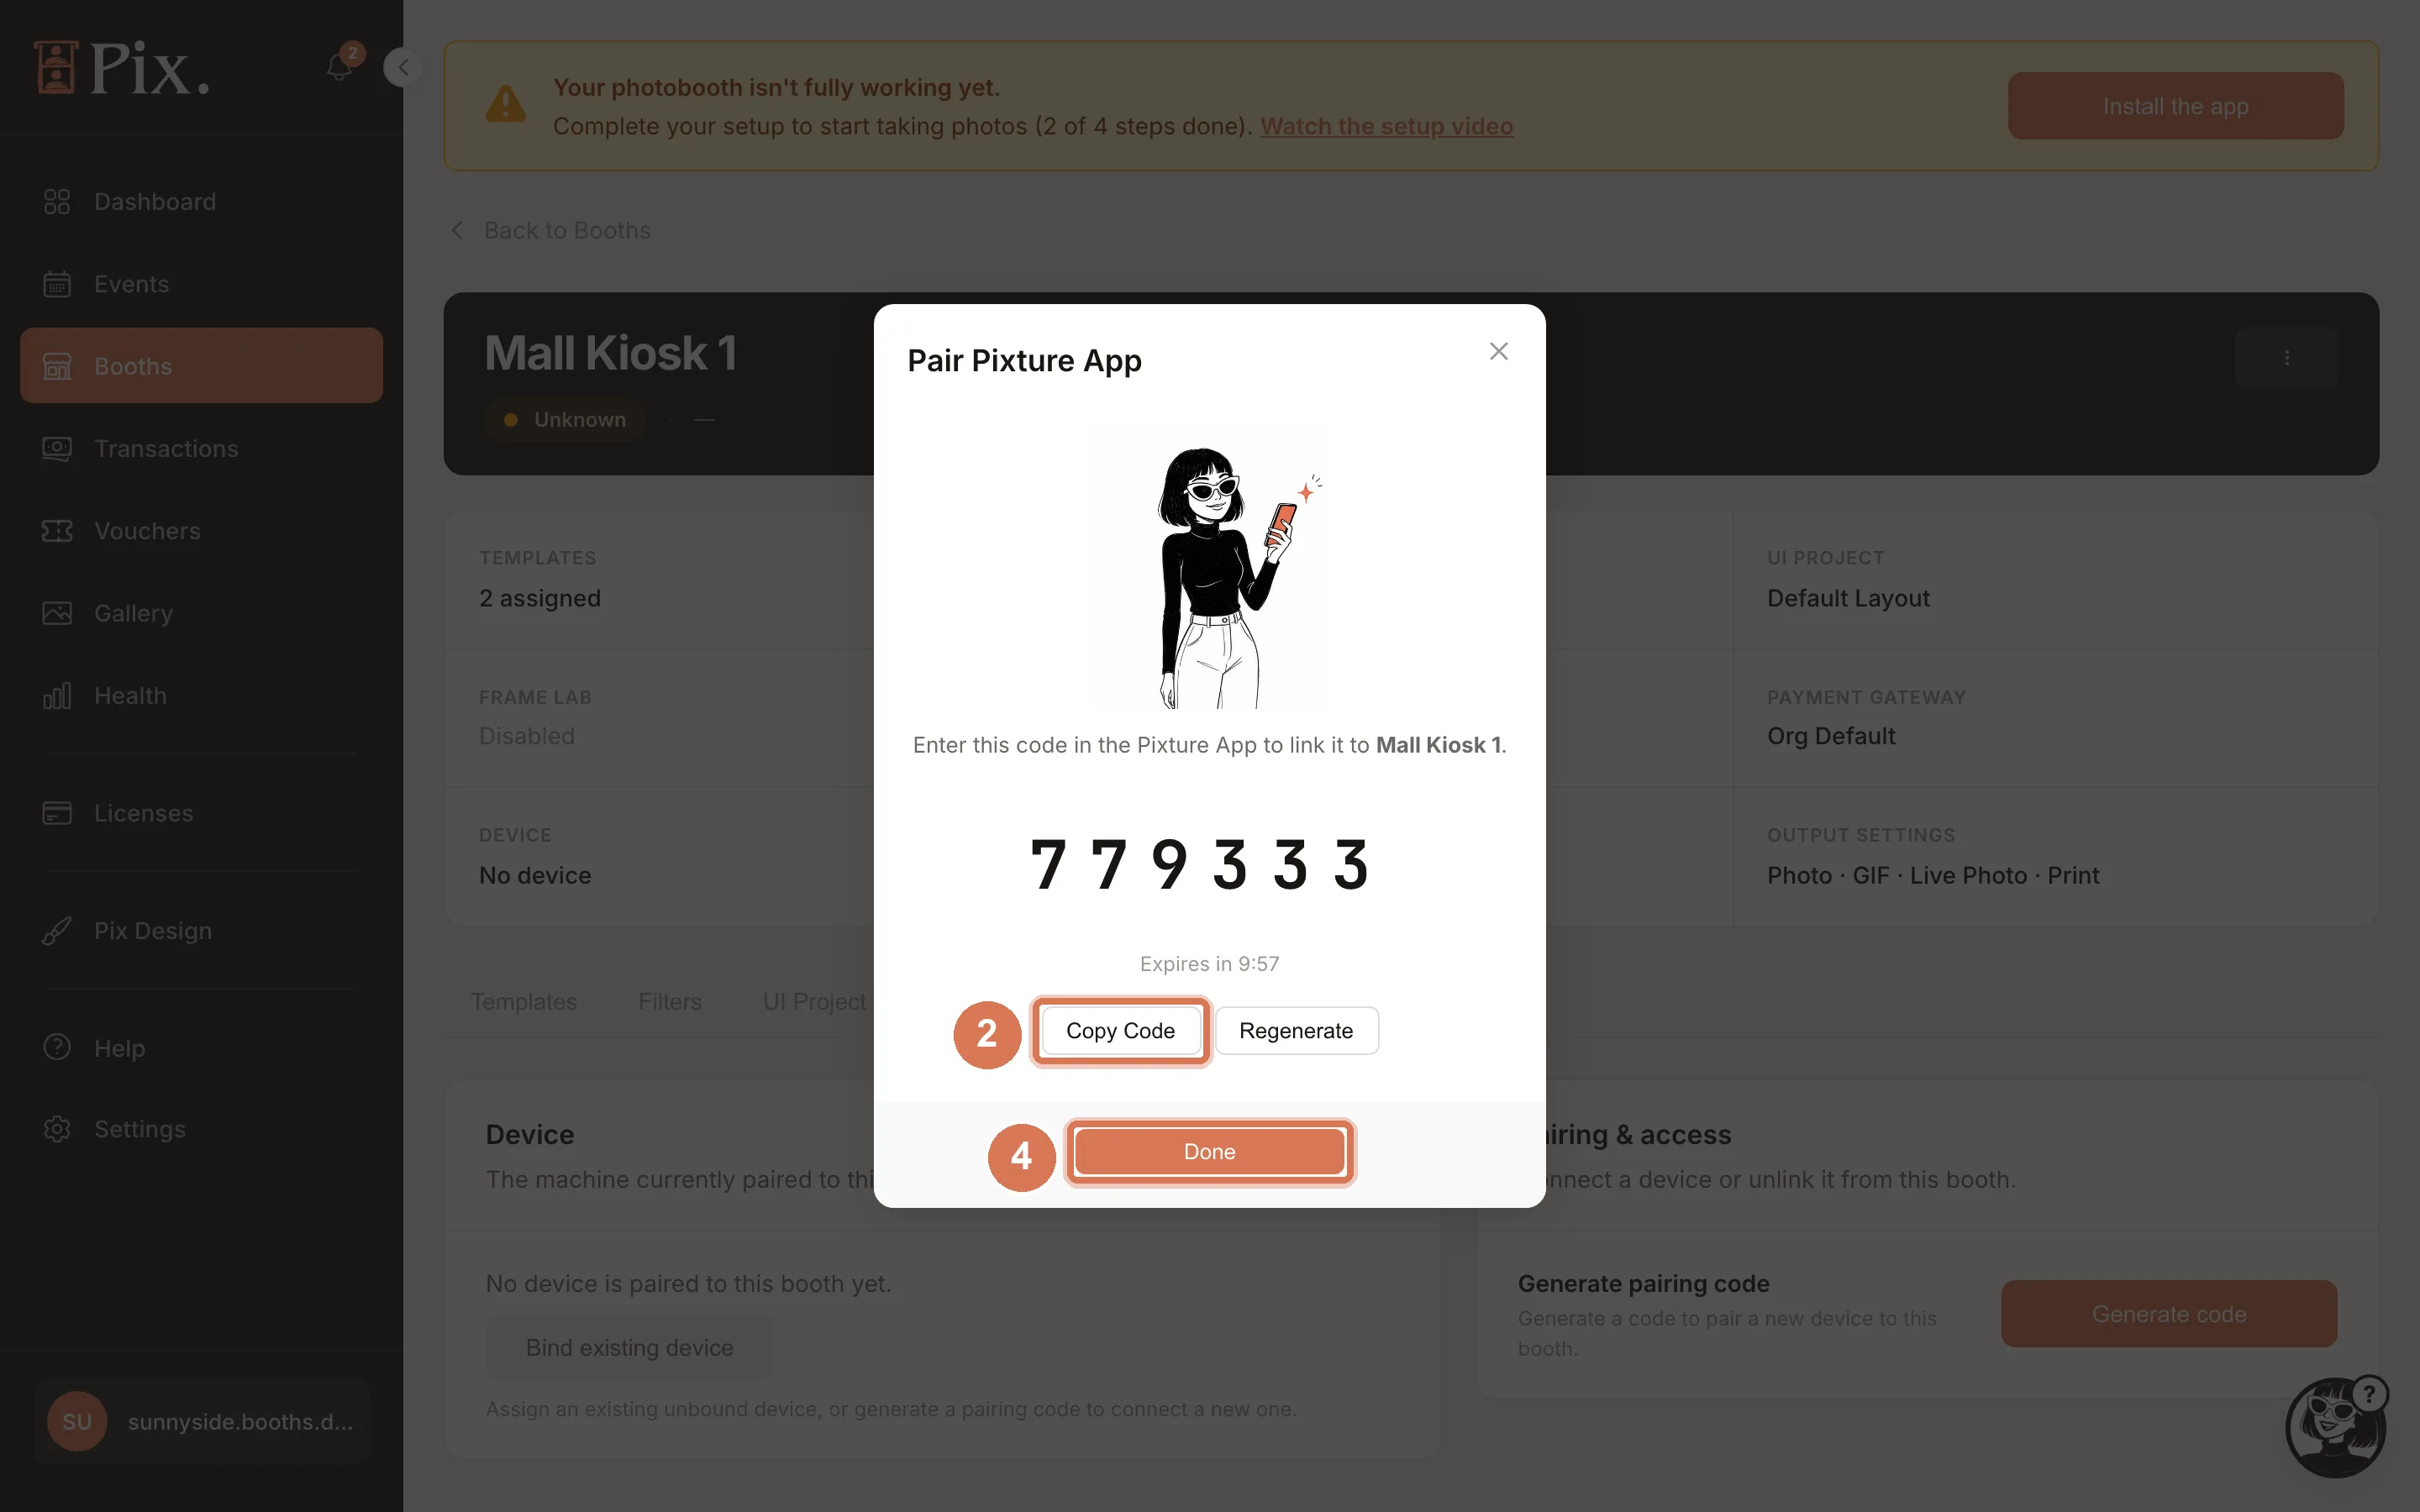
- On the booth computer, open the Pix Desktop App and enter the code on its pairing screen.
- Back in the dashboard, click Done.
If the modal shows "Device limit reached" instead of a code, every place on your subscription is taken. See Add a Second Computer or Move Pix Pro.
Step 8: Run a test photo session
- On the booth, tap the Start screen to begin a session.
- Pick a template, pose for the shots, choose a filter and continue to the Sharing screen.
- Scan the QR code with your phone and check that the print comes out.
If Payment on this booth is on, either switch it off for the test or create a voucher under Vouchers > + Create > Single Voucher with the discount type Free Session, and enter its code on the Payment screen.
Check It Worked
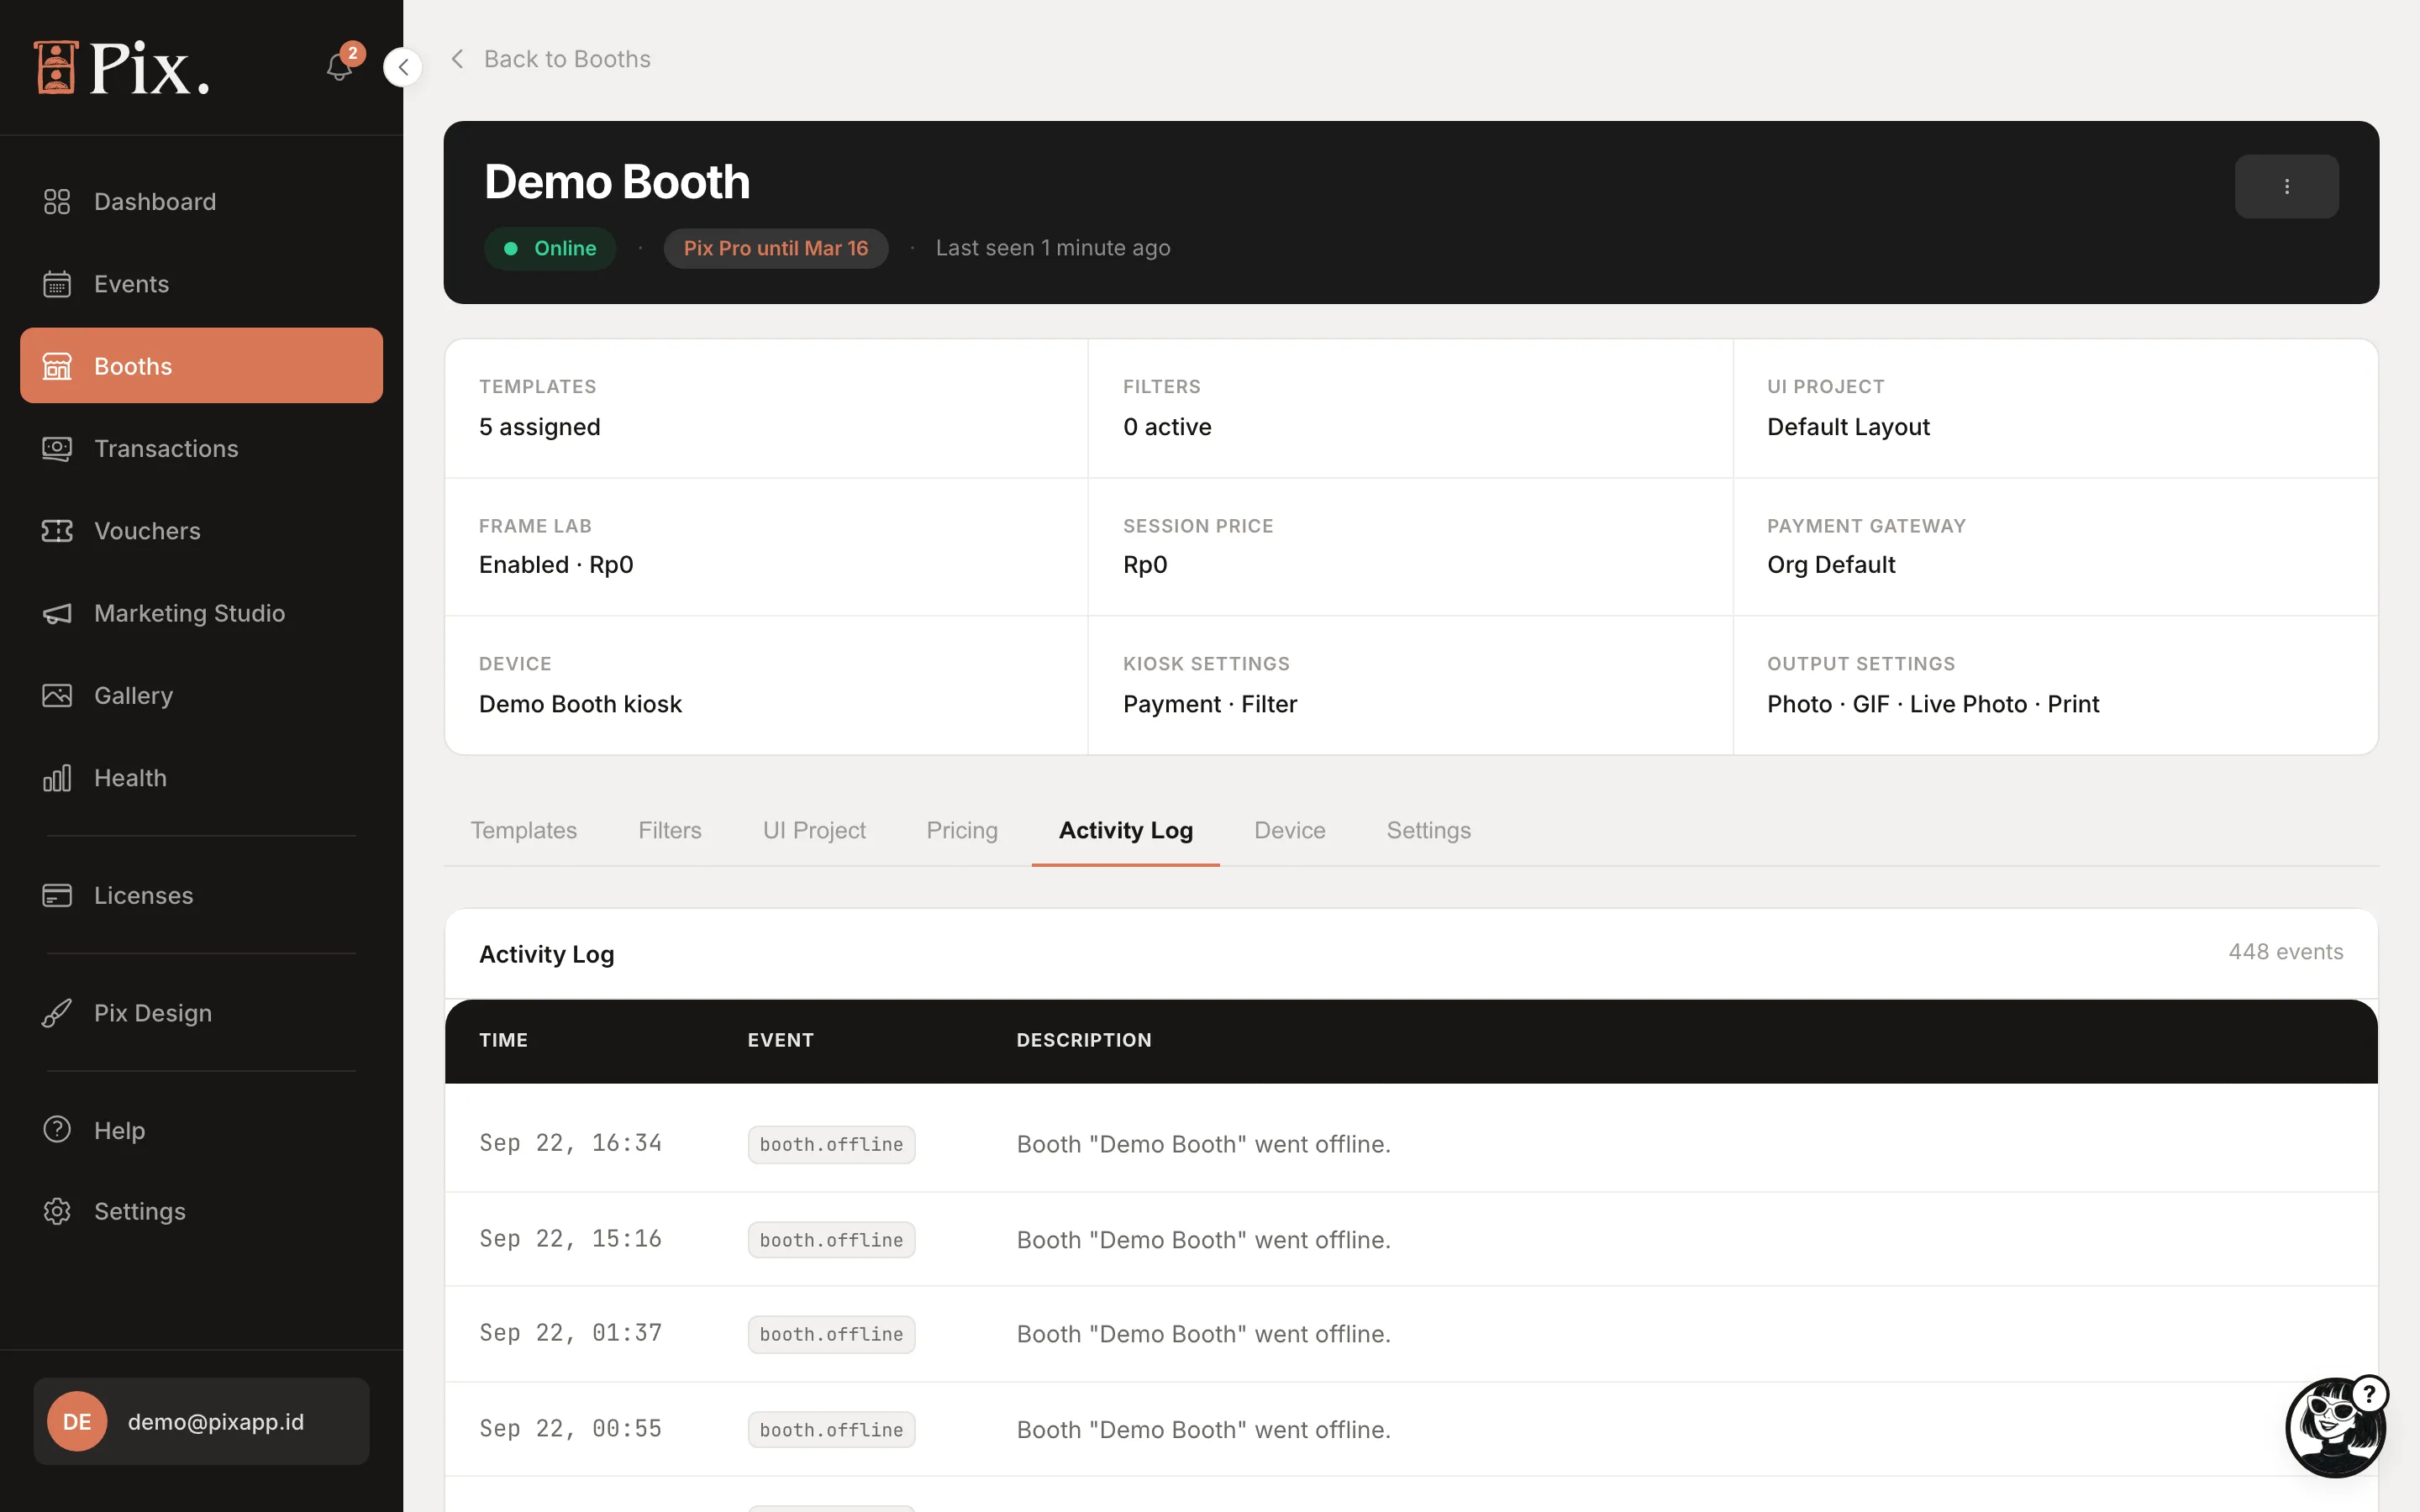
- The booth page header shows Online and the plan for the computer: Pix Pro until a date, Trial until a date, or Watermarked on Pix Starter.
- Booths lists the computer under DEVICE and the plan under PLAN.
- Gallery shows the test photos, and the dashboard home shows a banner saying your booth is live, with View gallery.
- Health lists the booth as Healthy, with its paper level and last seen time.
Troubleshooting
| Symptom | Cause | Fix |
|---|---|---|
| The pairing code is refused | Codes expire after 10 minutes | Click Regenerate and enter the new code |
| "Device limit reached" instead of a code | Every place on your subscription is active, or this is a second computer on Pix Starter | Deactivate a computer on the Devices page, add a device, or use an Event Pass. Pix Starter runs one computer |
| The booth shows Offline or Unknown | No contact from the computer in the last 12 minutes | Check the computer's internet connection and that the Pix Desktop App is running |
| Guests see no templates | Nothing is assigned on the Templates tab | Assign at least one template and click Save Templates |
| Every session is free | Payment on this booth is off, or the computer is on Pix Starter | Turn the switch on and connect a gateway; Pix Starter skips the Payment screen |
| Photos carry a Pixture watermark | The computer is on Pix Starter | Start the free trial or buy Pix Pro on the Devices page |