Accept Payments at the Booth
In this tutorial you will connect a payment gateway to your Pixture account, set what a photo session costs at one booth, run a first paid session and find the money in Transactions. It takes about 20 minutes, plus whatever time your gateway needs to approve your merchant account.
Before You Start
- Pix Pro on the booth's computer. A Pix Starter computer is watermarked and skips the Payment screen, so it never charges.
- A merchant account with a supported gateway and its API keys. In Indonesia that is Midtrans, Xendit or DOKU (QRIS). Everywhere else it is Stripe (card).
- The booth paired and online, with at least one template assigned.
- Owner or admin access to the Pixture dashboard.
Payments go straight from the guest to your own gateway account. Pixture never holds your money, so a wrong key means charges that look fine on the dashboard but never pay out. Step 2 catches that.
Step 1: Connect a Gateway
No merchant account yet, or unsure where each key lives on the provider's dashboard? Create a Payment Gateway walks through that first; come back here once the gateway card shows on your Settings page.
-
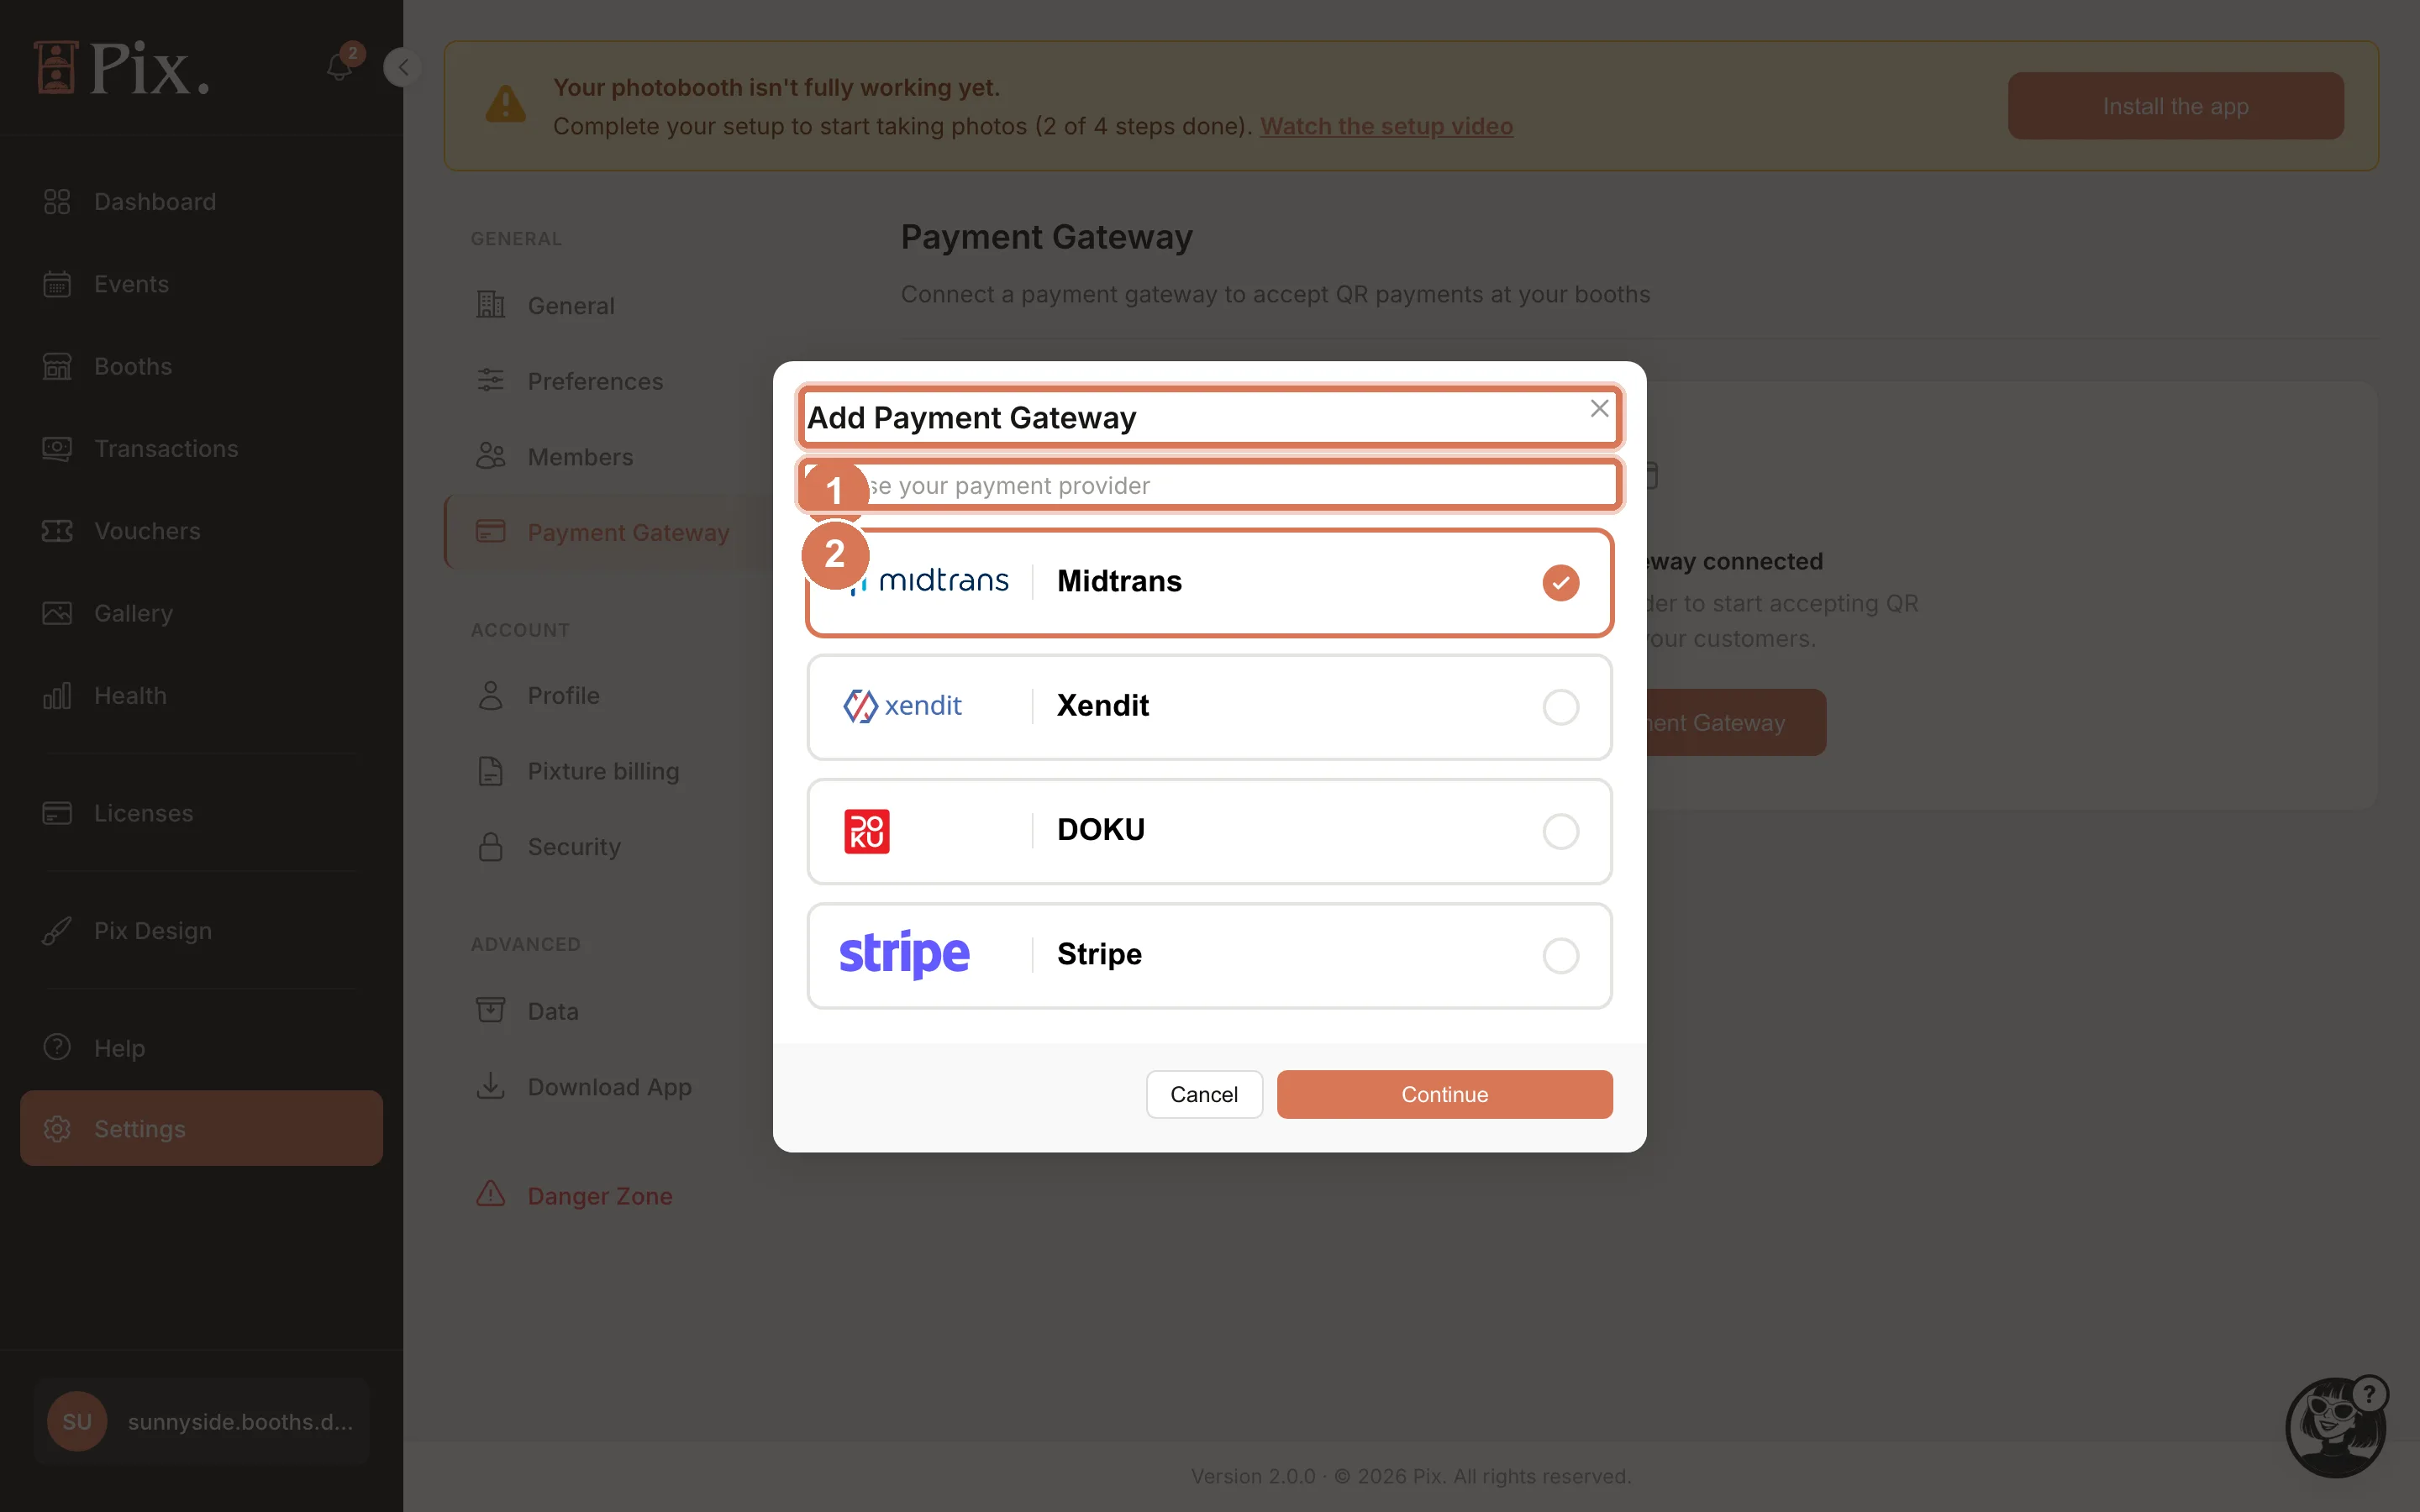
Go to Settings > Payment Gateway and click Add Payment Gateway.
-
Choose your provider: Midtrans, Xendit or DOKU for QRIS in Indonesia, Stripe for card payments everywhere else.
-
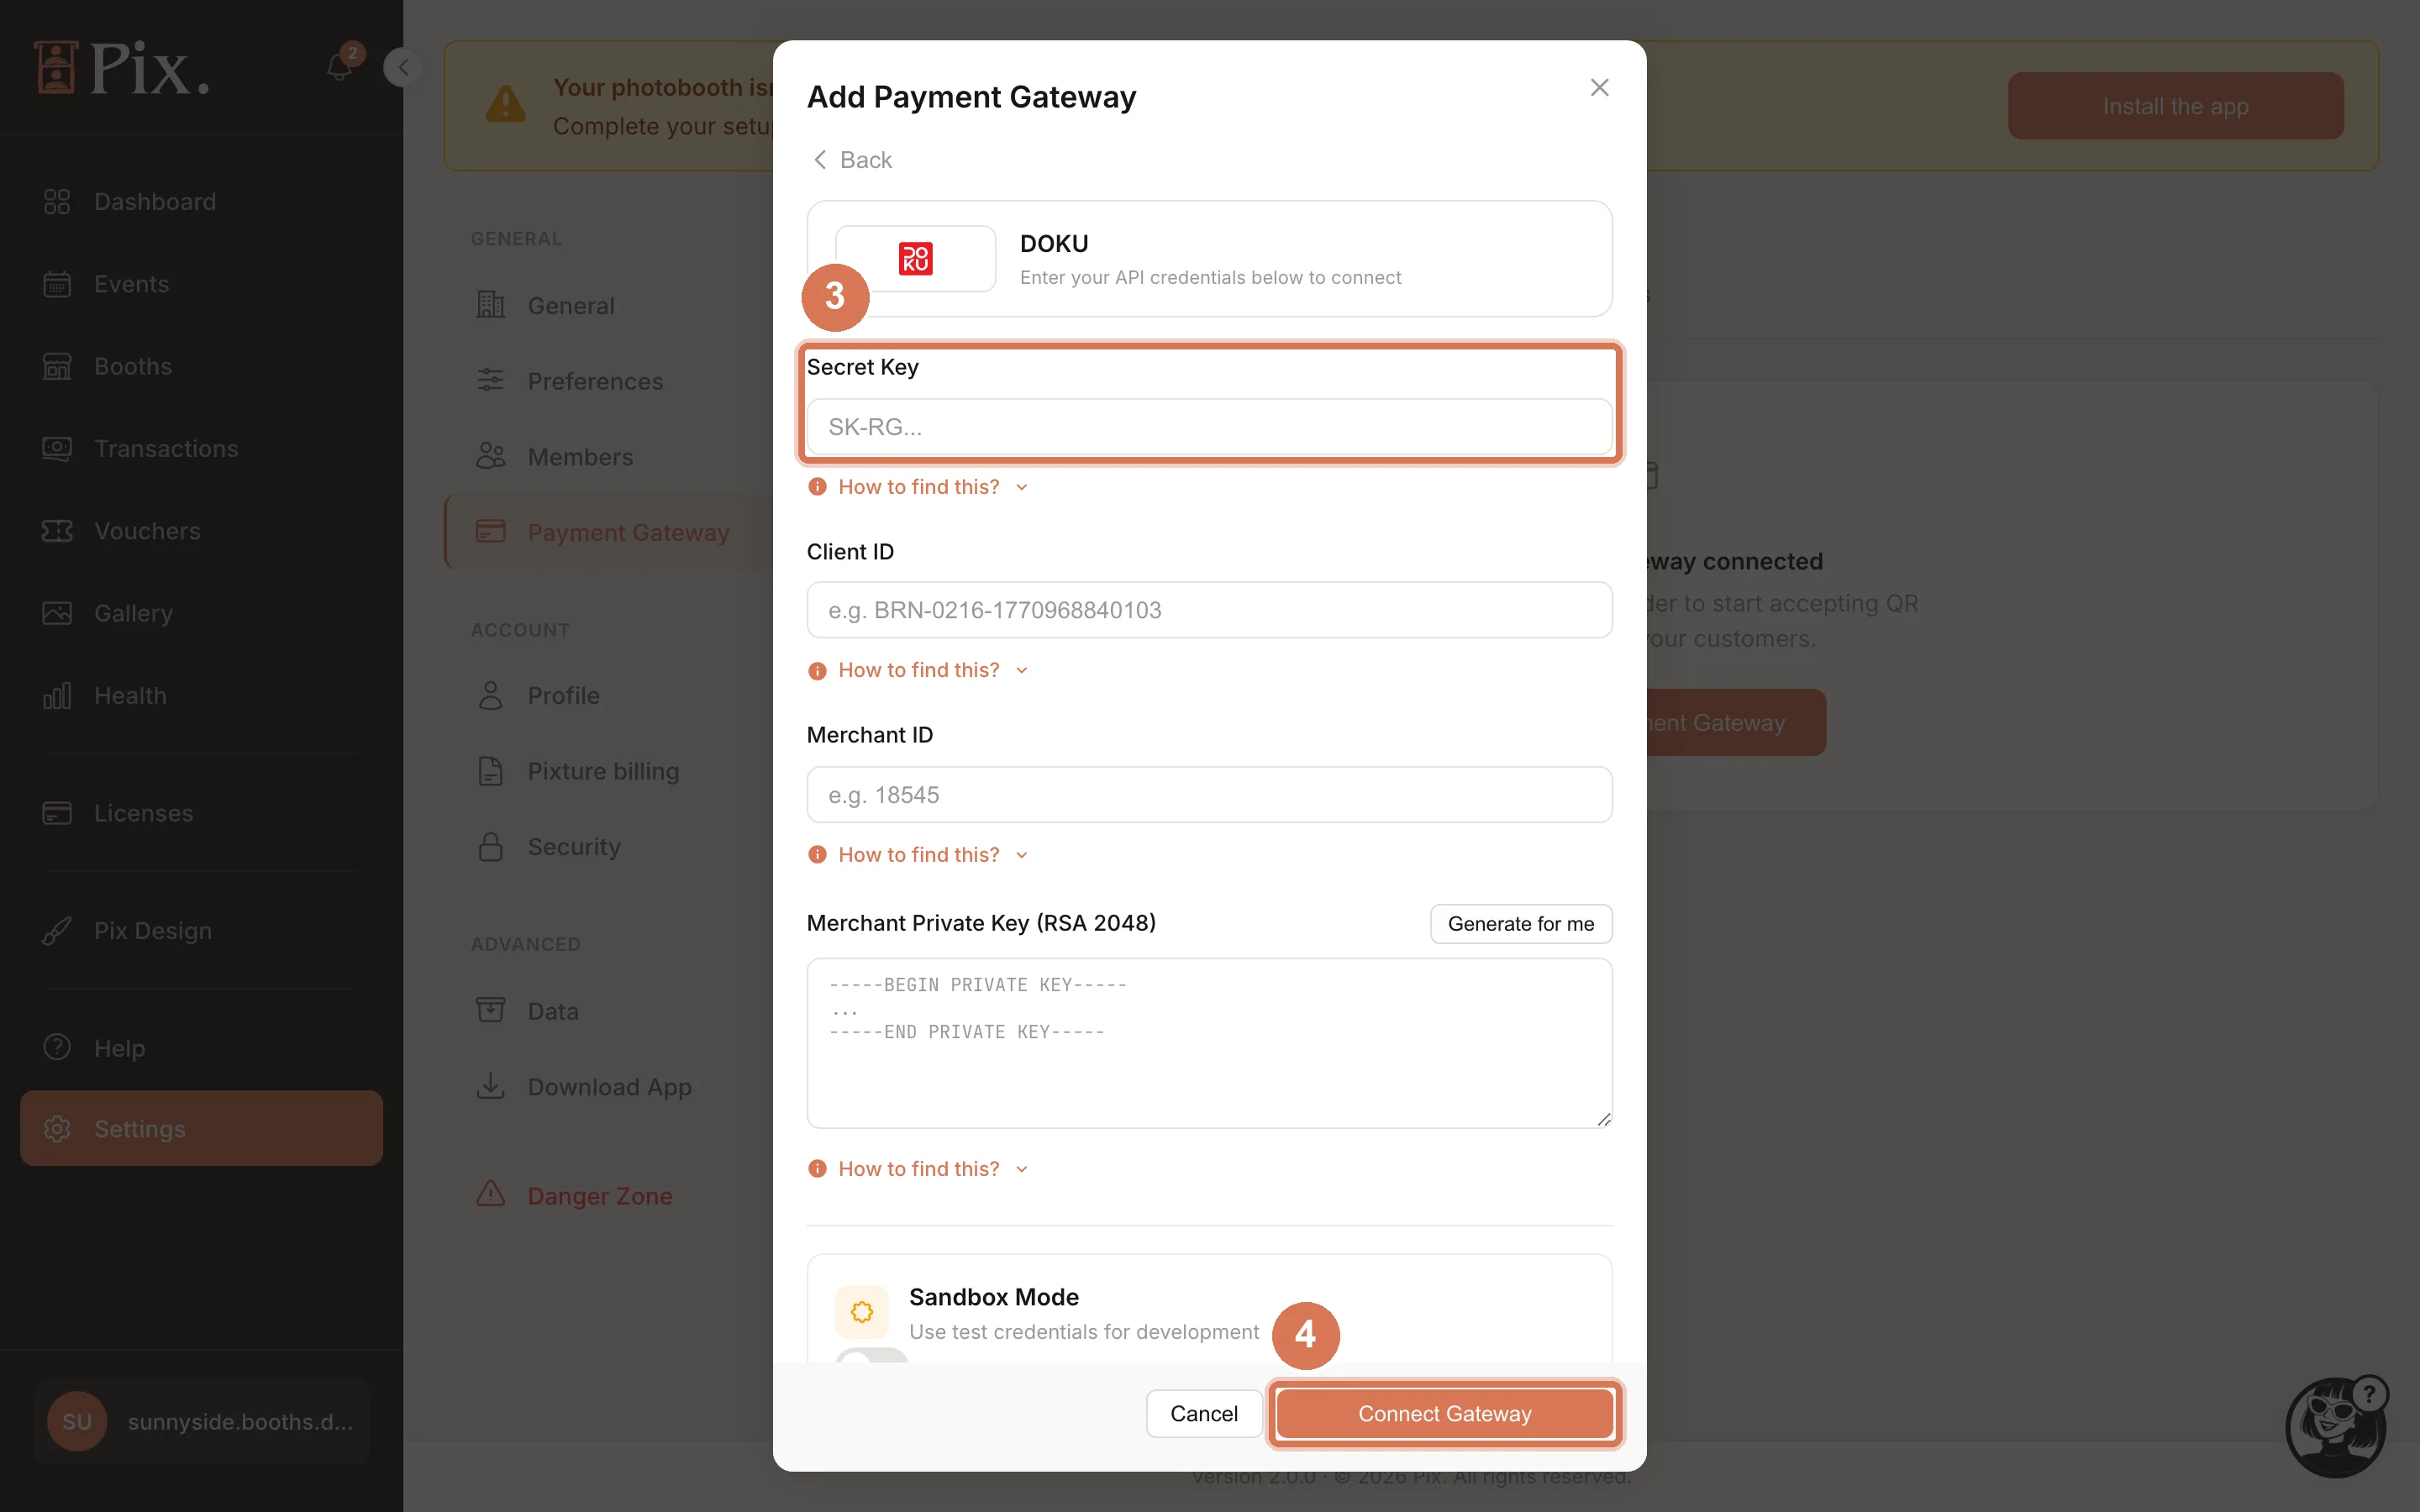
Fill in the keys from your gateway's merchant dashboard.
-
DOKU: Secret Key, Client ID, Merchant ID, and a Merchant Private Key (RSA 2048), each with a How to find this? expander. Click Generate for me if you do not have one. Turn on Sandbox Mode only while testing with DOKU test credentials.
-
Midtrans: Server Key and Client Key.
-
Stripe: the Secret key. It must start with
sk_orrk_; Pixture checks the key when you save. There is no Sandbox switch for Stripe: the key itself decides test or live, and ansk_test_key creates charges that never pay out.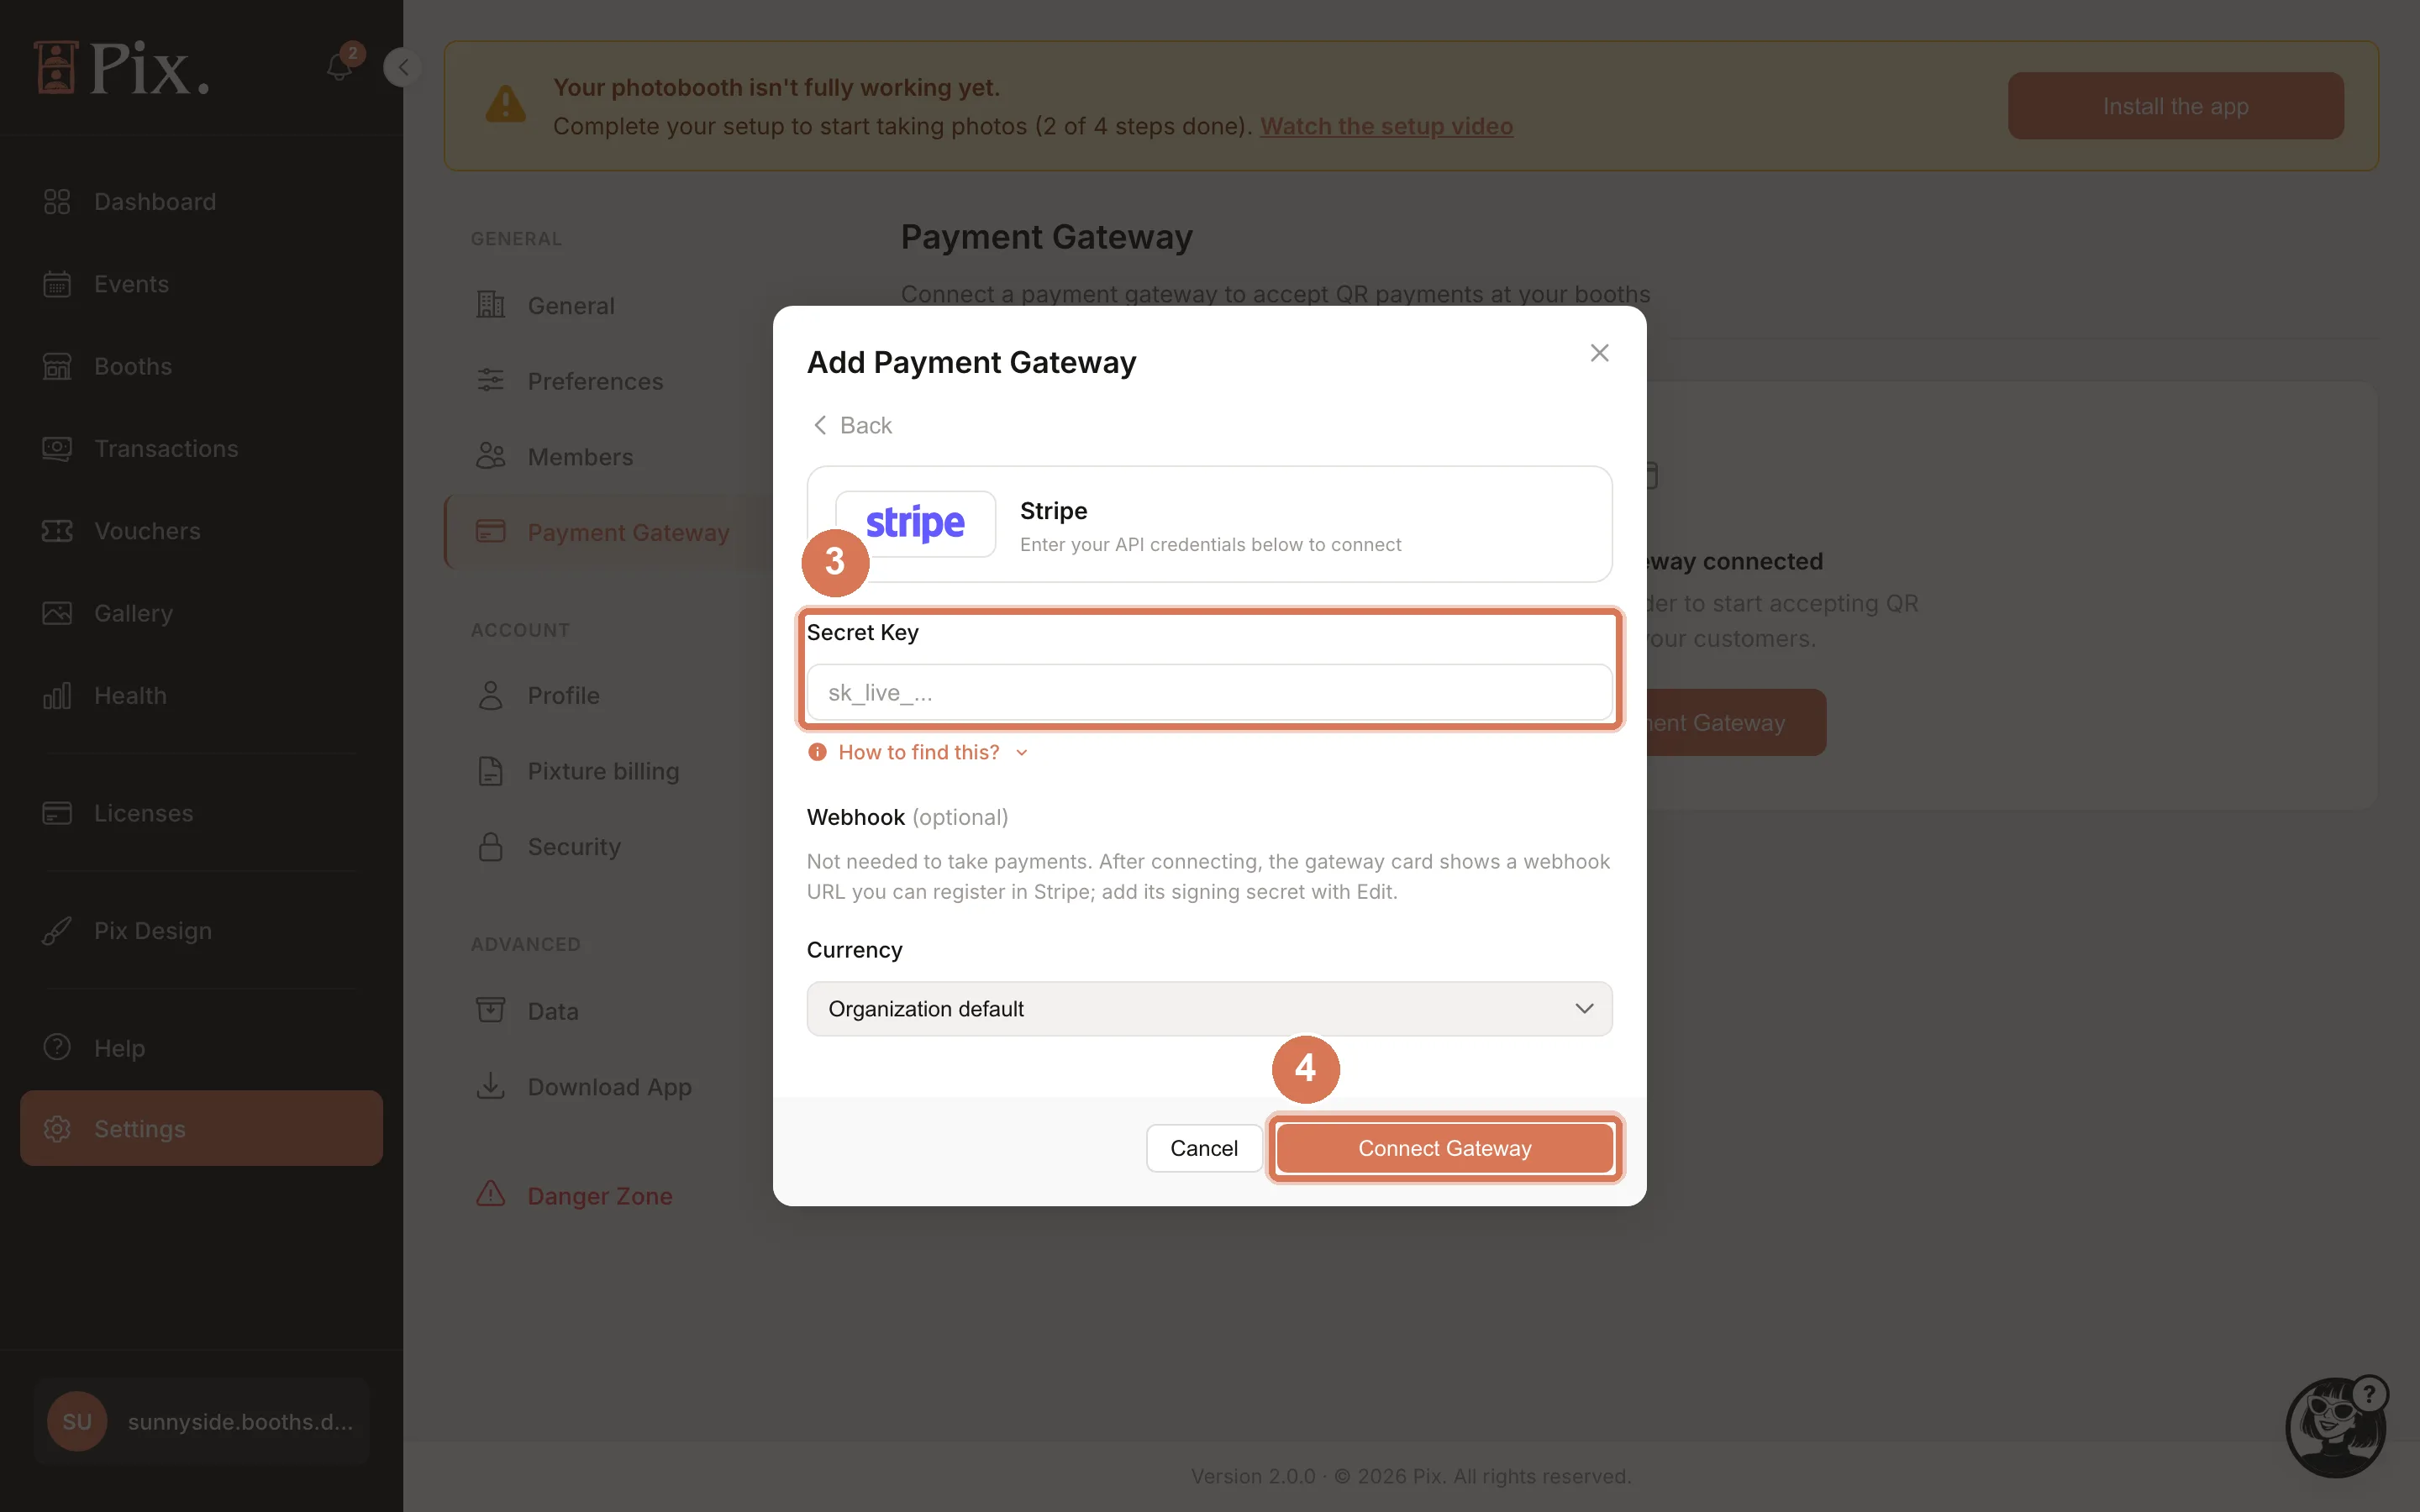
-
-
Click Continue, then Connect Gateway.
Step 2: Run a Test Charge
- On the gateway card, click Test. A result window shows whether the gateway accepted a small charge and how to verify it on the gateway's side.
- If the test fails, click Edit, paste the keys again and test once more. With Stripe, a rejected key is usually something else copied from the Stripe dashboard (an API key ID or a publishable key) instead of the secret key.
Step 3: Set Prices on the Booth
-
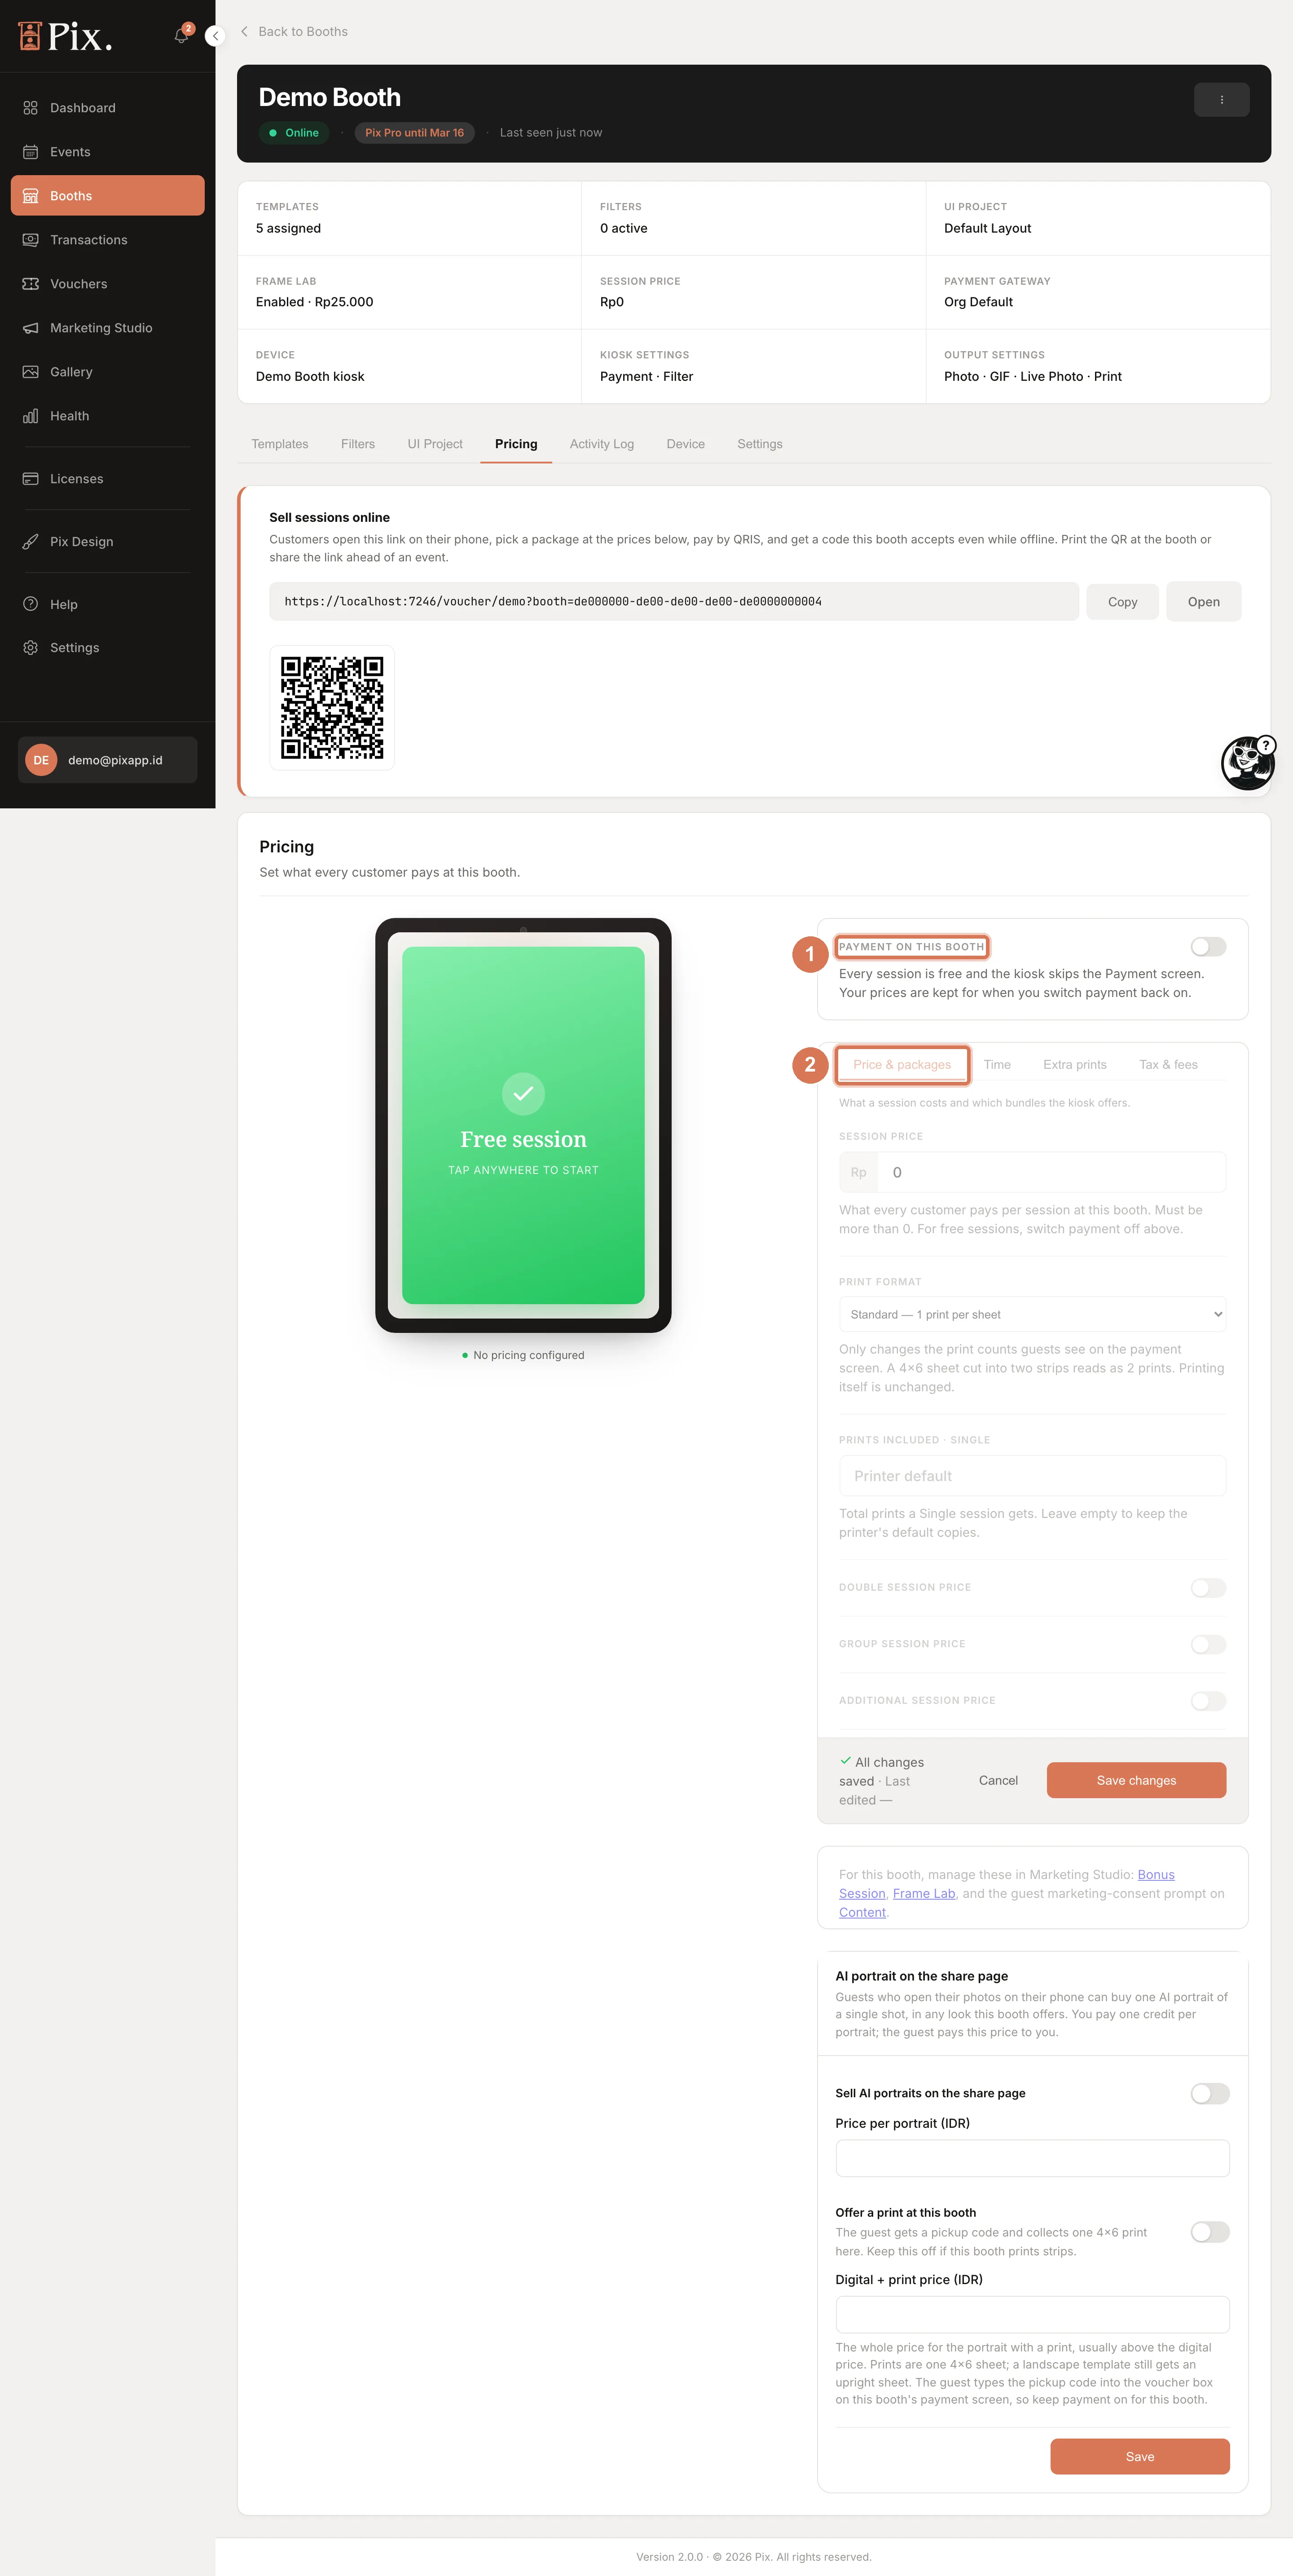
Open Booths, click Configure on the booth, then the Pricing tab. Turn Payment on this booth ON. The preview on the left shows the booth's payment screen as you edit.
-
On Price & packages, enter the Session price (it must be above 0). Pick the Print format that matches your paper: Standard (1 print per sheet), 2 inch cut (2 per sheet) or Triple strip (3 per sheet). Turn on Double session price, Group session price (4 sessions) and Additional session price if you sell packages, each with its Prints included.
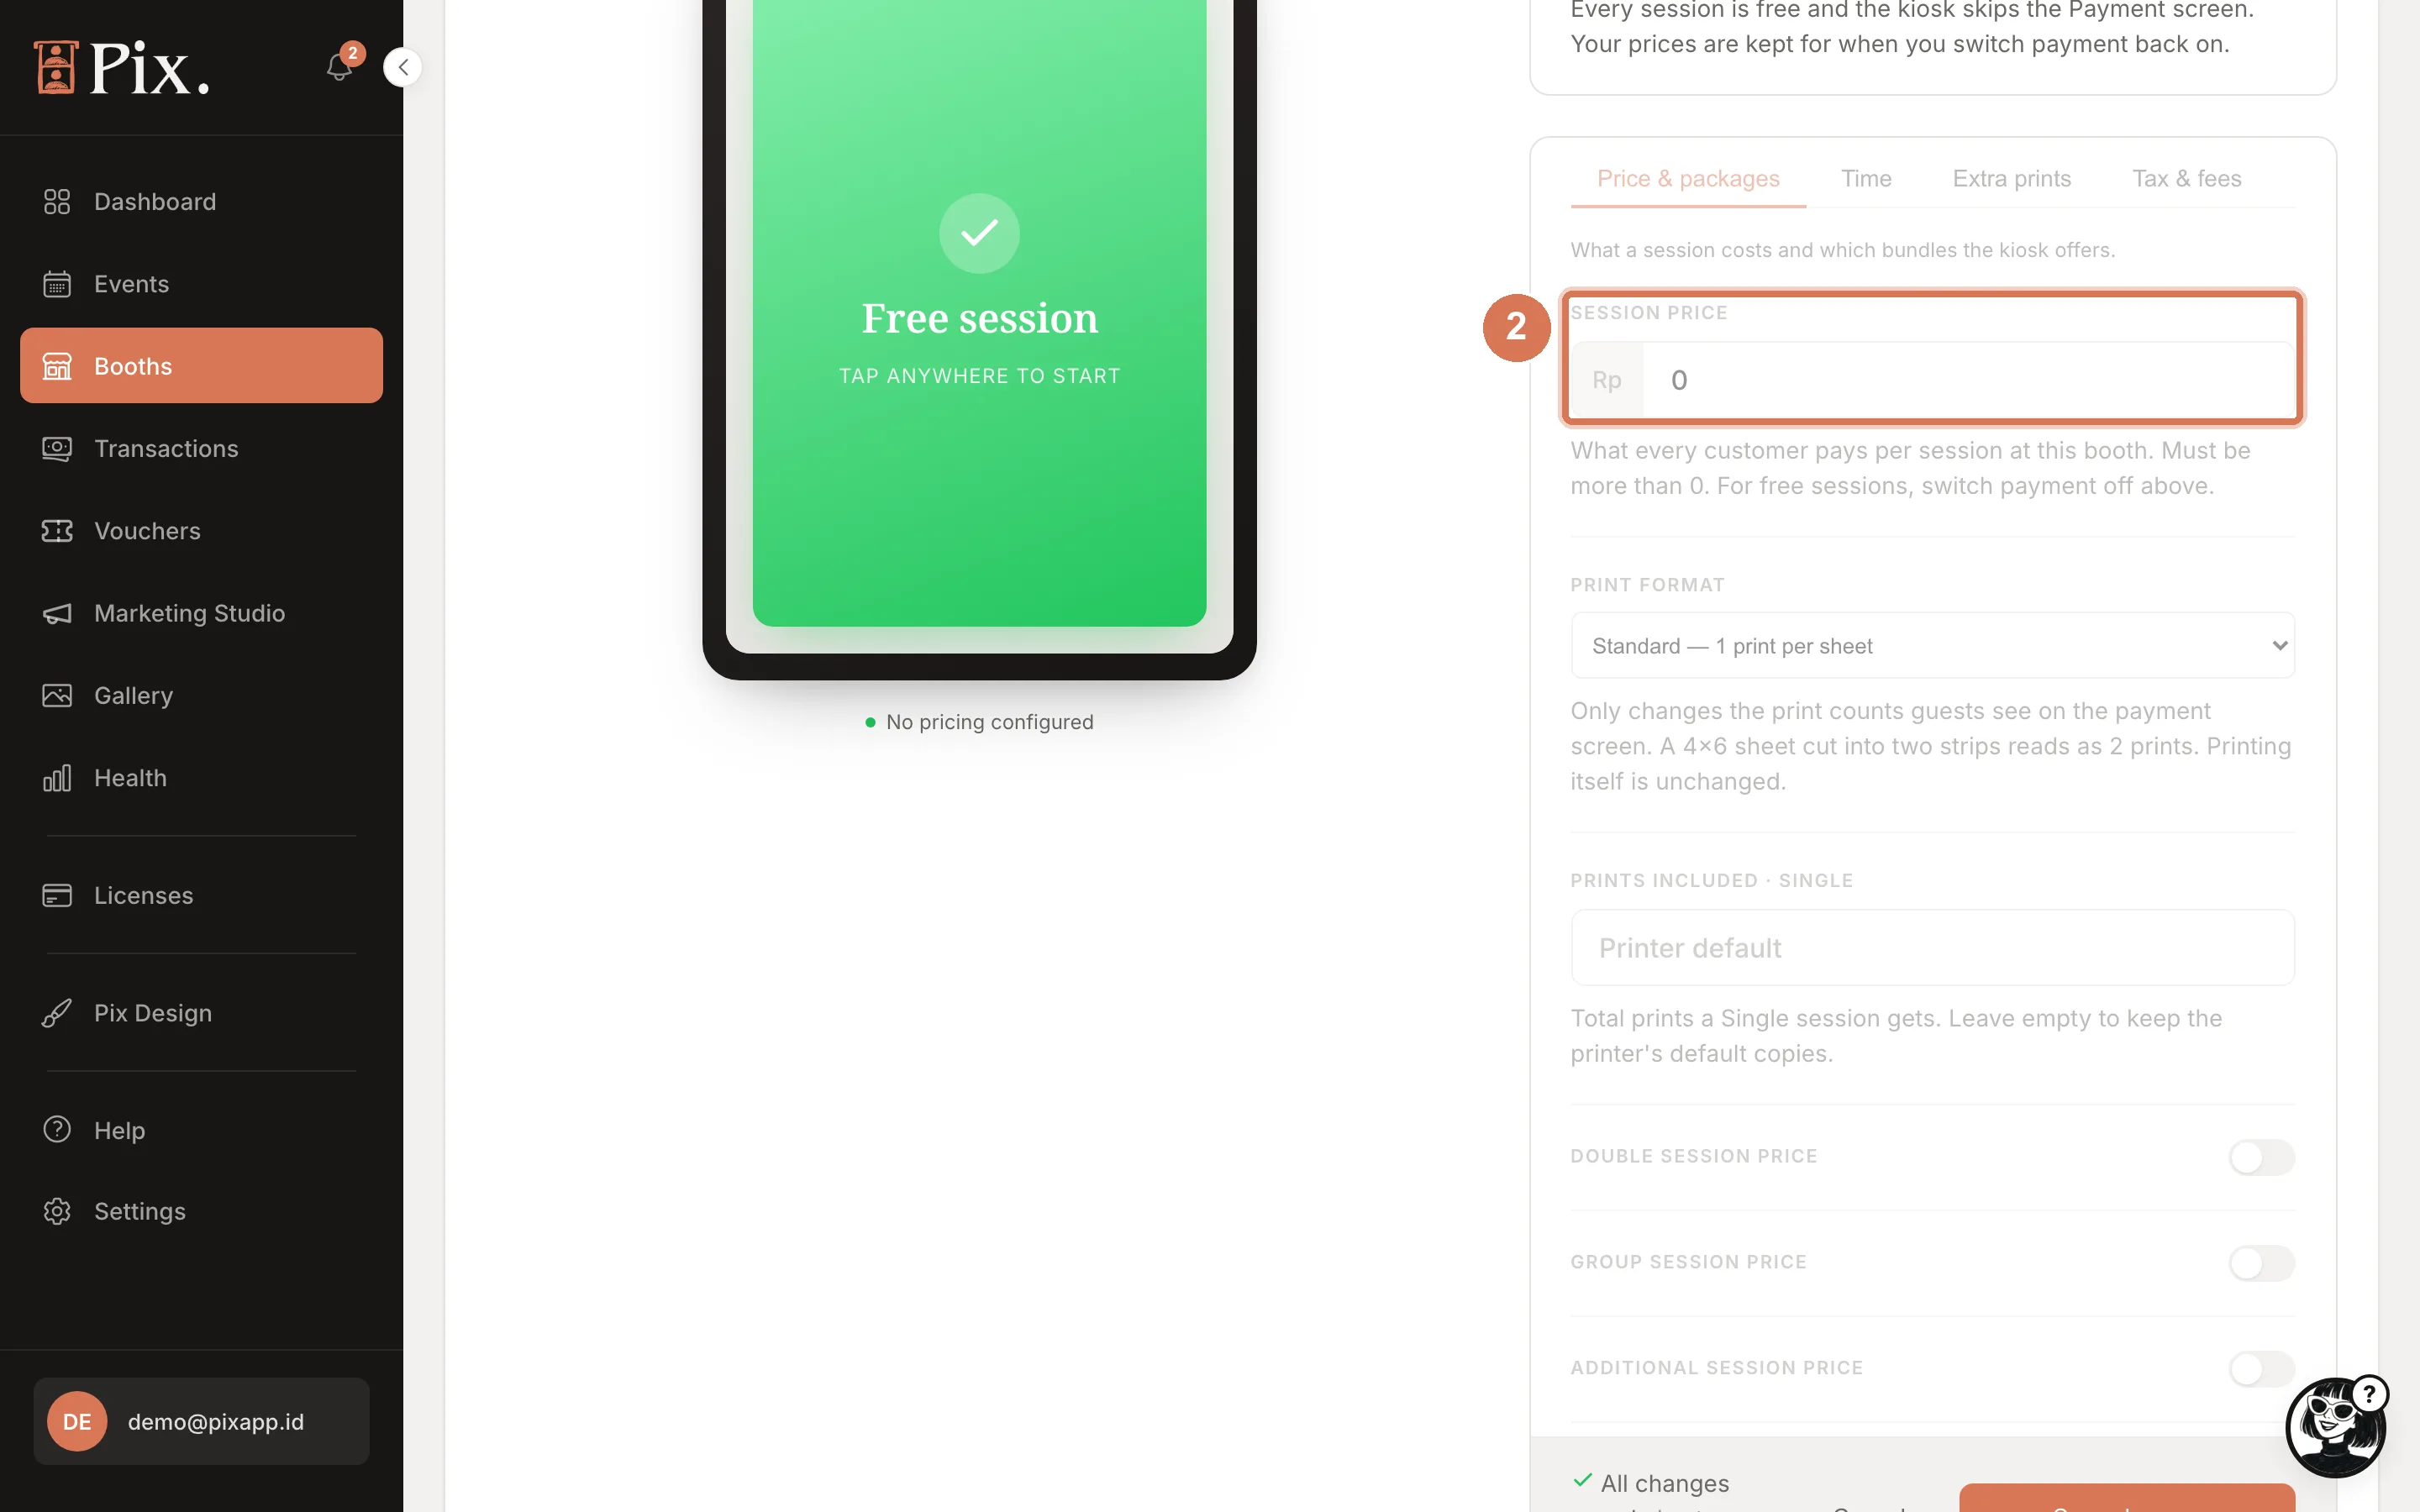
-
On Time, set the Payment timeout (30 to 1800 seconds), how long the guest has to pay. On Extra prints, turn on Extra print price if guests may buy more prints on the Sharing screen.
-
On Tax & fees, enter the tax percentage and label, choose Charge to: Guest (added on top of the prices) or Included in the prices (shown as incl.), and add any fixed or percentage fees with + Add fee. Click Save changes in the save bar.
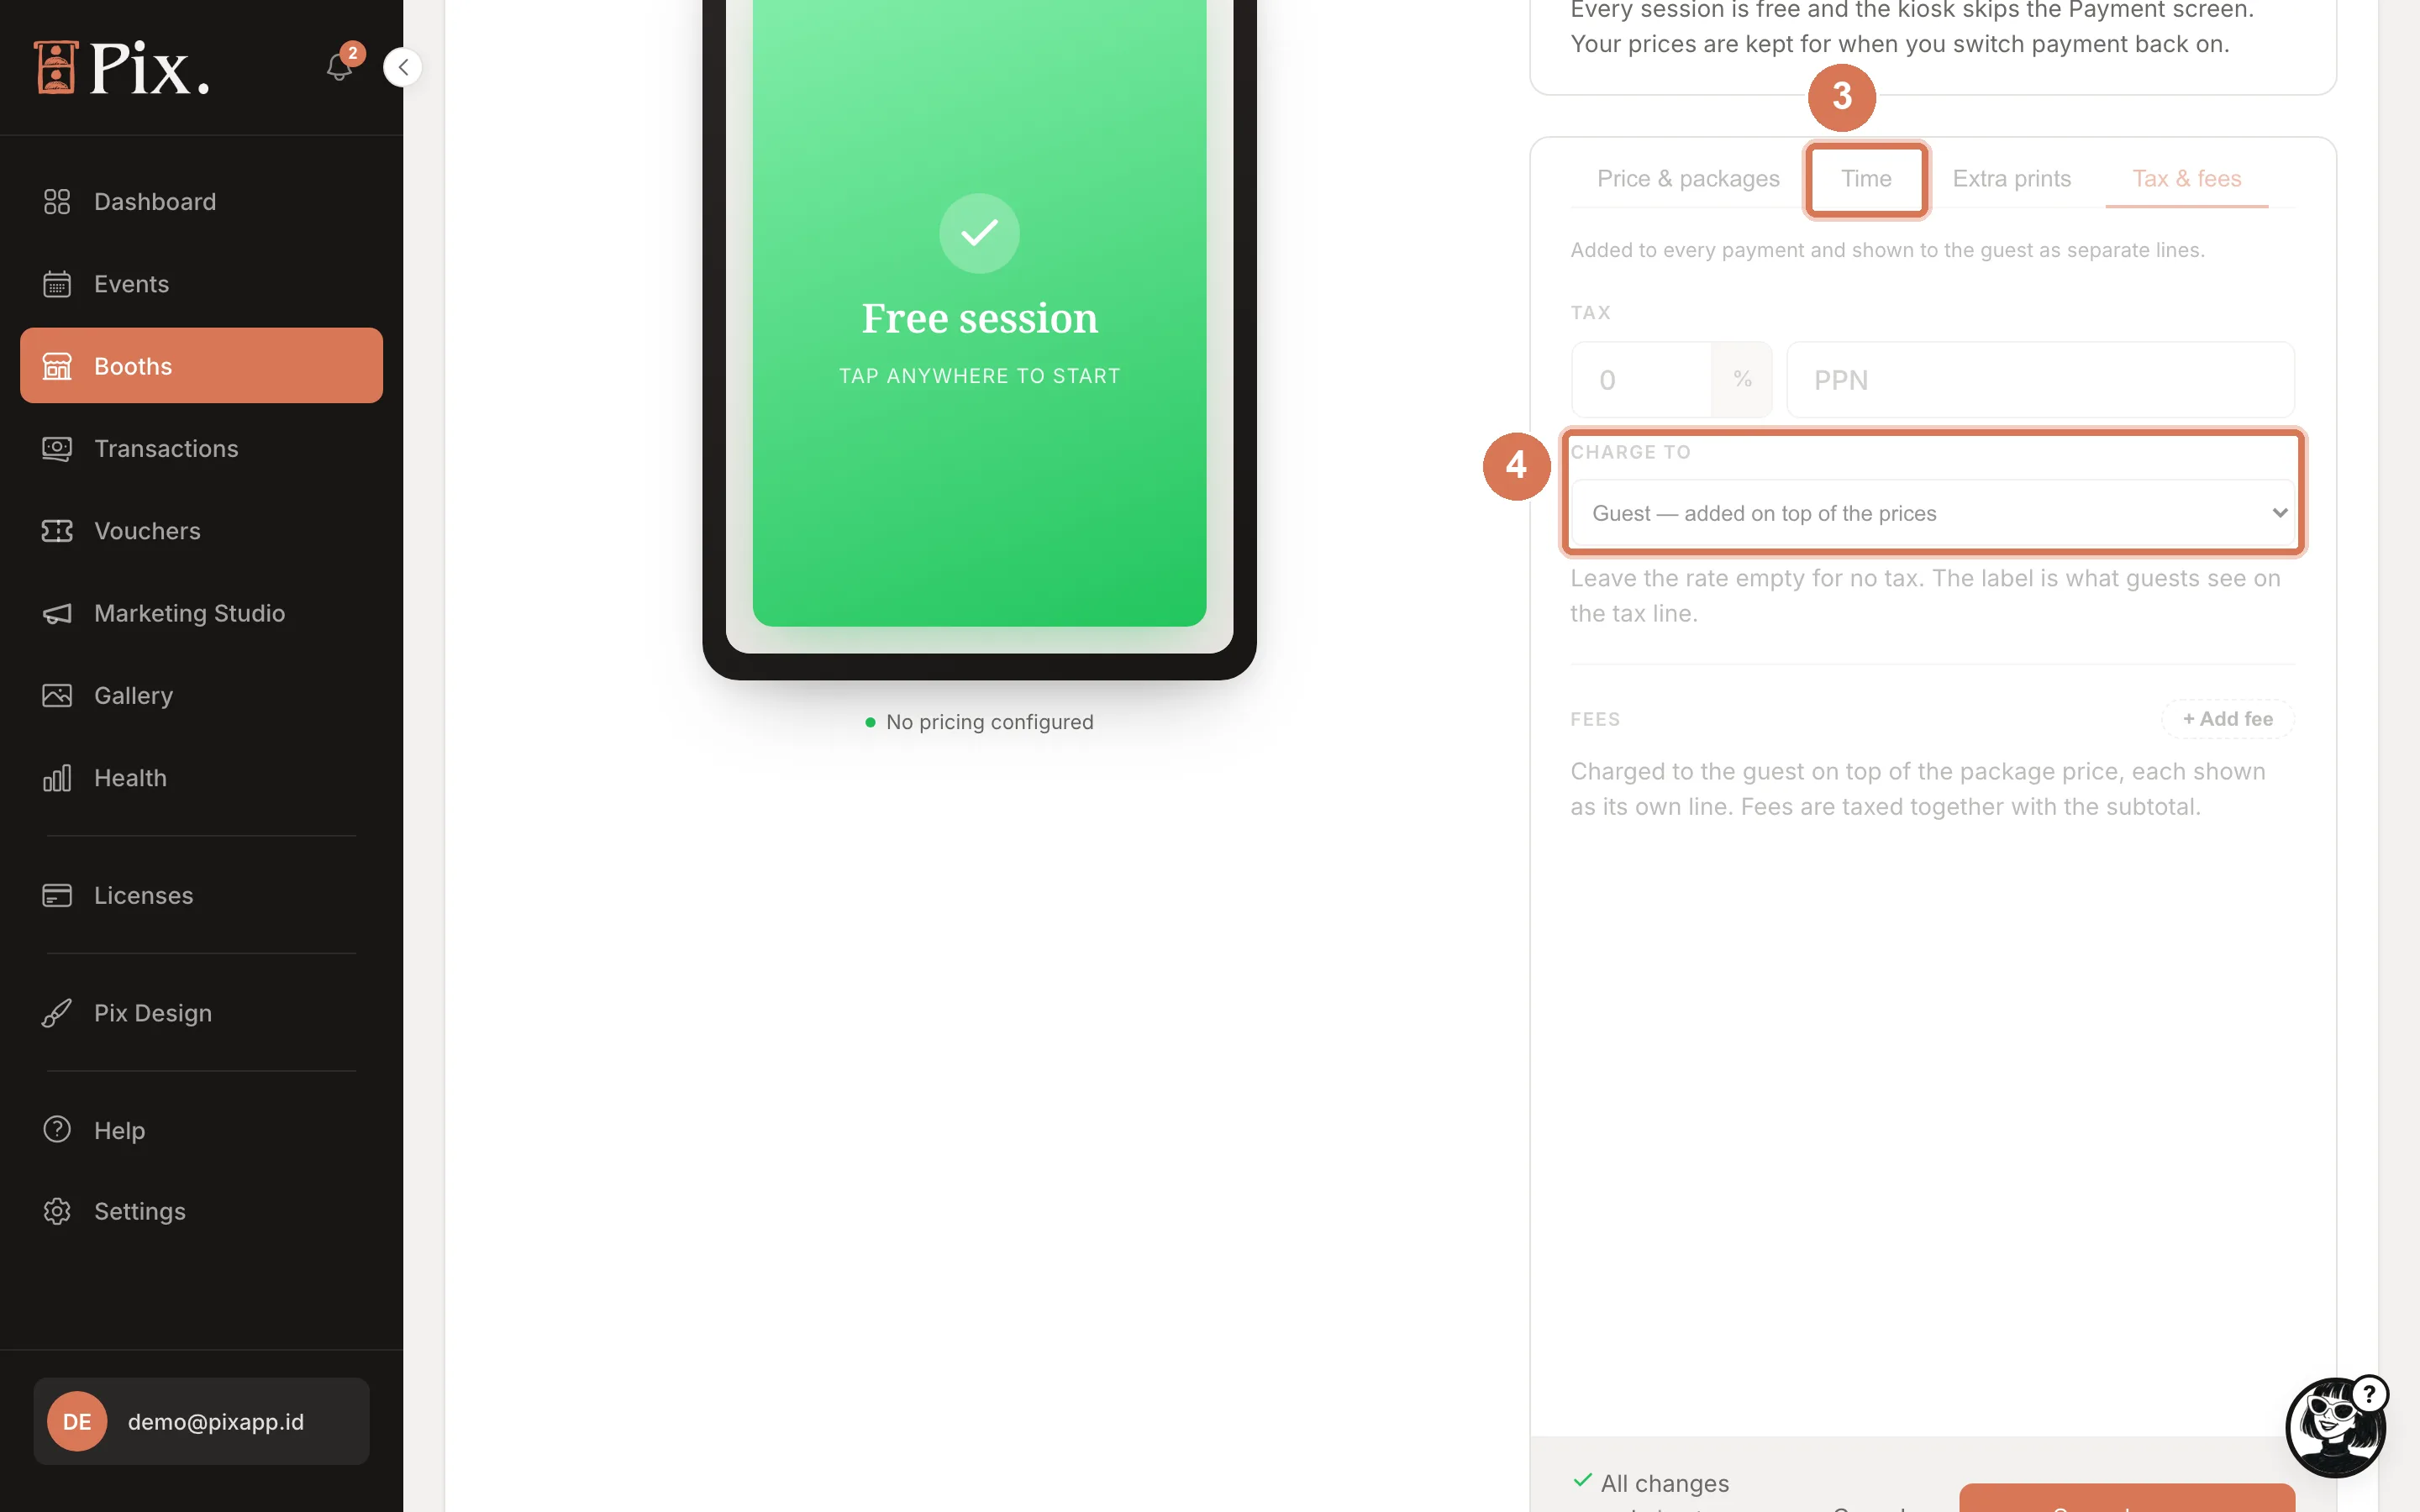
Print counts are sheets of paper. A 4x6 sheet with a 2 inch cut is one sheet to the printer and two prints to the guest. Set Prints included to 1 and Print format to 2 inch cut; the booth then shows "2 prints". Setting the count to 2 prints two sheets.
Step 4: Use a Different Gateway on One Booth (Optional)
-
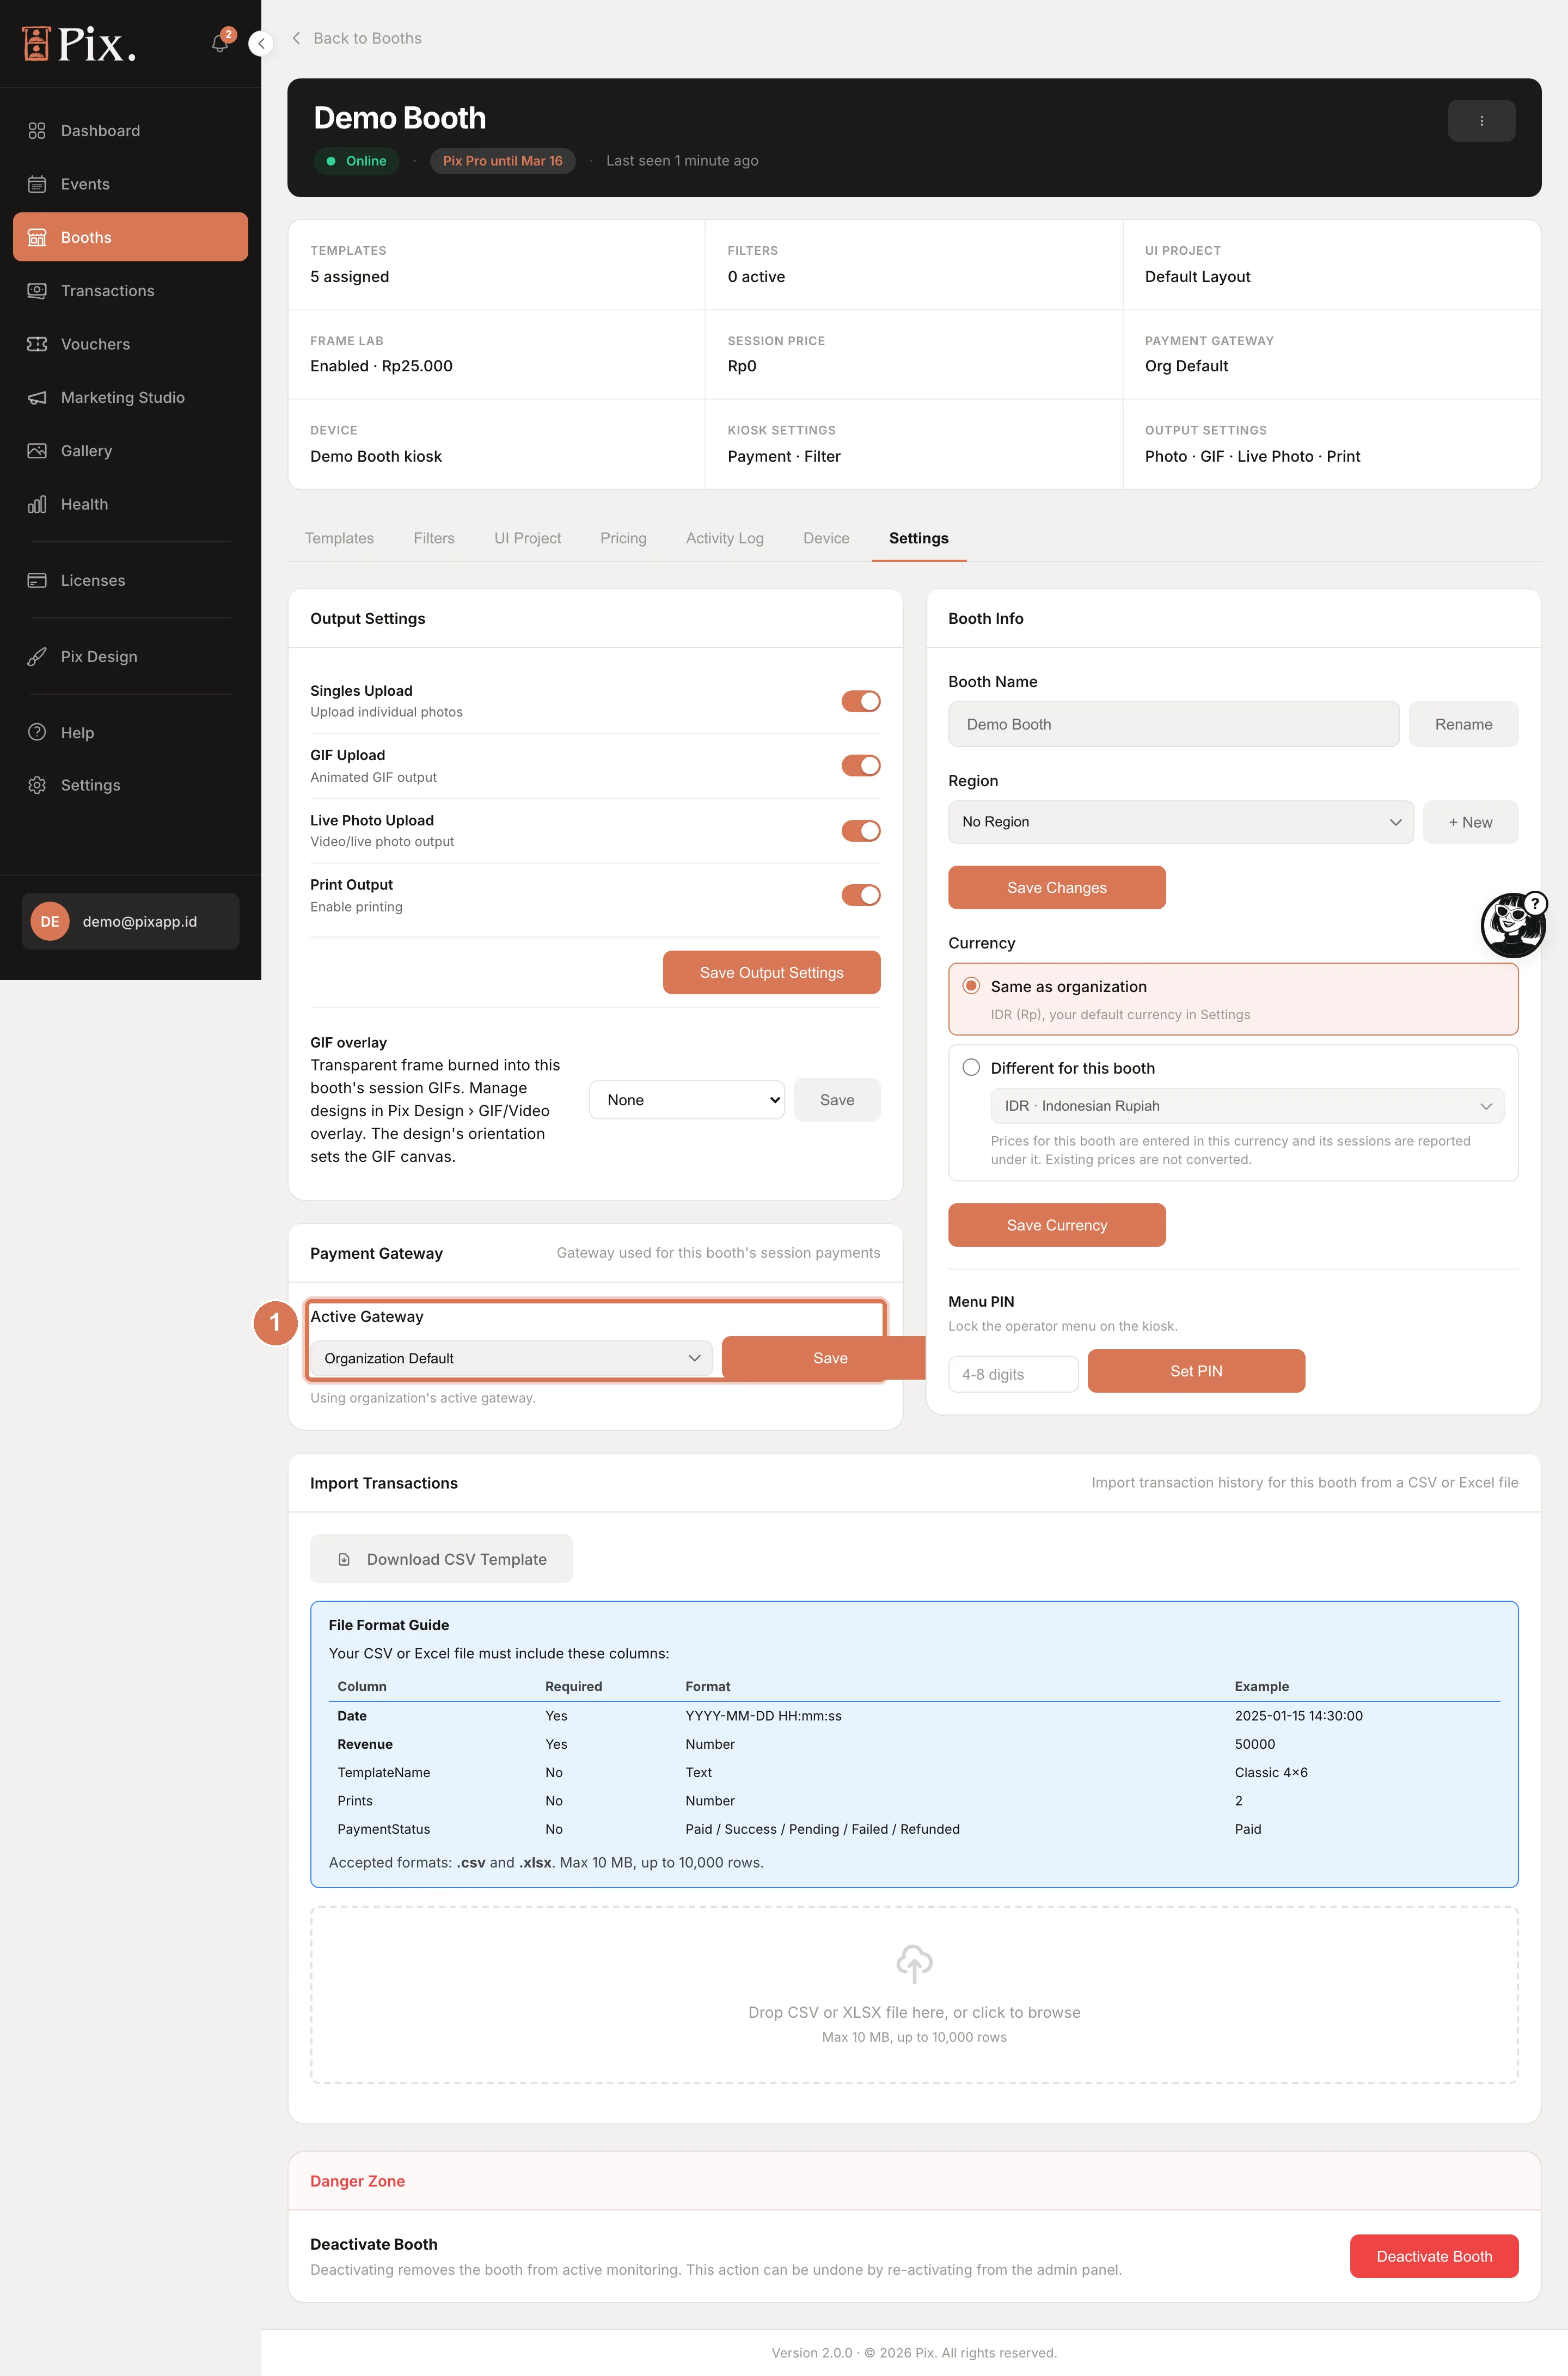
On the booth's Settings tab, find Payment Gateway and set Active Gateway to Organization Default or a specific gateway, then click Save. The same tab holds the booth's Currency; the active gateway must be able to charge in it.
Step 5: What the Guest Sees
- After the Start screen (and the Tutorial, if enabled), the booth shows the Payment screen with the price and, if you sell packages, a package picker with the print counts, subtotal, fees and tax.
- With a QRIS gateway, a QR code appears with the amount and a countdown. The guest scans it with any wallet app and pays on their phone.
- With Stripe, the QR opens a Stripe checkout page on the guest's phone, where they pay by card.
- Once the gateway confirms the payment, the booth shows the Payment Success screen for a few seconds (tap anywhere to continue) and moves on to template selection. Coin and card readers connected to the booth use the same screen through the Coin and Card steps.
Step 6: Find the Money
-
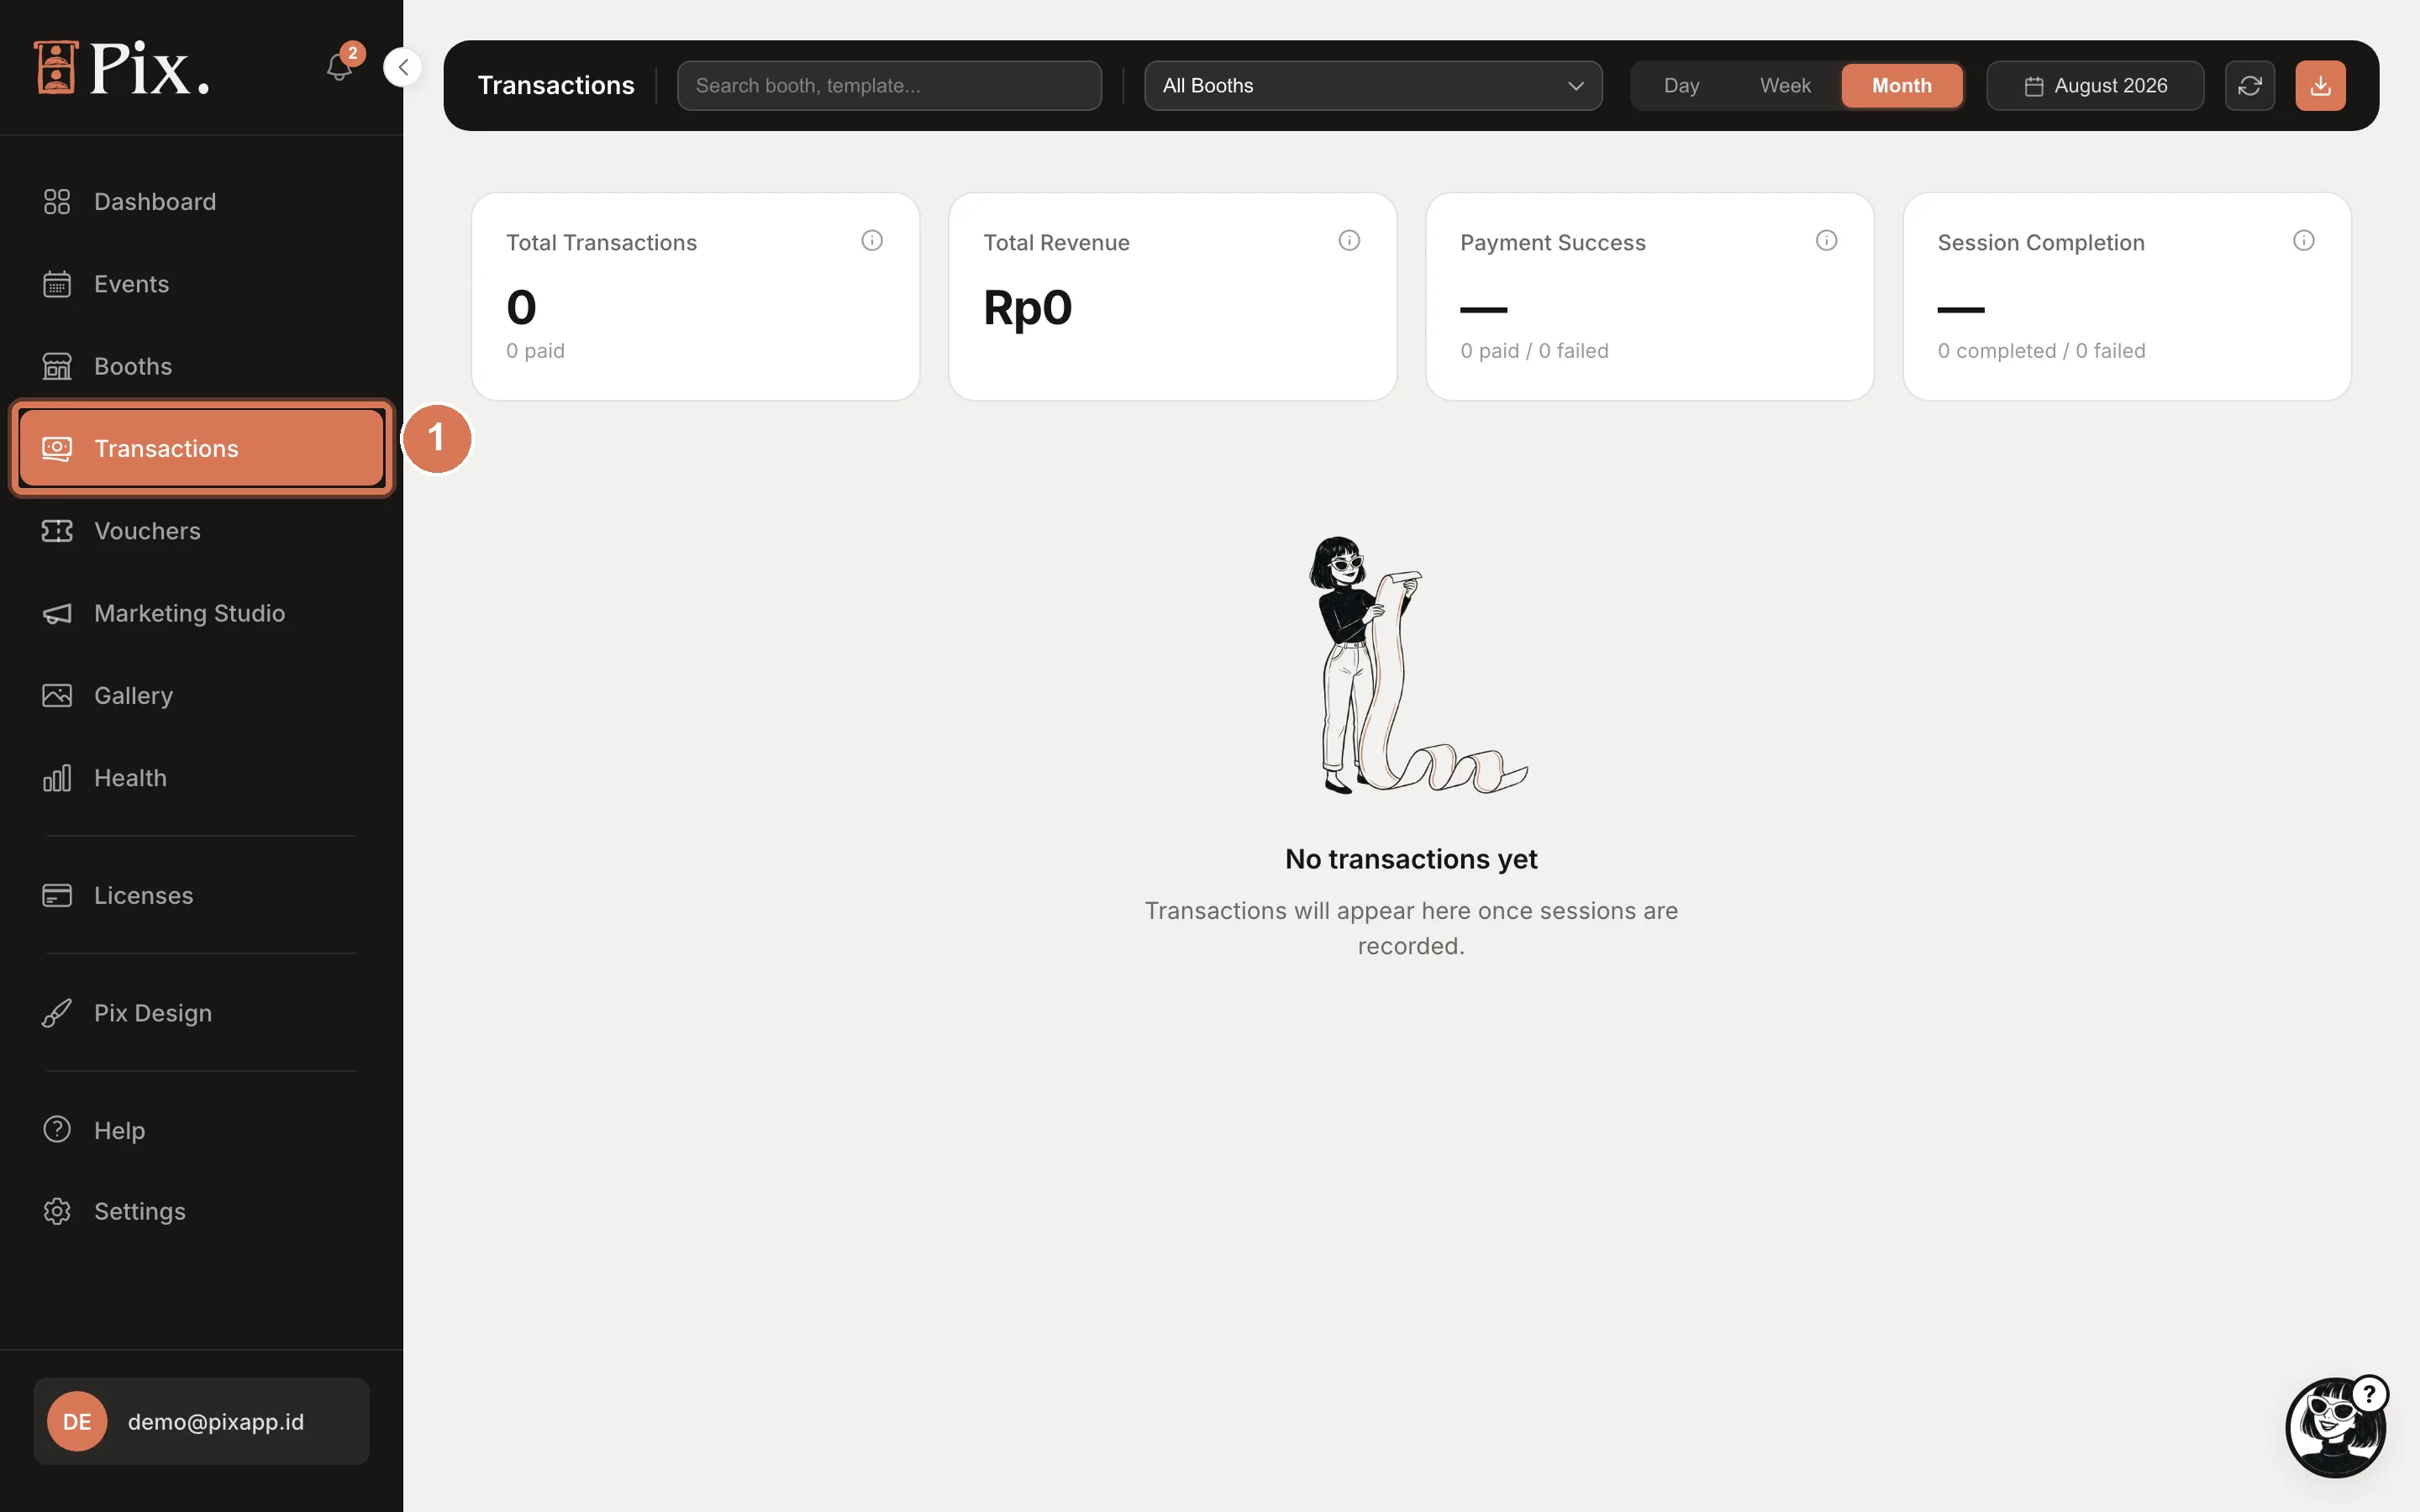
Open Transactions. Each paid session is a row; the cards on top show Total Transactions, Total Revenue, Payment Success and Session Completion for the period you pick (Day, Week, Month or Custom).
-
If a payment reached your gateway but is missing here, click the Sync with payment gateway icon, set a Start Date and End Date and click Run Sync. Use the Export Excel icon for your accountant.
Step 7: Test Without Spending Money
-
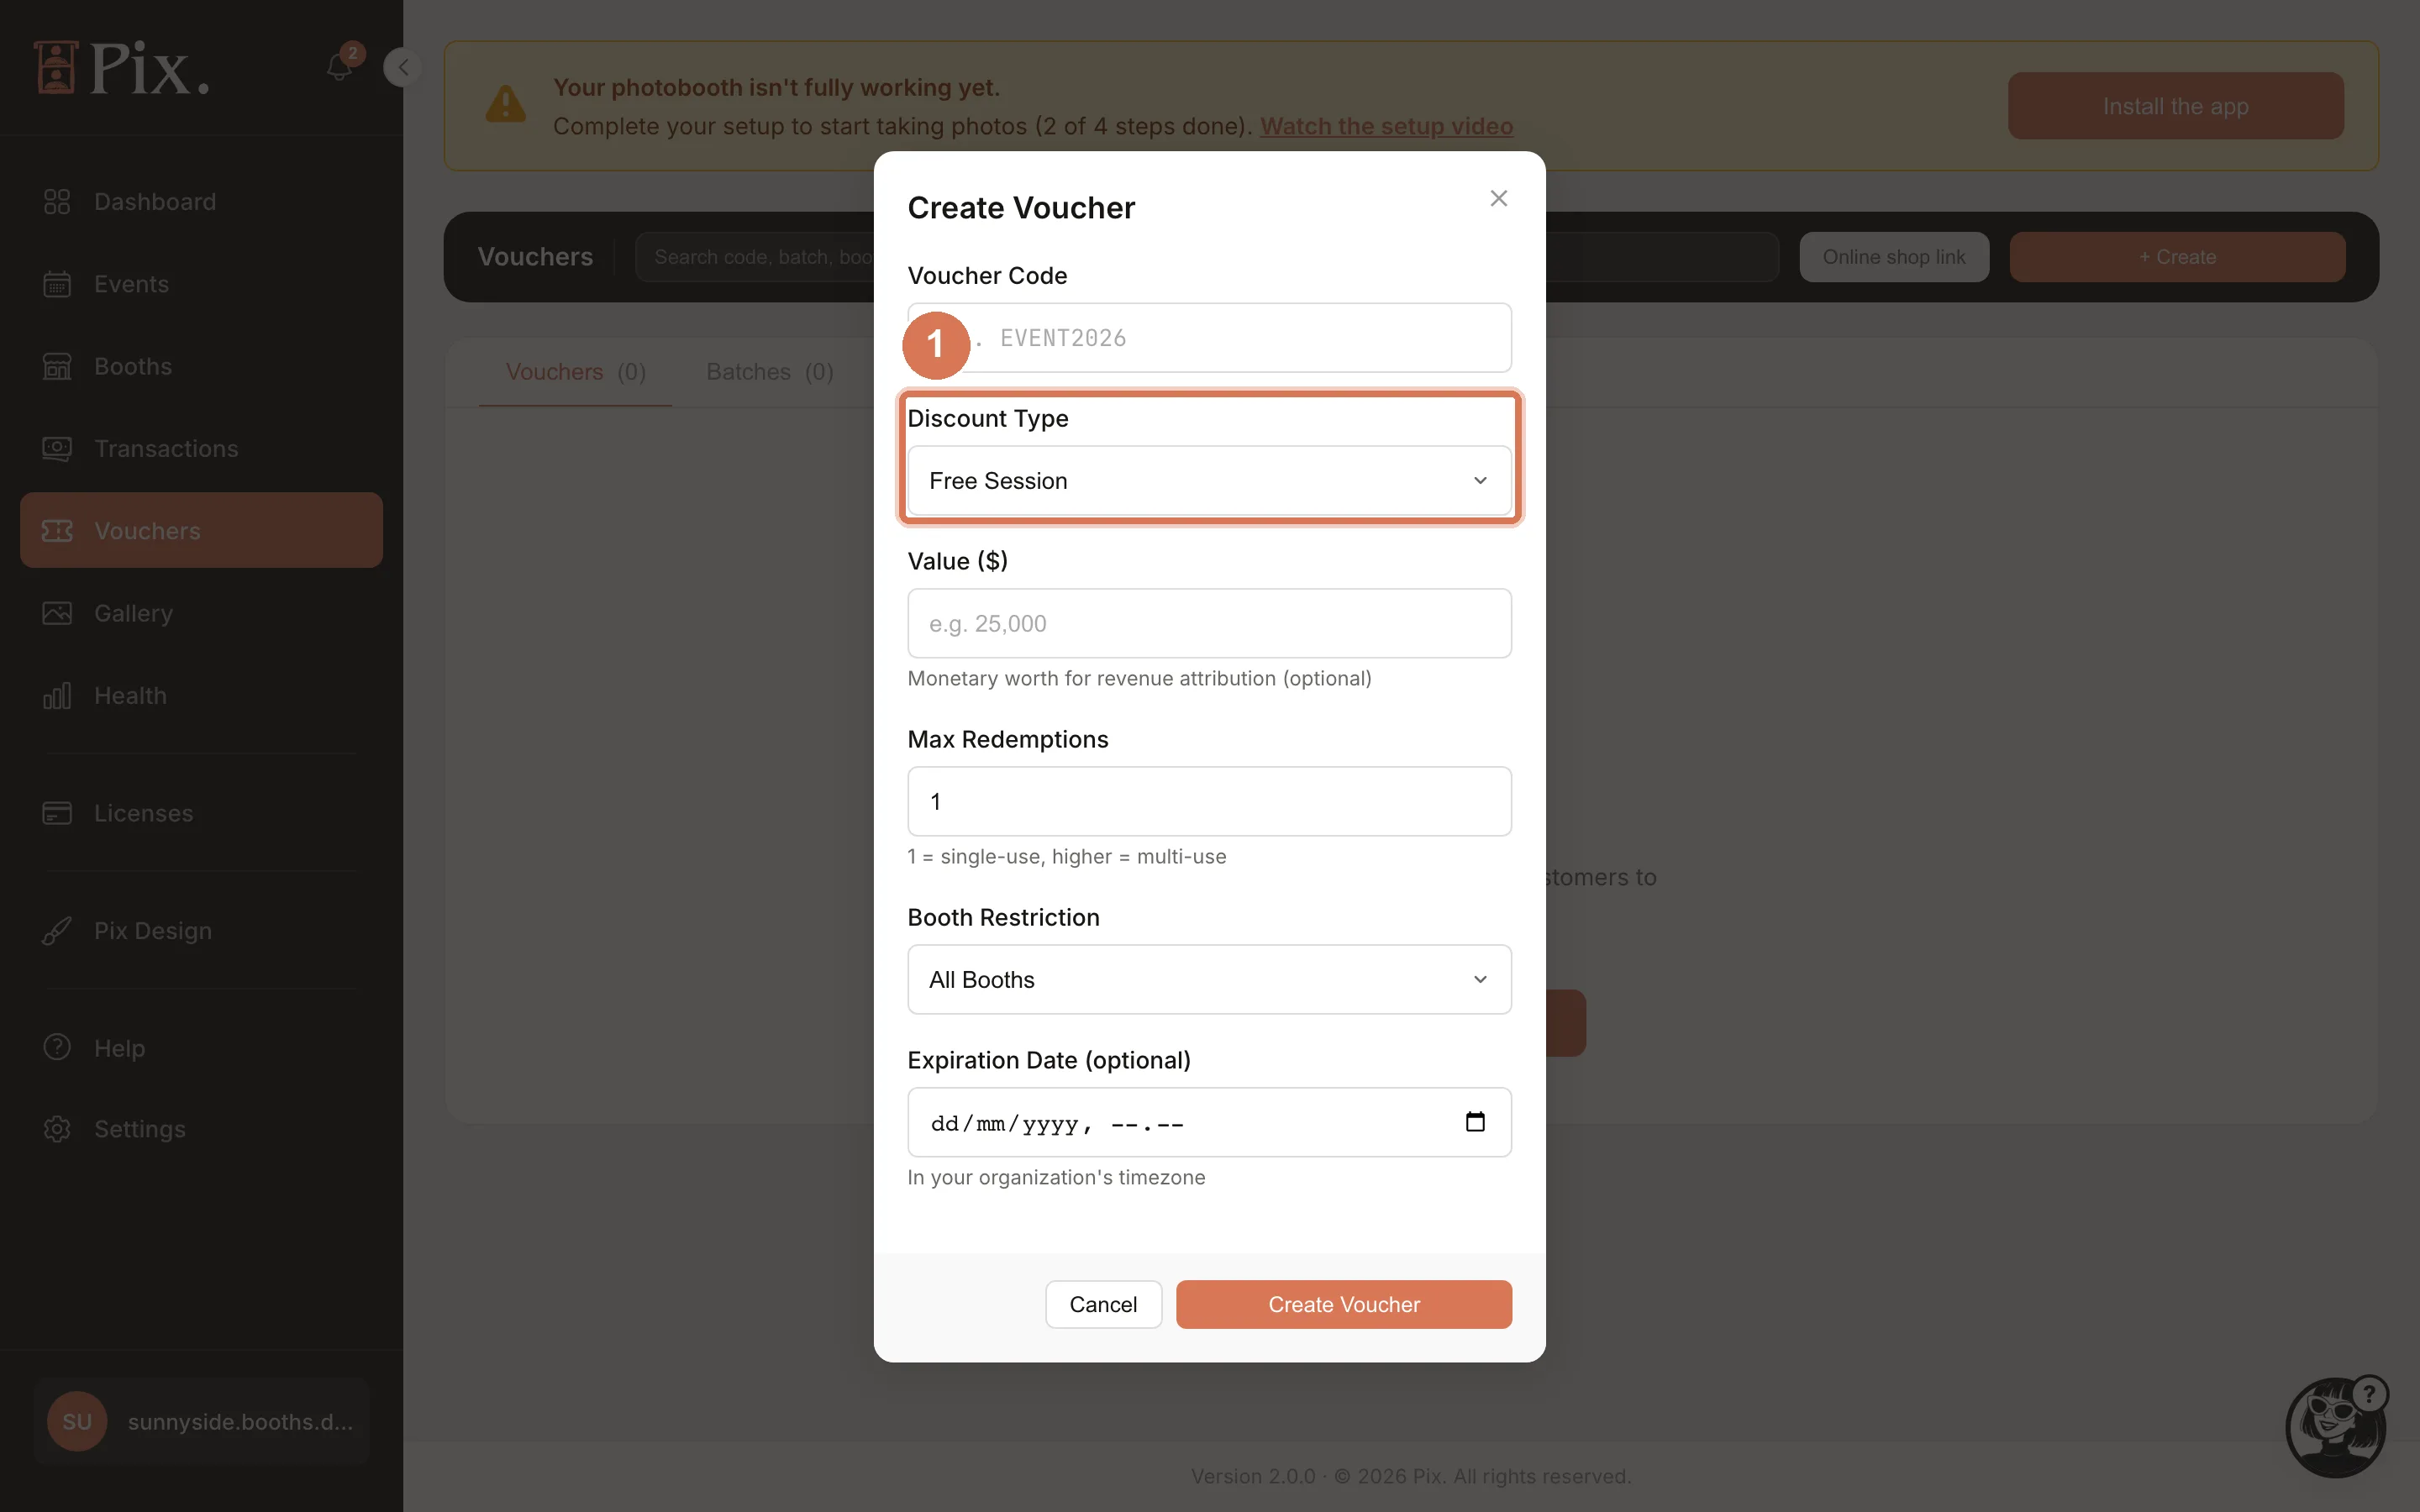
Open Vouchers, click + Create, then Single Voucher. Enter a Voucher Code, set Discount Type to Free Session, a Max Redemptions count and, if you like, a Booth Restriction and an Expiration Date.
-
On the booth's Payment screen, tap Voucher and type the code. A voucher that covers the whole price shows the Payment Success screen and continues like a paid session, with no charge created.
Check It Worked
- Start a session on the booth. The Payment screen shows your price and a QR code.
- Pay with your own phone (or a Free Session voucher). The booth shows Payment Success and continues to templates.
- The session appears as a row in Transactions, and the real payment appears in your gateway's own dashboard.
Troubleshooting
| What you see | What to check |
|---|---|
| The booth never shows a Payment screen | The computer is on Pix Starter (watermarked), Payment on this booth is OFF, or the Payment Screen has Enabled in session flow unticked in the booth's UI project (Pix Design > UI Editor). |
| "Enter a price, or switch payment off above" when saving | The session price must be above 0. Free sessions are the switch at the top of the Pricing tab, never a price of 0. |
| Stripe charges succeed but nothing pays out | The saved key is an sk_test_ key. Paste the live sk_live_ key, save, and run the test charge again. |
| The QR tile stays blank while the countdown runs | The booth could not download the QR image. Check the booth's internet connection and start the payment again. |
| The guest's wallet says the merchant was not found ("Merchant tidak ditemukan") | That message comes from the guest's wallet, not the booth: weak mobile data at the venue, or a QR that expired (it lasts as long as the booth's Payment timeout). Cancel and start a fresh payment. |
| A payment reached the gateway but the session shows no revenue | Run Sync with payment gateway on the Transactions page for that date. |