Sell Sessions Online
In this tutorial you will find a booth's online shop link, put its QR code where customers can scan it, and redeem a bought code at the booth. It takes about 10 minutes.
The online shop is a phone page for one booth. Customers pick a package at the booth's prices, pay by QRIS (in Indonesia) or by card (Stripe), and get a code that the booth accepts even while it is offline. Use it to sell ahead of an event, to shorten a queue, or to let a host prepay for their guests.
Before You Start
- Pix Pro on the booth's computer.
- A payment gateway connected (Settings > Payment Gateway). Indonesian gateways sell by QRIS; Stripe sells by card.
- Prices saved on the booth's Pricing tab, with Payment on this booth ON. The shop sells exactly what the booth sells.
- Pix Desktop App 1.1.101 or newer on the booth. Older versions can only accept a code for a single session.
Step 1: Find the Link and QR Code
-
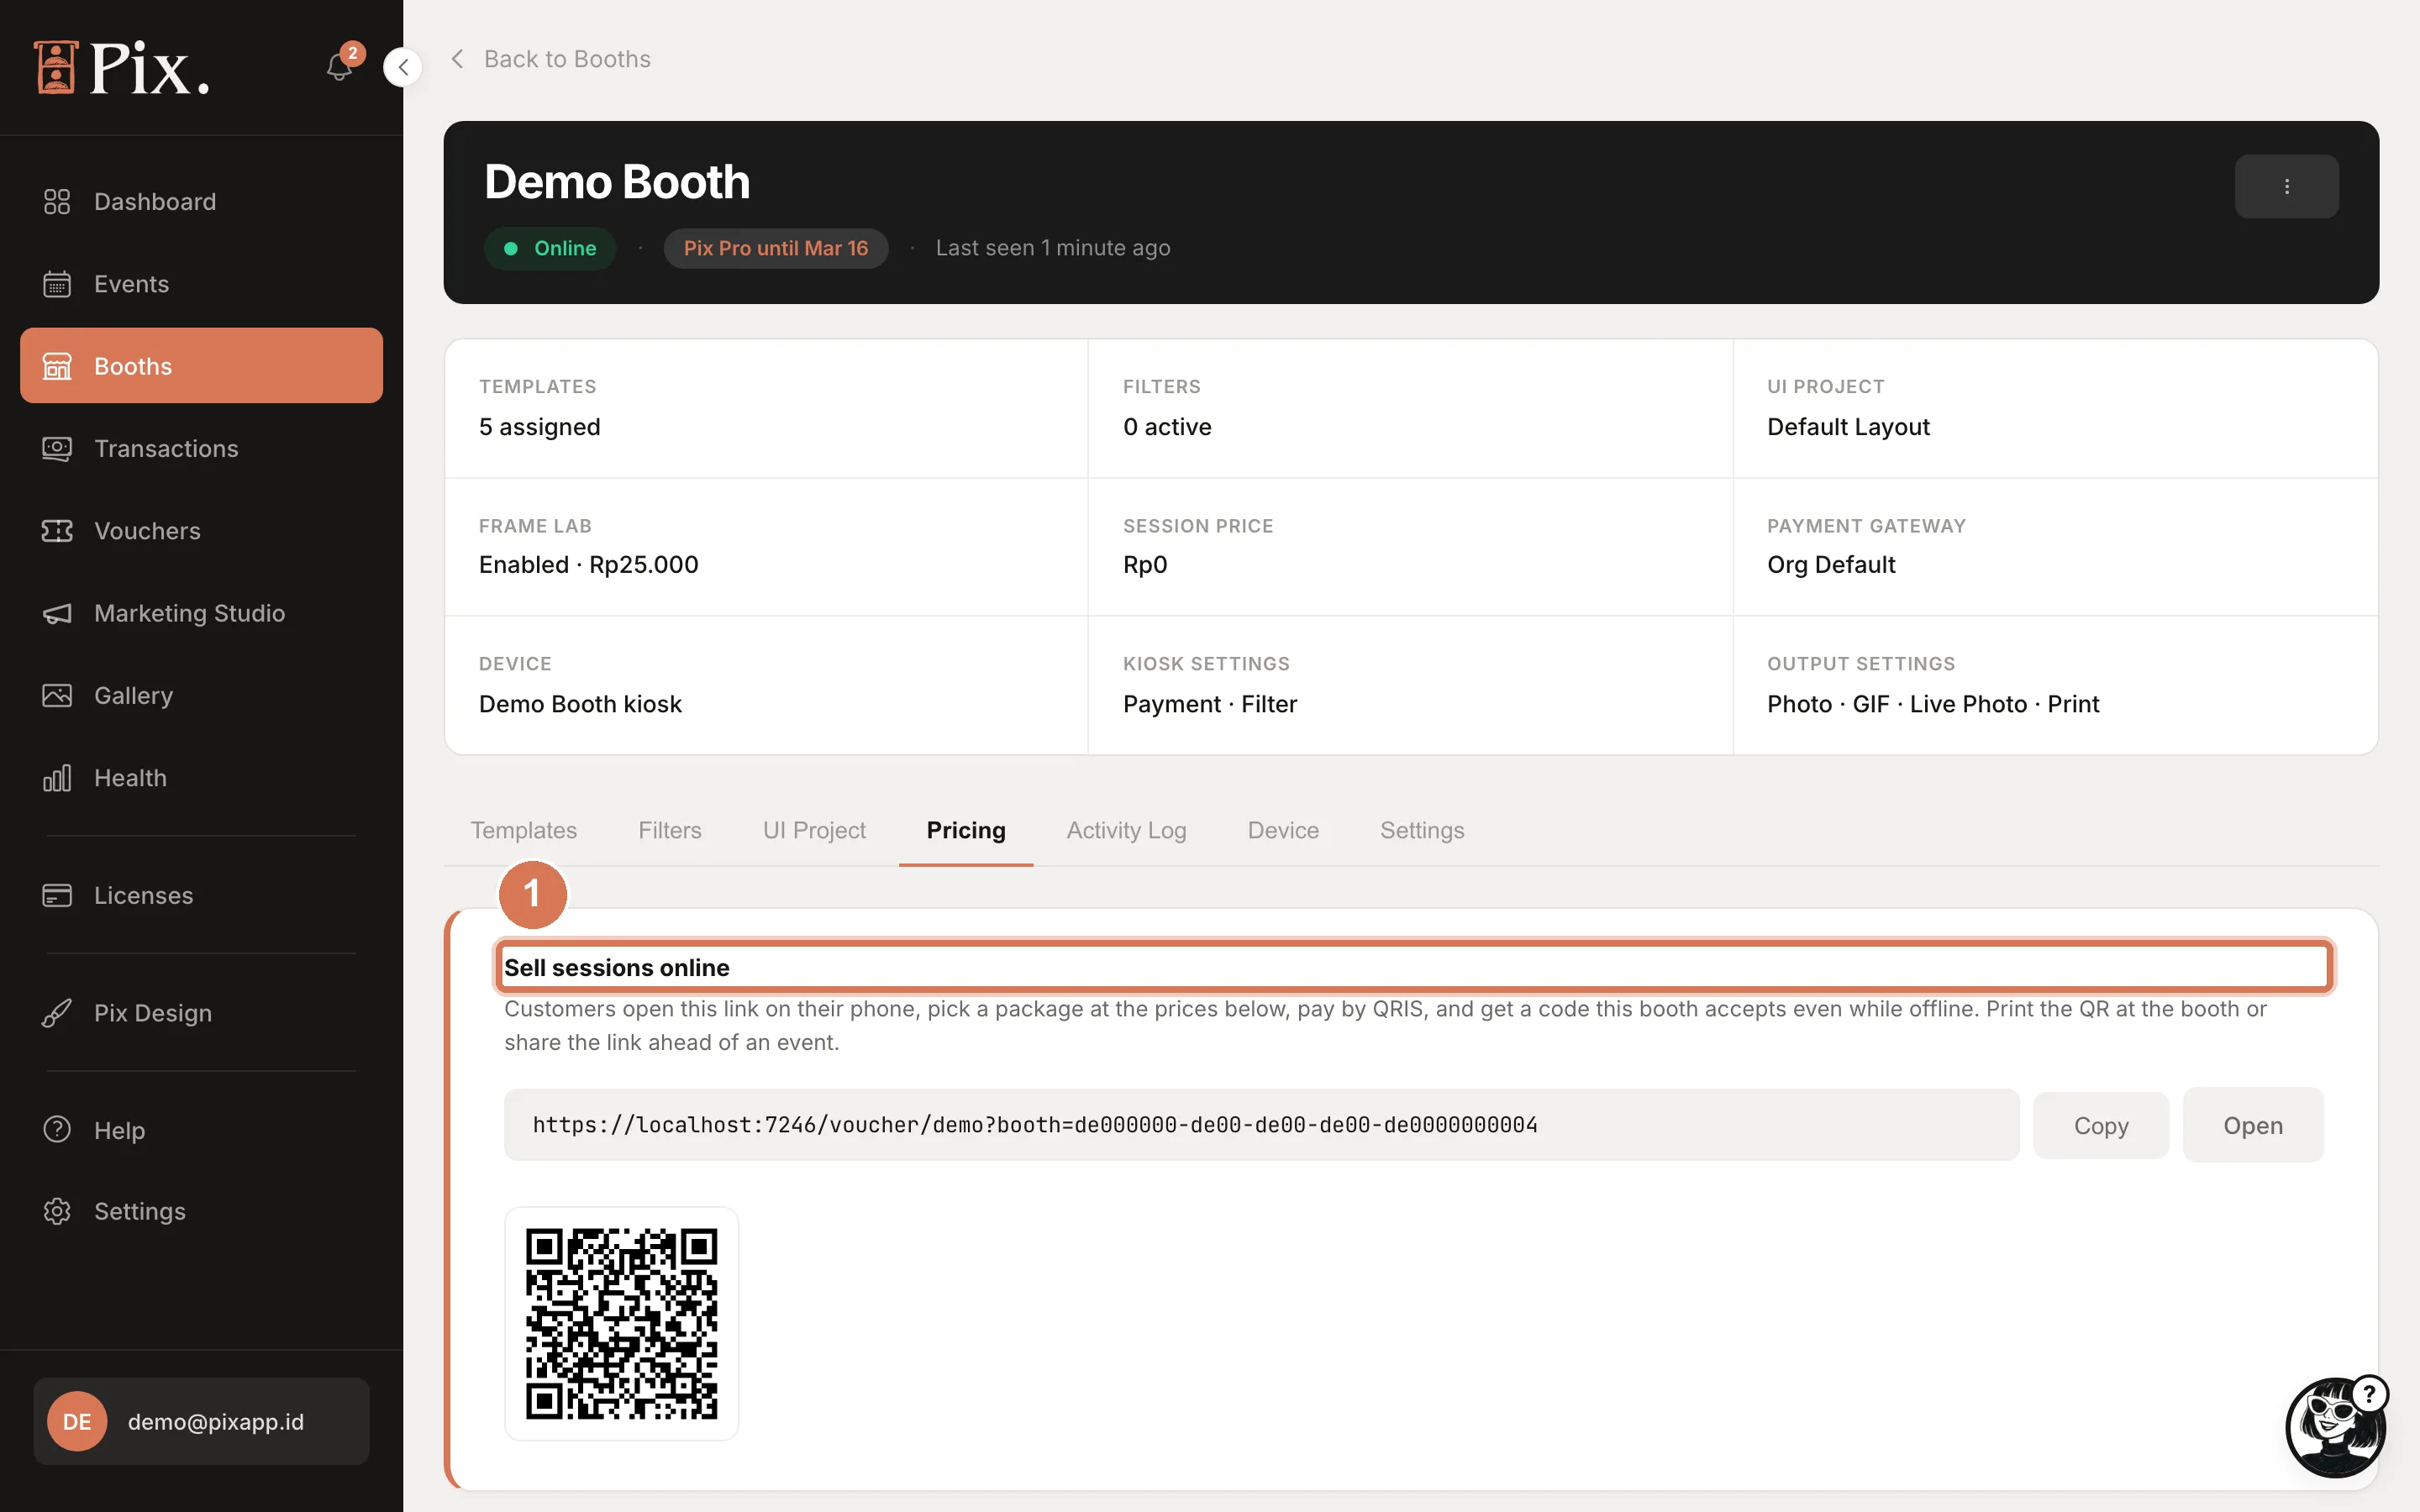
Open Booths, click Configure on the booth, then the Pricing tab. The Sell sessions online card at the top shows the booth's link with Copy, Open and a QR code.
-
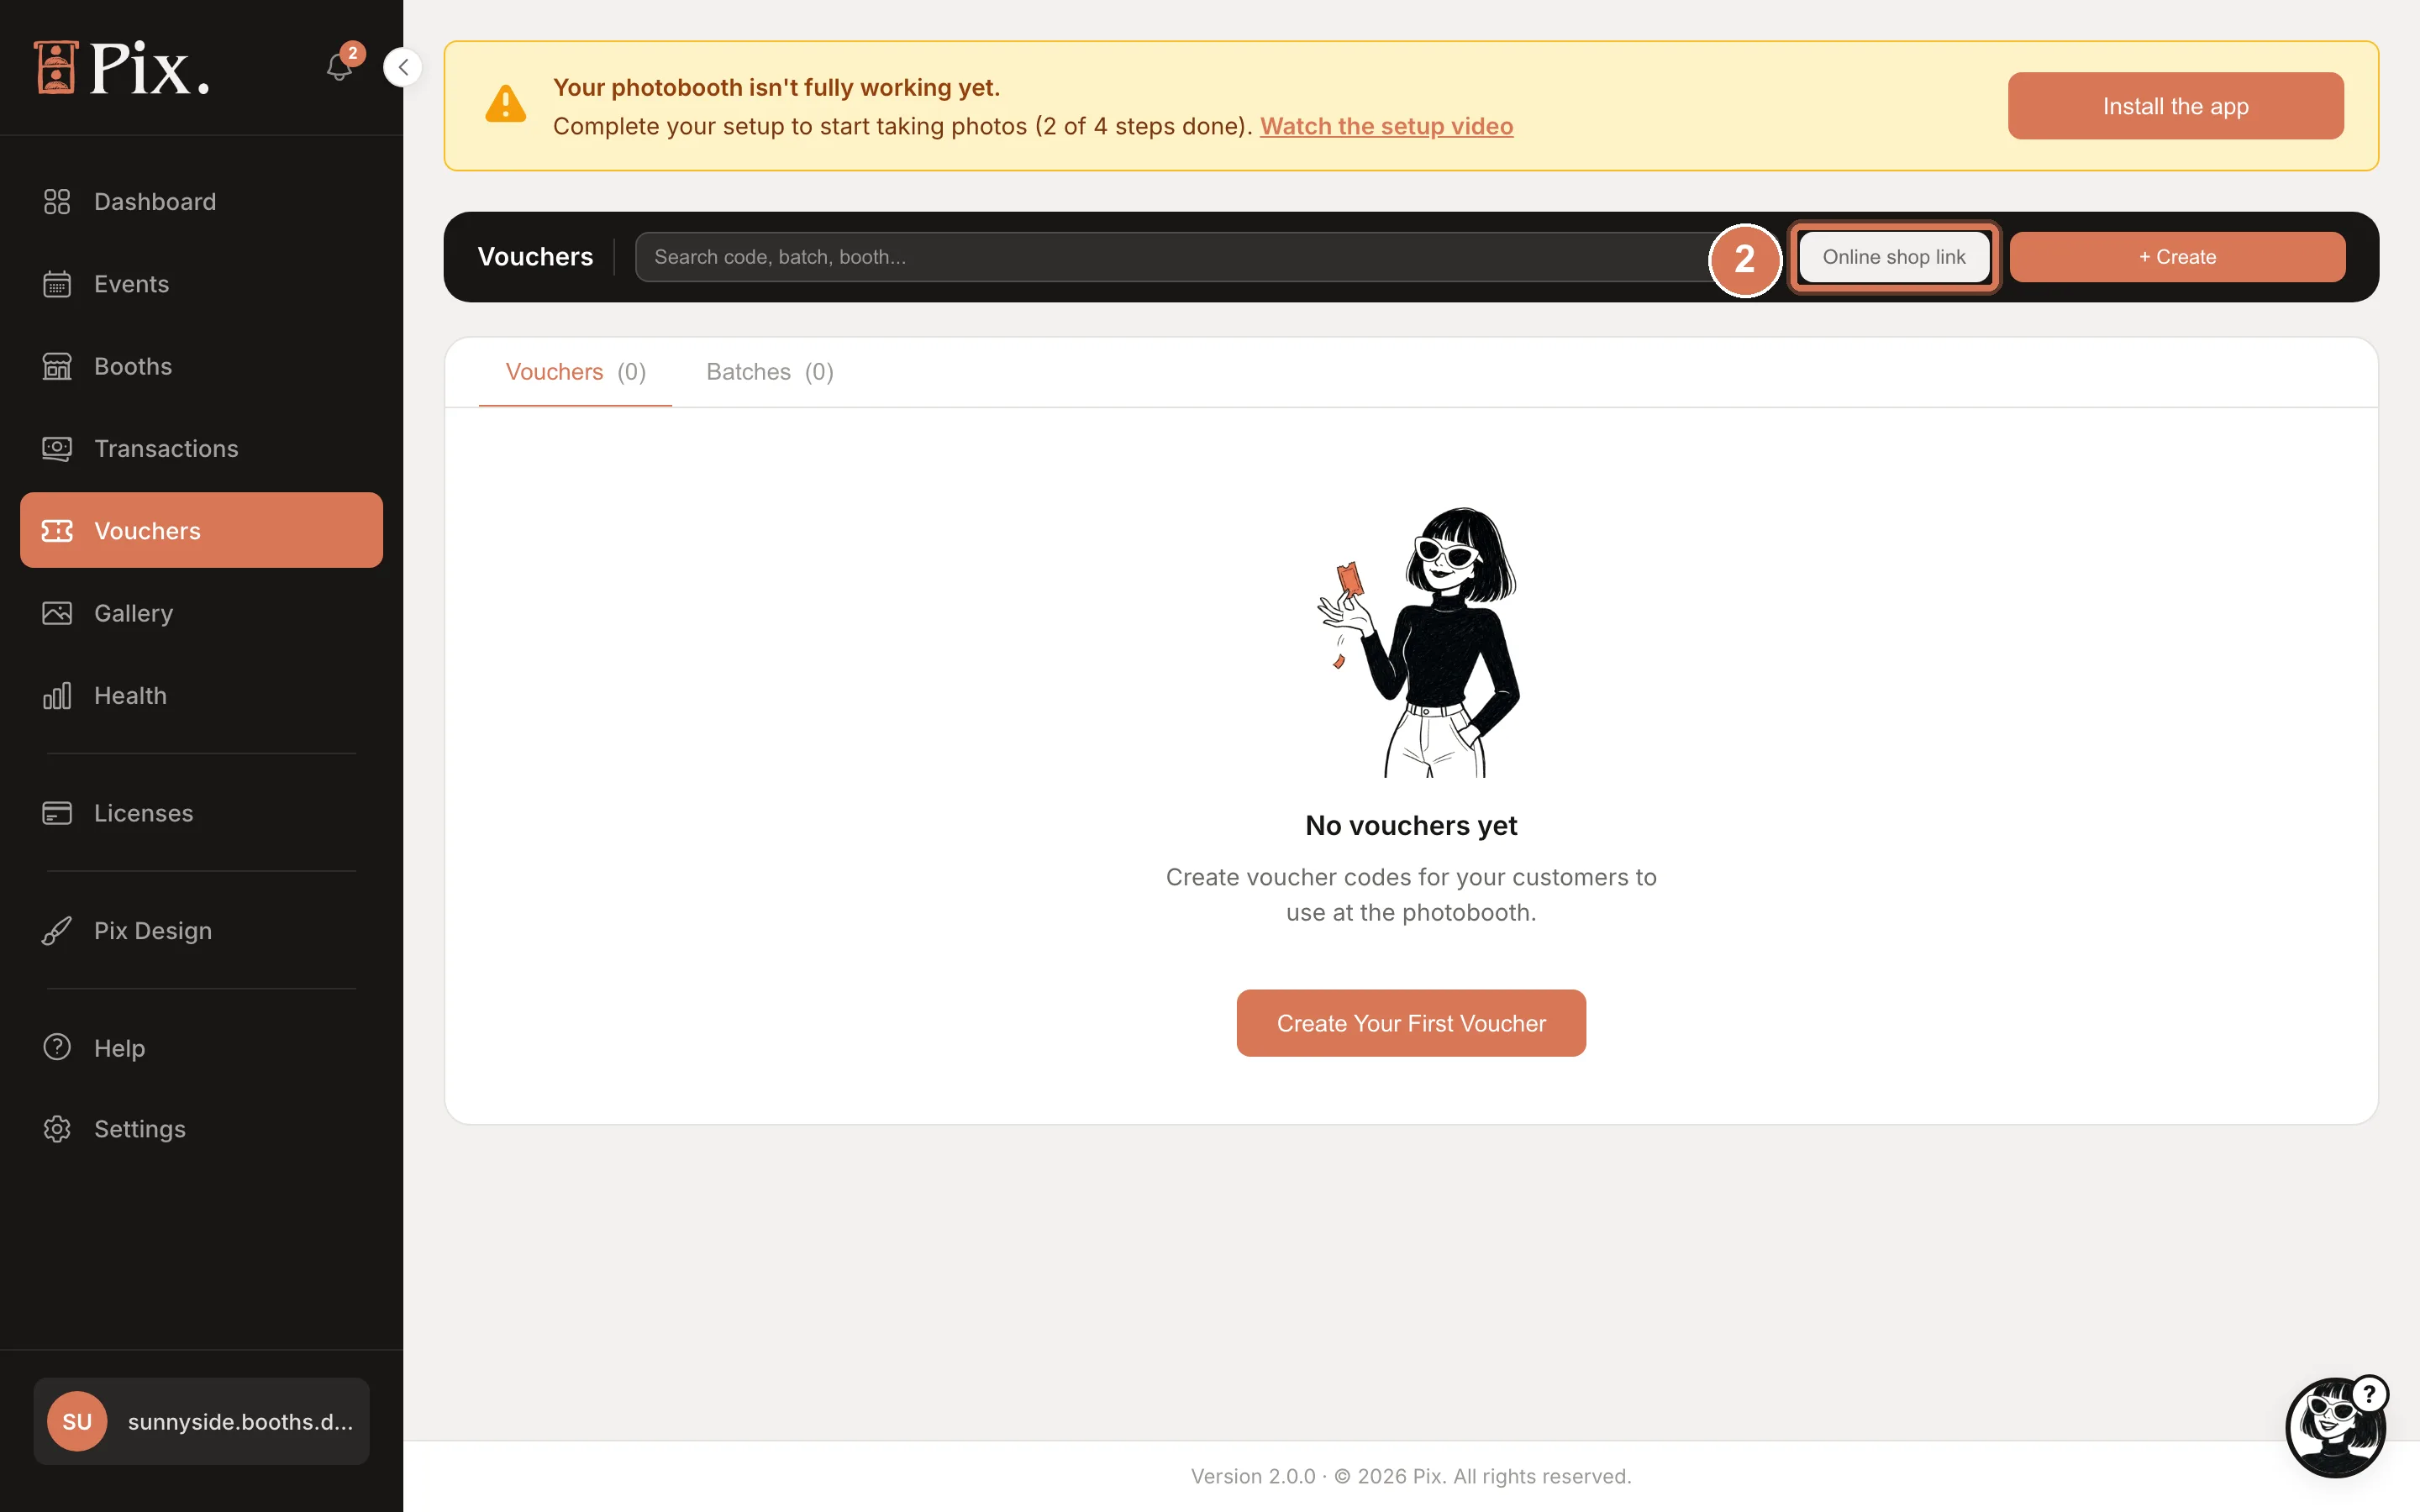
The same link is one click away on the Vouchers page: click Online shop link.
Step 2: Check the Prices the Shop Will Show
-
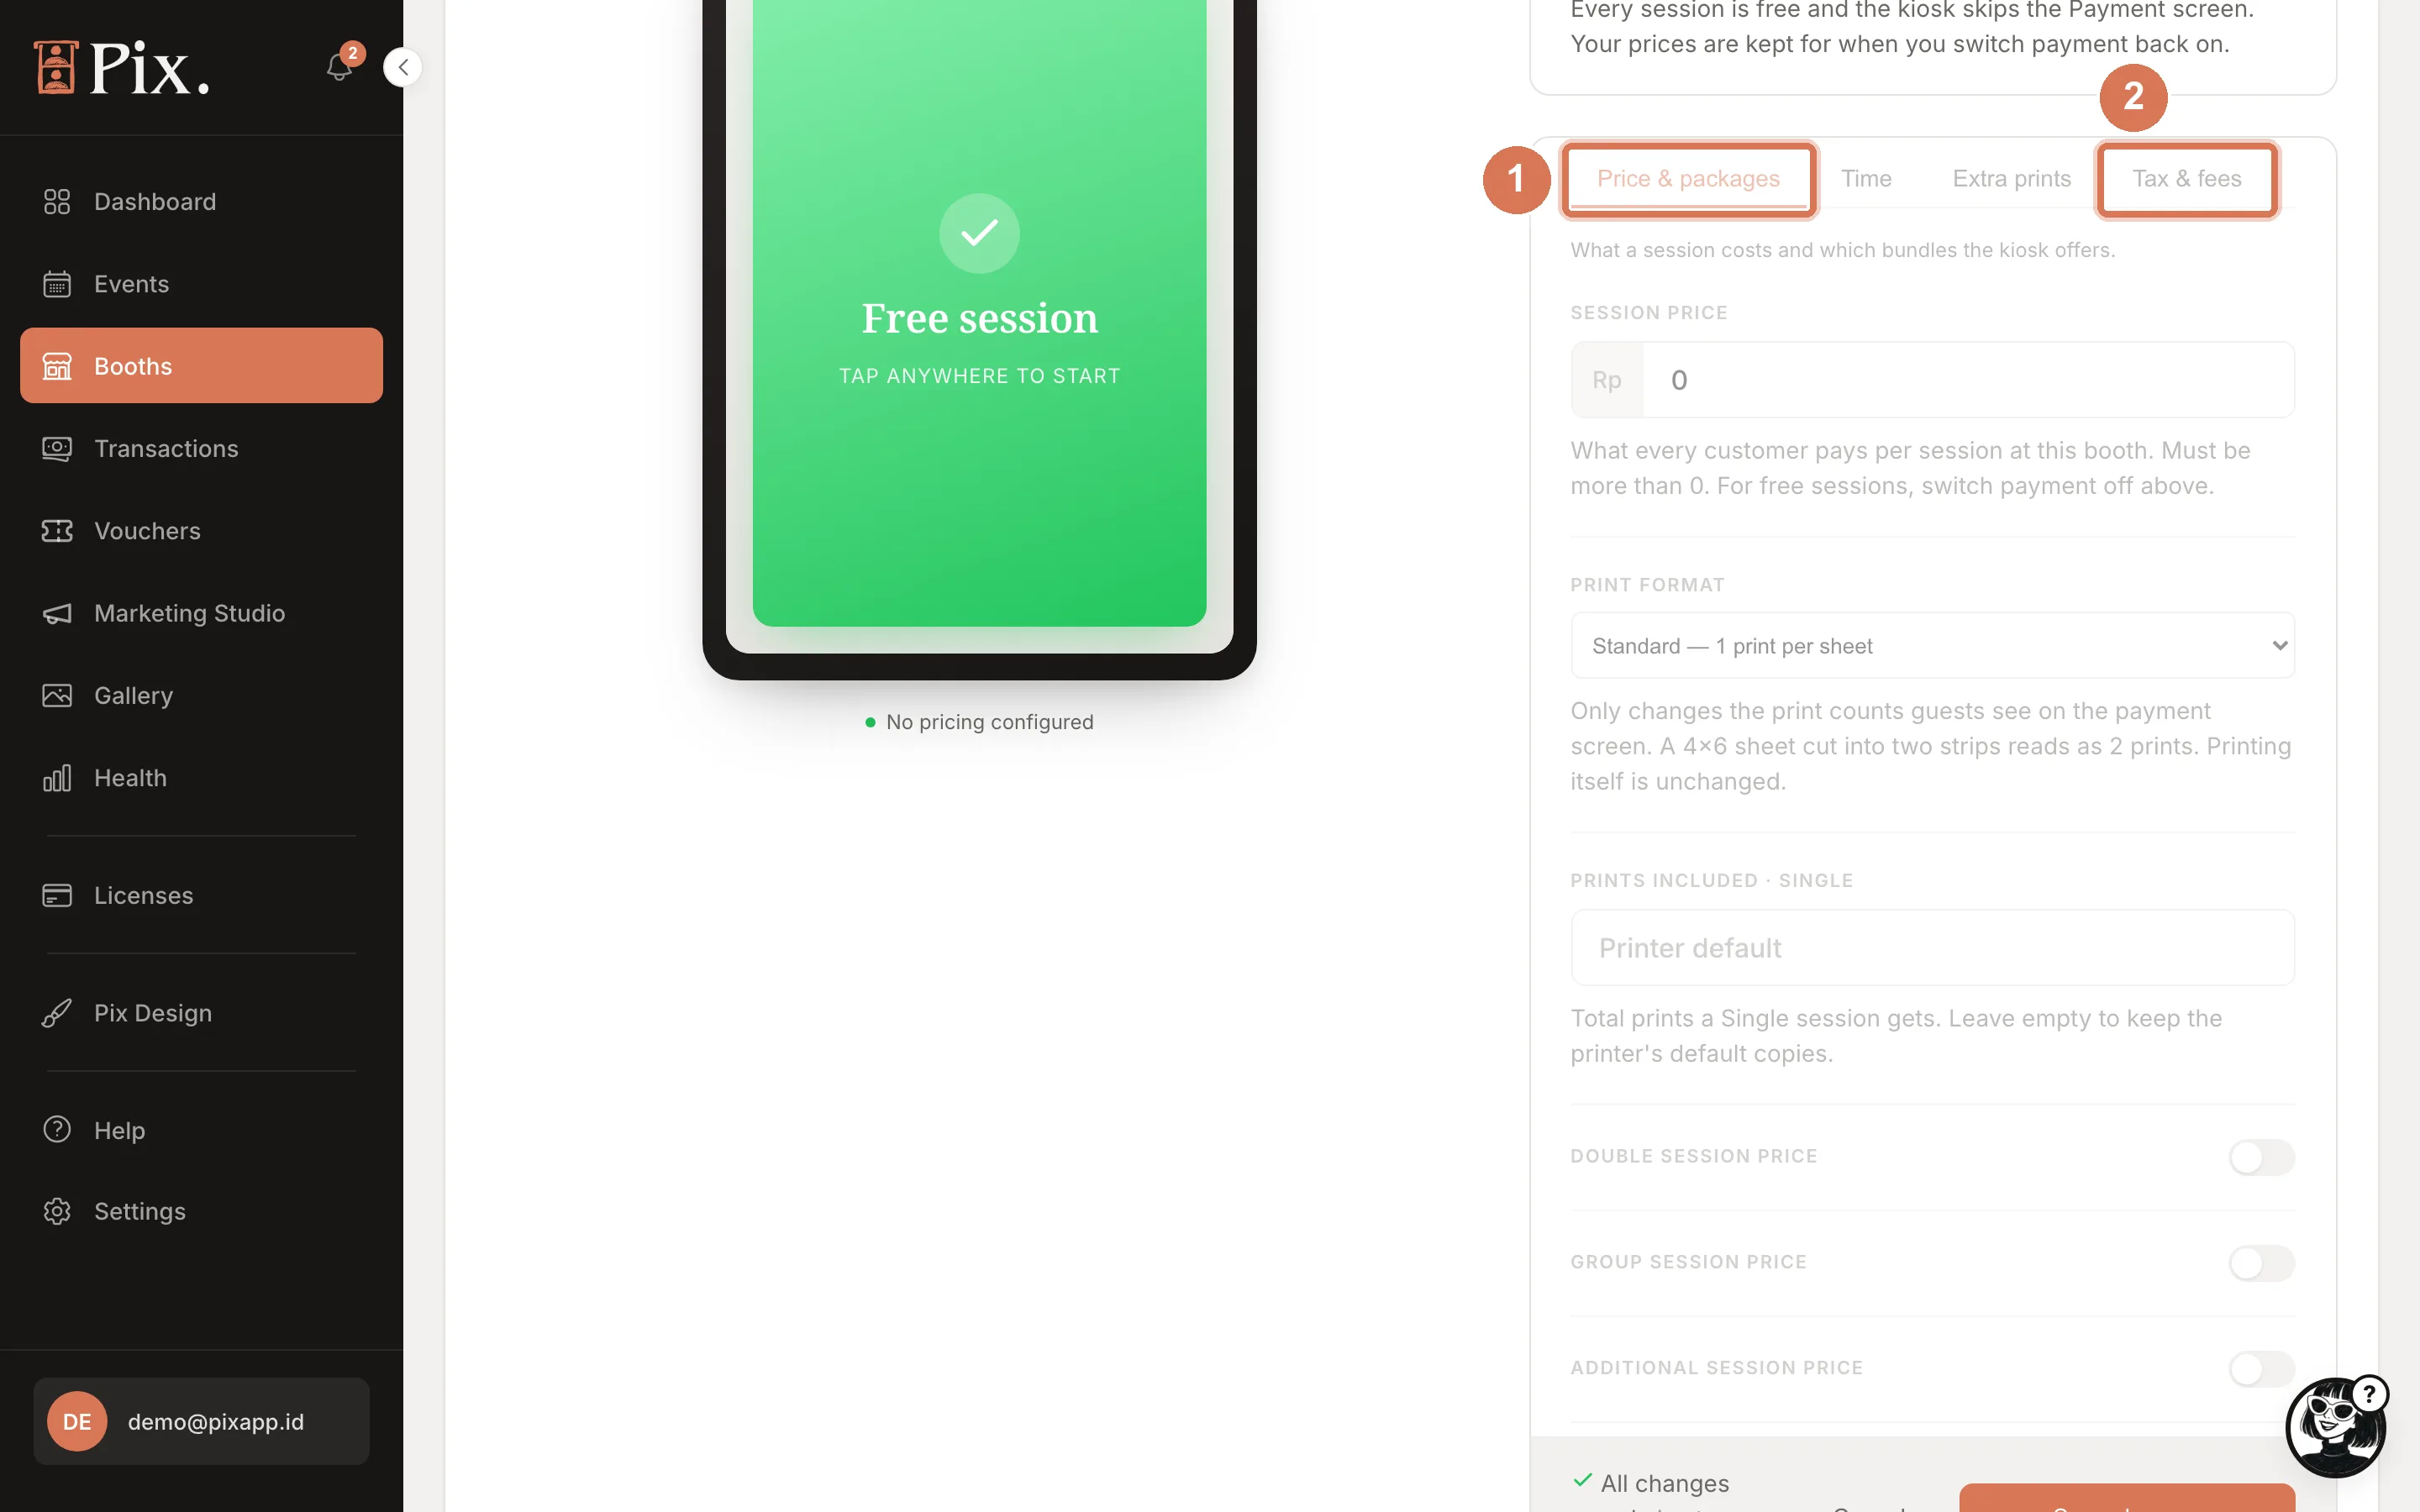
On the Price & packages sub-tab, review the Session price, the Double and Group packages, the Additional session price, the Print format and the prints included. The shop shows the same cards as the booth's package picker.
-
Tax and fees from the Tax & fees sub-tab apply to the shop too. Click Save changes if you edited anything.
Step 3: Print or Share the QR Code
- Print the QR code from the card and place it at the booth or at the start of the queue. Customers scan it while they wait and arrive with a code.
- Share the link ahead of an event: in the invitation, on your social profile, or with a client who prepays for their guests.
Step 4: What the Customer Sees
- The page shows the booth's packages: Single, Double and Group cards, a stepper for additional sessions, the prints included in the booth's print format, and any tax or fees, with the total.
- The customer pays by QRIS through your gateway, or by card when your gateway is Stripe.
- After payment the page shows a 7-character code. The customer keeps that page open or screenshots it. A booth on an older app version gets a 6-character code that is always worth one single session.
Step 5: Redeem at the Booth
- The customer starts a session. On the Payment screen, they tap Voucher and type the code.
- The booth checks the code itself, so it works without internet. The code carries the package that was bought (double, group, additional sessions), and the booth shows the Payment Success screen before moving on to templates.
- A code works at the booth it was bought for.
Step 6: Where It Shows
- Transactions lists each online purchase with the amount paid.
Check It Worked
- Click Open on the card and buy a single session with your own phone.
- Type the code into the booth's voucher box. The booth shows Payment Success and continues to templates.
- The purchase appears on Transactions.
Troubleshooting
| What you see | What to check |
|---|---|
| The shop offers only a single session, no packages | The booth's app is older than 1.1.101. Update it from the operator menu with Check for Updates. |
| The shop shows no prices | Prices are not saved on the Pricing tab, or Payment on this booth is OFF. |
| No QR or card button on the shop | No gateway is connected, or the gateway cannot charge in the booth's currency. |
| The customer paid by card but sees no code | Reload the page. It shows the code as soon as the payment is confirmed. |
| The booth refuses the code | The code was mistyped, or it was bought for a different booth. Codes never contain the letters I, L or O. |