Run a Studio Mode Session
In this tutorial you will create a Studio UI project in Pix Design, design its Capture and Assign photos pages, assign it to a booth and run a timed photo session. It takes about 30 minutes.
In Studio mode the booth does not shoot one photo per template slot. Guests, or a photographer with a remote shutter, take a pool of shots inside a time limit, review each one, then choose which shot goes into each slot of the template. The flow is Start, Payment, Templates, a timed Capture, Assign photos, Filter and Sharing.
Before You Start
- Pix Pro. Saving a UI project needs Pix Pro.
- Pix Desktop App 1.1.98 or newer on the booth. Use 1.1.100 or newer if you want a live photo for every shot and every shot shared as a single; the current version is 1.1.115.
- A print template assigned to the booth. Its slot count sets the minimum number of shots.
- Optional: a remote shutter, foot switch or clicker plugged into the booth's computer.
Step 1: Create a Studio UI Project
-
Go to Pix Design > UI Editor and click New Project.
-
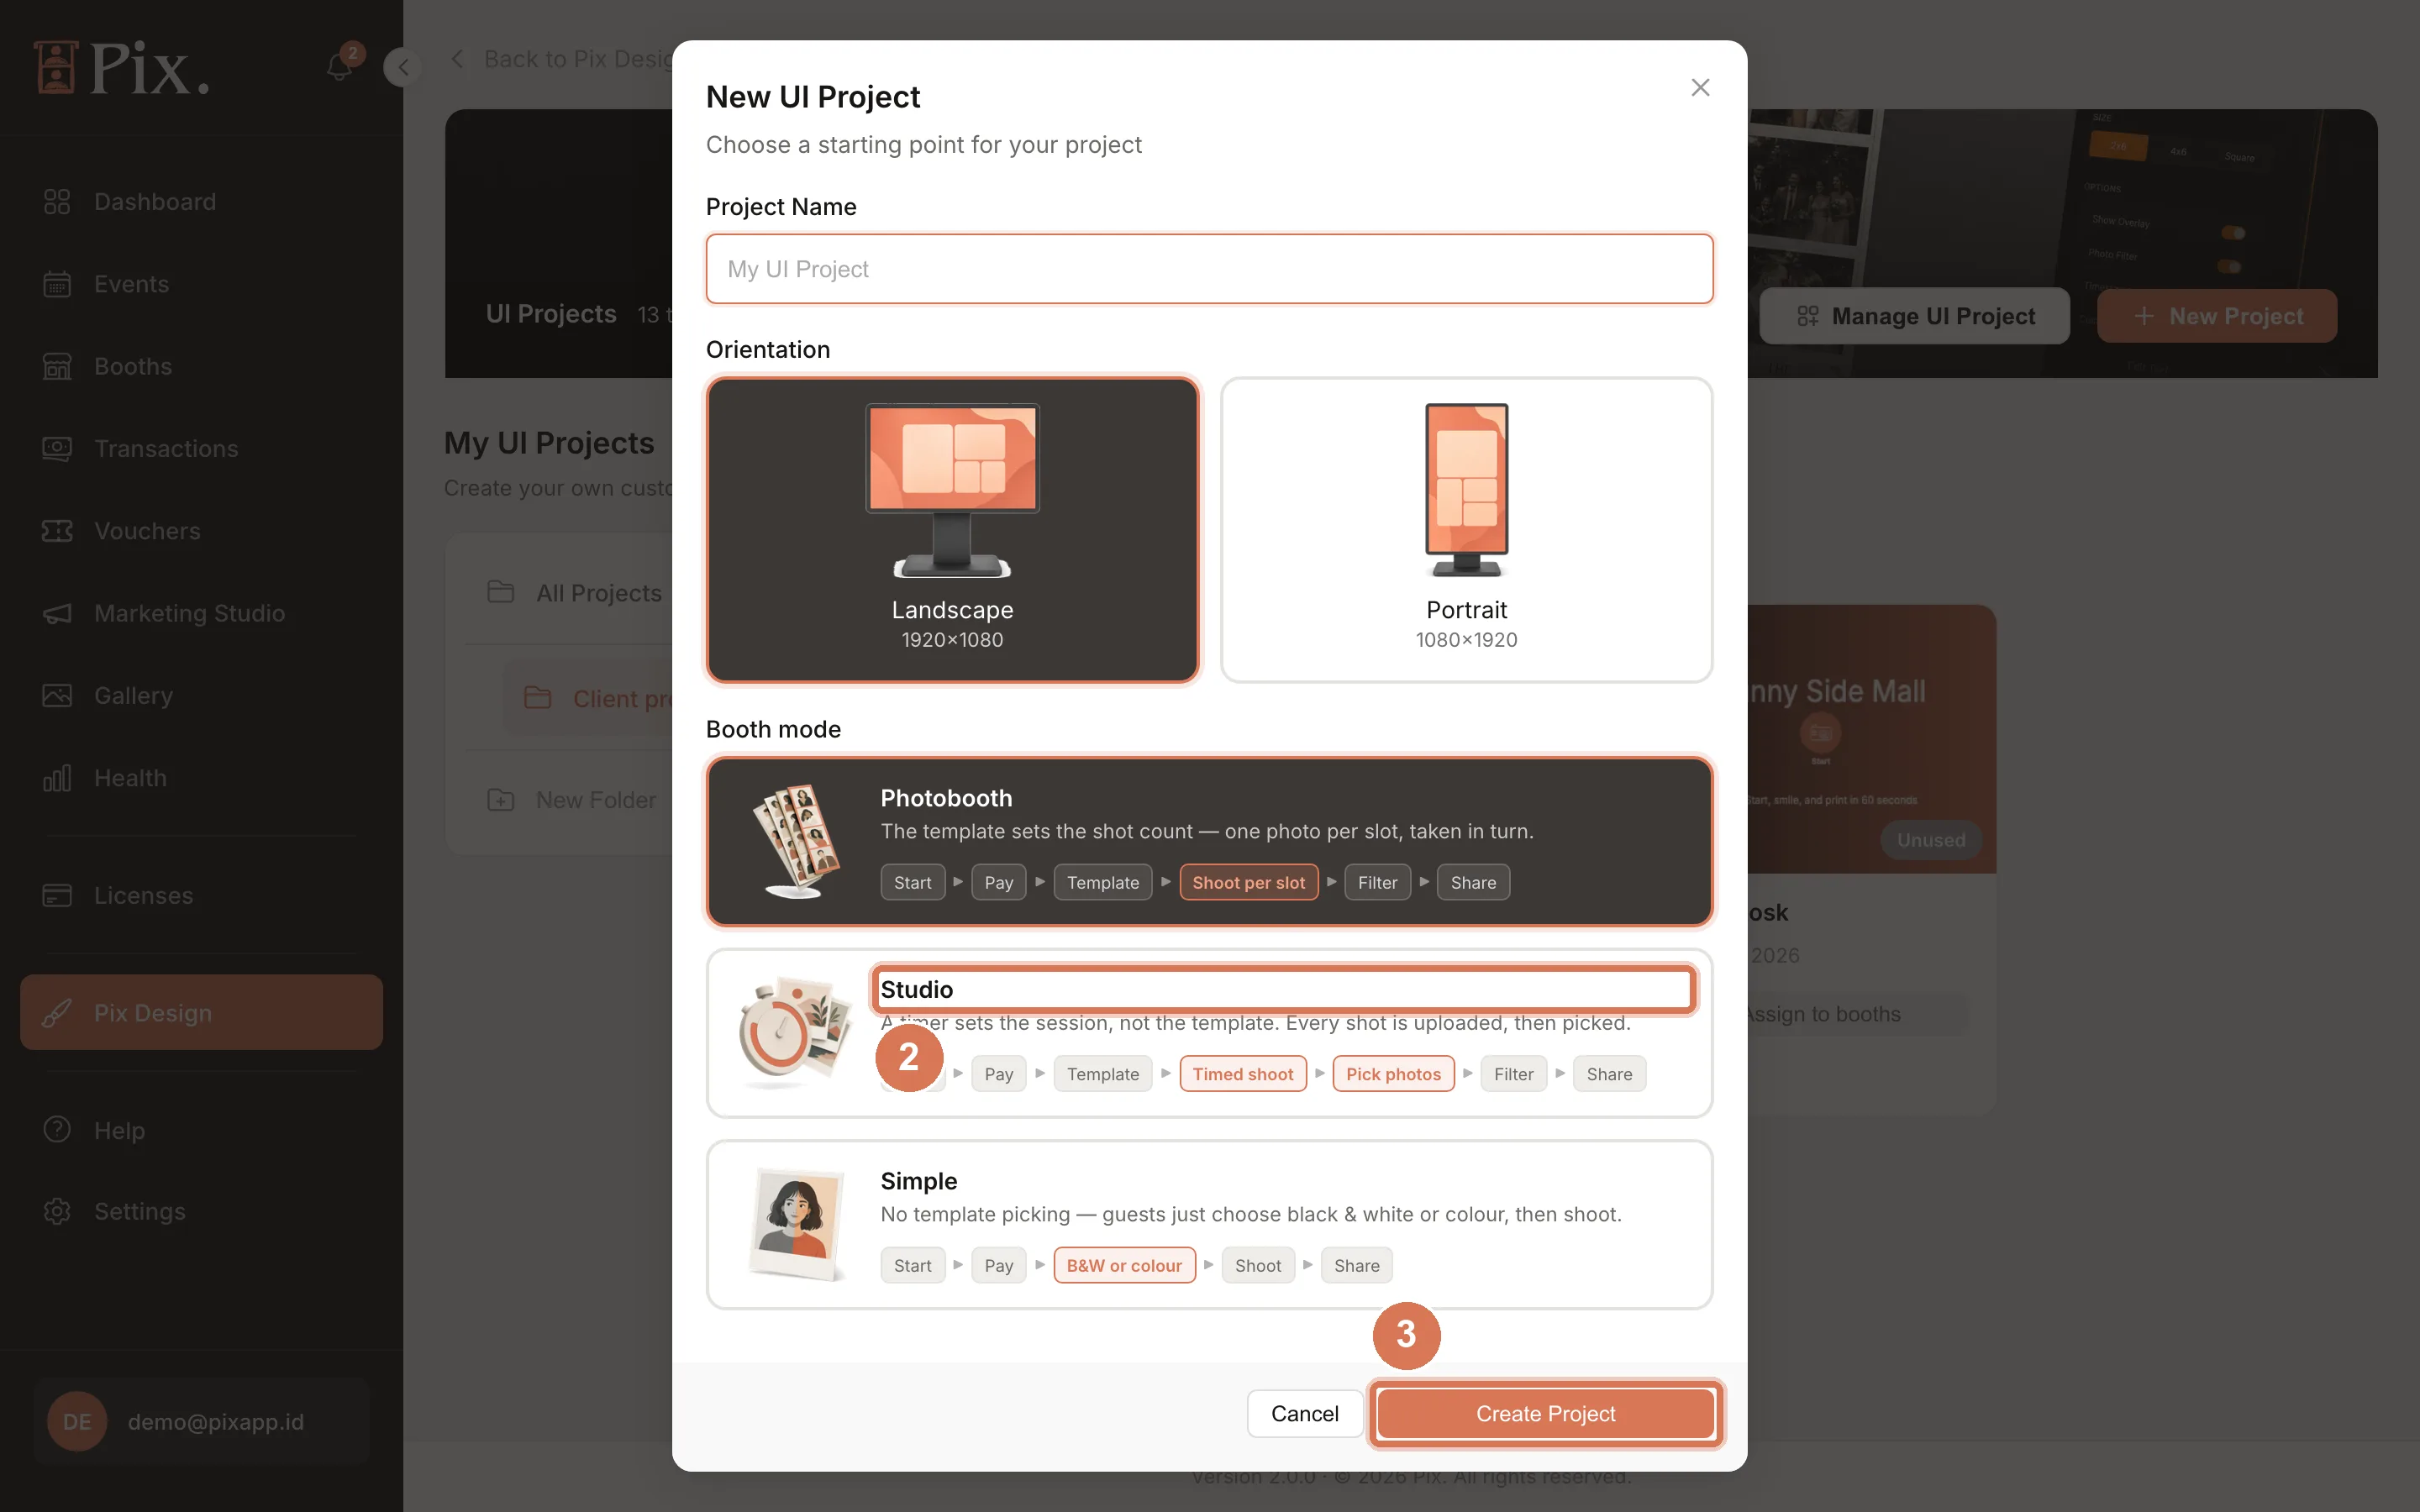
Enter a Project Name, choose the Orientation (Landscape 1920×1080 or Portrait 1080×1920) and pick the Studio booth mode card (Start, Pay, Template, Timed shoot, Pick photos, Filter, Share).
-
Create the project. The editor opens with the usual page tabs plus Assign photos.
Step 2: Design the Capture Page
-
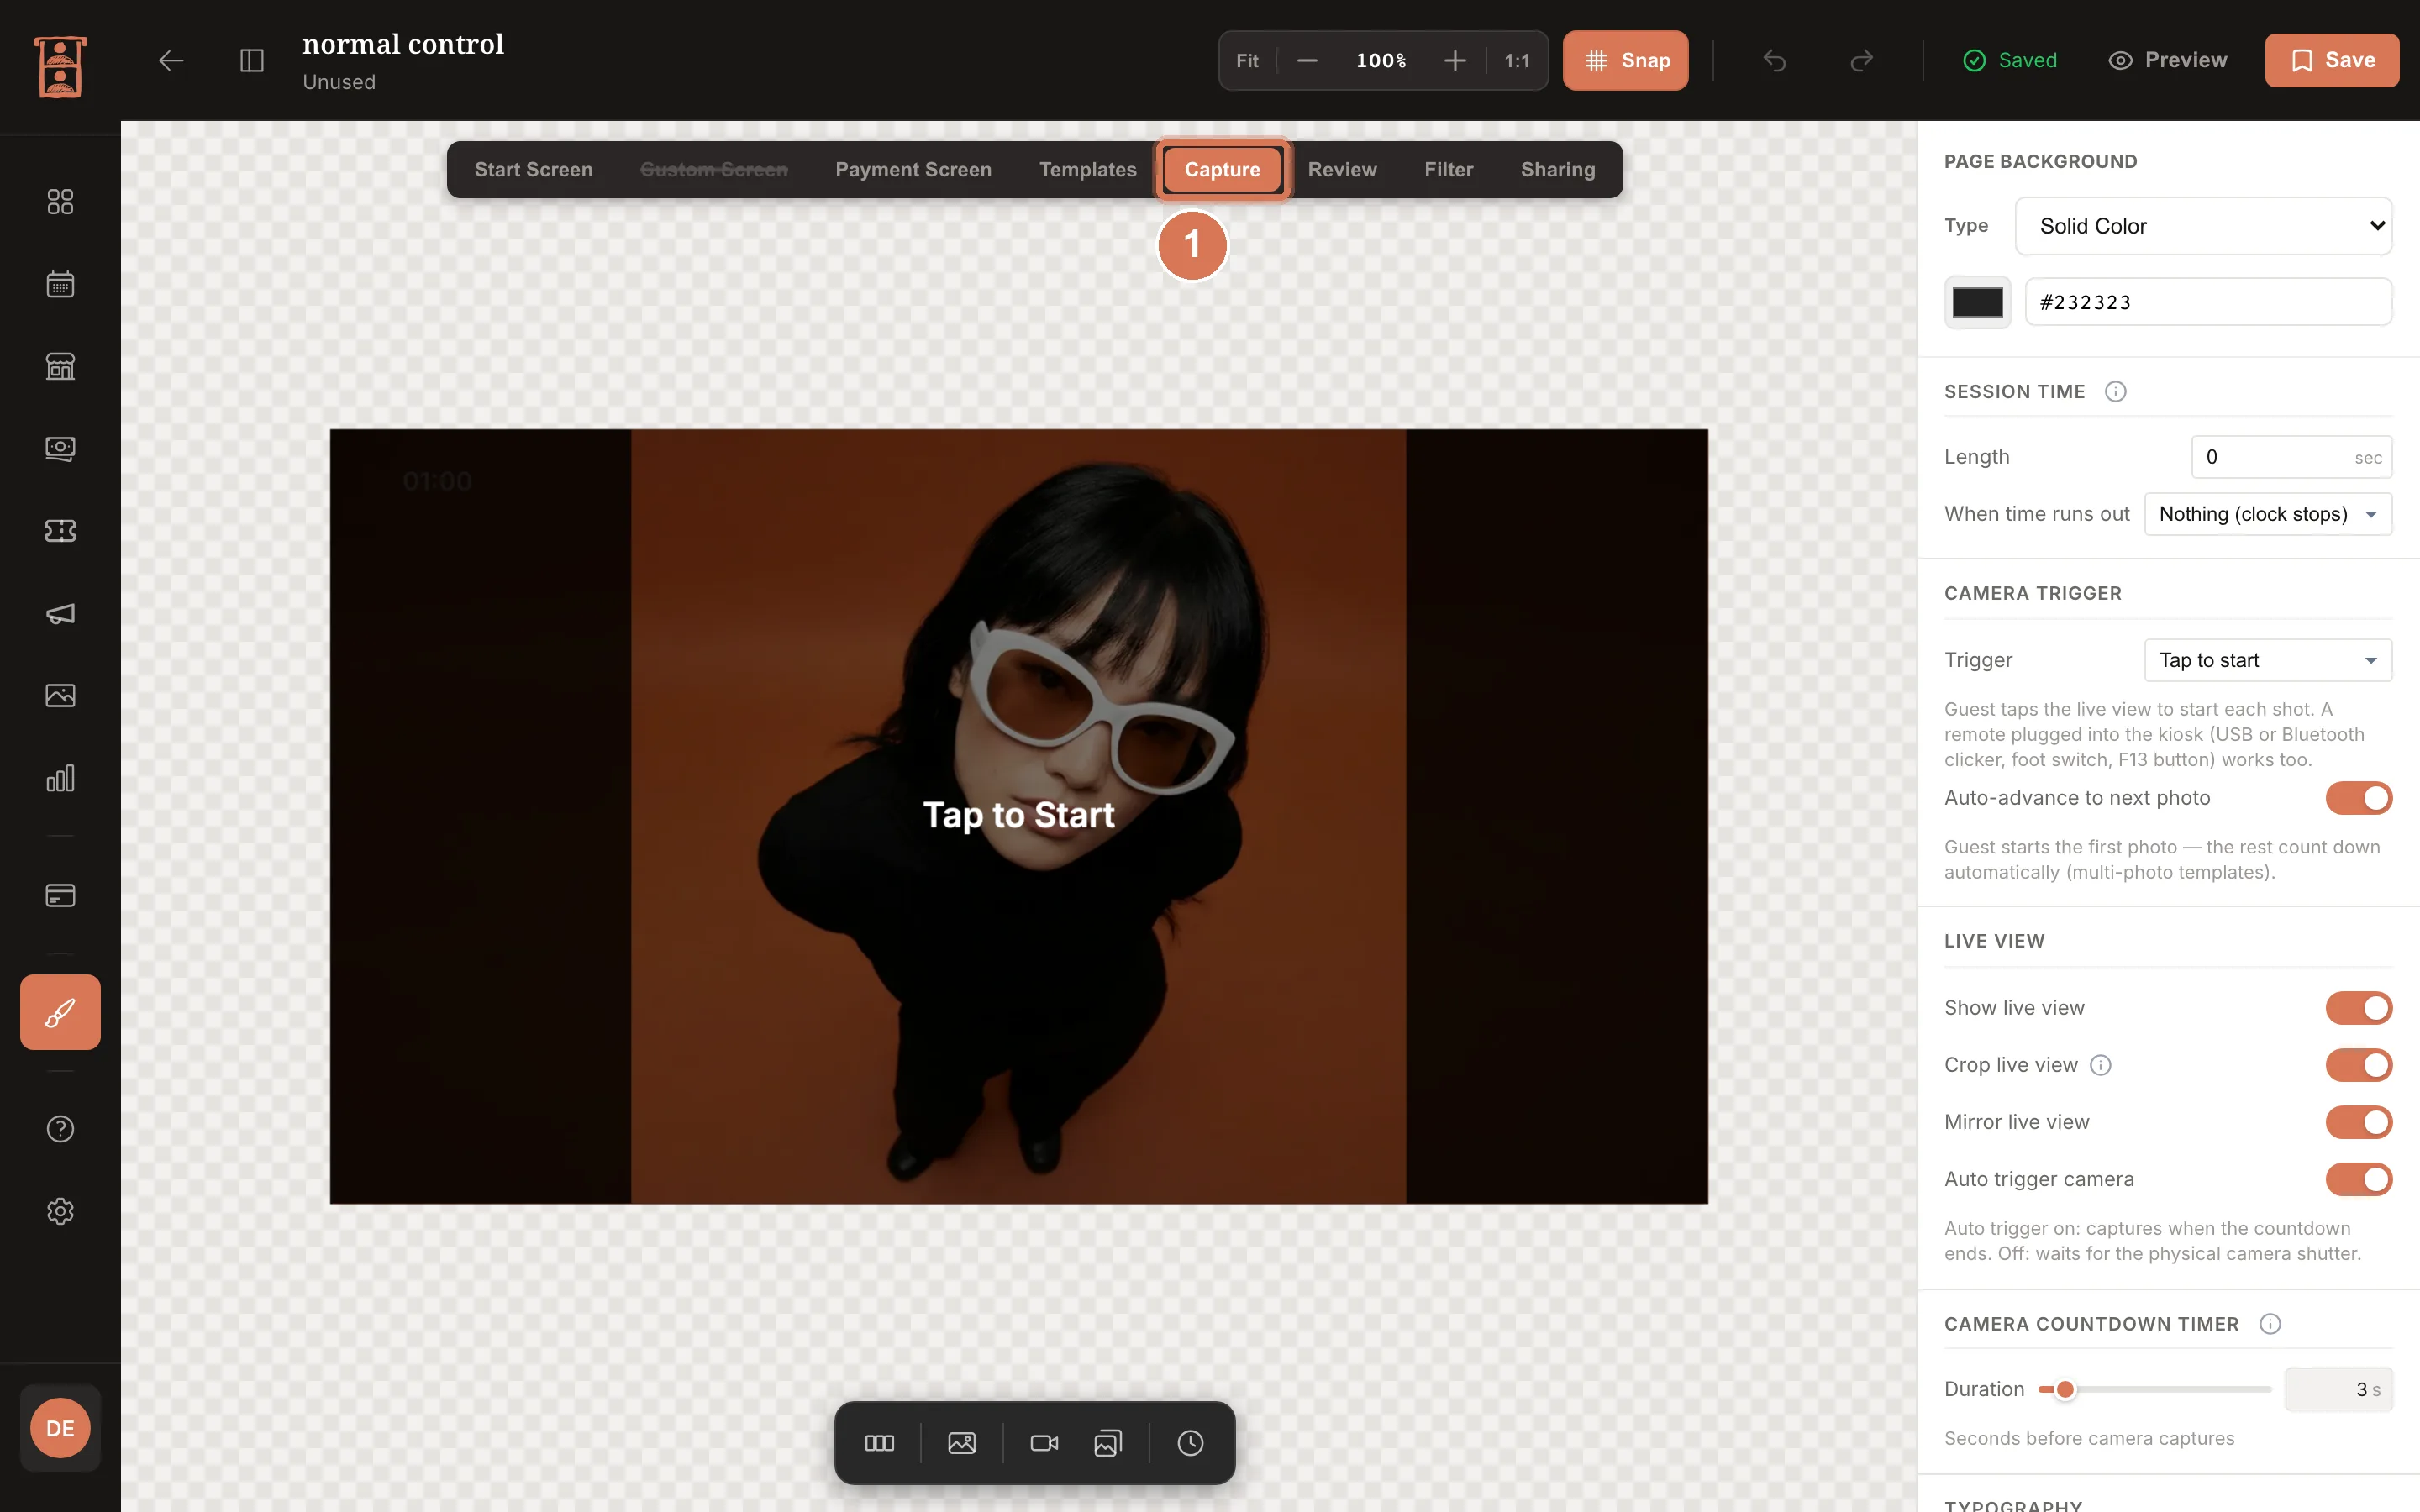
Open the Capture tab. The right rail holds the pool settings: the session length (the pool timer, 0 for no time limit), Max photos (0 for no limit, up to 40), and Camera trigger: Tap, Shutter button or Camera shutter (the photographer shoots from the camera body). Studio projects start with Tap and a "Tap to Start" overlay.
-
Arrange the blocks: the shutter button (a red disc with a white ring; shape and centre are yours to change), the Last Shot card (opens a gallery of the pool with Remove), the Photo Counter ("n of N"), the Session Timer and the Done button. Done stays hidden until the minimum number of shots is reached. The Preview Cards block adds one square card per template slot that fills as shots land (app 1.1.114 or newer).
-
Every shot gets a short review: Next keeps it, Retake drops it. The review settings let you hide Retake or the counter.
-
For a remote shutter, open the Start Screen tab and tick the SESSION TRIGGER keys your remote sends (Space, S, Page Up, Page Down, or F13). In a Studio session those keys take the shot instead of starting a session.
Step 3: Design the Assign Photos Page
- Open the Assign photos tab. It shows the template with its slots and a grid of the pool. Guests tap a slot, then a photo; used photos dim and show their slot number.
- Keep the three buttons: Replace swaps the photo in a slot, Take more returns to Capture with the pool and the timer intact, and Next continues to Filter. A placed photo can be scaled, moved and mirrored inside its slot.
- Adjust the highlight options in the right rail (selection ring, slot ring, badges, dimming of used photos), then click Save.
Step 4: Assign the Project to the Booth
-
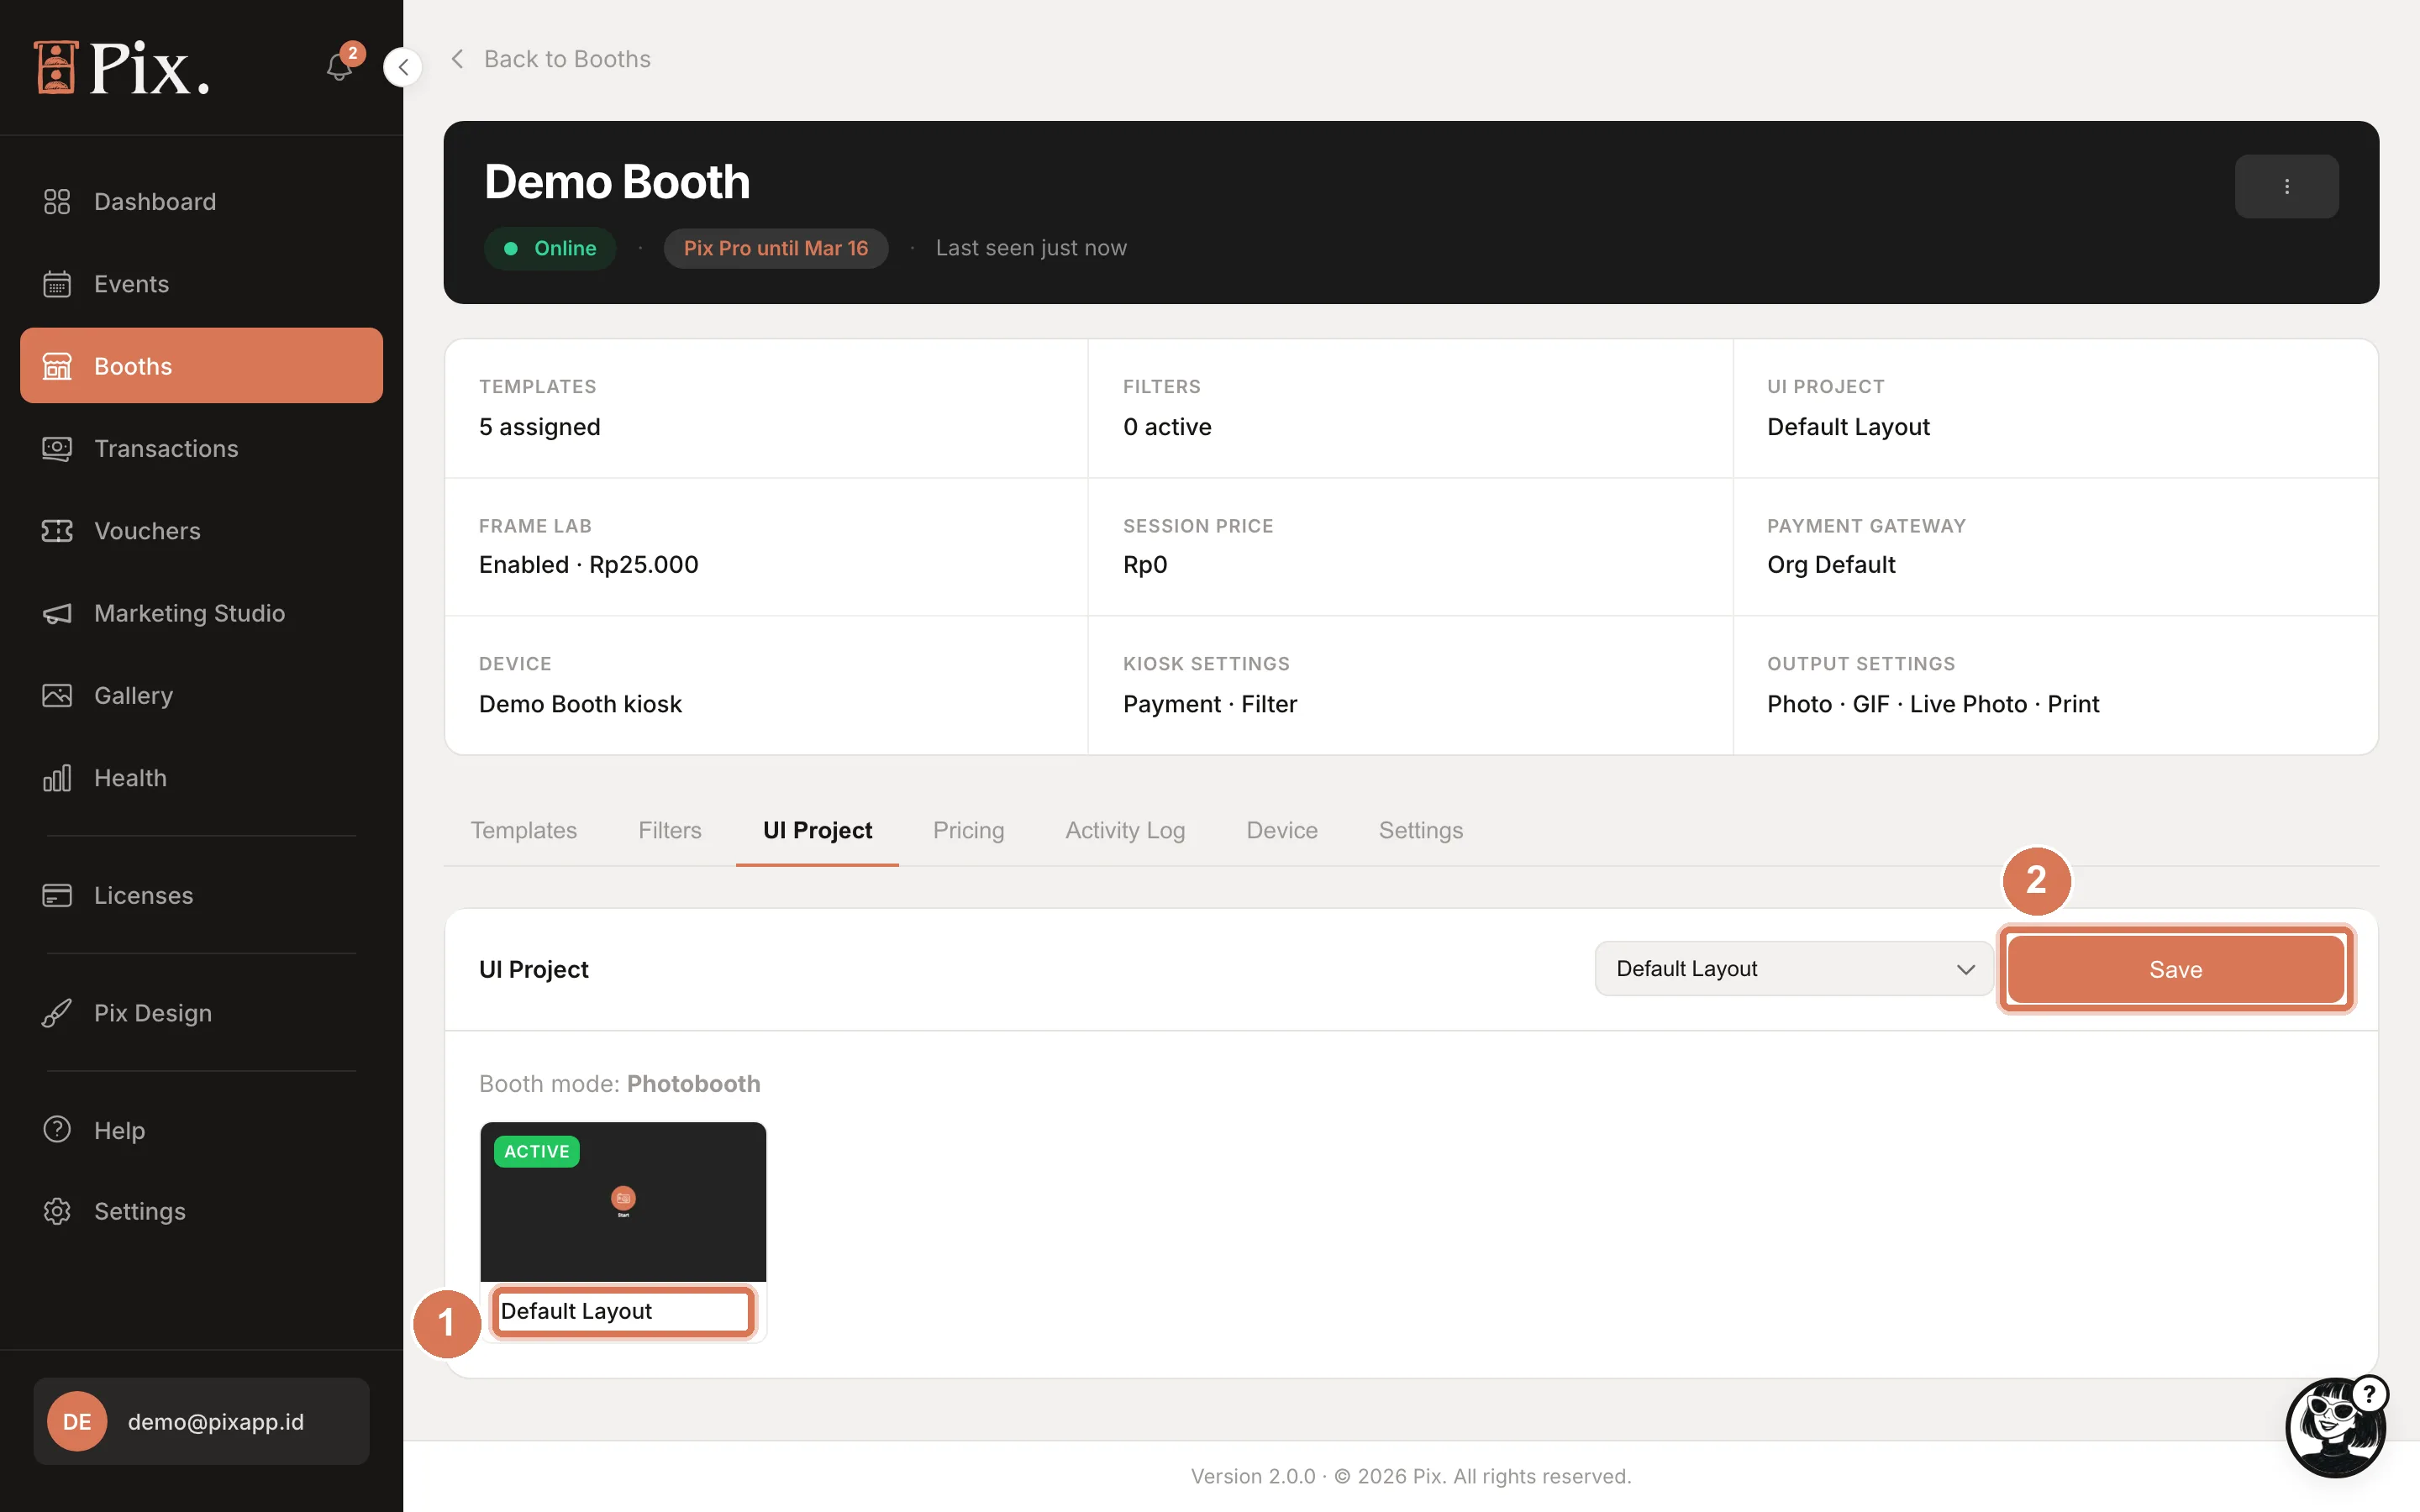
Open Booths, click Configure on the booth, then the UI Project tab. The dropdown is grouped into Photobooth mode, Studio mode and Simple mode; pick your project under Studio mode. The page then reads "Booth mode: Studio".
-
Click Save. A warning appears if the booth's app is older than 1.1.98.
-
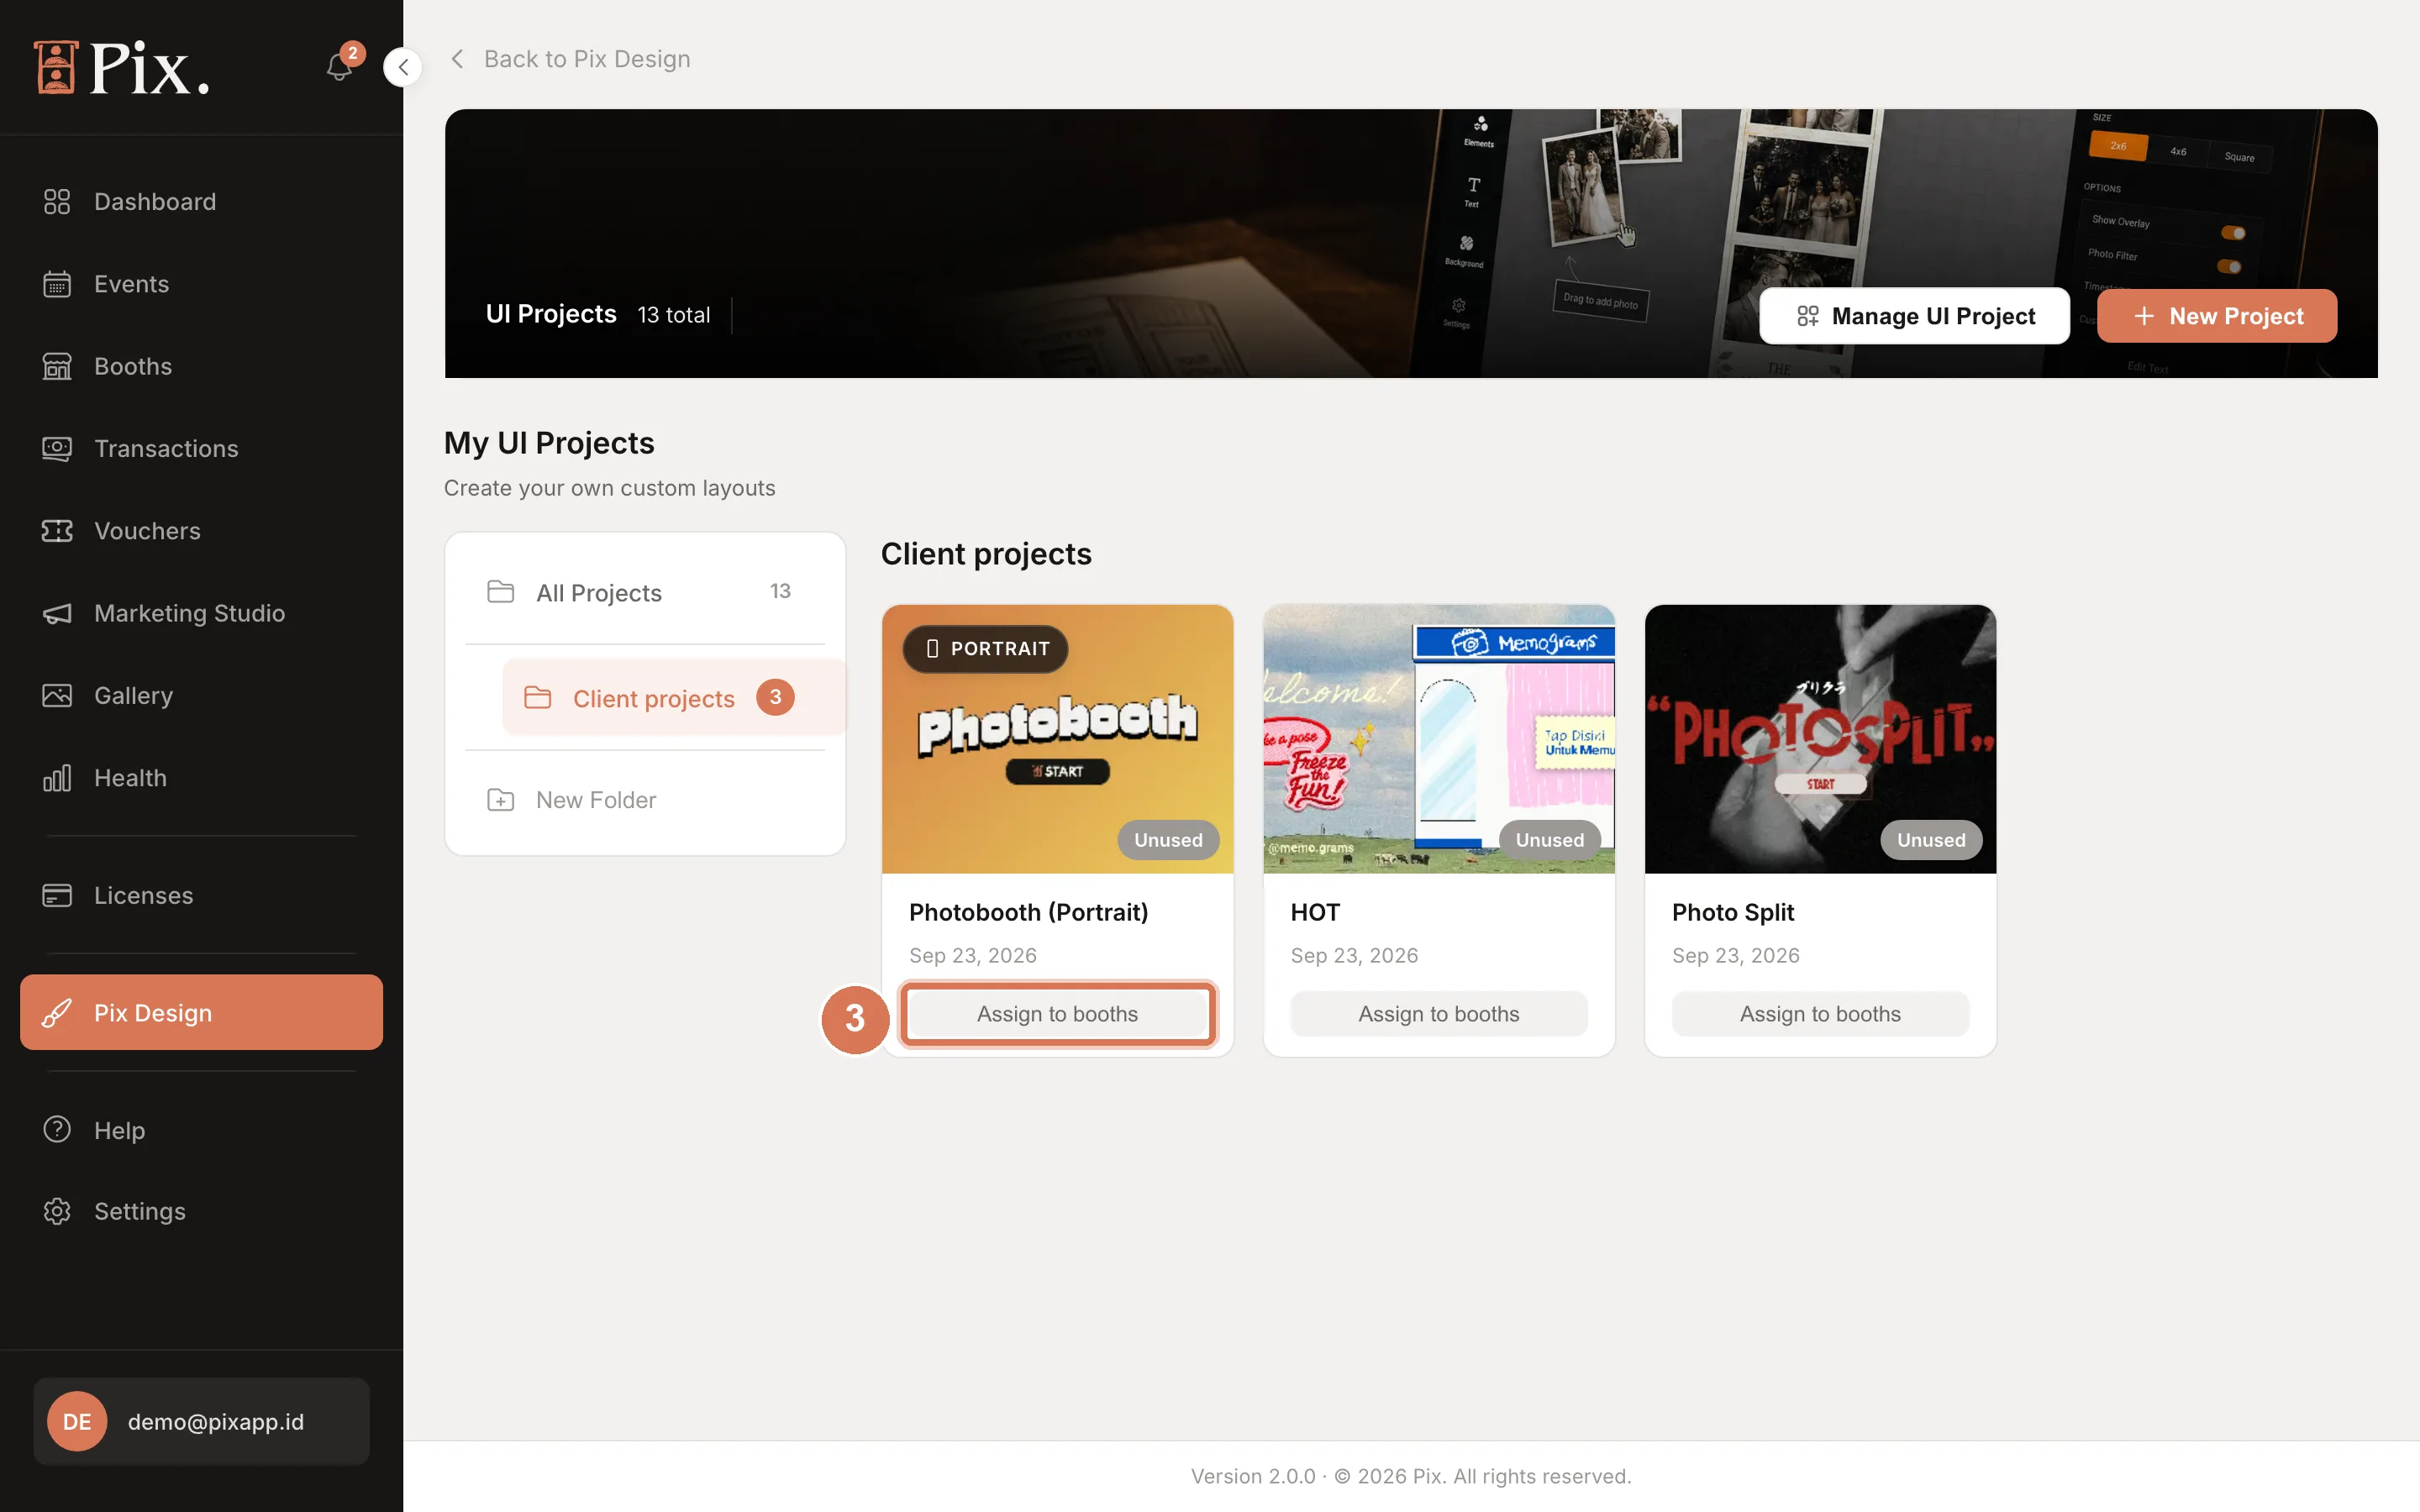
To put the same design on several booths at once, use the card menu on Pix Design > UI Editor and choose Assign to booths.
Step 5: Run a Session
- On the booth, start a session and pay (or skip payment if the booth is free). On the template screen the guest picks a template; its slot count becomes the minimum number of shots.
- On Capture, each tap, shutter press or remote click takes a shot, followed by Next or Retake. The session ends when the timer runs out, when Max photos is reached, or when the guest taps Done. The hard cap is 40 shots, and the pool can never end below the template's slot count.
- On Assign photos, the guest fills every slot, replaces or takes more, then taps Next.
- Filter and Sharing work as usual. Every kept shot in the pool is shared as a single, and each shot has its own live photo.
Check It Worked
- After the template screen the booth shows the timer, the shutter button and the Last Shot card instead of one slot at a time.
- After Done, the Assign photos screen appears with the template and the pool.
- The share page lists every kept shot as a single next to the composed print.
Tips
- Set the timer to 0 for photographer-led sessions and rely on Max photos or Done; use a short timer for self-serve booths.
- Max photos never goes below the template's slot count.
- The operator menu opens on the Assign photos screen too: tap the top-right corner twice within 3 seconds.
Troubleshooting
| What you see | What to check |
|---|---|
| The booth still shoots one photo per slot | The project was not saved or not assigned, the app is older than 1.1.98, or the booth is on a live event with its own Kiosk UI. |
| Done never appears | The guest is below the template's slot count. Keep shooting. |
| The remote clicker does nothing | Tick the matching key under SESSION TRIGGER on the Start Screen tab and save the project. |
| Shares have no live photo per shot | Update the booth to 1.1.100 or newer. |