Design a Print Template
In this tutorial you will prepare a template PNG in your own design tool, create a template project in Pix Design, check the photo slots the editor finds, save the template and assign it to a booth. Allow about 20 minutes, plus your design time.
Before You Start
- A design tool that exports PNG with transparency: Photoshop, Canva, Figma, Affinity, GIMP or anything similar.
- Pix Pro on your account, or the free trial. Pix Starter comes with two ready-made templates and lets you open the editor, but creating or saving a template needs Pix Pro (see Step 6).
- Know which paper your printer loads: 4x6, 2x6 strips, 6x8 or another size.
How Templates Work
A Pixture template is a single PNG at the exact pixel size of the print. Wherever the PNG is transparent, the editor places a photo slot; wherever it is opaque, your design shows. The booth takes one photo per slot, fills the slots and prints the result.
Print sizes are at 600 DPI:
| Print size | Pixels |
|---|---|
| 2x6" | 1200 x 3600 |
| 4x6" | 2400 x 3600 |
| 6x8" | 3600 x 4800 |
A4, A3 and a Custom size (you set the pixels) are also available. The editor names the target size for the project and resizes any image to fit, so an off-size export still works, but design at the exact size for the sharpest print.
Step 1: Prepare the PNG
- Create a canvas at the pixel size of your print, for example 2400 x 3600 px for 4x6.
- Draw your frame, logo, text and decorations. Leave the areas where photos go fully transparent: not white, not partly transparent.
- Keep everything else opaque, so no photo shows through by accident.
- Export as PNG-24 with an alpha channel, under 15 MB.
Your design tool cannot export transparency, or you only have a JPG? Export it with solid white boxes where the photos go, and remove them in Step 3 with Remove BG.
The editor turns every transparent region into one slot, so give each slot a single clear shape with a hard edge at full transparency. Soft or partly transparent edges make the slot boundary unclear.
Step 2: Create the template project
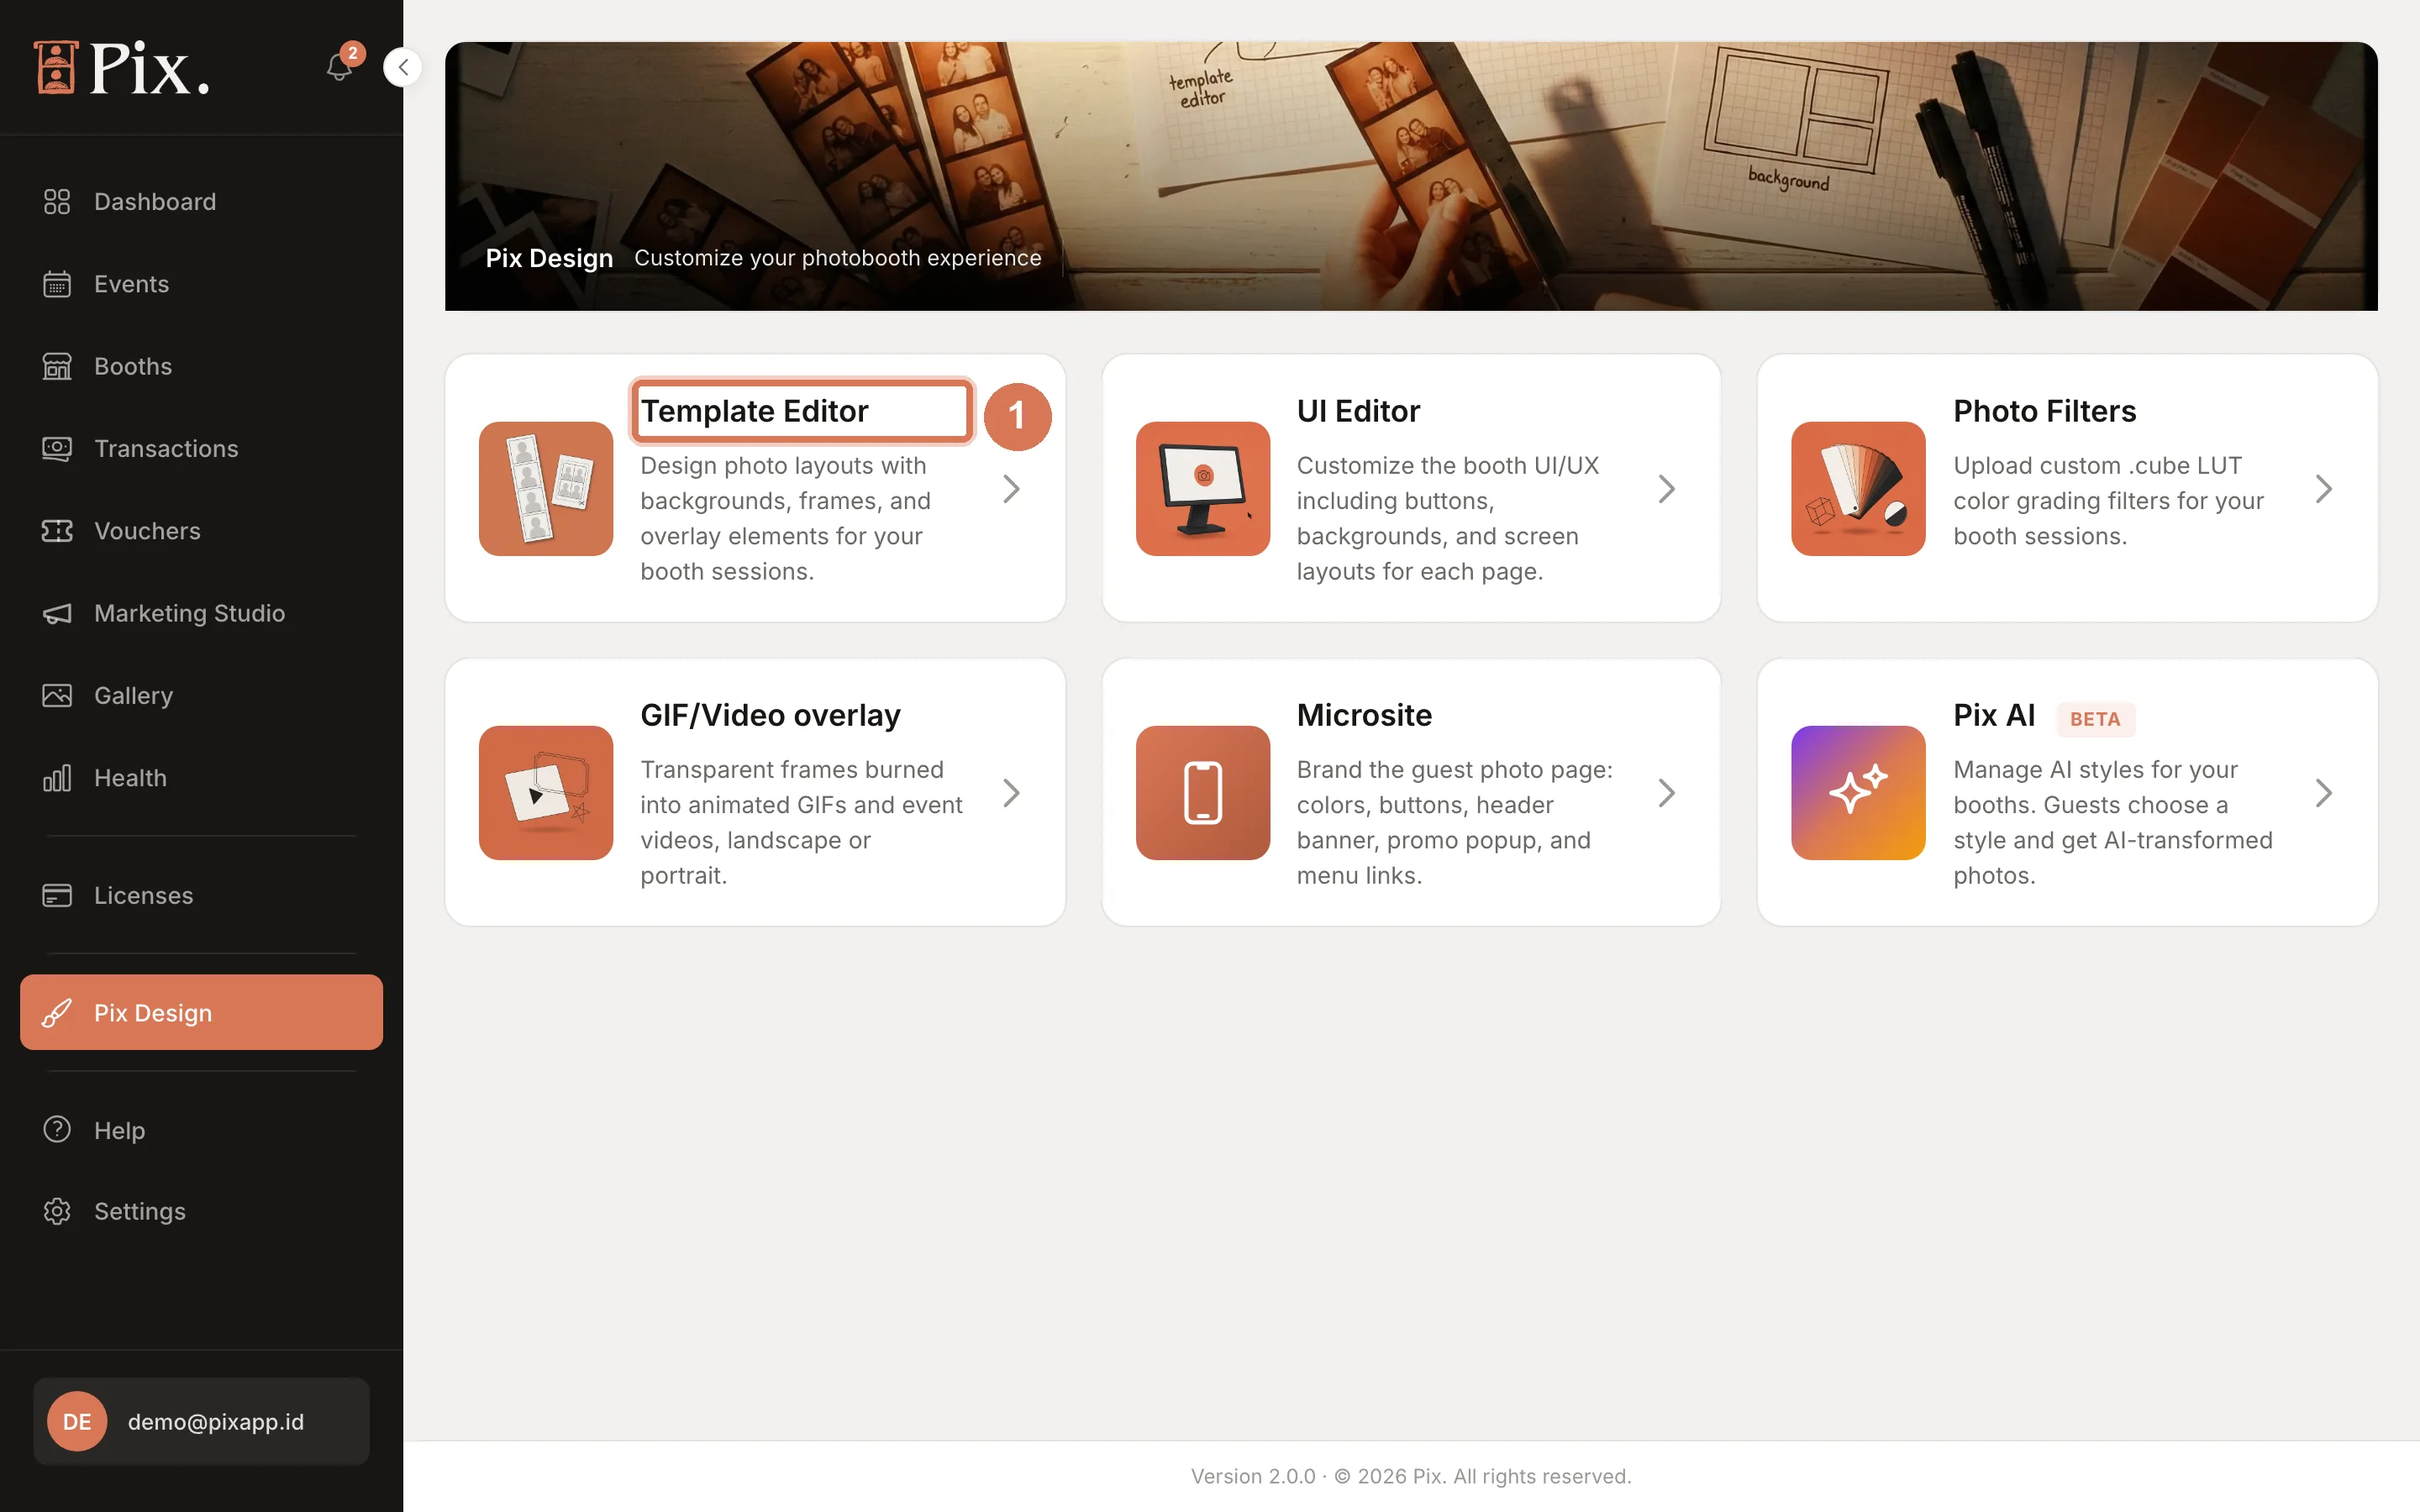
- In the sidebar click Pix Design, then open Template Editor.
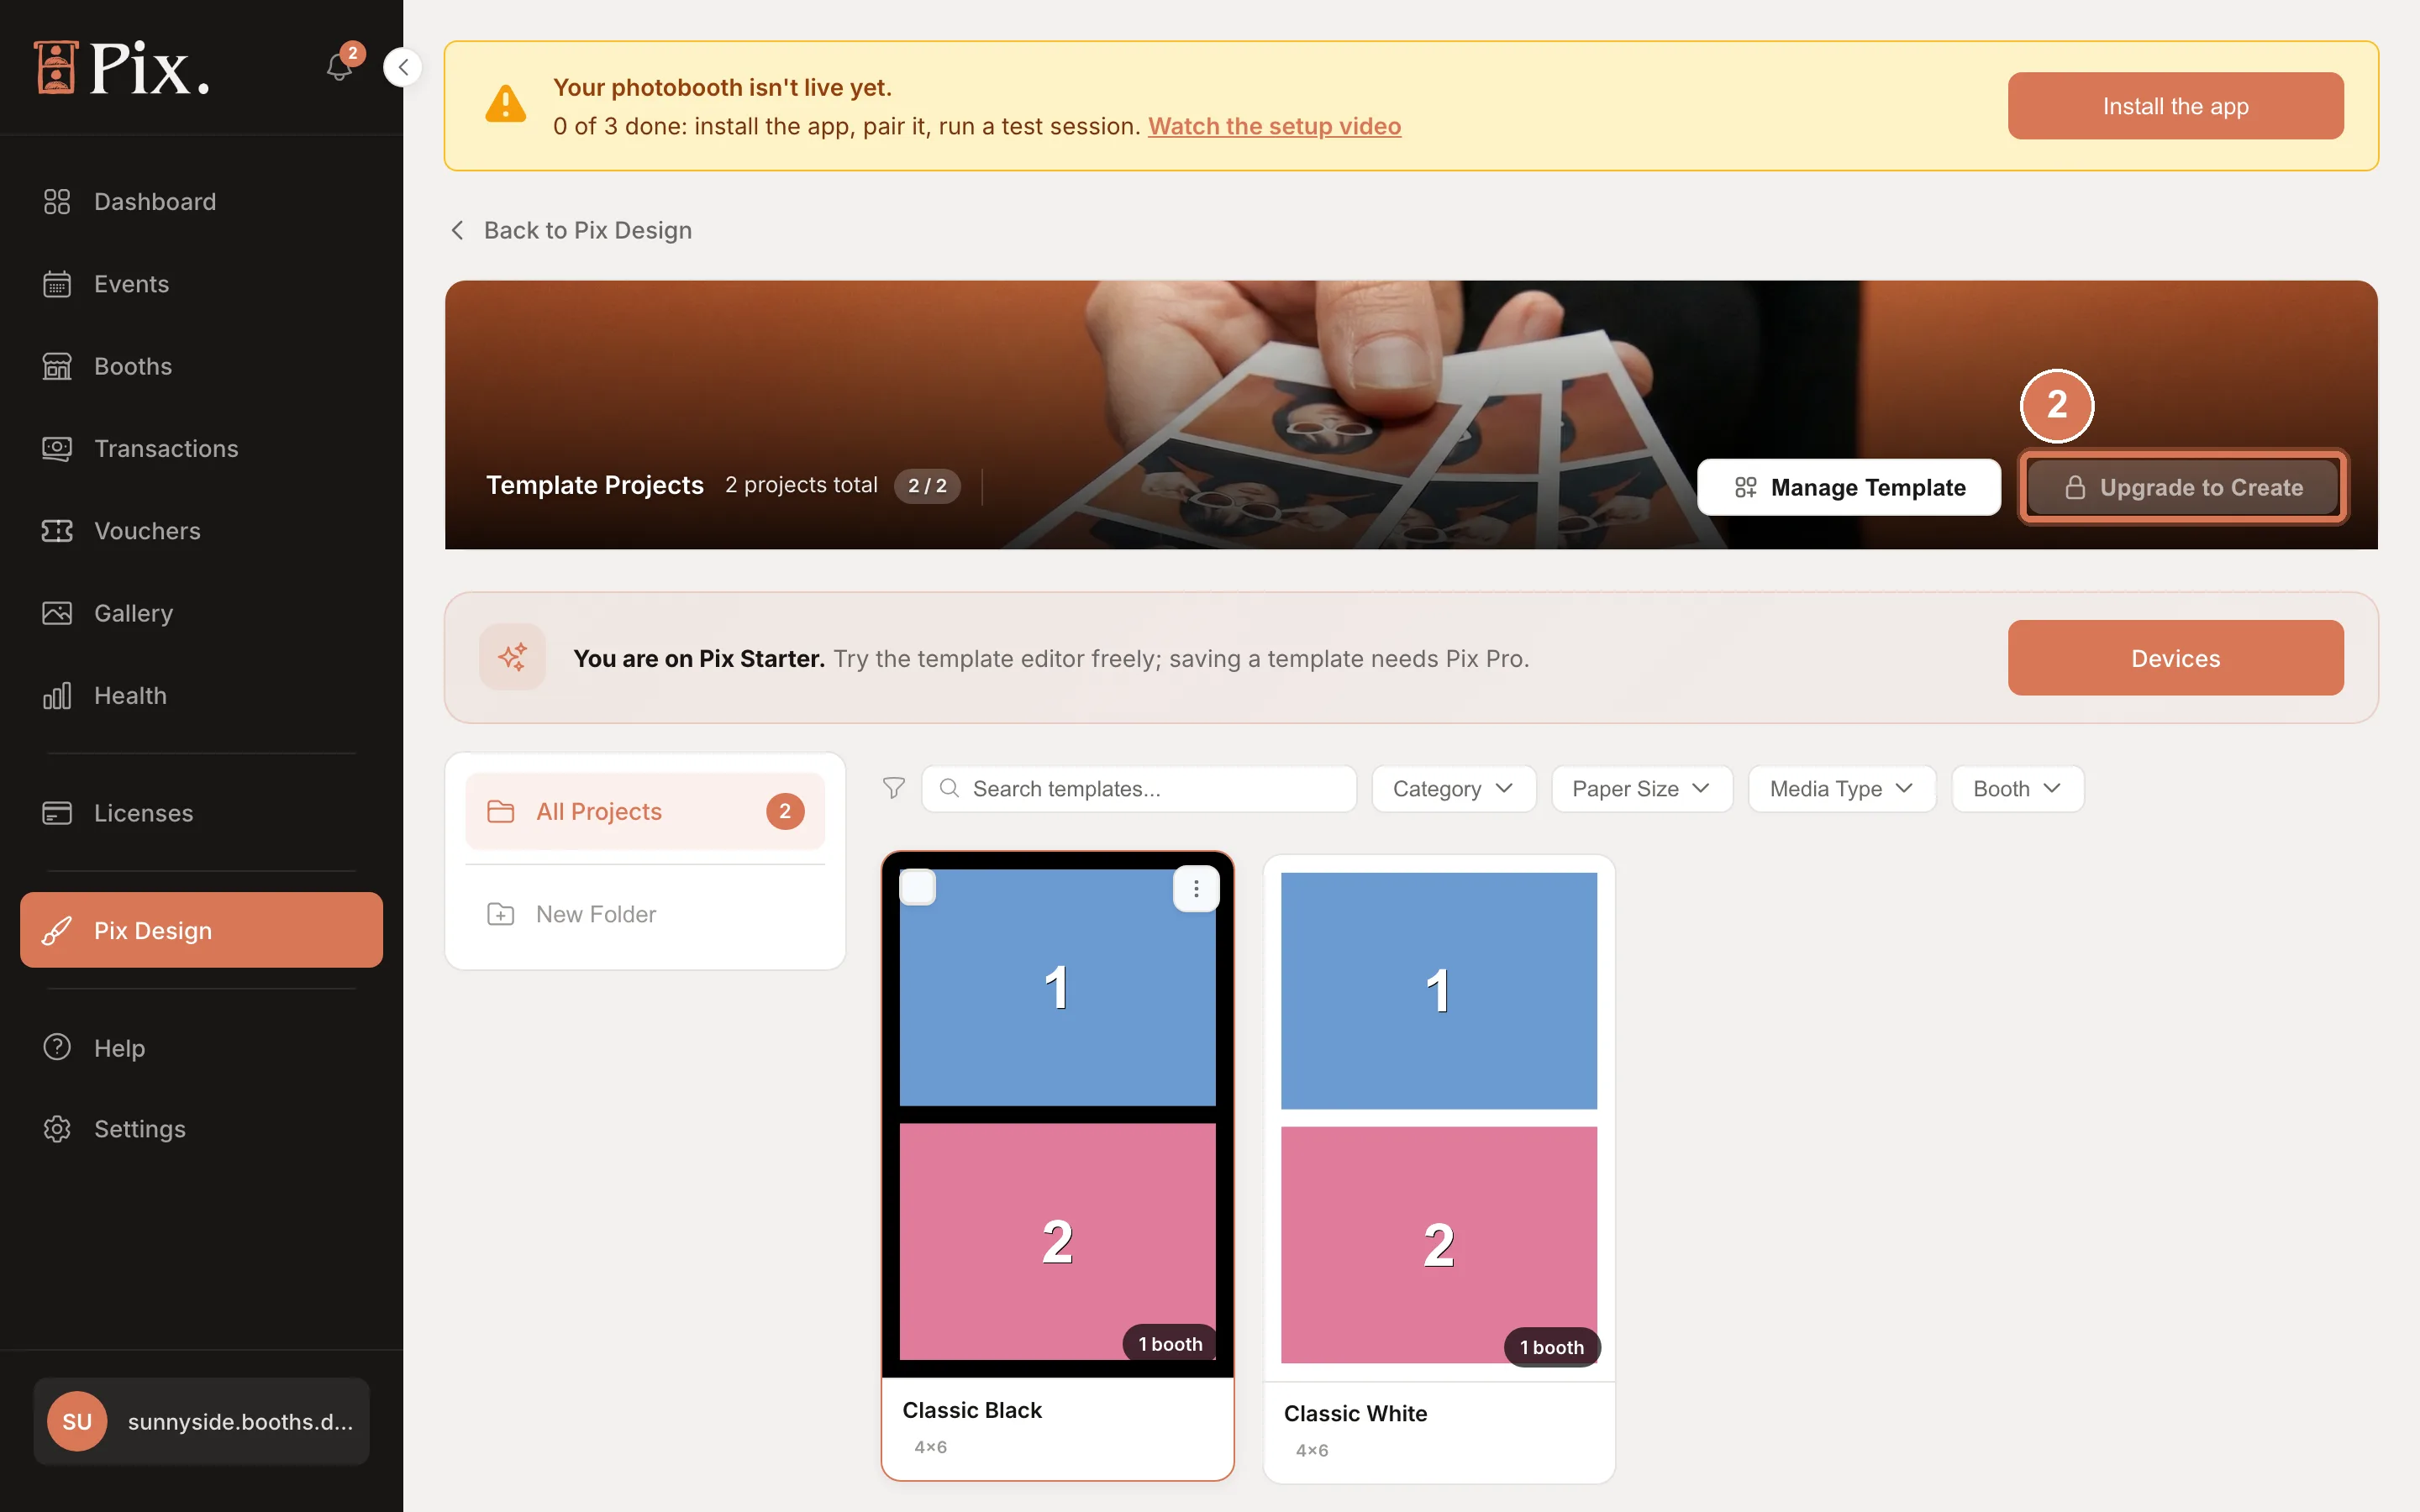
- On Template Projects, click New Project. On Pix Starter the same button reads Upgrade to Create, because saving a template of your own needs Pix Pro; the two ready-made templates, Classic Black and Classic White, are already there to use.
- Pick a Print Size card and a Media Type card, drop your PNG on Template PNG, and click Create Project. The button stays disabled until both a size and a file are chosen.
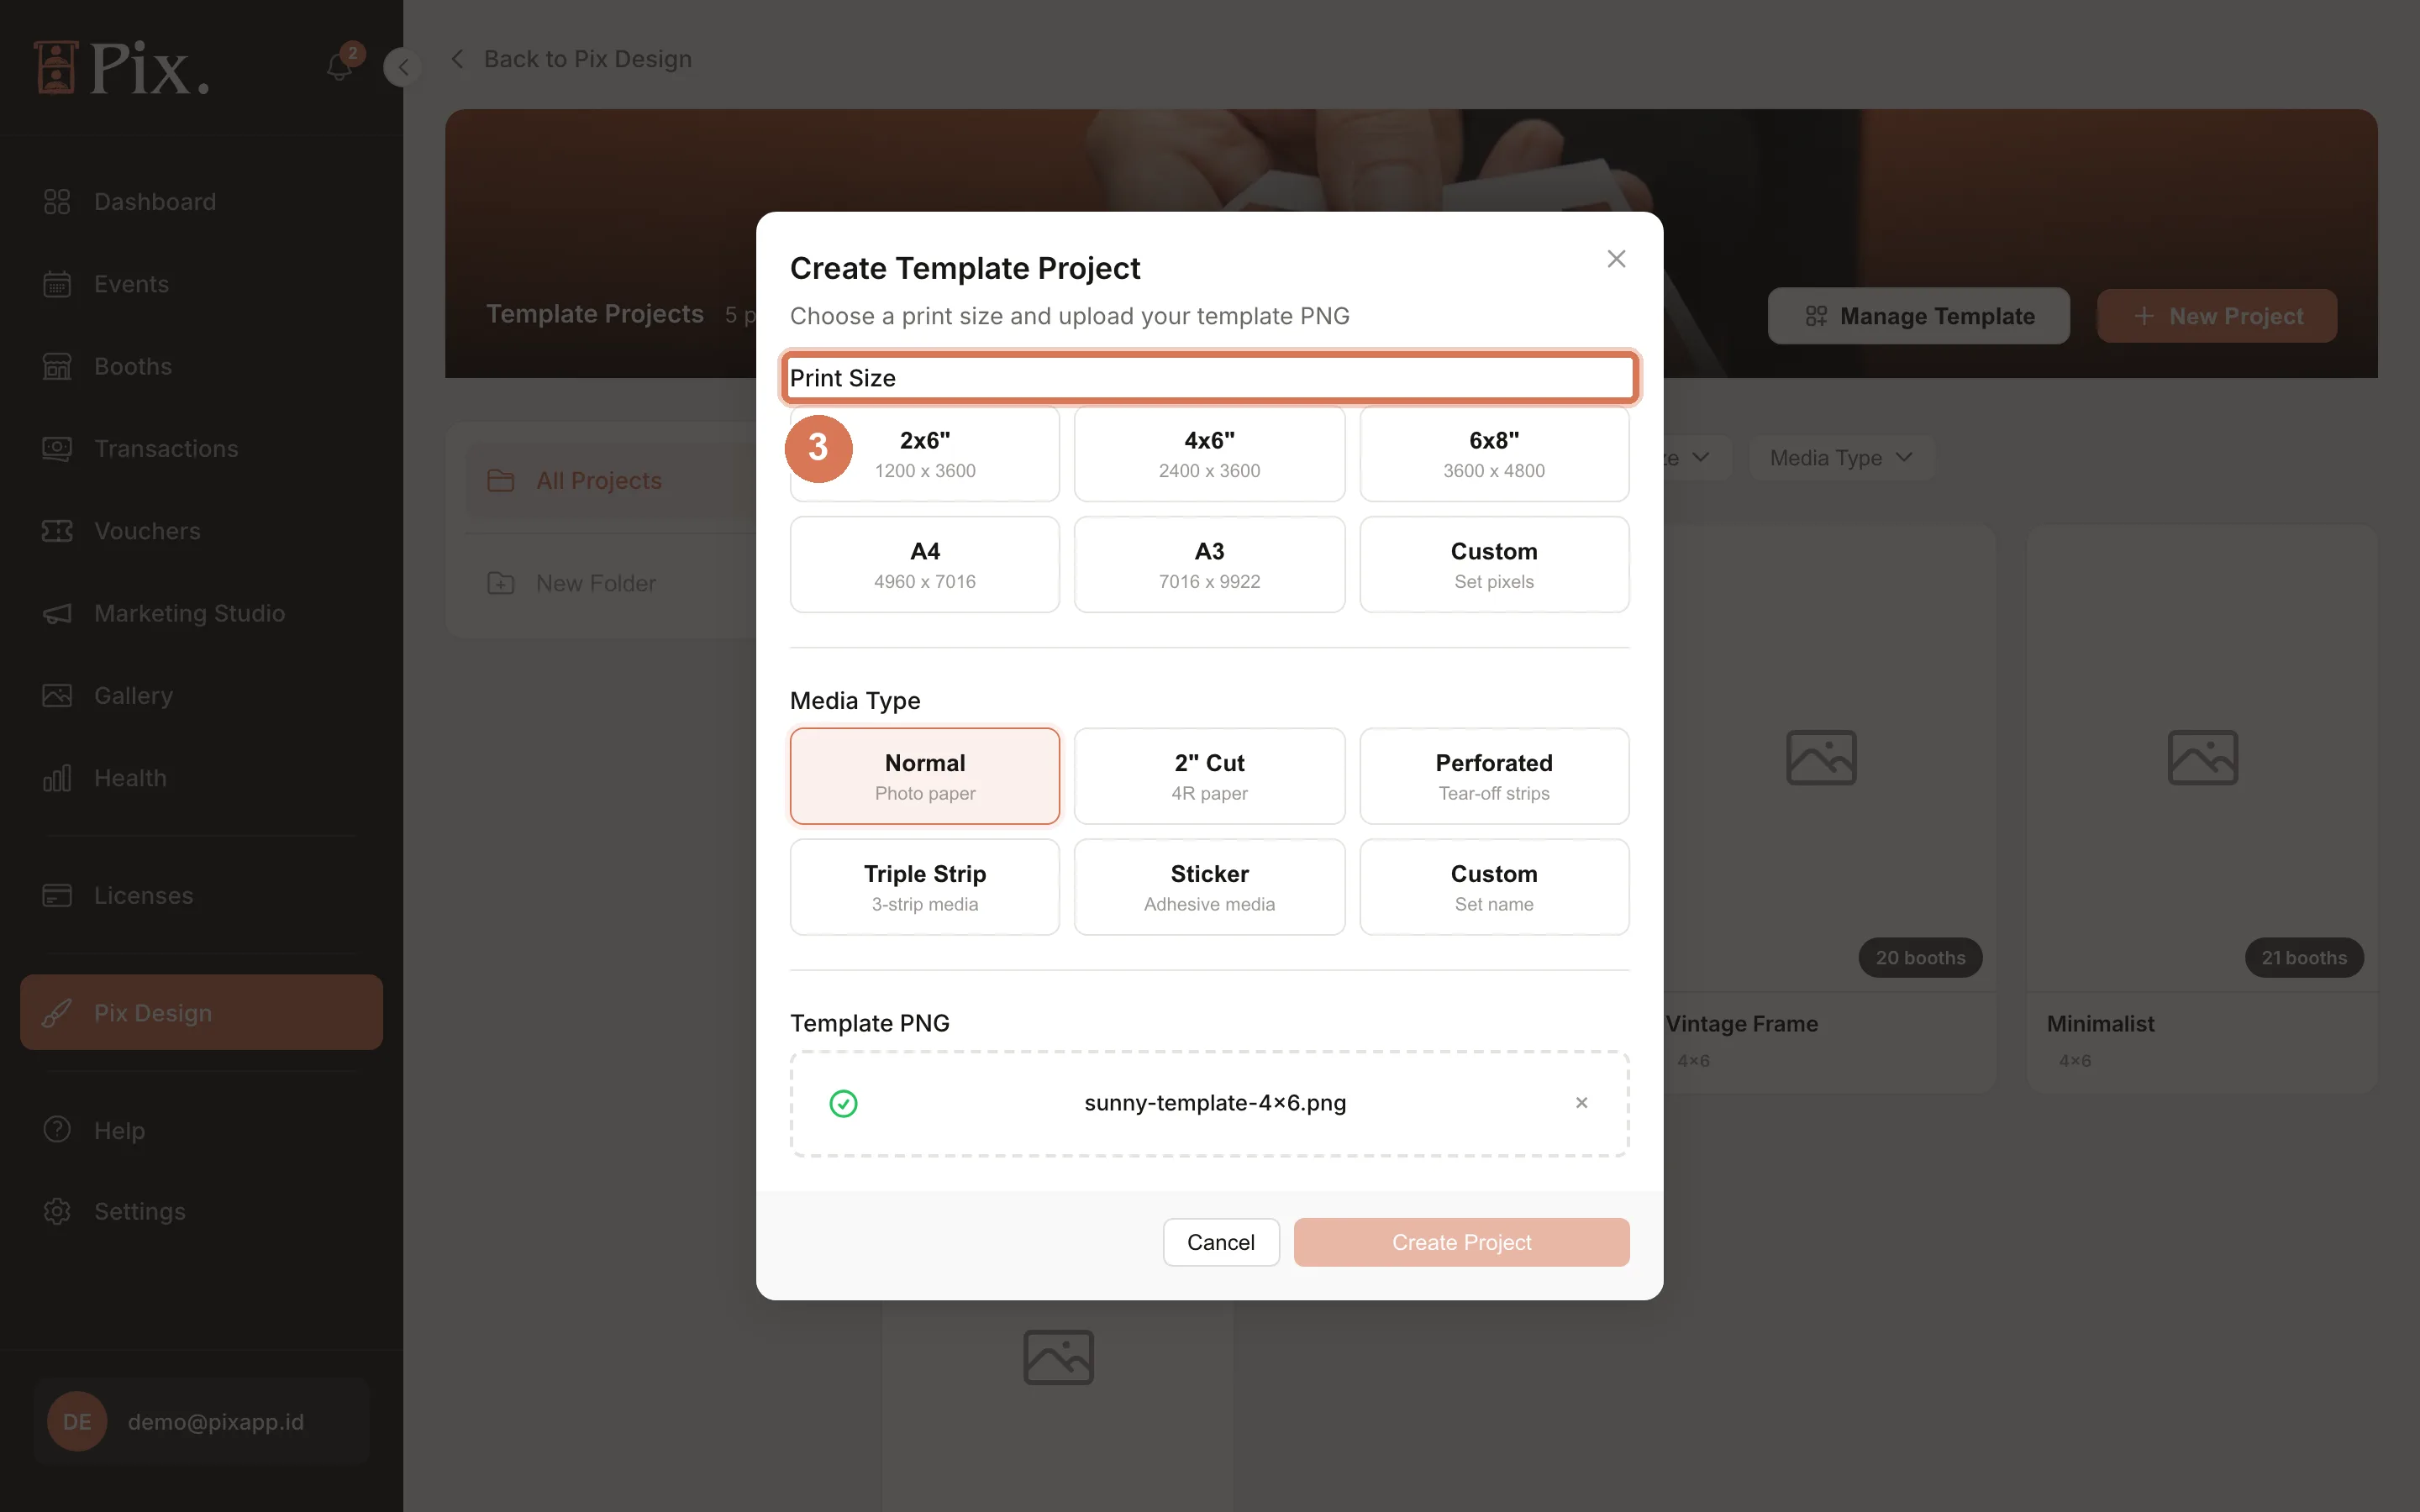
Media Type tells the booth and the printer how each sheet is used:
| Media Type | Meaning |
|---|---|
| Normal | Photo paper, one print per sheet |
| 2" Cut | 4R (4x6) paper the printer cuts into two 2x6 strips, so one sheet gives two prints |
| Perforated | Tear-off strips |
| Triple Strip | 3-strip media, three prints per sheet |
| Sticker | Adhesive media |
| Custom | You set the name |
Step 3: Check the photo slots
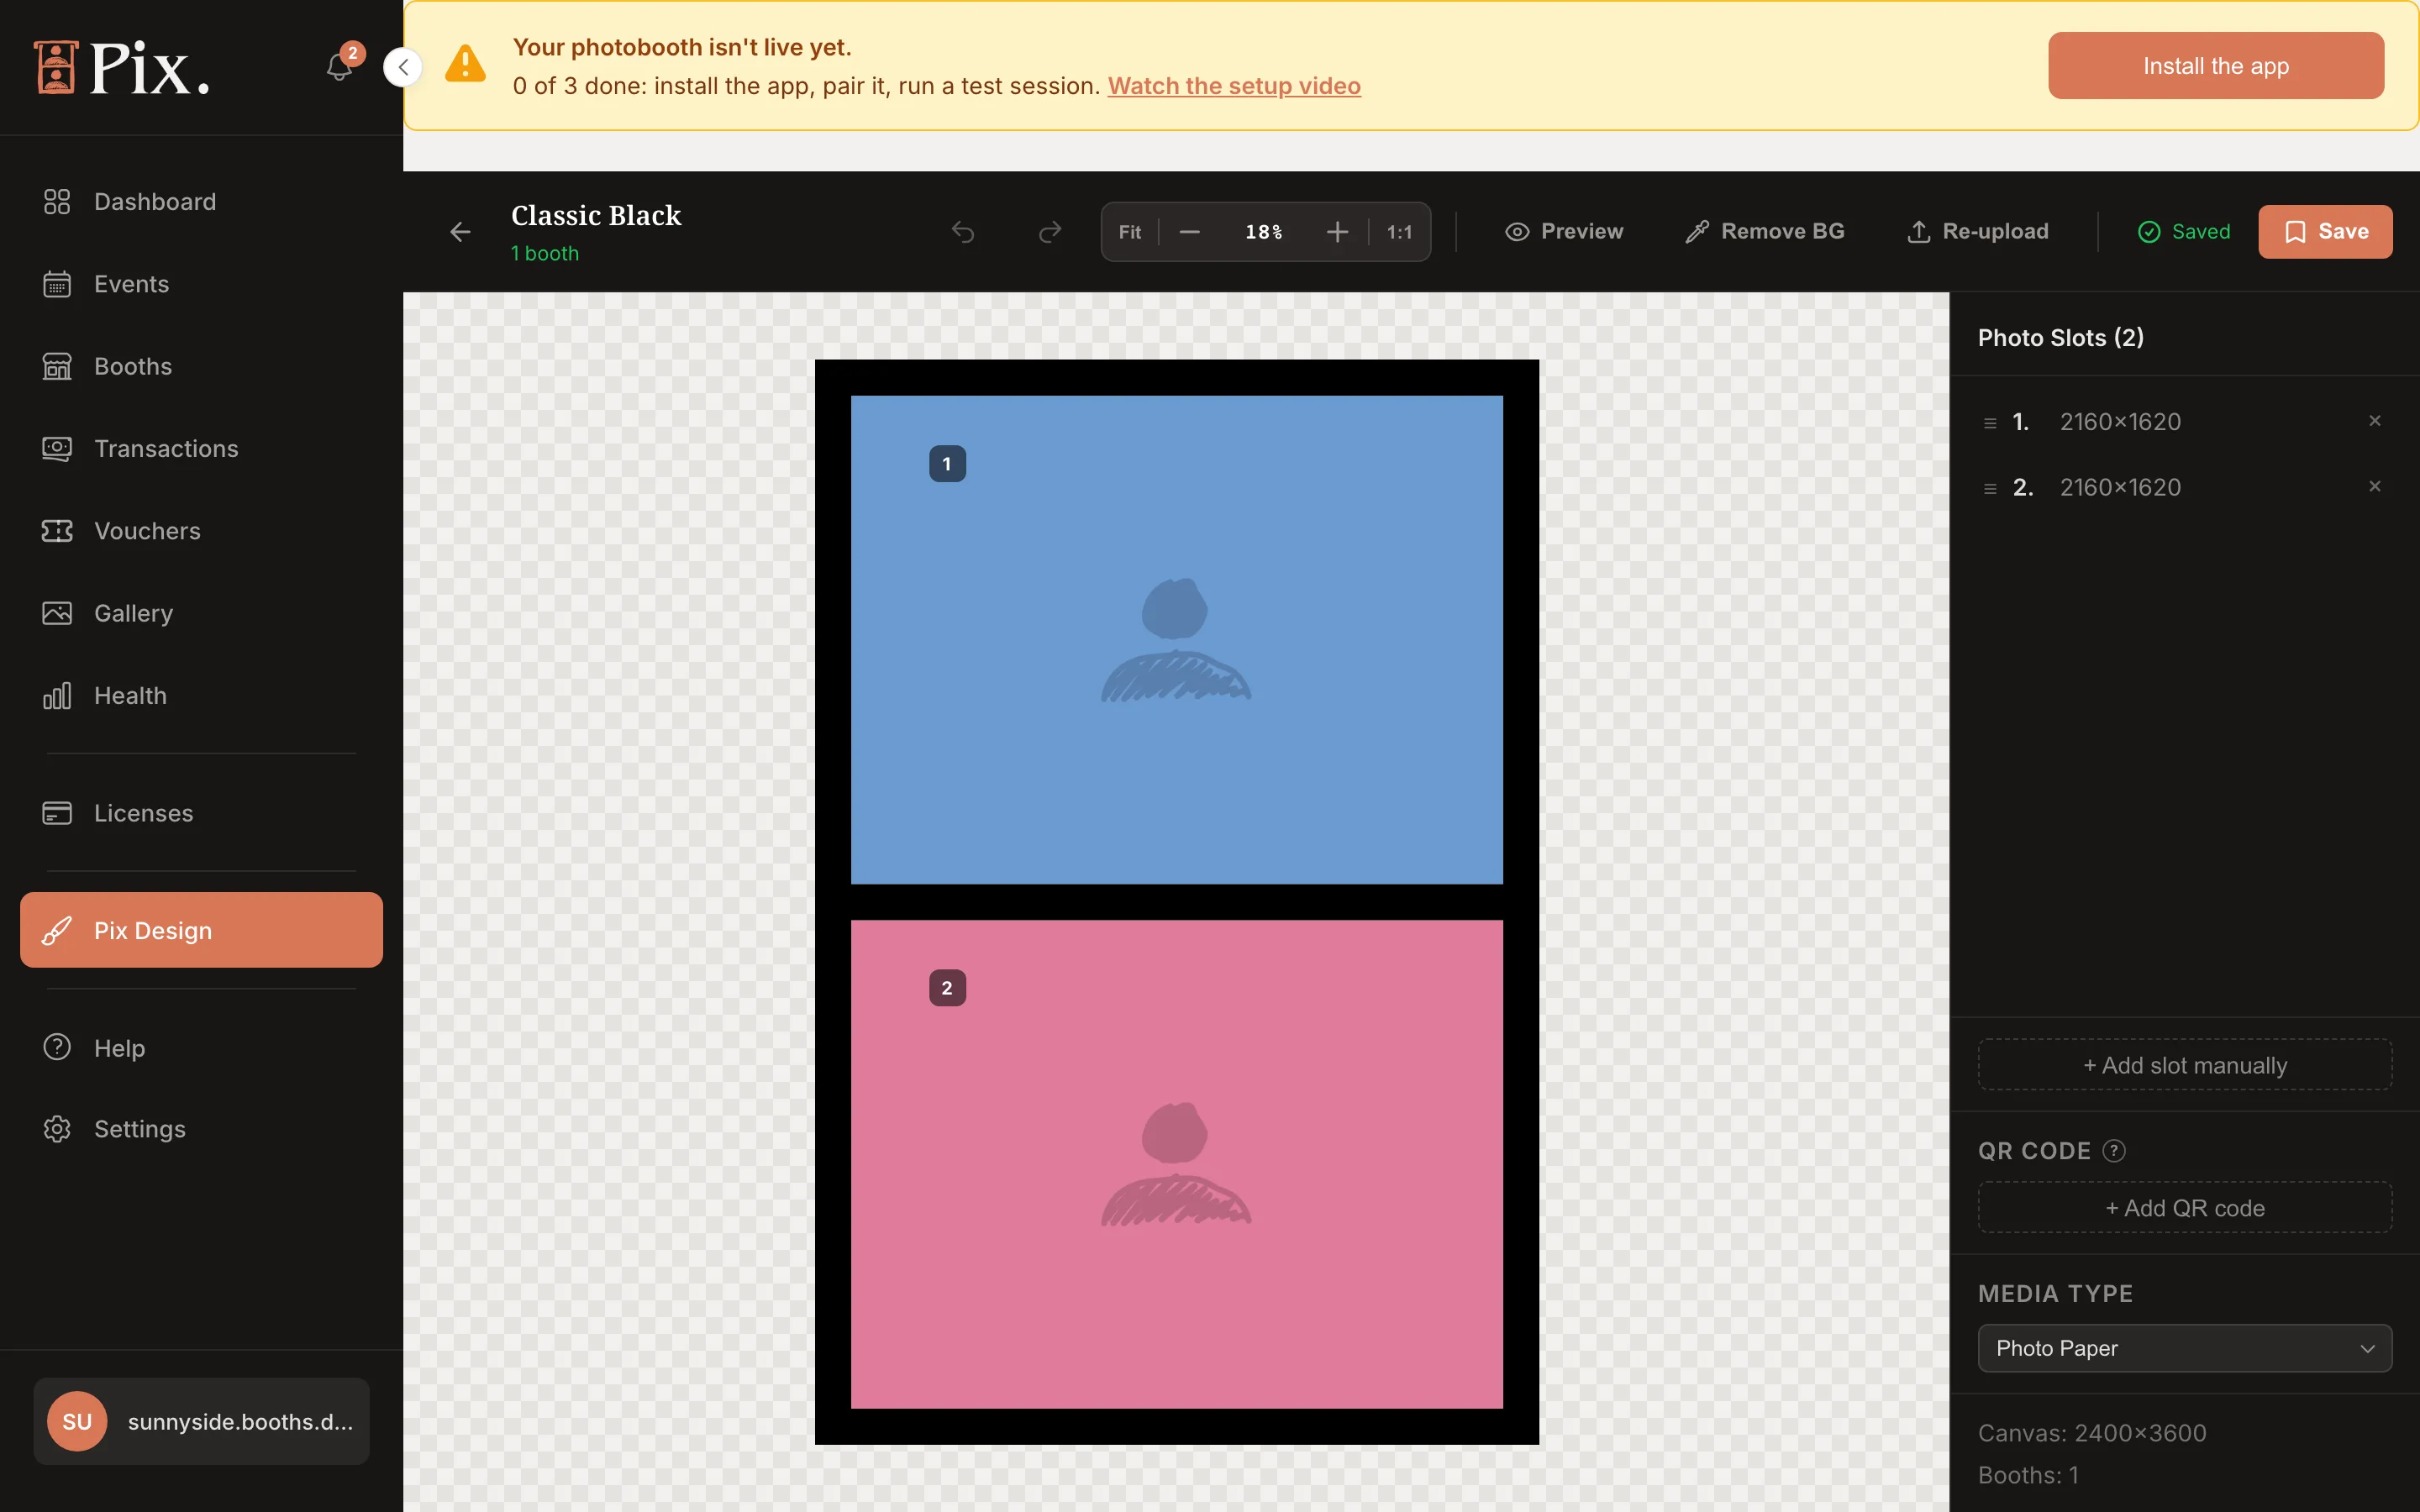
The editor opens with your PNG on the canvas. The side panel lists Photo Slots (n), one for each transparent area it found.
-
Check that the count matches your design. If a slot is missing, click Add slot manually and draw it. A slot drawn over your artwork has Cut out artwork ticked, so that rectangle is cleared from the design when you save.
-
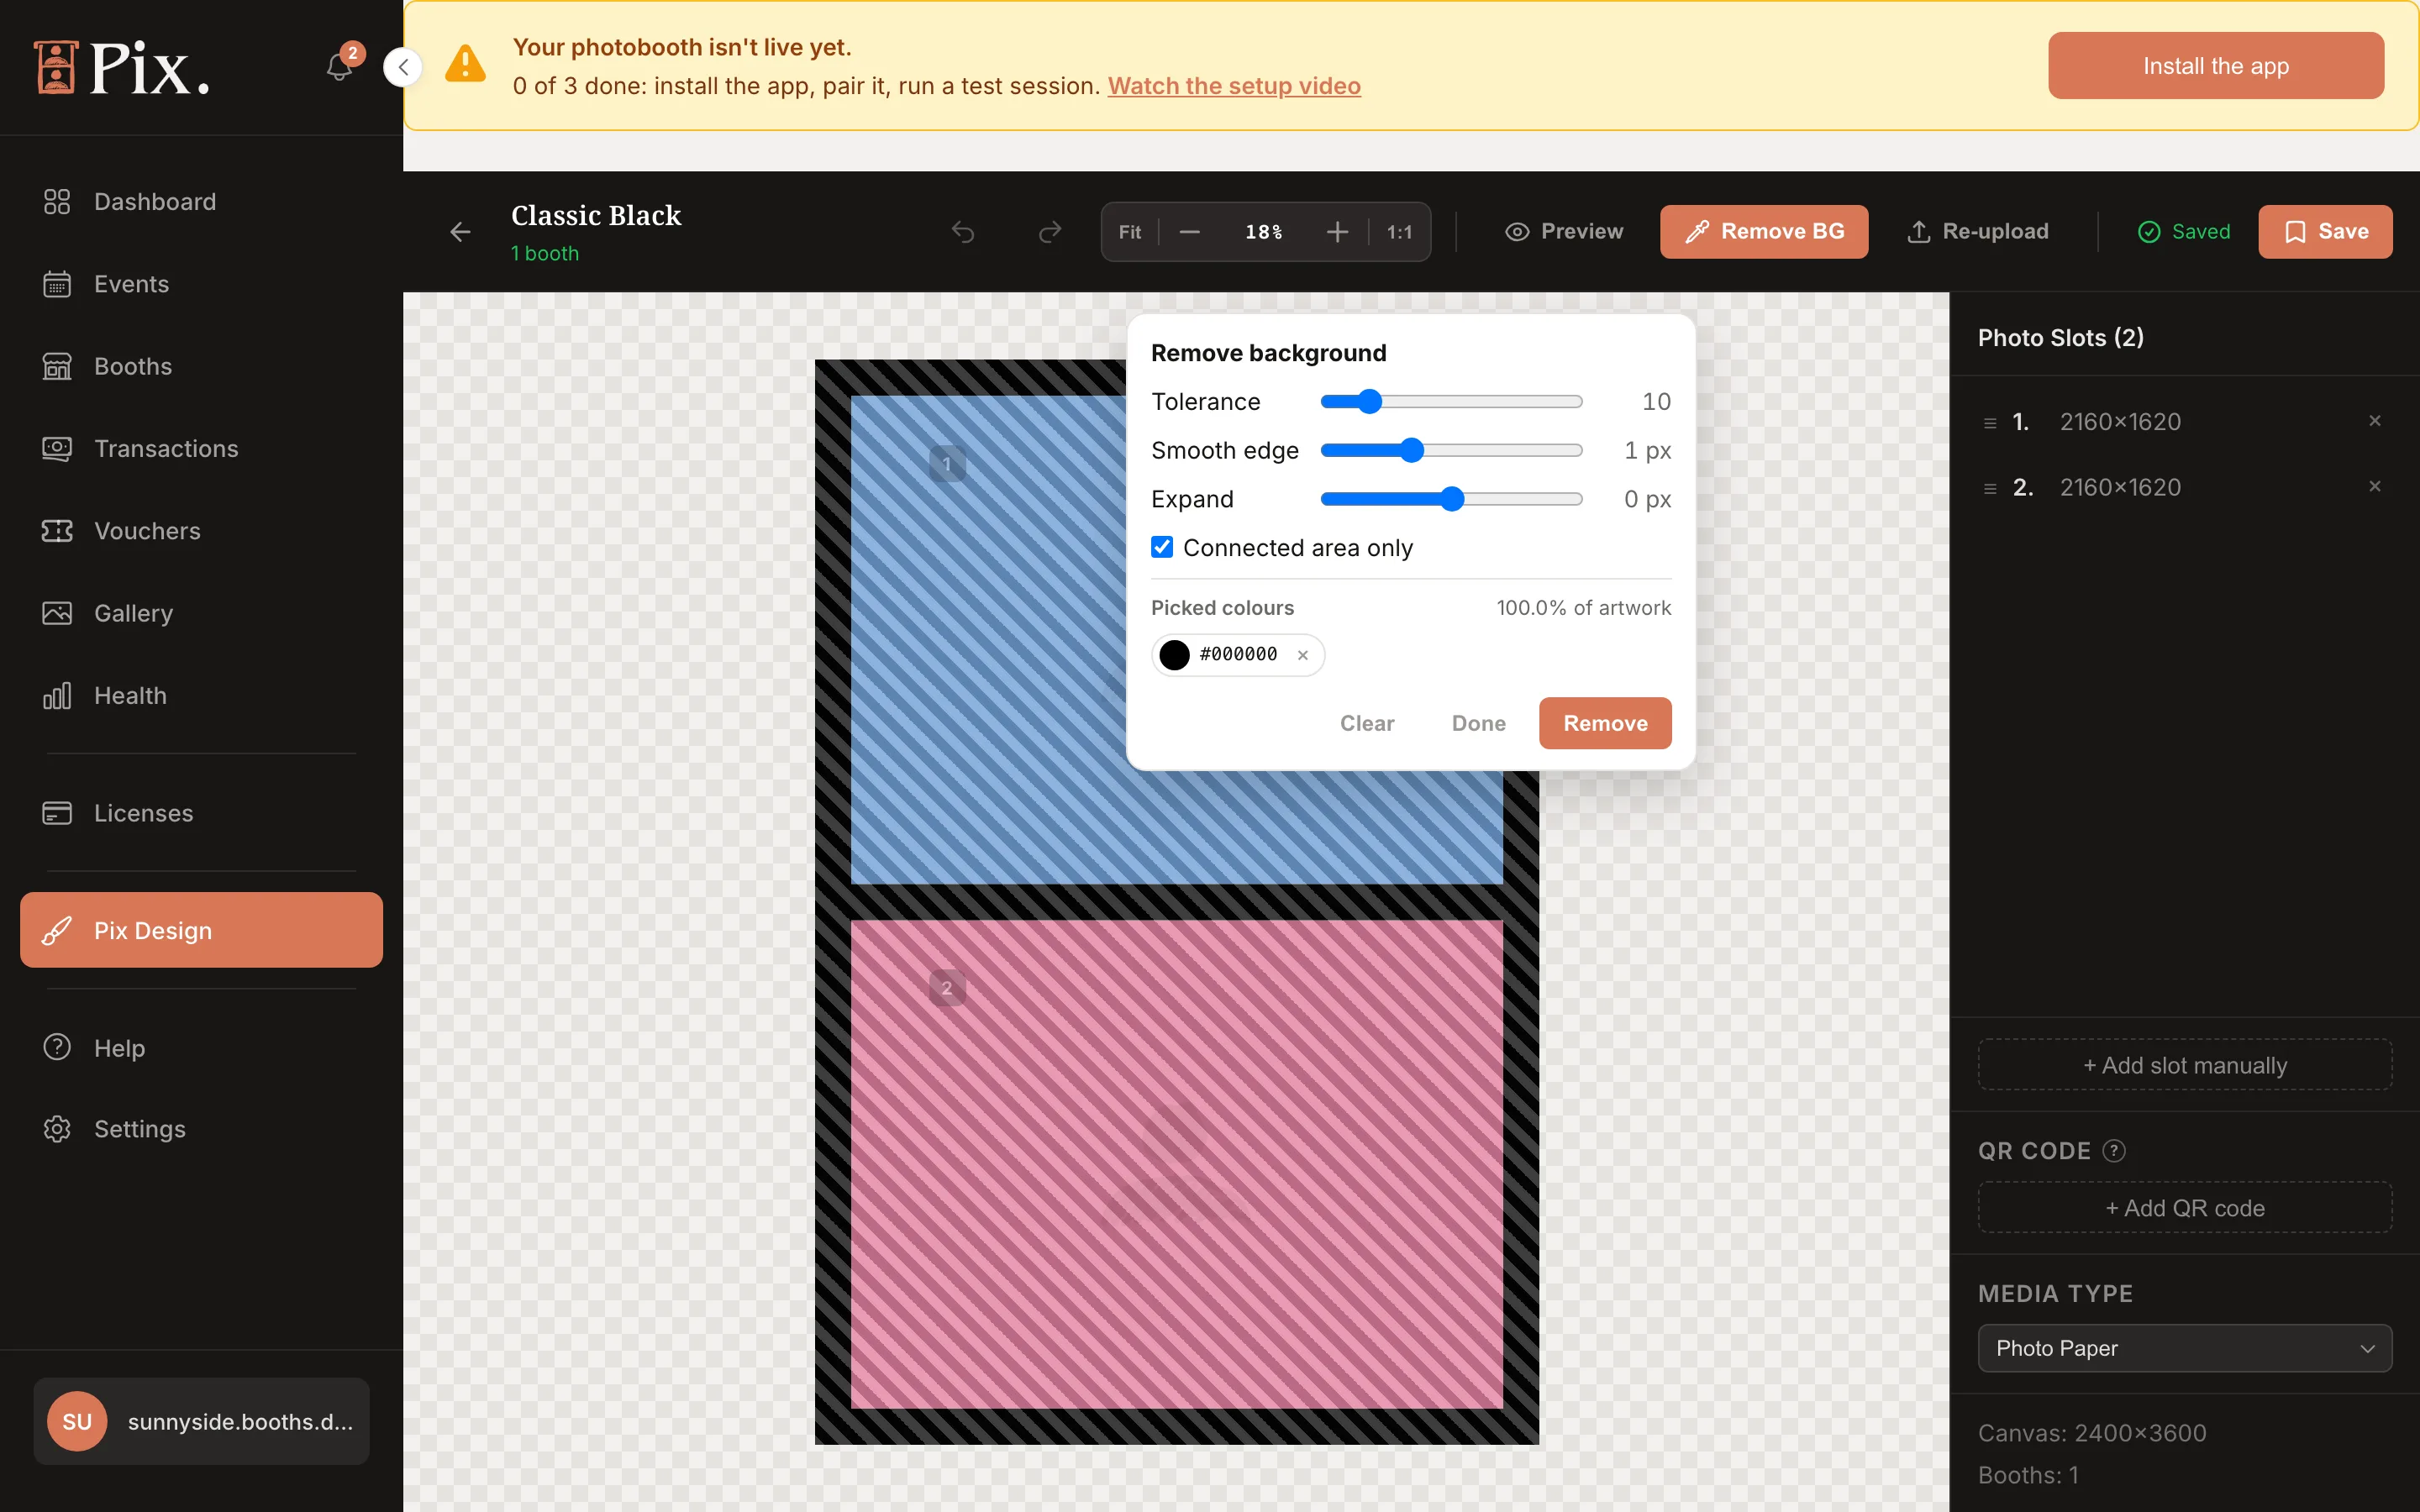
No slots at all because the photo boxes are white? Click Remove BG, click inside one box, Shift-click the others, and click Remove. The boxes turn transparent and each one becomes a slot.
-
To line slots up, drag a box around them (or press Cmd+A / Ctrl+A) and move or resize them together; they snap to the canvas centre and to each other.
-
To put a QR code on the print, click Add QR code and place it.
-
Click Preview to check the result.
-
If the design needs a change, fix it in your design tool and click Re-upload; the slots are detected again.
Every tool in the editor is described in Template Editor.
Step 4: Save and name the template
- Click Save.
- Under Name Your Template, type the name your team and your guests will see.
- Under Assign to booths, tick the booths that should offer it now, or leave it for later.
Step 5: Organise and assign later
- On Template Projects, each card's menu has Rename, Assign to booths and Delete. Assign to booths opens the booth list with an All booths option and Apply.
- New Folder in the folder sidebar groups templates by client, season or size. Tick cards with Select All and use Move to to file them.
- Filter the list by Category, Paper Size, Media Type and Booth. With a booth picked, Manage templates opens that booth's templates in a window on the same page.
- Delete on a template that booths still use lists those booths and offers Unassign & delete.
The booth's own Templates > Manage Templates modal works the other way round: pick templates for one booth. See Assigning Templates to Booths.
Settings > Data > Import Templates takes a ZIP of up to 50 PNGs (200 MB) for one print size, so a batch of ready designs does not need creating one by one.
Step 6: On Pix Starter
A Pix Starter account comes with two ready-made 4x6 templates, Classic Black and Classic White, both already assigned to your first booth. The Template Projects header reads 2 / 2 and the button reads Upgrade to Create, as in the screenshot under Step 2.
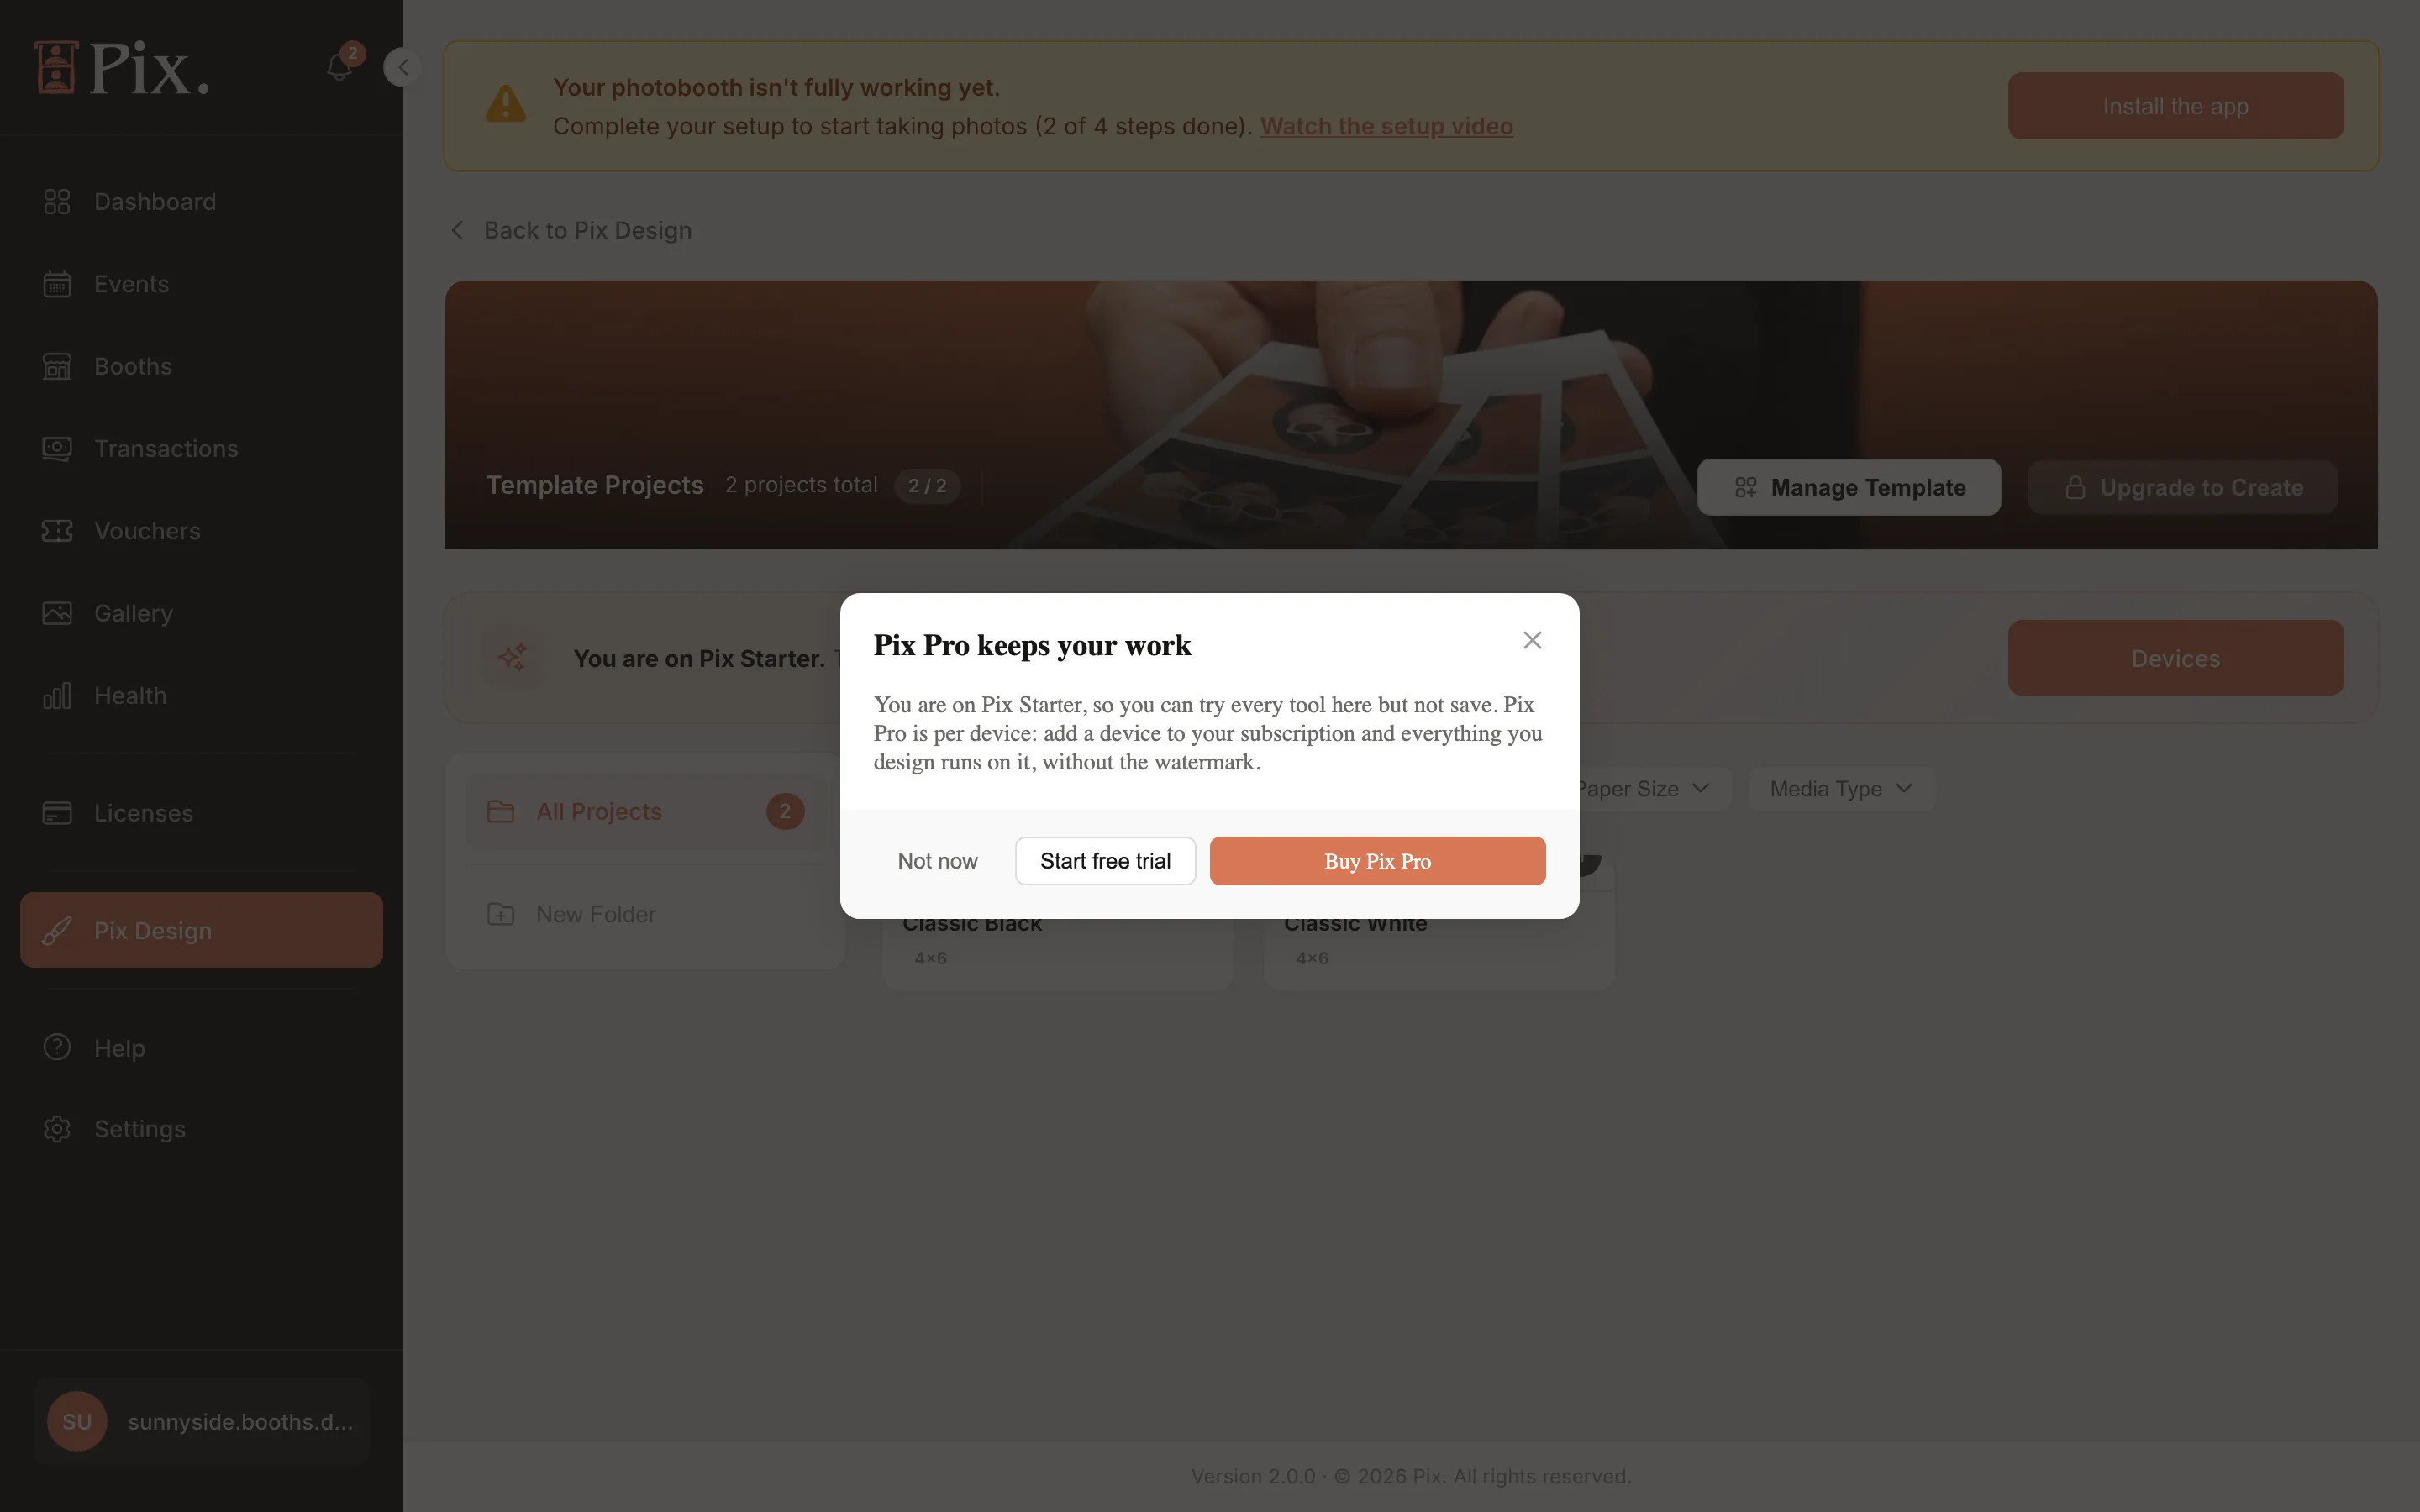
You can open the editor and try every tool, but creating a new project or saving needs Pix Pro. Upgrade to Create opens the "Pix Pro keeps your work" modal with Not now, Start free trial and Buy Pix Pro. The free trial gives you 3 days of Pix Pro on one computer, with no credit card required.
Check It Worked
- The template card on Template Projects shows a booth count badge, for example "2 booths".
- The booth's Templates tab lists the template under Assigned Templates.
- On the booth, the template card shows on the Templates screen with the thumbnail from the editor, and a test session fills every slot and prints at the right size.
Troubleshooting
| Symptom | Cause | Fix |
|---|---|---|
| The editor finds no slots, or one big slot | The photo areas are not transparent, or the whole background is | Make only the photo areas transparent, re-export and click Re-upload |
| A slot is split in two or has a ragged edge | Partly transparent pixels or a soft edge in that area | Give each slot a hard edge at full transparency |
| Photos look soft on the print | The PNG was smaller than the target and was resized up | Export at the exact pixel size |
| Create Project stays disabled | No print size or no file chosen | Pick a size card and drop a PNG under 15 MB |
| Save opens the Pix Pro modal | The account is on Pix Starter | Start the free trial or buy Pix Pro |