Microsite (Share Page)
Every photo session gets its own page on pixture.io. The guest scans the QR code on the Sharing screen, the page opens on their phone, and there they find the finished composite, the single photos, the animated GIF and the live photo, each with a download button, under your organization's logo. The Microsite page in Pix Design is where you brand that page. By the end of this page you will have the share page in your colours and saved to your booths.
What Guests See
The link looks like pixture.io/s/… and is unique per session. It shows:
- The composite (the print layout with the guest's photos), the single photos, the GIF and the live photo, as far as the booth's Output Settings allow.
- Your organization logo from Settings > General, and the header, colours, buttons and links you set here.
- The promo popup, if you turned it on.
- On beta accounts with an AI portrait price set, a banner that leads to the AI portrait shop. See Pix AI (Beta).
If the booth loses its connection mid-session, the QR code still shows and the booth tells the guest their photos will appear at the link once the booth reconnects. The page fills in as the uploads land. See Public links for the full list of guest-facing links.
Designing the Page
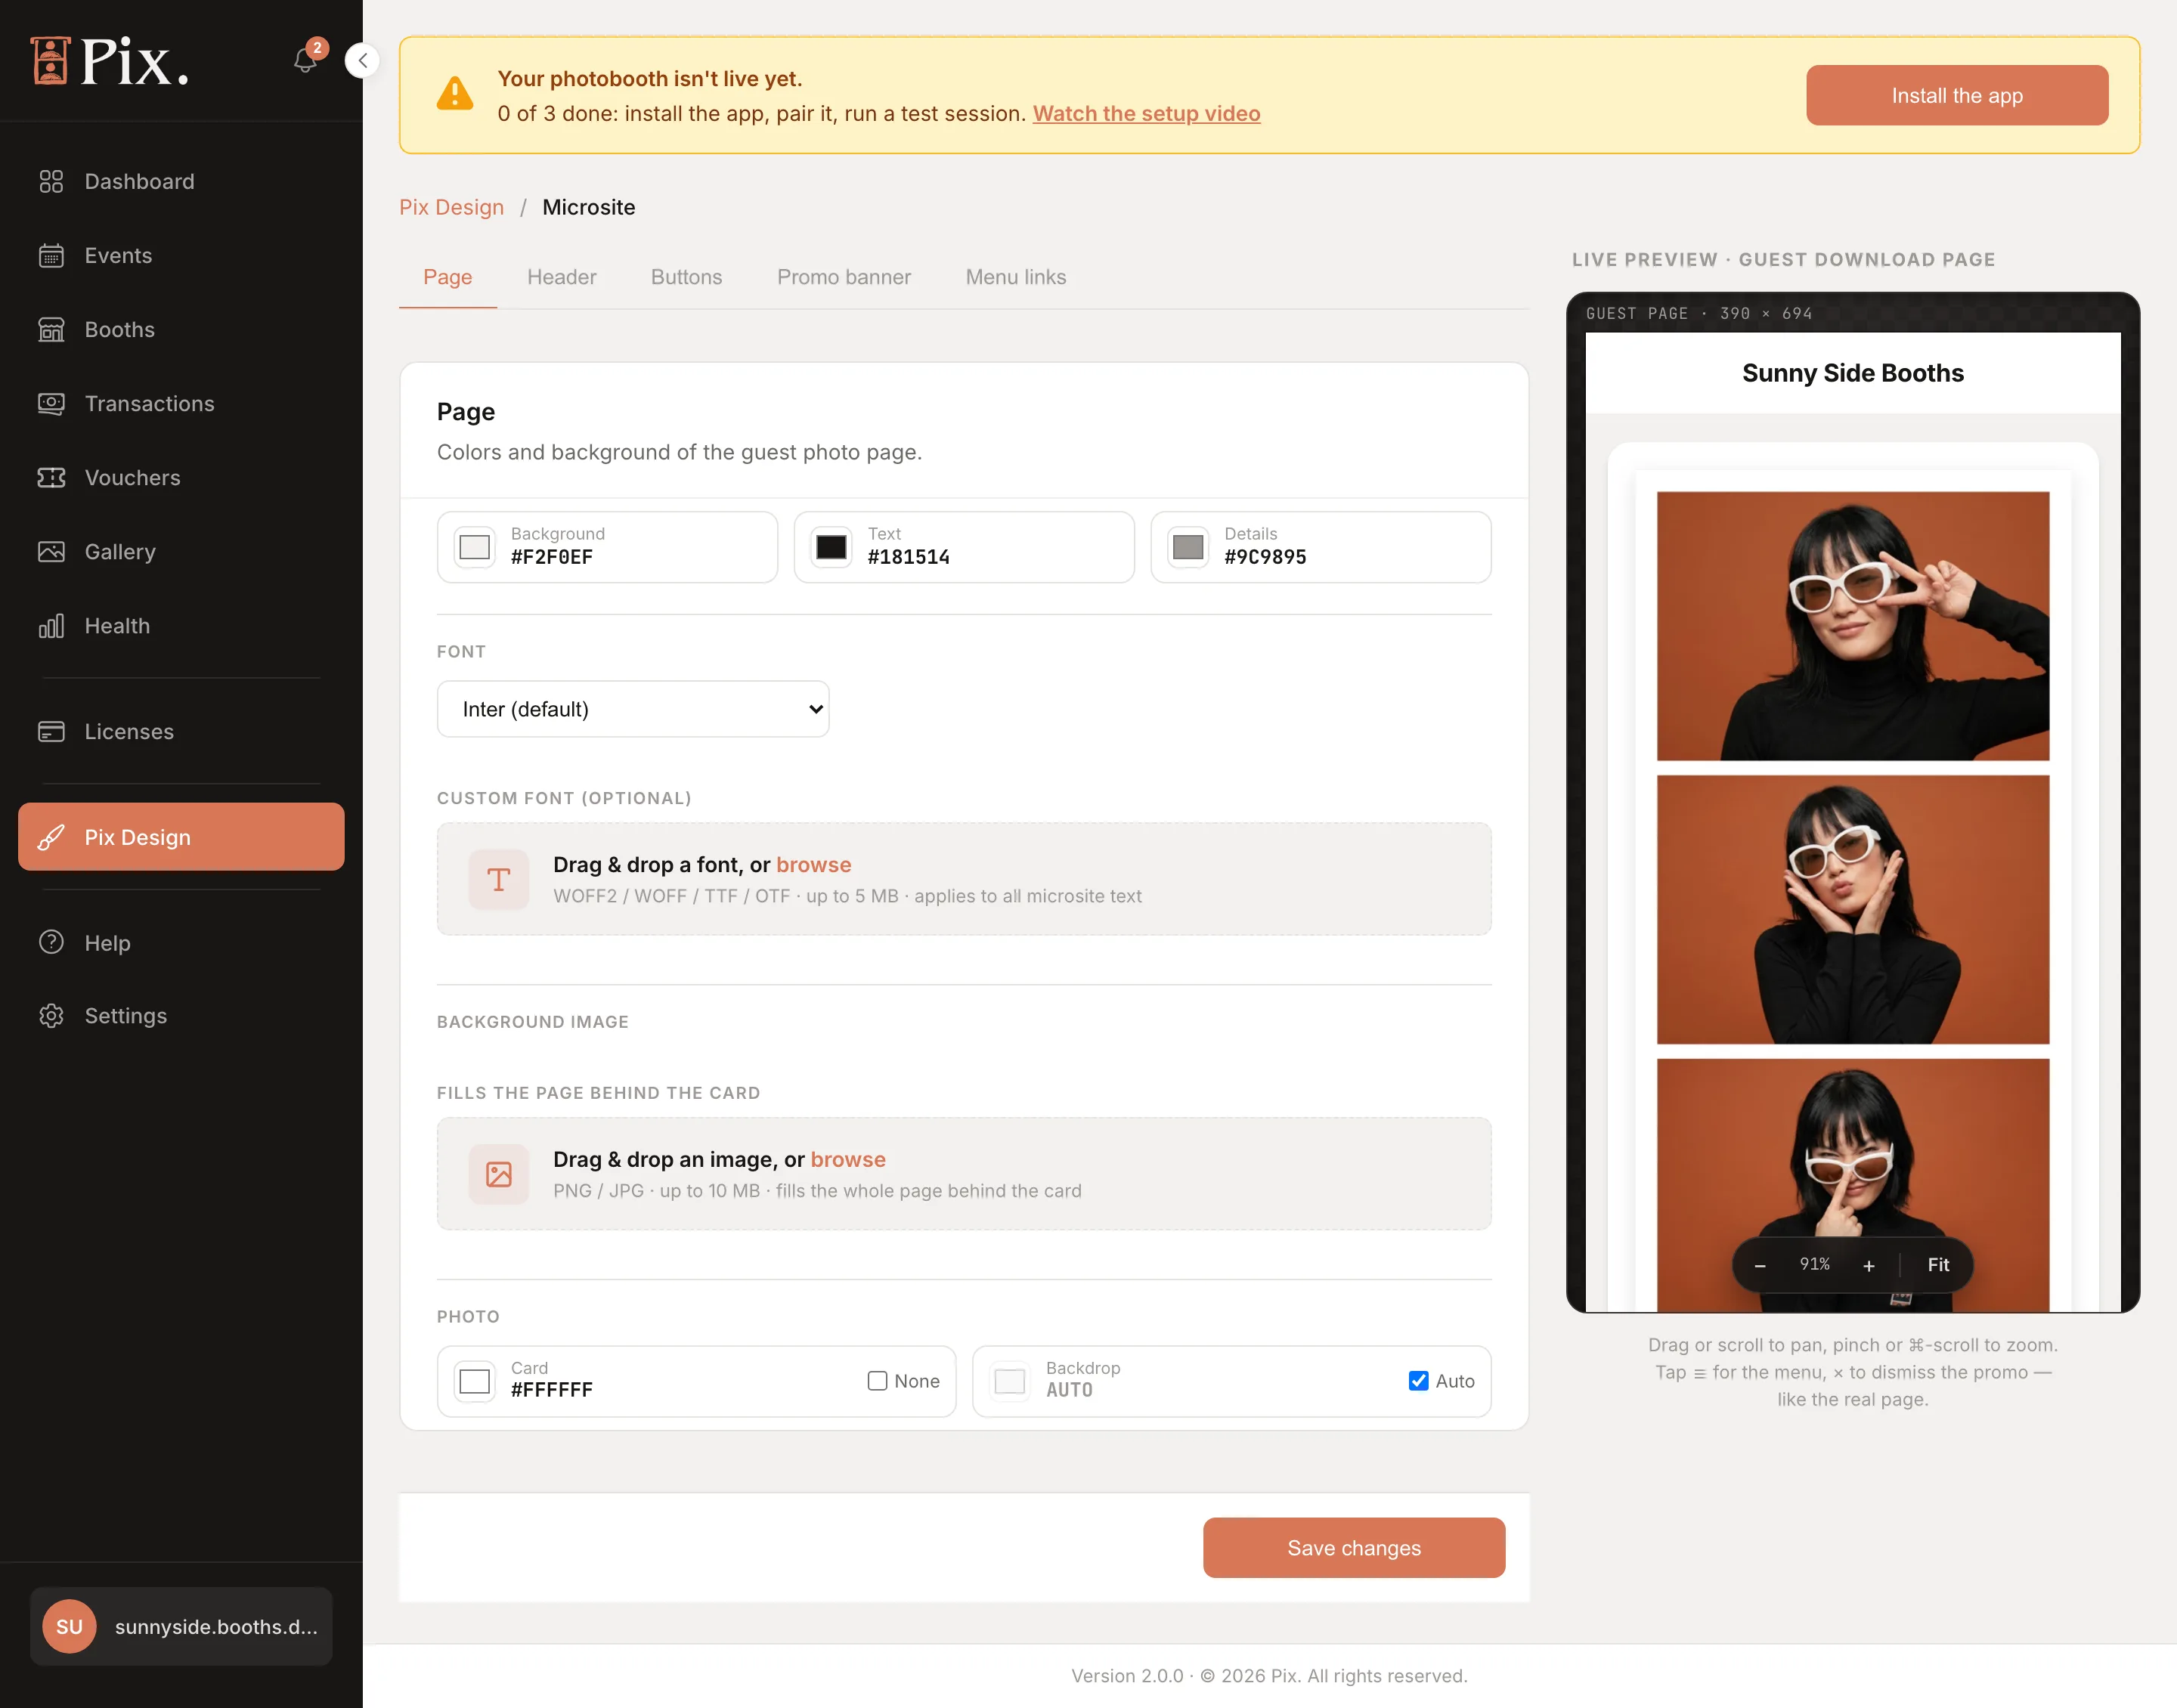
Open Pix Design > Microsite. The settings are grouped in five sections, with a phone-sized preview of the page beside them that you can pan and zoom like the real page.
| Section | What it controls |
|---|---|
| Page | The page's background and text colours, with a Background image to replace the flat colour |
| Header | The banner at the top of the page, with an optional link |
| Buttons | The look of the download buttons guests tap |
| Promo banner | An image popup shown when the page opens, with an optional link |
| Menu links | Links behind the page's menu, for example your website, Instagram or a booking form |
Below the sections sit the font picker, Custom font (optional) for a brand typeface, and the Background image upload.
- Set the Page colours first, then the Header. Watch the preview after each change.
- Give the Buttons a colour that stands out from the background; this is what guests tap most.
- Add the Menu links every guest should have.
- Turn on the Promo banner if you have an offer to push. Guests read it once, on a phone, so keep the image simple.
- Click Save changes.
Save to booths
The share page design is held per booth. Save to booths opens a booth picker. Choose the booths and confirm. A venue with its own branding can have its own share page while the rest of your booths keep another design.
Show promo popup again
In the preview, tap × to dismiss the promo popup the way a guest would. Show promo popup again brings it back in the preview so you can check it after a change.
Pix Starter and Pix Pro
The Microsite page opens on Pix Starter and you can try every setting, but saving the design for a booth needs Pix Pro on that booth's computer, the same rule as the watermark. When you save to a mix of booths, the ones without Pix Pro are skipped and the toast tells you how many. On a Pix Starter computer the shared files also carry the Pixture watermark; Pix Pro removes it. See Pix Design Overview.
Microsite visits are counted in Marketing Studio > Performance, and the promo banner can be rolled out as part of a campaign there. See Marketing Studio.