Events
An event is a booking: a set of dates, a client and a venue, with its own booth mode, outputs, pricing, templates, screen design and a public album of everything captured. You pair the computers that run it, straight from the event page. The event runs itself. It is ONGOING from the moment you create it, it ends by itself the day after its last date, and its computers follow the dates plus one night of grace, so a party that runs past midnight still counts. There is no Start or End button.
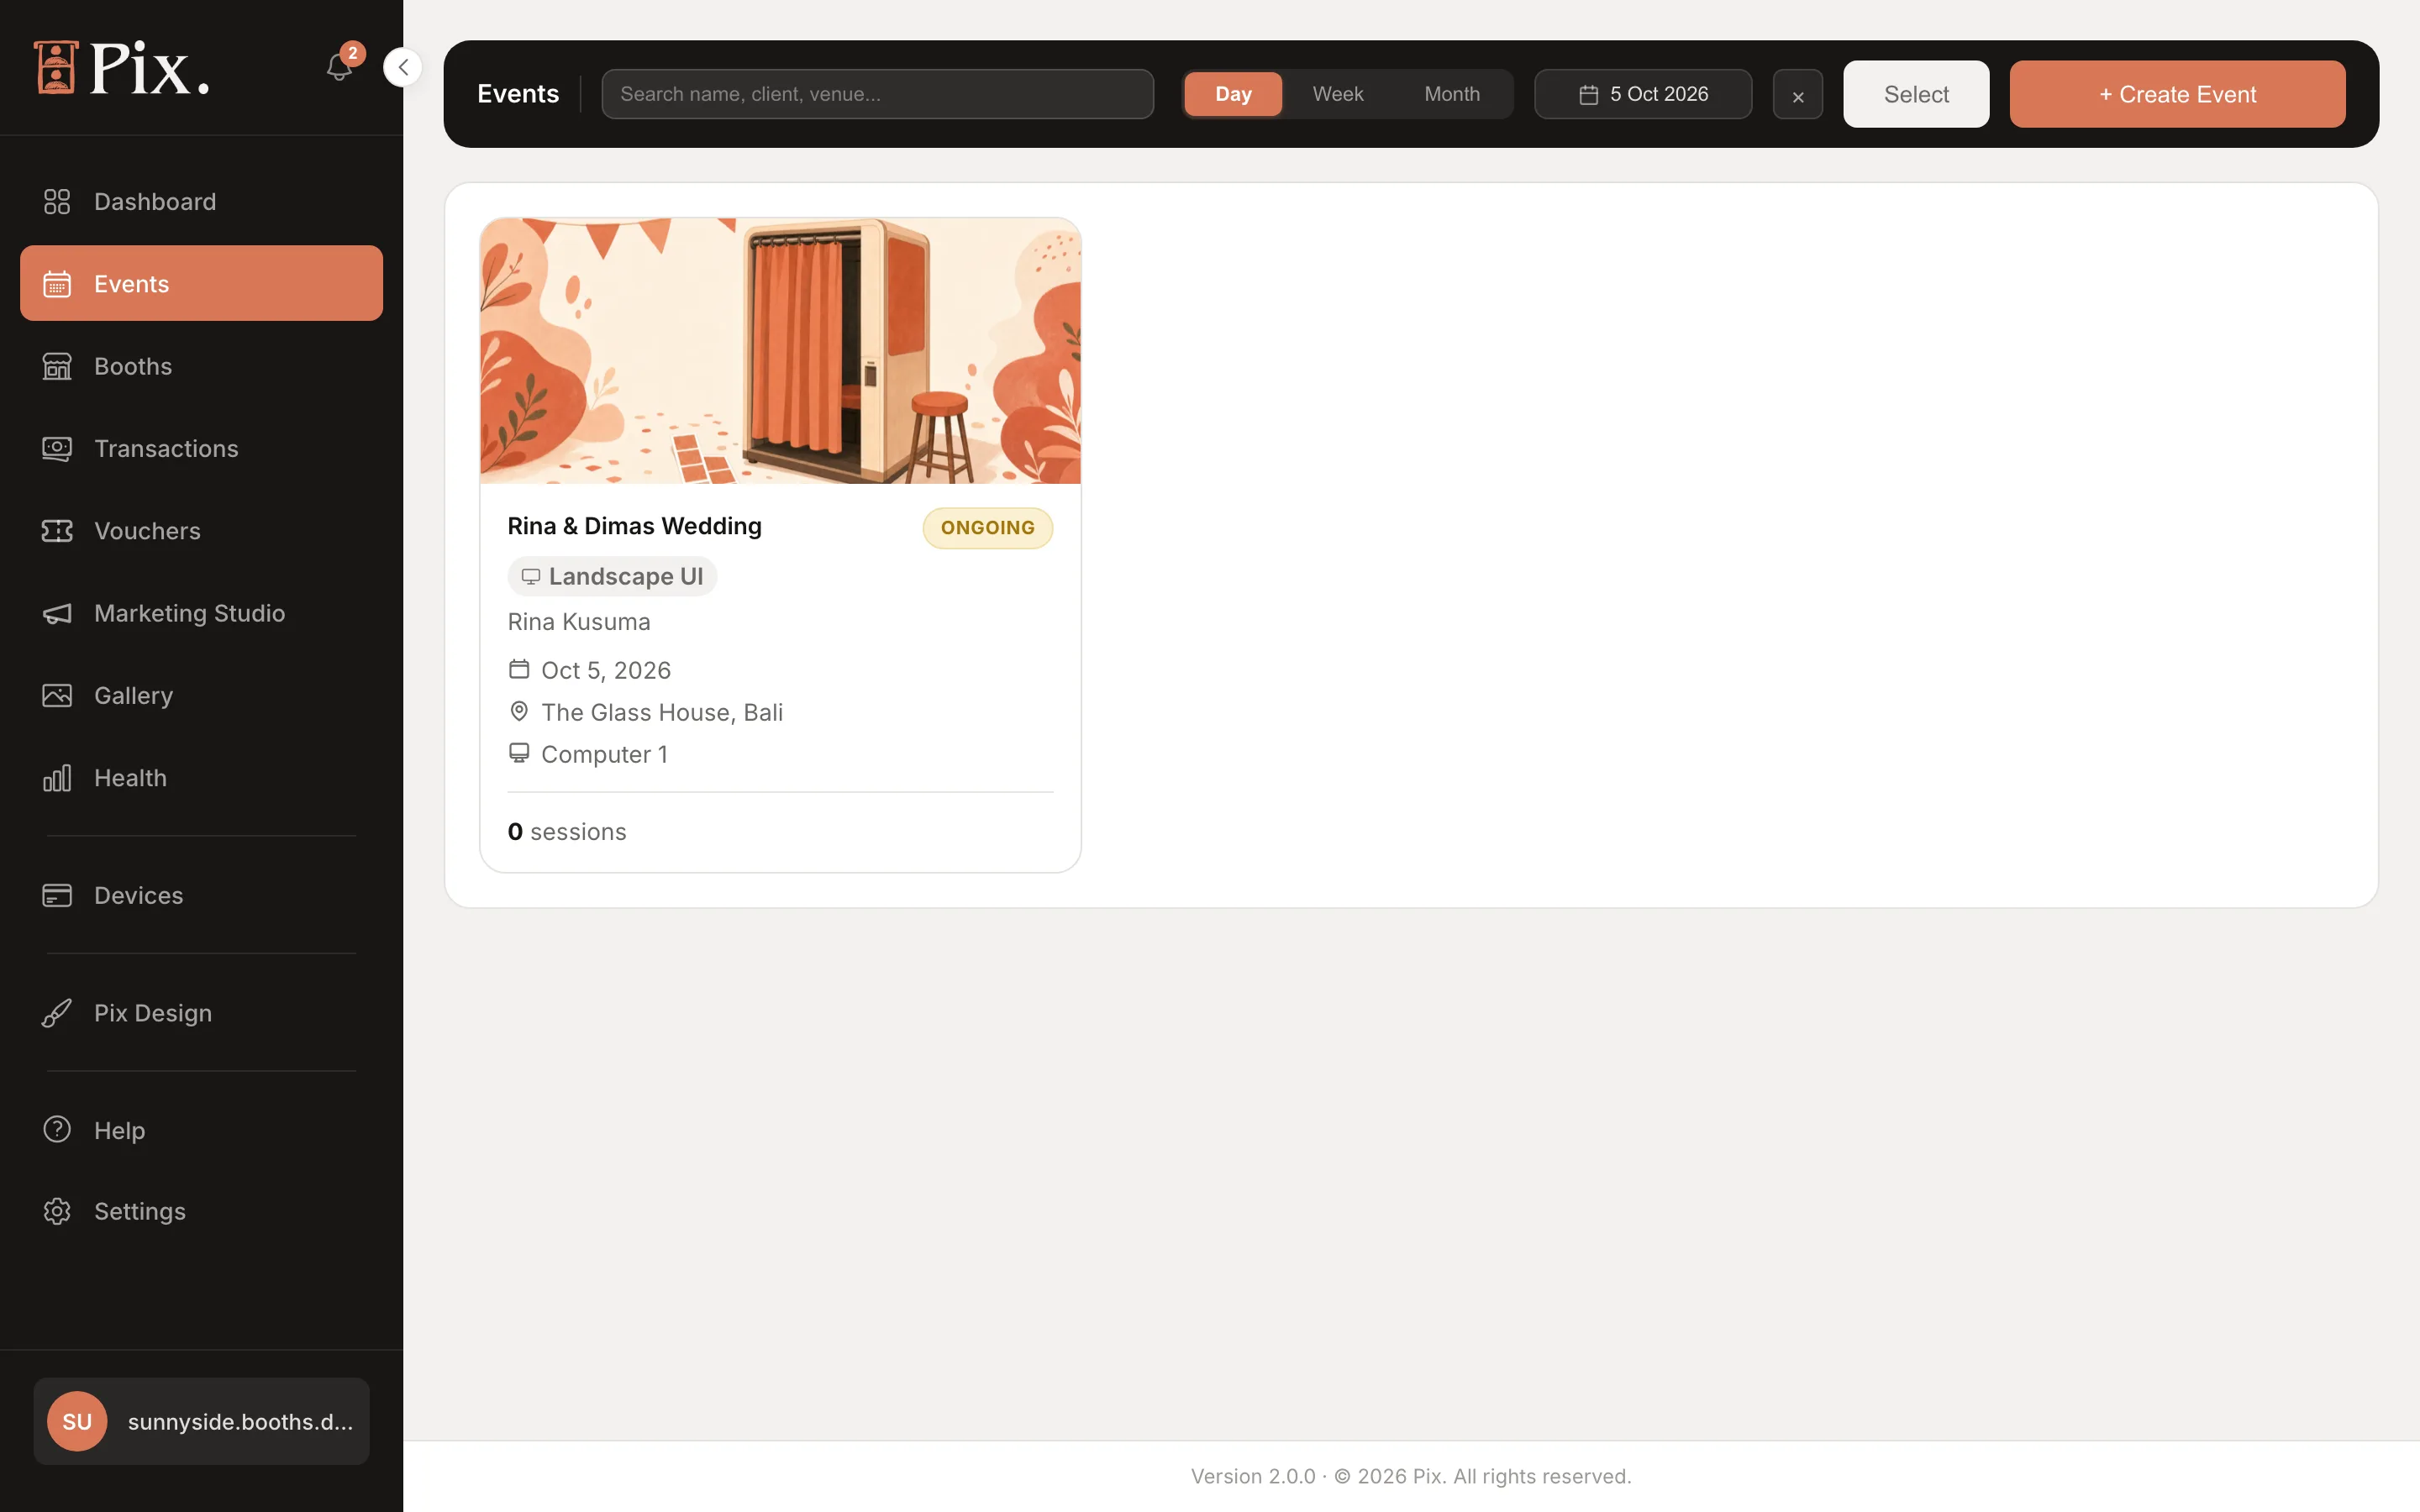
The Events List
Each event is a card with its cover photo, name, client, venue, dates, status, a Landscape UI or Portrait UI chip, its computers, the session count and, for paid events, the revenue. The bar above it has a search box ("Search name, client, venue..."), Day / Week / Month pills, Select for bulk actions, Delete for the selected events, and + Create Event.
Creating an Event
+ Create Event opens a short wizard. A progress bar across the top shows where you are: Details, Templates, Screens, Payment, then Pair, which happens on the event page once it exists.
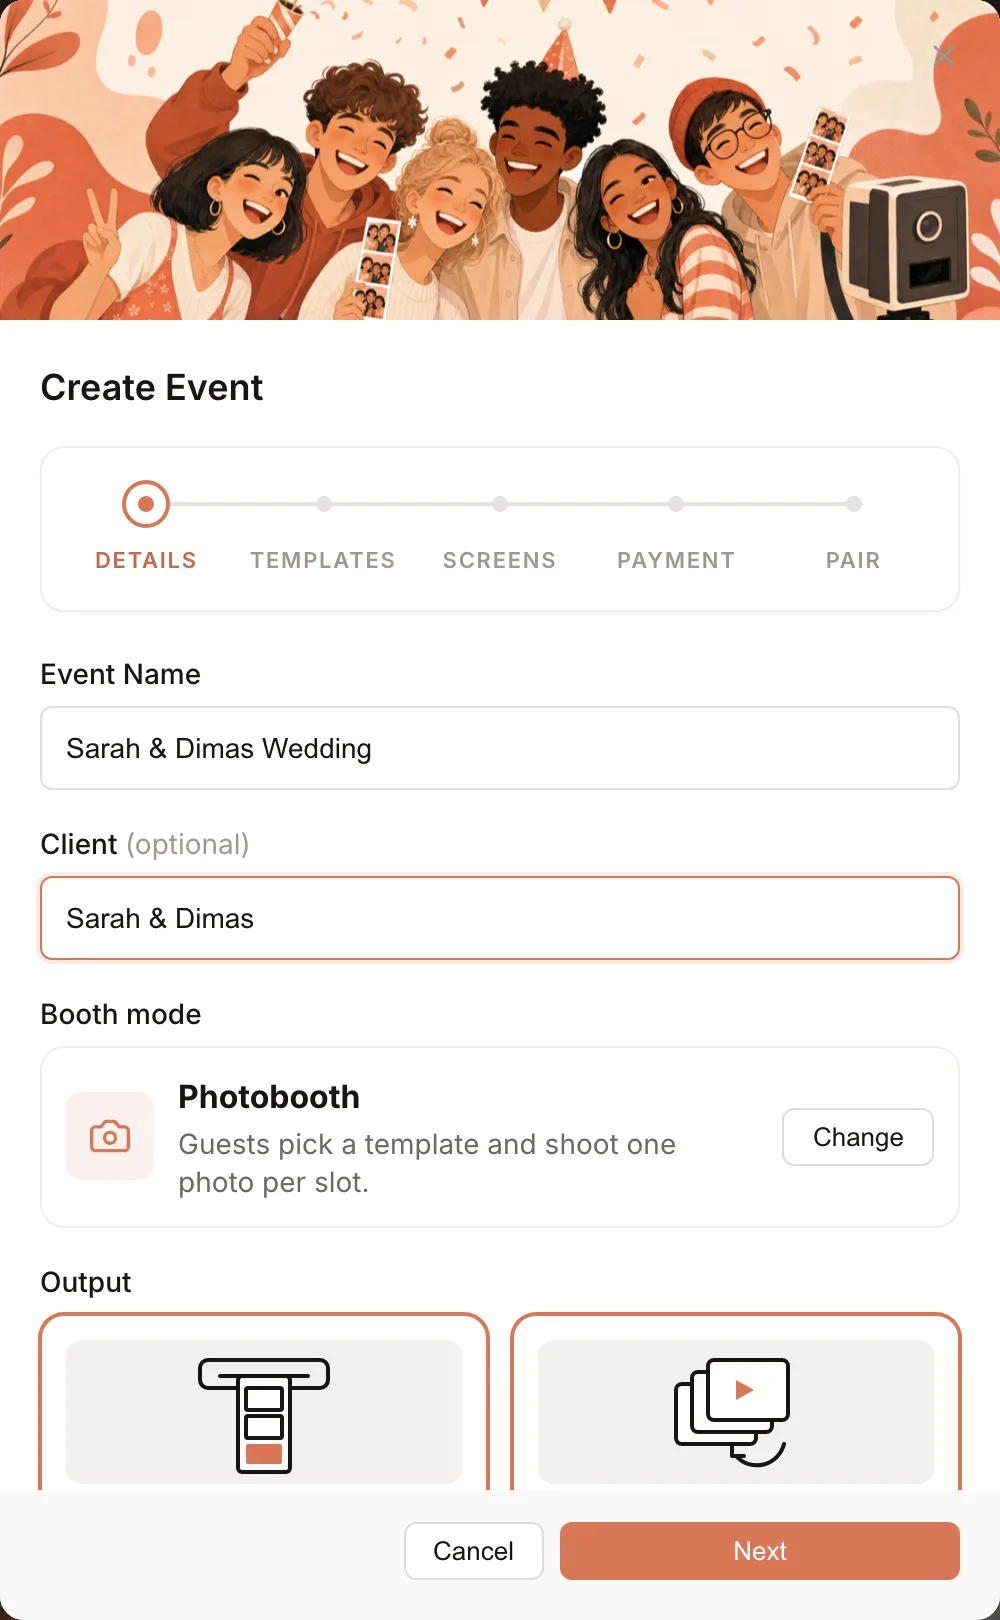
| Step | What you set |
|---|---|
| Details | Event Name, Client, Booth mode, Output, Event date (prefilled with today), Start Time and End Time (both optional) and Venue |
| Templates | The print templates guests can pick at this event |
| Screens | The Appearance: the screen design the booth shows during the event. Click Configure to pick one; a Landscape / Portrait switch filters the list, which shows only designs made for the event's booth mode |
| Payment | Pay Per Session: on, guests pay at the booth with the Session price, plus Double session price, Group session price and Additional session price, each behind its own switch and on only if you sell it; off, every session is free, for a hosted wedding or a sponsored booth. Payment gateway: leave it on the organization default unless the client needs another. Without a connected gateway, turning on Pay Per Session tells you to connect one first in Settings > Payment Gateway |
Create event saves it and opens the event page with Pair a computer ready.
Booth Mode
Each event has one booth mode, picked in the wizard and changed later with Change on the event page ("One mode per event. Booths pick it up at their start screen."). The picker groups the modes:
| Group | Mode | What guests do |
|---|---|---|
| Photo | Photobooth | Pick a template and shoot one photo per slot |
| Photo | Studio | A timer runs the session; guests shoot freely, then pick their photos. Needs a Studio UI project from Pix Design first |
| Photo | AI Photobooth | Marked Soon |
| Video | Video | Record a short clip with your overlay, for a video guest book. See Event Video Modes |
| Video | 360 Slow-mo | Marked Soon |
Changing the mode keeps the paired computers paired. Each booth picks the new mode up the next time it shows its Start screen. If the event's screen design does not fit the new mode, the event switches to one that does (a Studio design for Studio, the Default Layout for Photobooth and Video) and says so.
Output
Output is what guests get from a photo session, and it follows the booth mode. For photo modes, tick any of four, all on by default:
| Output | What it is |
|---|---|
| Prints | The printed strip or card from the booth's printer |
| GIF | The shots as a short looping animation to share |
| Live photo | A moving clip of each shot, like a phone Live Photo |
| Singles | The raw photos straight from the camera, without the template |
For Video the output is the video itself. Every computer paired to the event follows the event's outputs, whatever its booth had before.
The Event Page
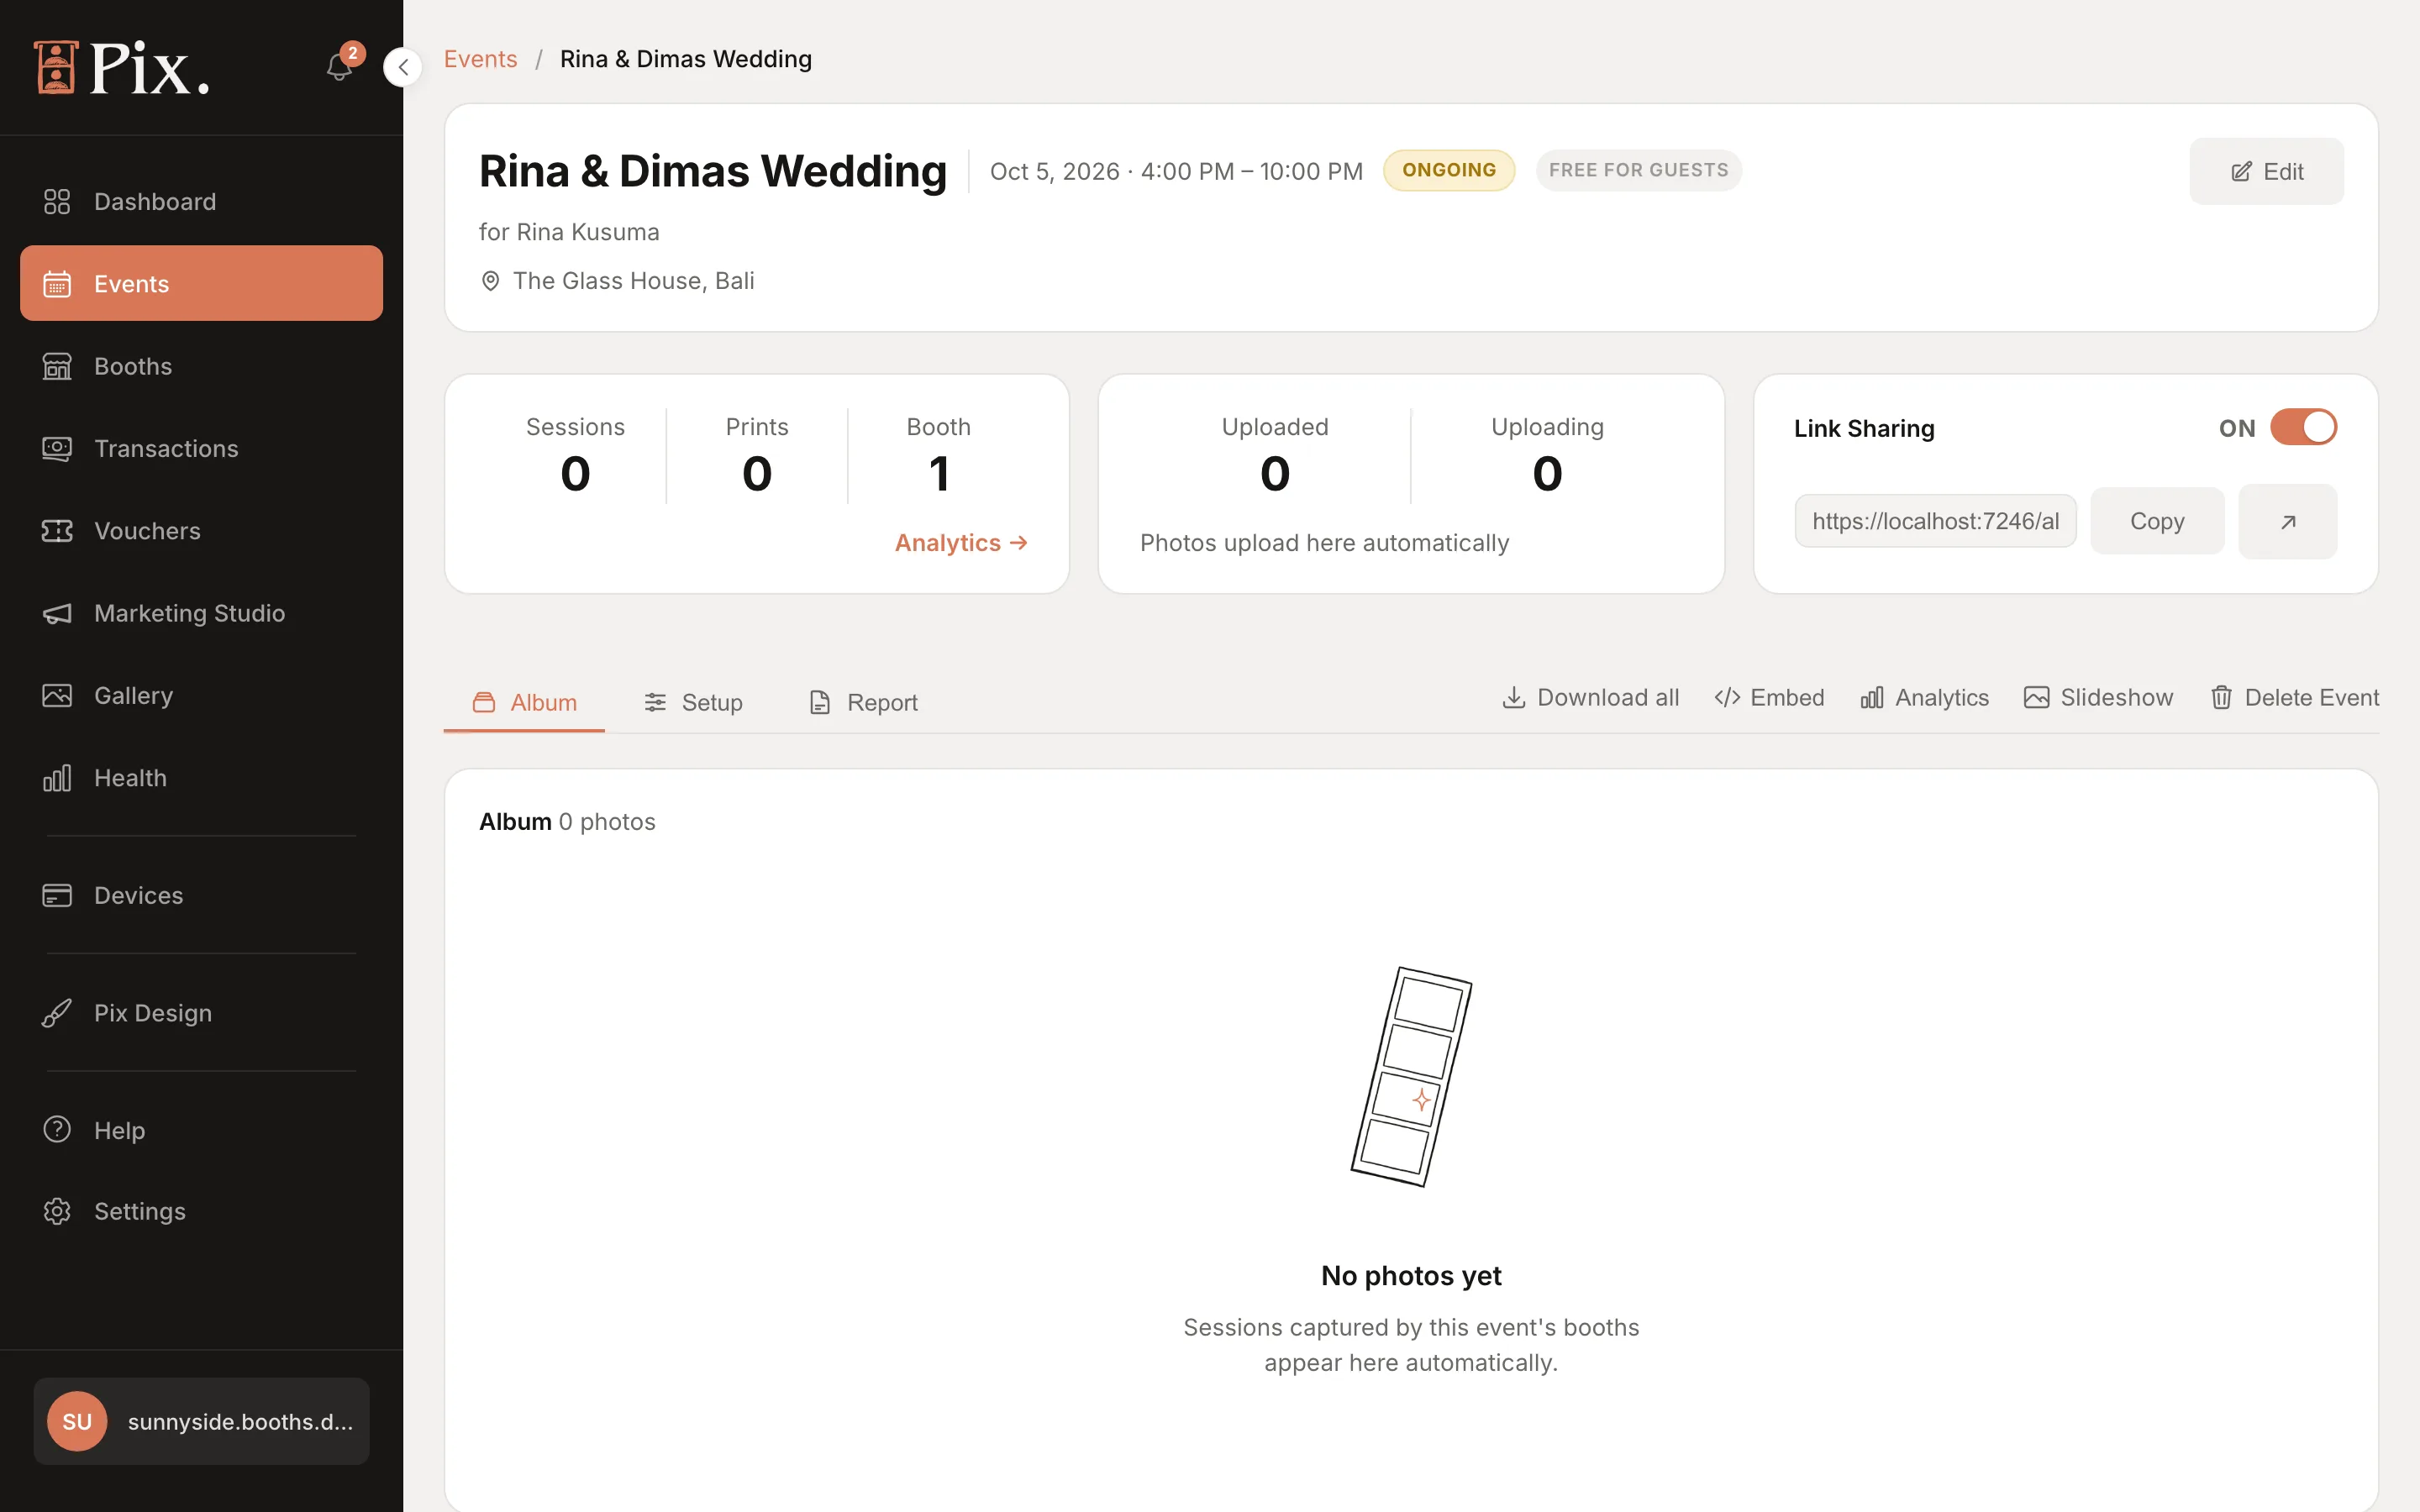
The header shows the name, dates and times, the status chip (ONGOING from creation, ENDED after the last date), a PAID SESSIONS or FREE FOR GUESTS badge, "for" followed by the client's name, the venue and Edit.
The overview cards count Sessions, Prints, Revenue (paid events only) and Booths (the event's computers), with an Analytics link to an activity chart; show the upload queue (Uploaded, Uploading, then "All photos uploaded"); and hold the Link Sharing switch with the album URL and Copy.
Link Sharing is on by default. The public album lives at pixture.io/album/<slug>; share the link or the QR with the client and their guests. Switch it off to make the album private. The booth always shows the album's QR code on the share screen.
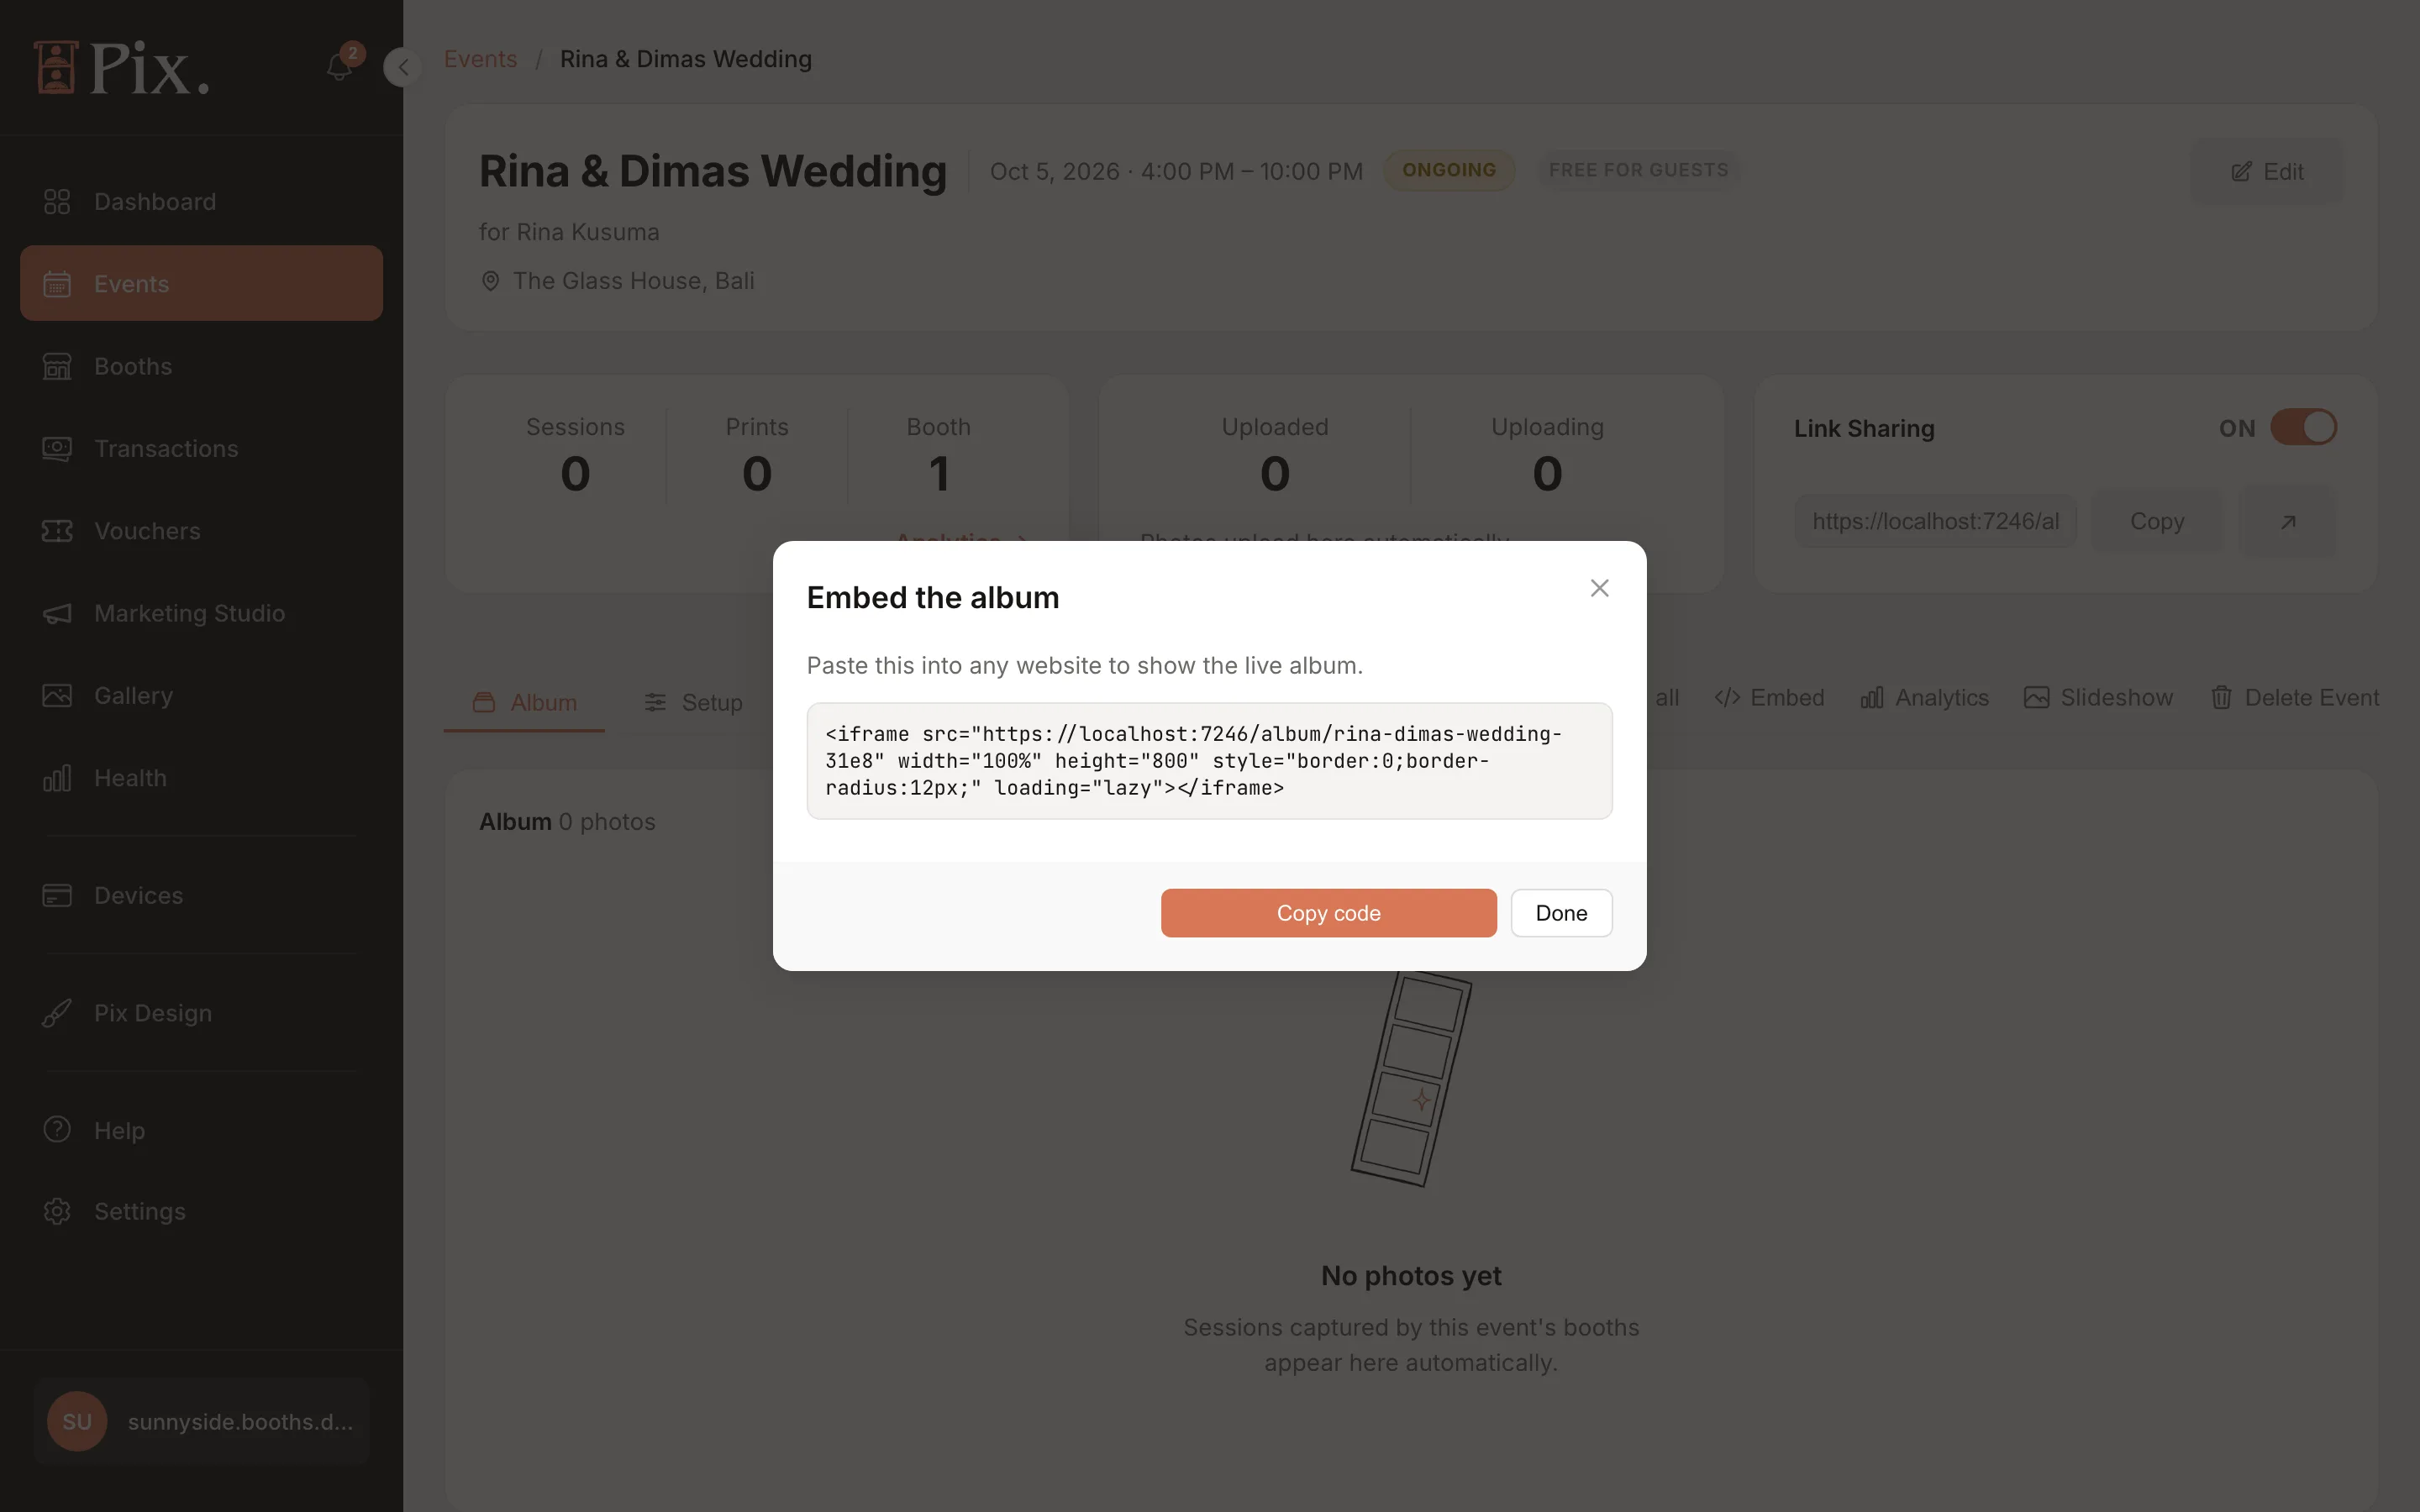
The toolbar has Download all (every photo as one zip), Embed (an iframe snippet for the client's website), Analytics (sessions and prints by hour), Slideshow (a full-screen loop of the album, shown while sharing is on) and Delete Event.
Tabs
Album
Everything captured during the event, newest first, with a filter by computer, Select and Delete.
Setup
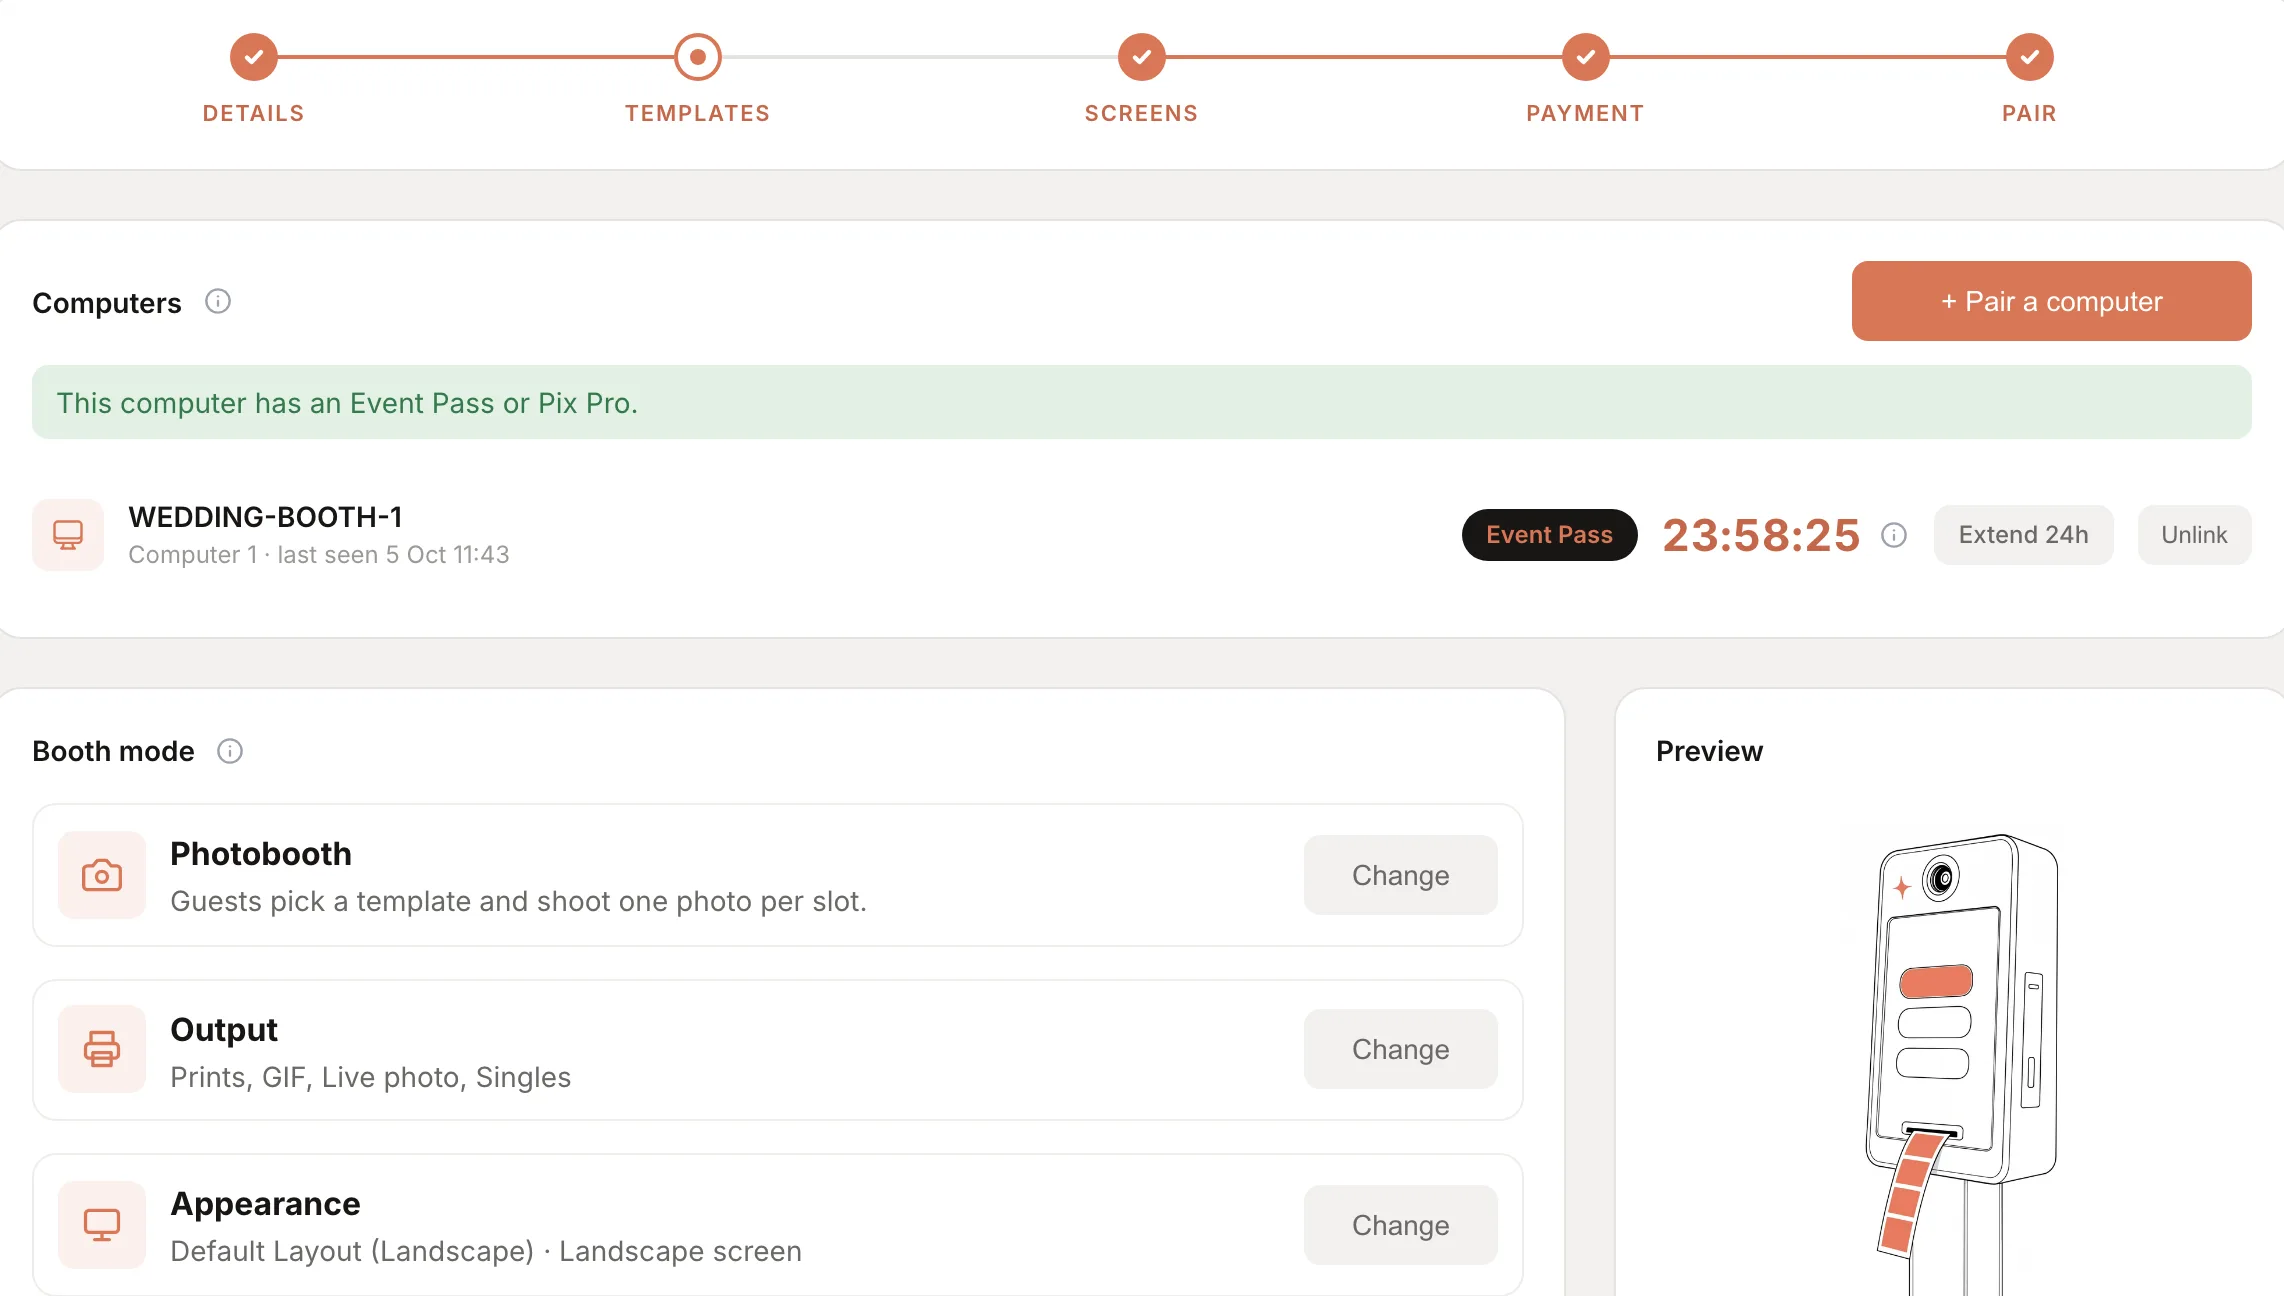
-
Everything on this tab saves as you go; a small "Saving…" then "Saved" confirms it.
-
Setup progress. The same five steps as the wizard. Click a step to jump to the part of the page where it is done. The bar disappears once every step is done.
-
Computers. Every computer paired to the event, with its state:
State Meaning Pix Pro The computer runs on Pix Pro Event Pass with a countdown An Event Pass is running; the countdown shows the hours left, and the info icon shows when it ends Needs license Paired, but it has no Event Pass or Pix Pro yet. The booth will not start sessions until it has one Not paired A pairing code was made but no computer used it yet Each row has Extend 24h (for a running Event Pass; with no unused pass it opens the Event Pass checkout), Use Pix Pro (on a Needs license row, when a Pix Pro is free in your account) and Unlink. A Not paired row, named "Waiting for a computer", has Show code. Once a computer is paired, a line above the list says "This computer has an Event Pass or Pix Pro." (or "All N computers have an Event Pass or Pix Pro."), or "N computers need an Event Pass or Pix Pro." with Buy license. On a multi-day event it counts an Event Pass per computer for each day left, so a computer with a running pass can still be counted as short.
Before any computer is paired the card reads "No computers paired yet": "Pair the computers you'll run at this event. Each one needs an Event Pass or Pix Pro."
-
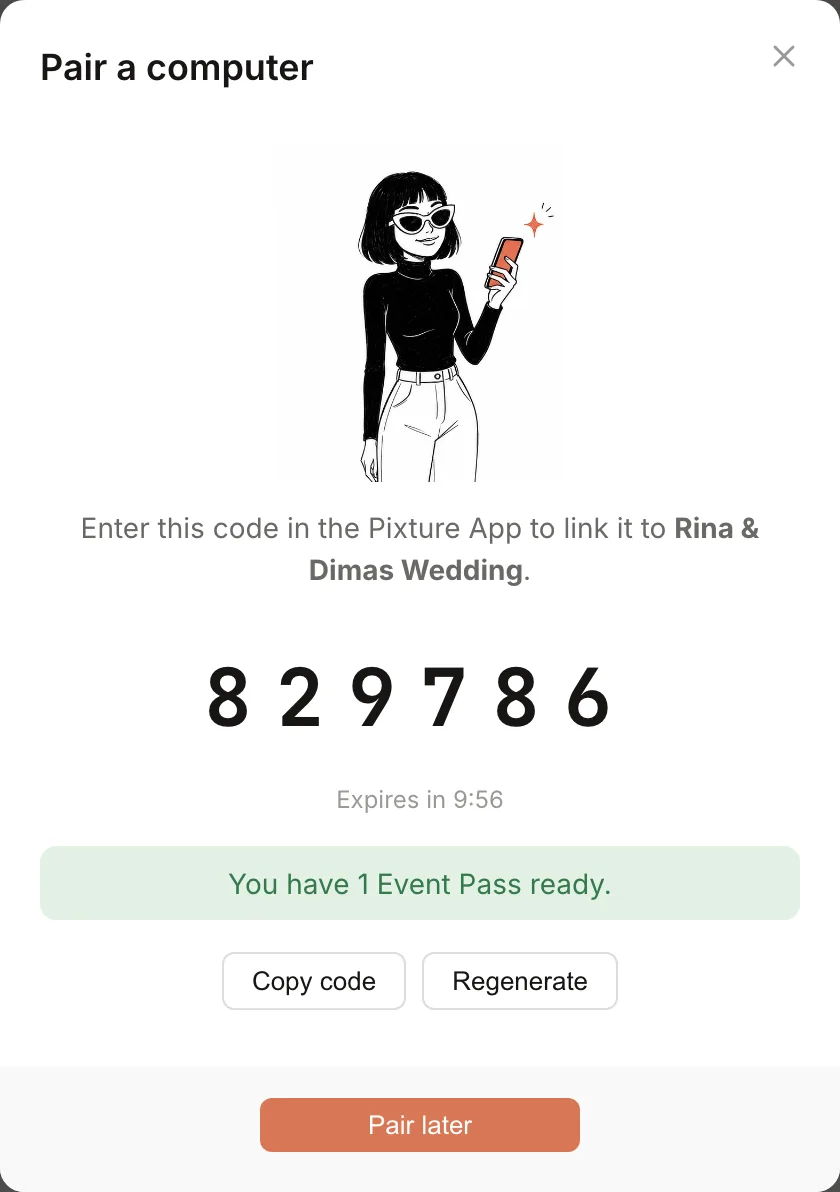
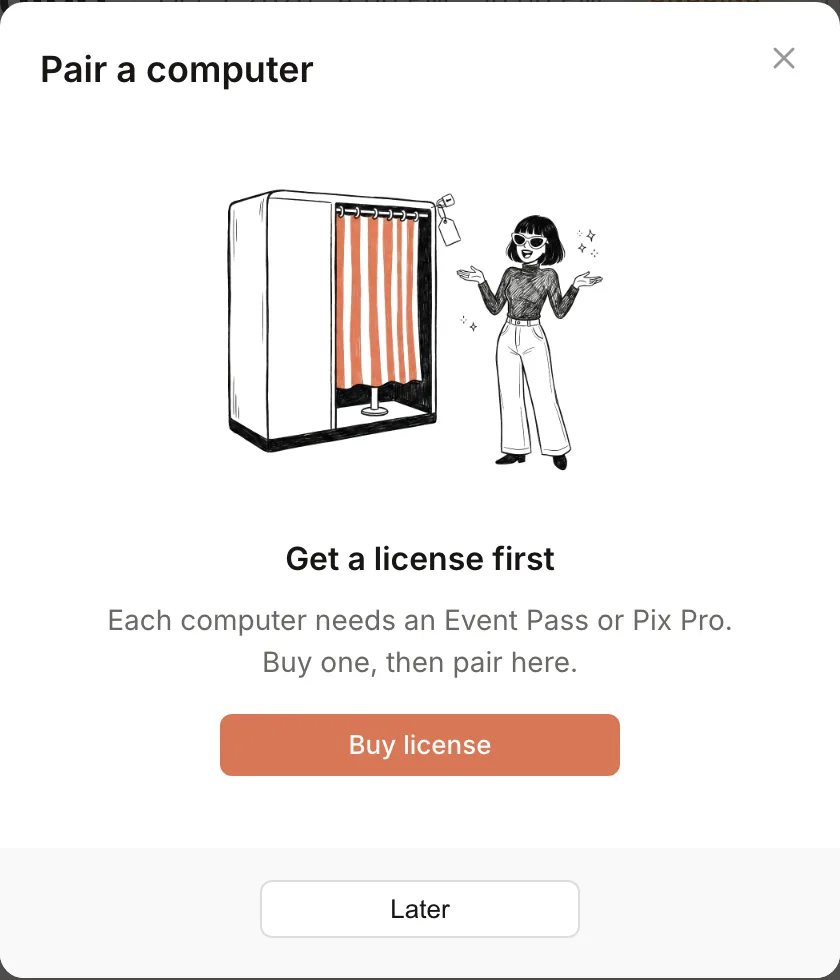
+ Pair a computer. Opens the Pair a computer popup with a 6-digit code: "Enter this code in the Pixture App to link it to" your event, with Copy code, Regenerate and Pair later. A line under the code names the license waiting for it, for example "You have 1 Event Pass ready." A code is only given when a license is available for the computer: an unused Event Pass, or a Pix Pro that is on no computer. Otherwise the popup says "Get a license first": "Each computer needs an Event Pass or Pix Pro. Buy one, then pair here.", with Buy license and Later. After you pay, the dashboard brings you back to the event and the popup shows "Finishing your payment" until the license lands, then the code.
-
Booth mode, Output and Appearance. Each is a box showing the current choice, with Change. Appearance lists only screen designs made for the event's booth mode.
-
Template, Countdown, Mirror and Overlay (photo modes). Template reads "Assign at least 1 template. Until you do, guests at this event have nothing to pick." Add templates and + Manage Templates pick from your own templates; the Manage Templates popup's Browse template packs button opens Pixture's free template packs ("Choose a template"), when packs are available: each pack brings its print layouts, a GIF overlay and a matching booth look. The event's template set is exclusive: the booth's own templates are not offered while the event runs. Video shows its own settings instead; see Event Video Modes. Template opens with "Which designs guests can pick at this event. Assign at least one: booths on this event offer only these, not their own library." and a Preview card on the right. Countdown is a slider from 1 to 10 seconds before each shot. Mirror is "Mirror captured photos": it mirrors the live preview and the saved result, like a selfie. Overlay is None or one of your GIF/Video overlay designs.
Report
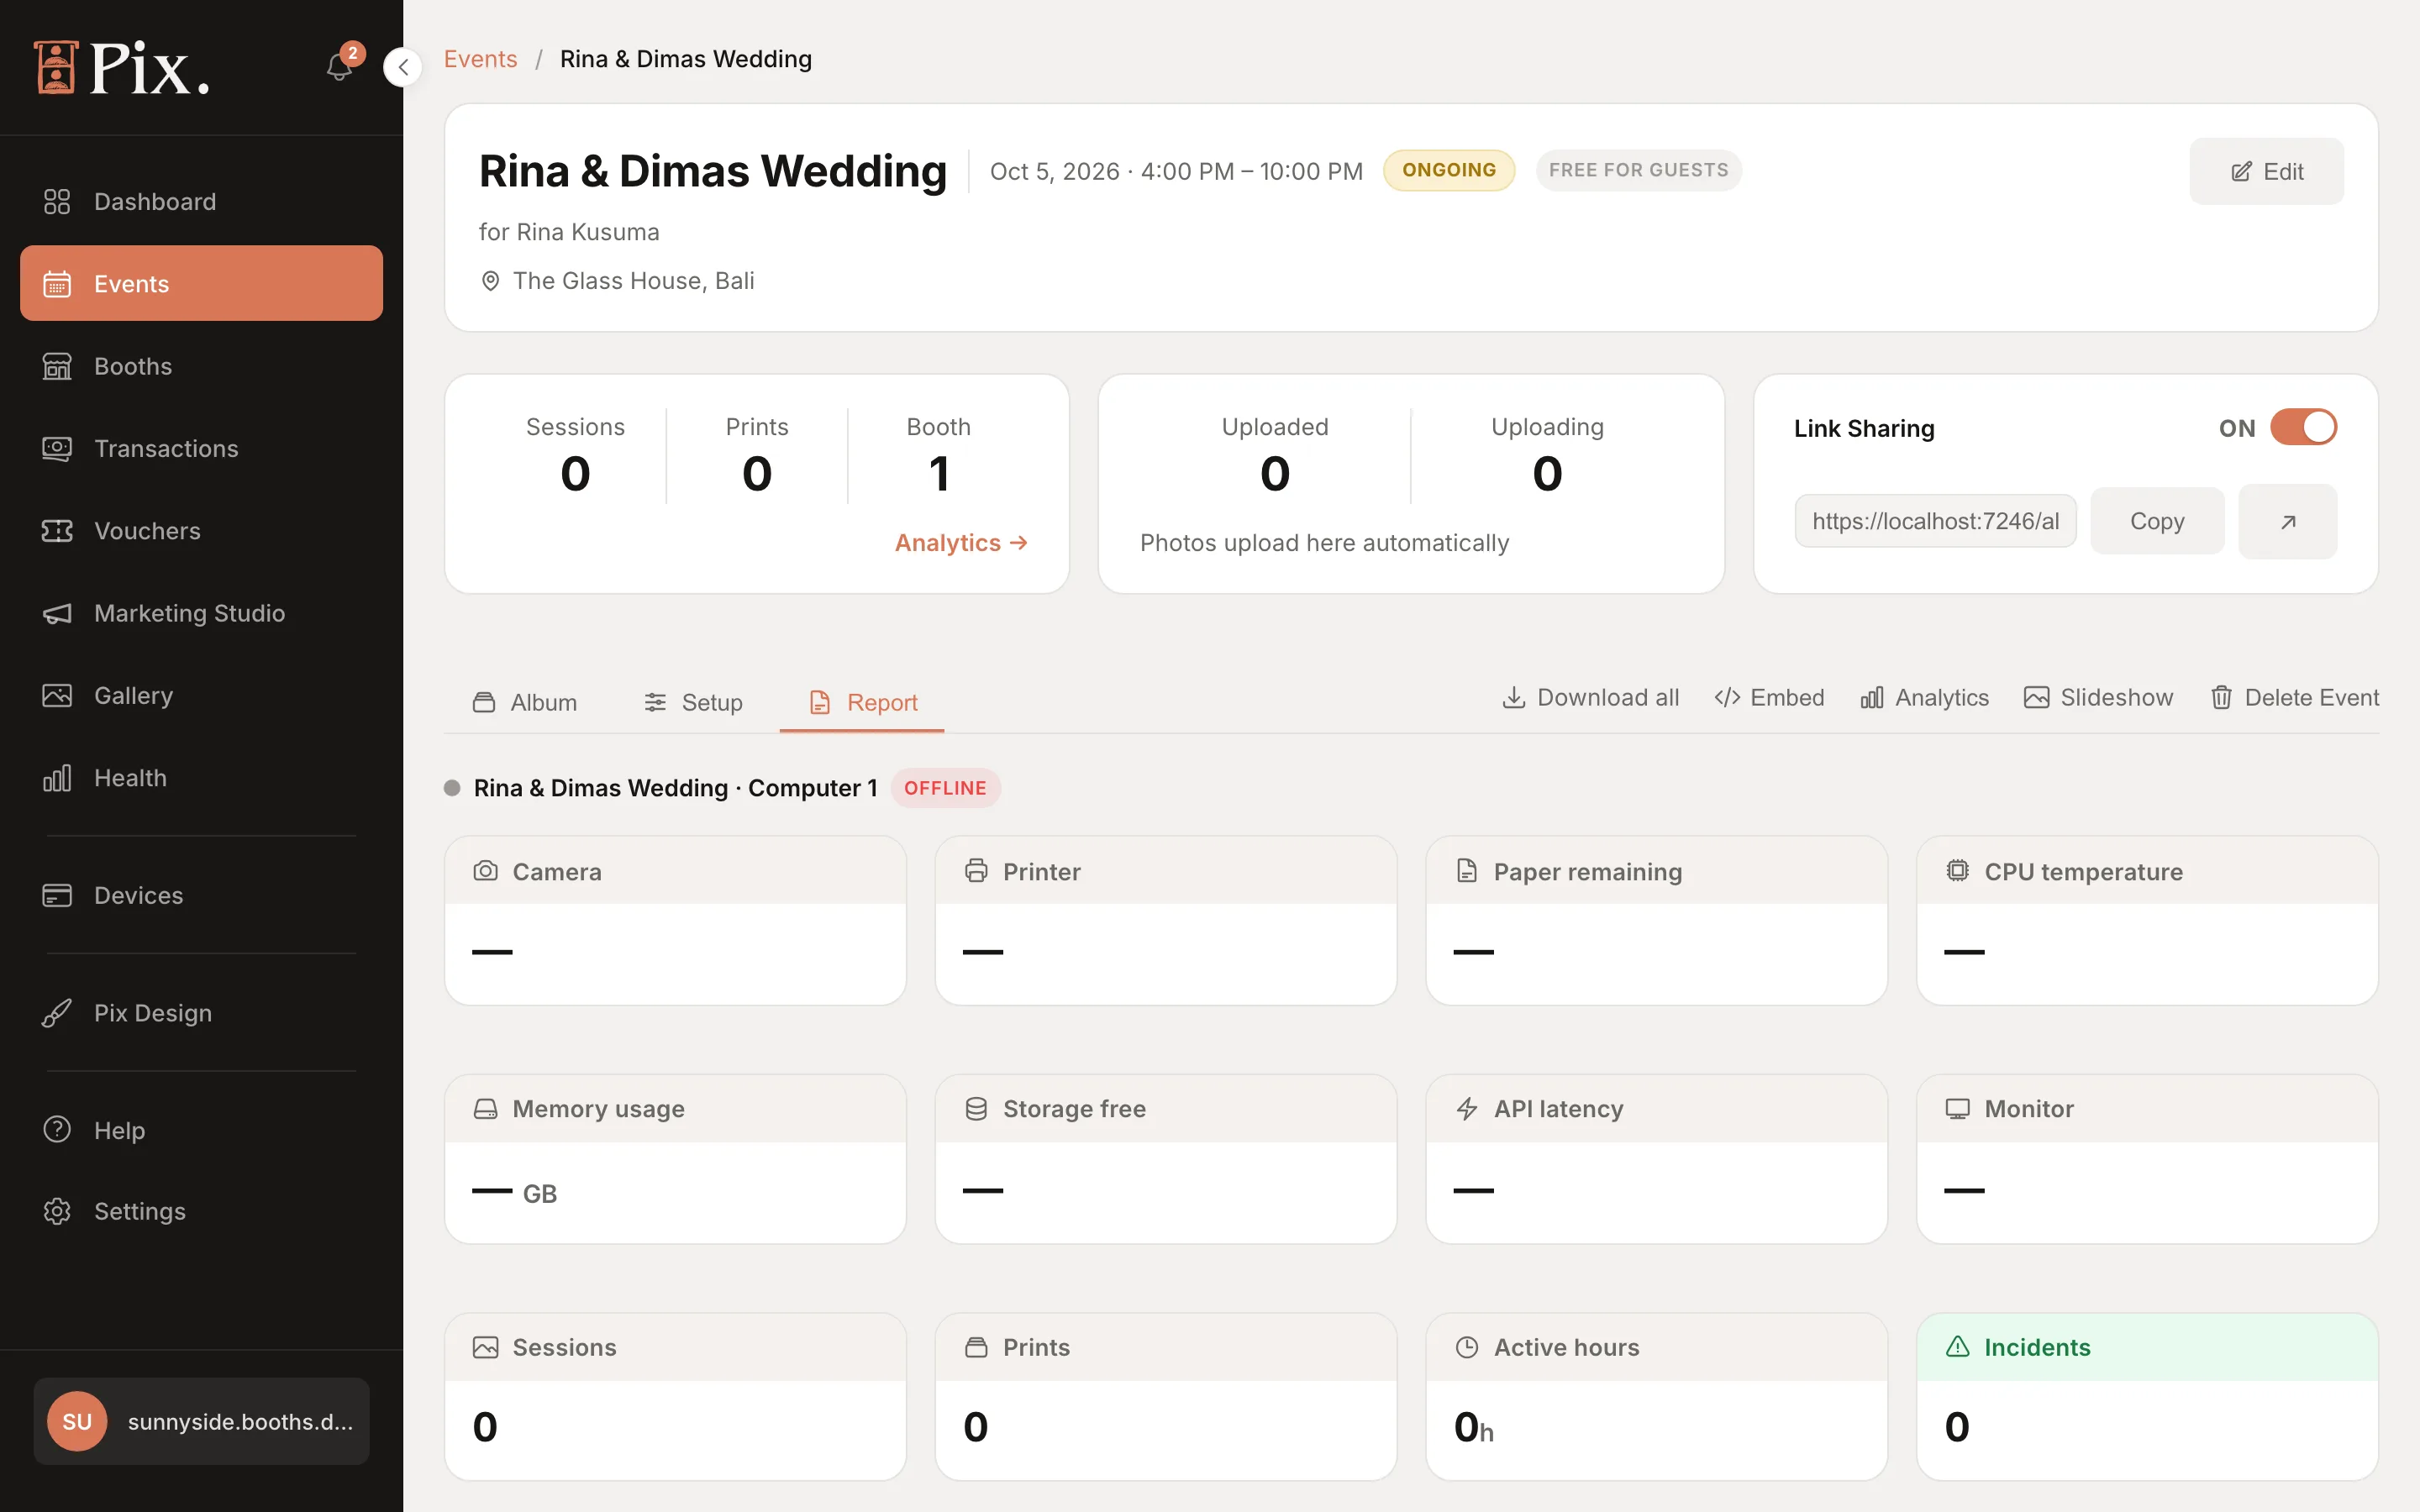
Per-computer health for the event, with an Online or Offline badge and the app version: camera, printer, paper remaining, CPU temperature, memory, free storage, API latency, monitor, sessions, prints, active hours, incidents and the printer unit, followed by "Incidents during the event".
Editing and Deleting
Edit opens the Edit Event modal with the name, client, dates, times, venue, Pay Per Session prices and, once Pay Per Session is on, the payment gateway. It is available until the event ends. Computers, booth mode, outputs, screen design and templates are changed on the Setup tab. Delete Event on the event page, or Select then Delete on the list, works at any time, even while the event is live. Its computers are unlinked (an Event Pass or Pix Pro stays on them) and the photos stay in your Gallery; only the event and its album go away.
Licenses, Pricing and Transactions
- Each computer on an event needs a license: Pix Pro, or an Event Pass, which is 24 hours of Pix Pro on one computer, starting when you use it at the booth. Buy license opens a choice between Event Pass (for an event) and Pix Pro (for regular use), each with its own checkout on the Devices page. A computer without a license stays paired but does not start sessions; there is no watermarked mode on an event.
- At the booth, a computer that needs a license shows "Use an Event Pass for today?" with Use Event Pass, or Use Pix Pro if a Pix Pro is free in your account. See Pix Pro on the Booth.
- Longer events. When an Event Pass is running, Extend 24h on its row adds 24 hours from one of your unused Event Passes, or opens the Event Pass checkout if you have none.
- Bringing a computer that already has Pix Pro: unlink it from its booth on the dashboard first. That puts its Pix Pro back in your account, so the event shows a pairing code and the computer pairs in on its own Pix Pro.
- While the event runs, its session price, packages and gateway replace the booth's own. Tax, fees and currency stay the booth's. The booth shows the Payment screen when the event charges and skips it when the event is free.
- Photo sessions captured during the event carry an event chip on Transactions, so the client's takings are easy to pull out.
- After the event. The night after its last date, the event's computers are unlinked and the booth app returns to its pairing screen. Their Event Pass or Pix Pro stays on them; pair each one to its next booth or event with a code.