Let Guests Design Their Own Frame (Frame Lab)
In this tutorial you will switch on Frame Lab for a booth, set its price, share the guest link, and follow a guest all the way from designing a frame on their phone to paying, receiving a voucher code and using it at the booth. Allow about 20 minutes. Frame Lab needs Pix Pro on the booth's computer.
Frame Lab is a page guests open on their phone. They build a frame in a small studio (colours, layout, stickers and a caption) or upload a print-ready PNG, pay for it, and get a single-use voucher code. At the booth they type the code on the Payment screen, the booth loads their frame as the only template, and the session prints and shares on their own design.
Before You Start
- Pix Pro on the booth's computer. On Pix Starter the switch is locked with a Pix Pro badge.
- A payment gateway connected under Settings > Payment Gateway. Frame Lab charges the guest by QR code payment through your gateway (QRIS in Indonesia), and the gateway must charge in the booth's currency. See Accept Payments at the Booth.
- At least one print template assigned to the booth. The guest's frame is built at that template's print size.
- A session price on the booth and Payment on this booth switched on. The voucher is redeemed on the booth's Payment screen, so a booth that runs free sessions cannot accept it.
Step 1: Switch Frame Lab on and set the price
- Open Marketing Studio and click the Frame Lab tab.
- Pick the booth in the Booth picker at the top.
- Turn on the Frame Lab switch in the "Per this booth" card.
- Enter the Price guests pay per frame, in the booth's currency.
- Leave Canvas (px) as it is. The guest's frame takes its size from the booth's assigned template; this value is only used when the booth has no template.
- Set Voucher expiry in hours (1 to 168). The clock starts when the guest pays.
- Click Save changes. To copy the same settings to every booth, click Apply to all booths.
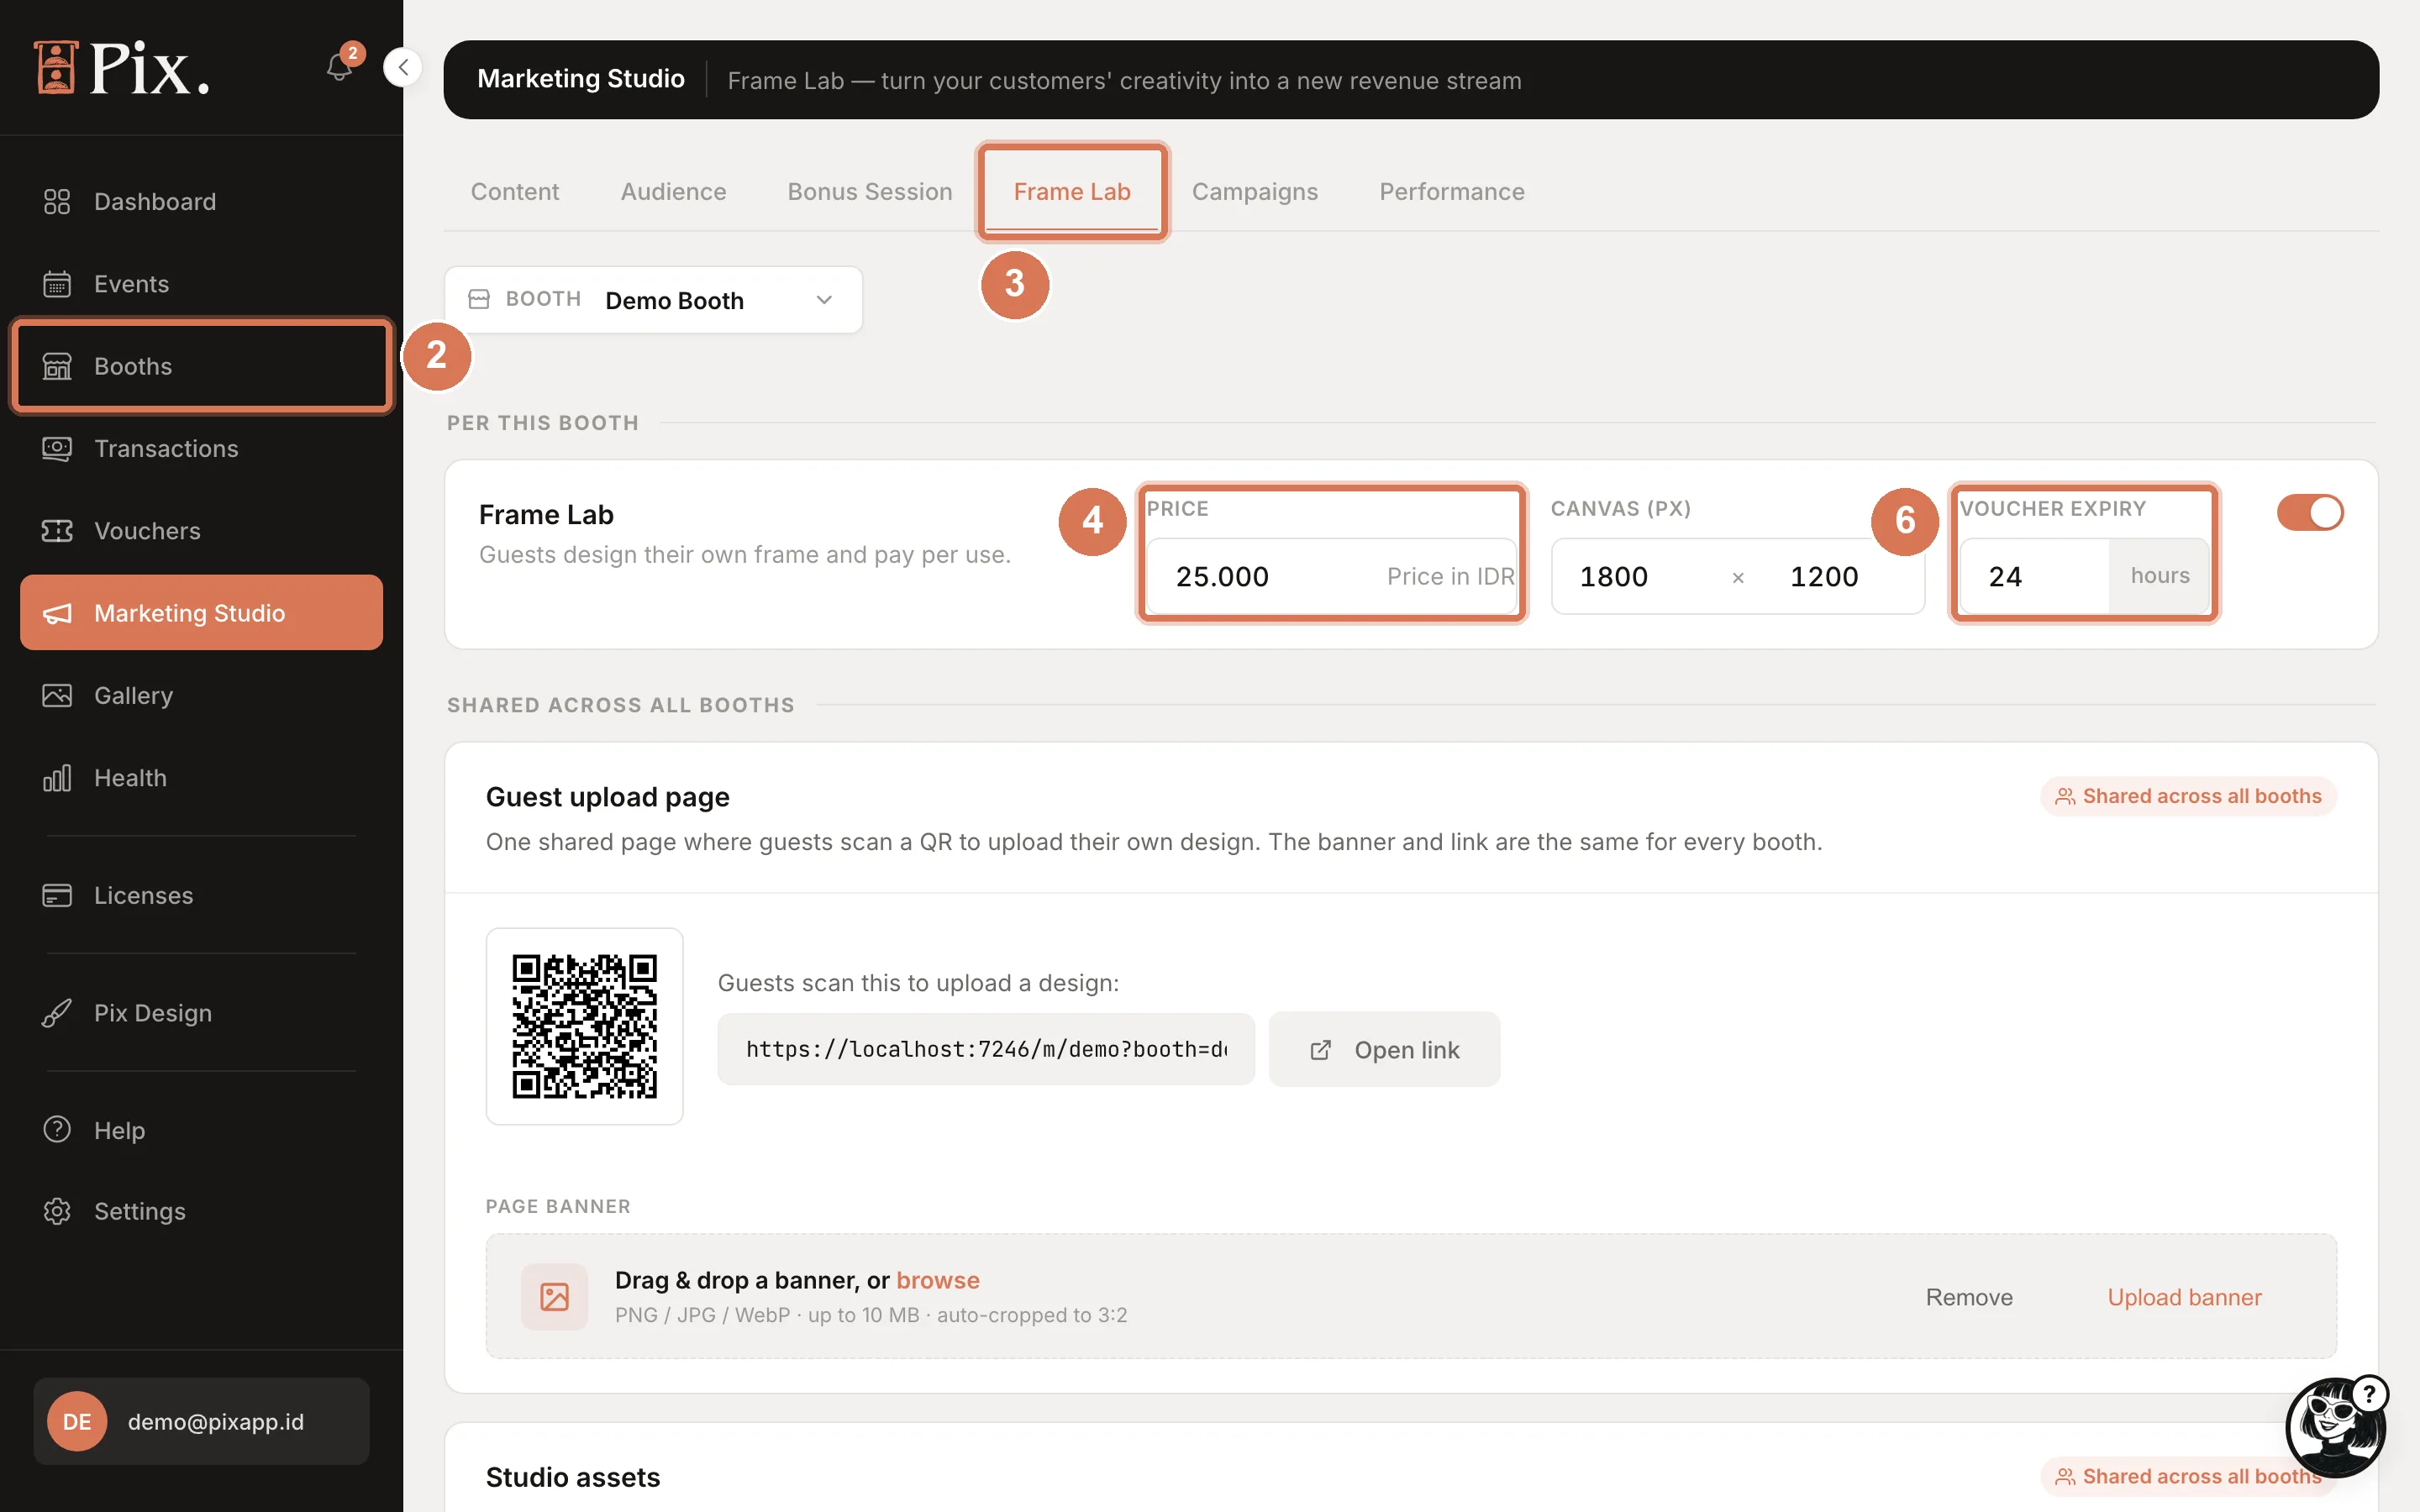
The switch refuses to turn on until the booth has a template ("Assign at least one active template to this booth before enabling Frame Lab."). The same settings also live on the booth page: click the Frame Lab cell in the booth's property grid.
Step 2: Add textures and graphics for the studio (optional)
Under Studio assets in the same tab, choose Texture or Graphic and click Upload asset (PNG, JPG or WebP, up to 5 MB, up to 60 assets per account). Textures appear as background patterns in the guest studio; graphics appear as stickers the guest can place, resize and rotate. They are shared by every booth. They do not affect guests who upload their own finished PNG.
Step 3: Share the guest link
- Still on the Frame Lab tab, scroll to Guest upload page. The QR code and link open Frame Lab for the booth you picked, in the form
pixture.io/m/your-organisation?booth=…. - Click Open link to test it on your own phone, or print the QR and put it on the booth.
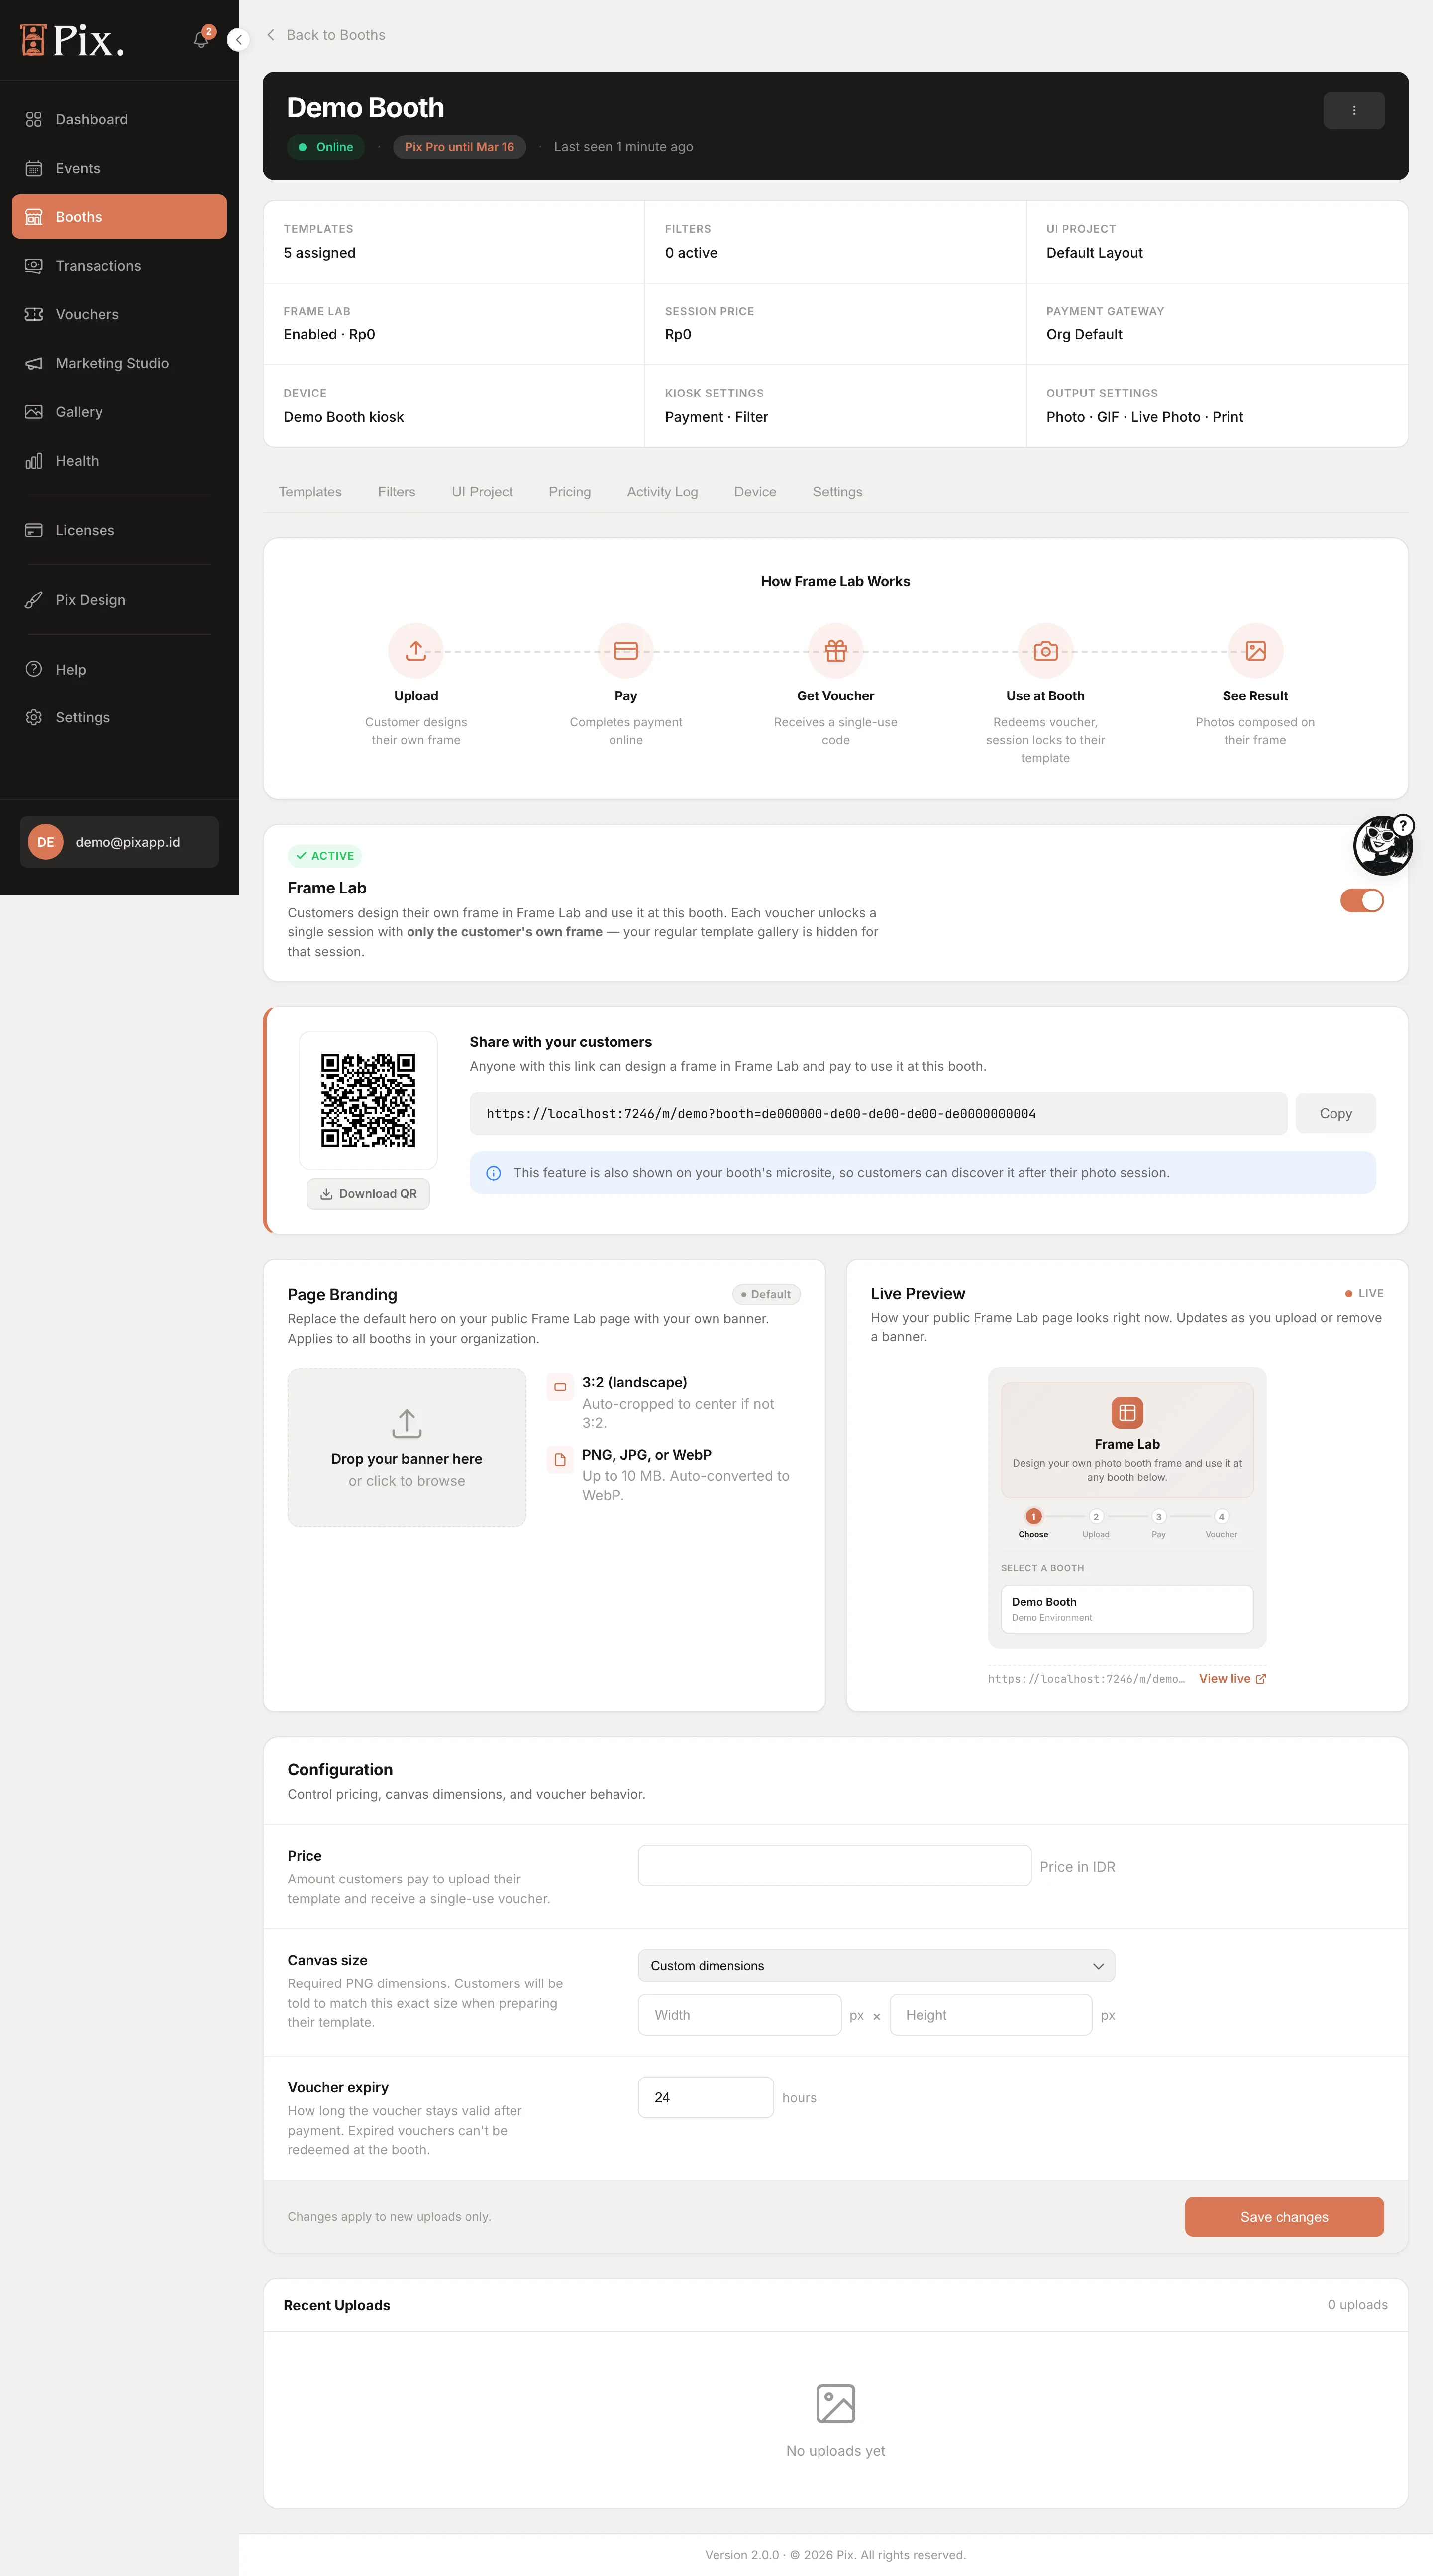
The booth's own Frame Lab page has the same link with Download QR. Guests also find a Frame Lab link on the share page of any photo session from that booth while Frame Lab is on.
Step 4: What the guest does, building a frame in the studio
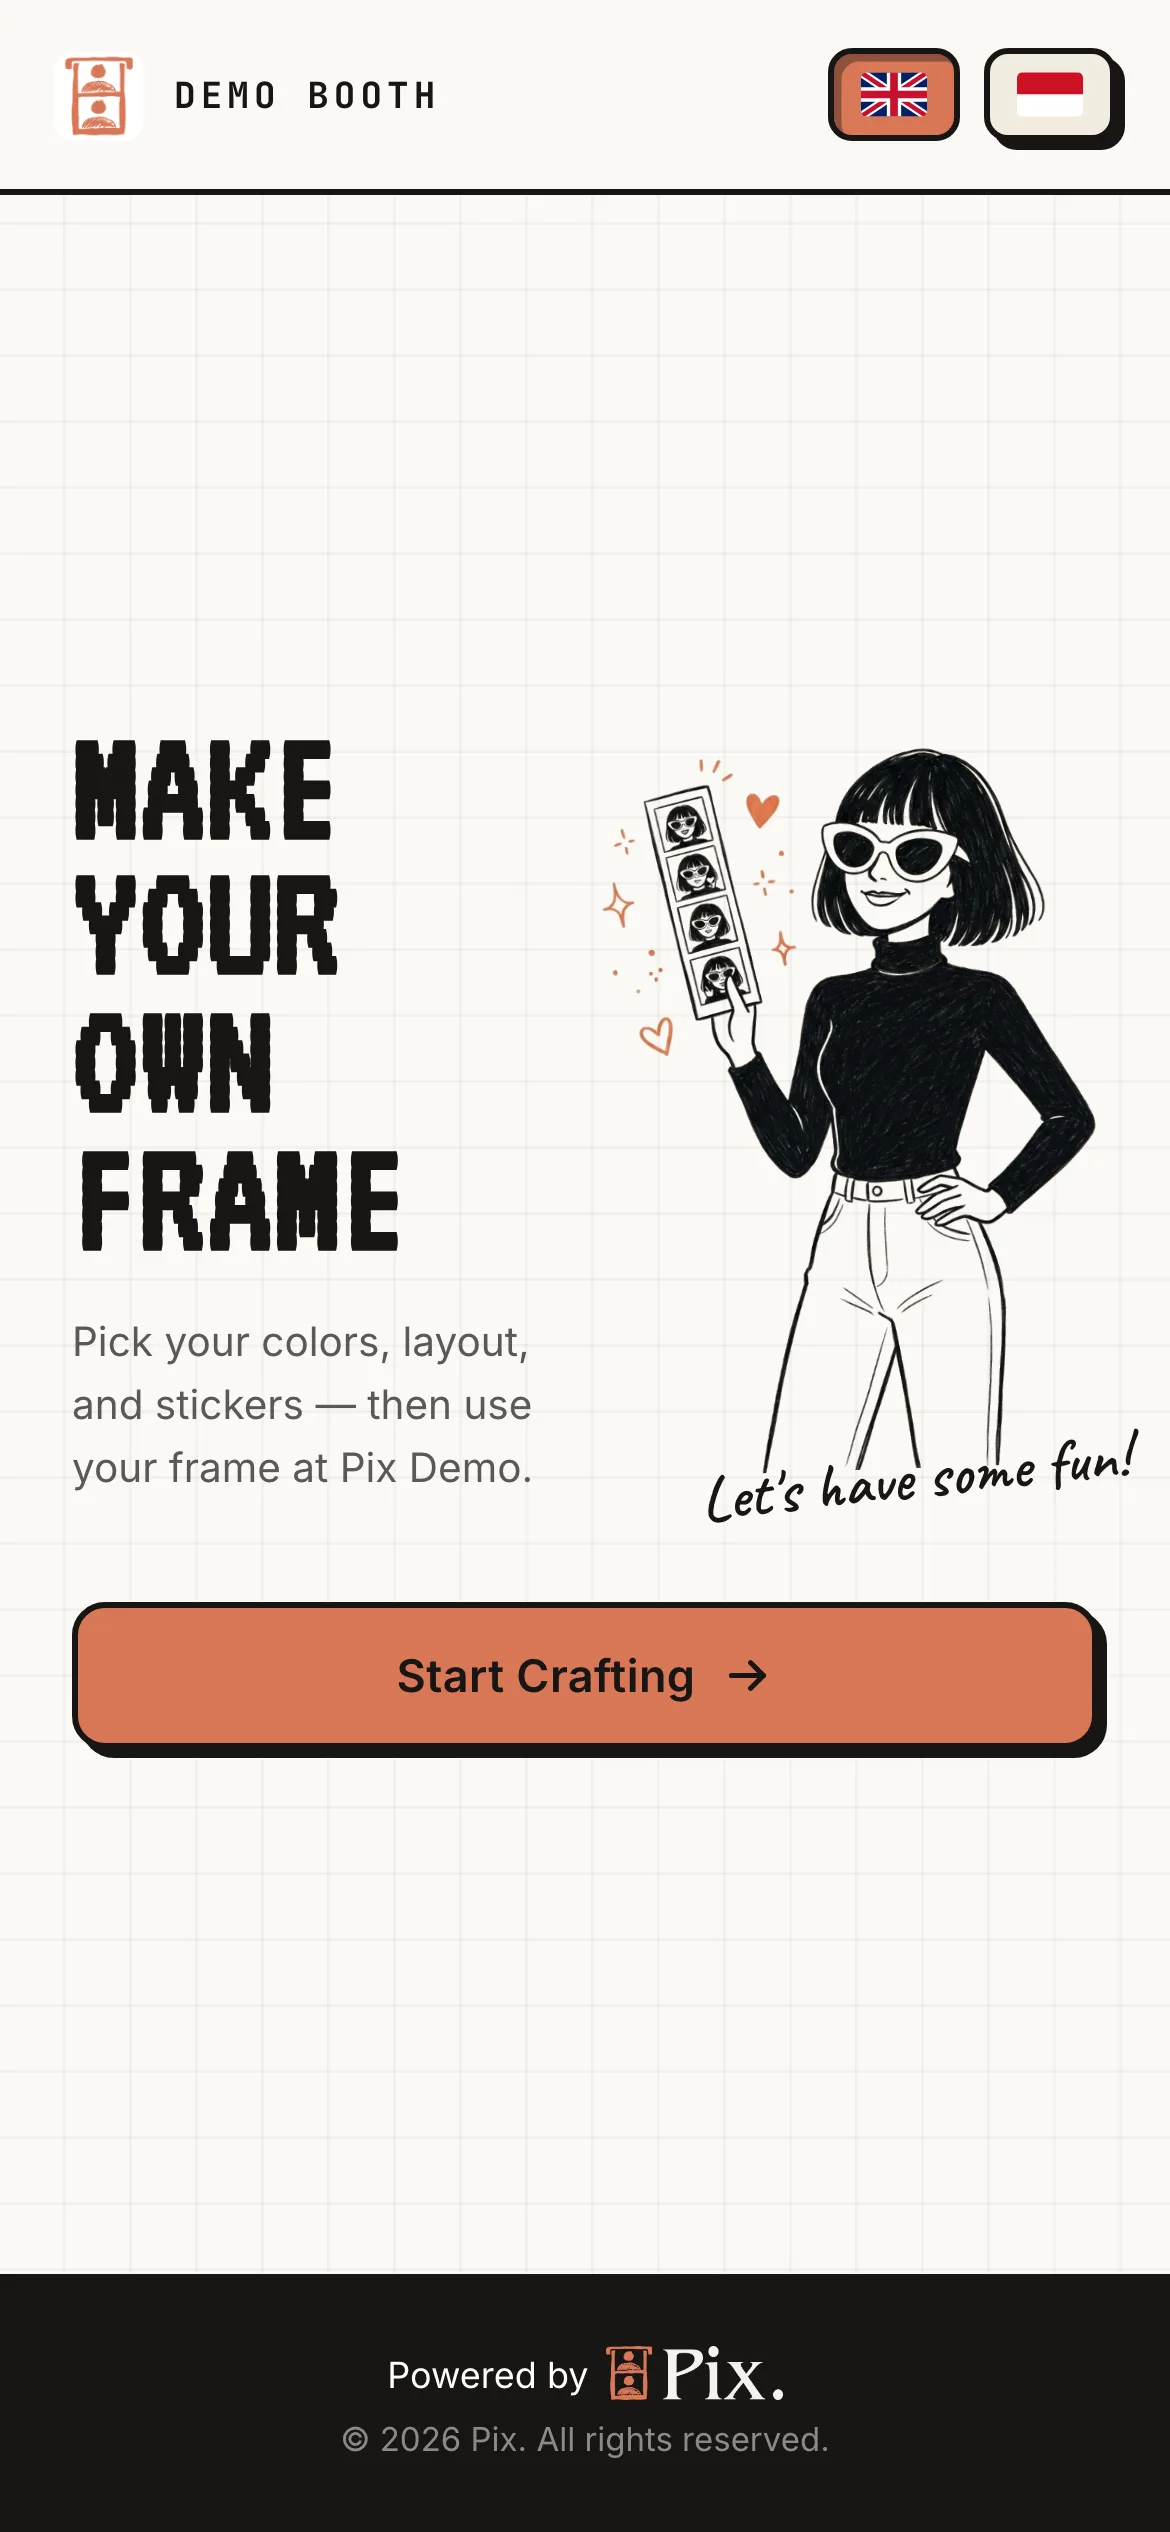
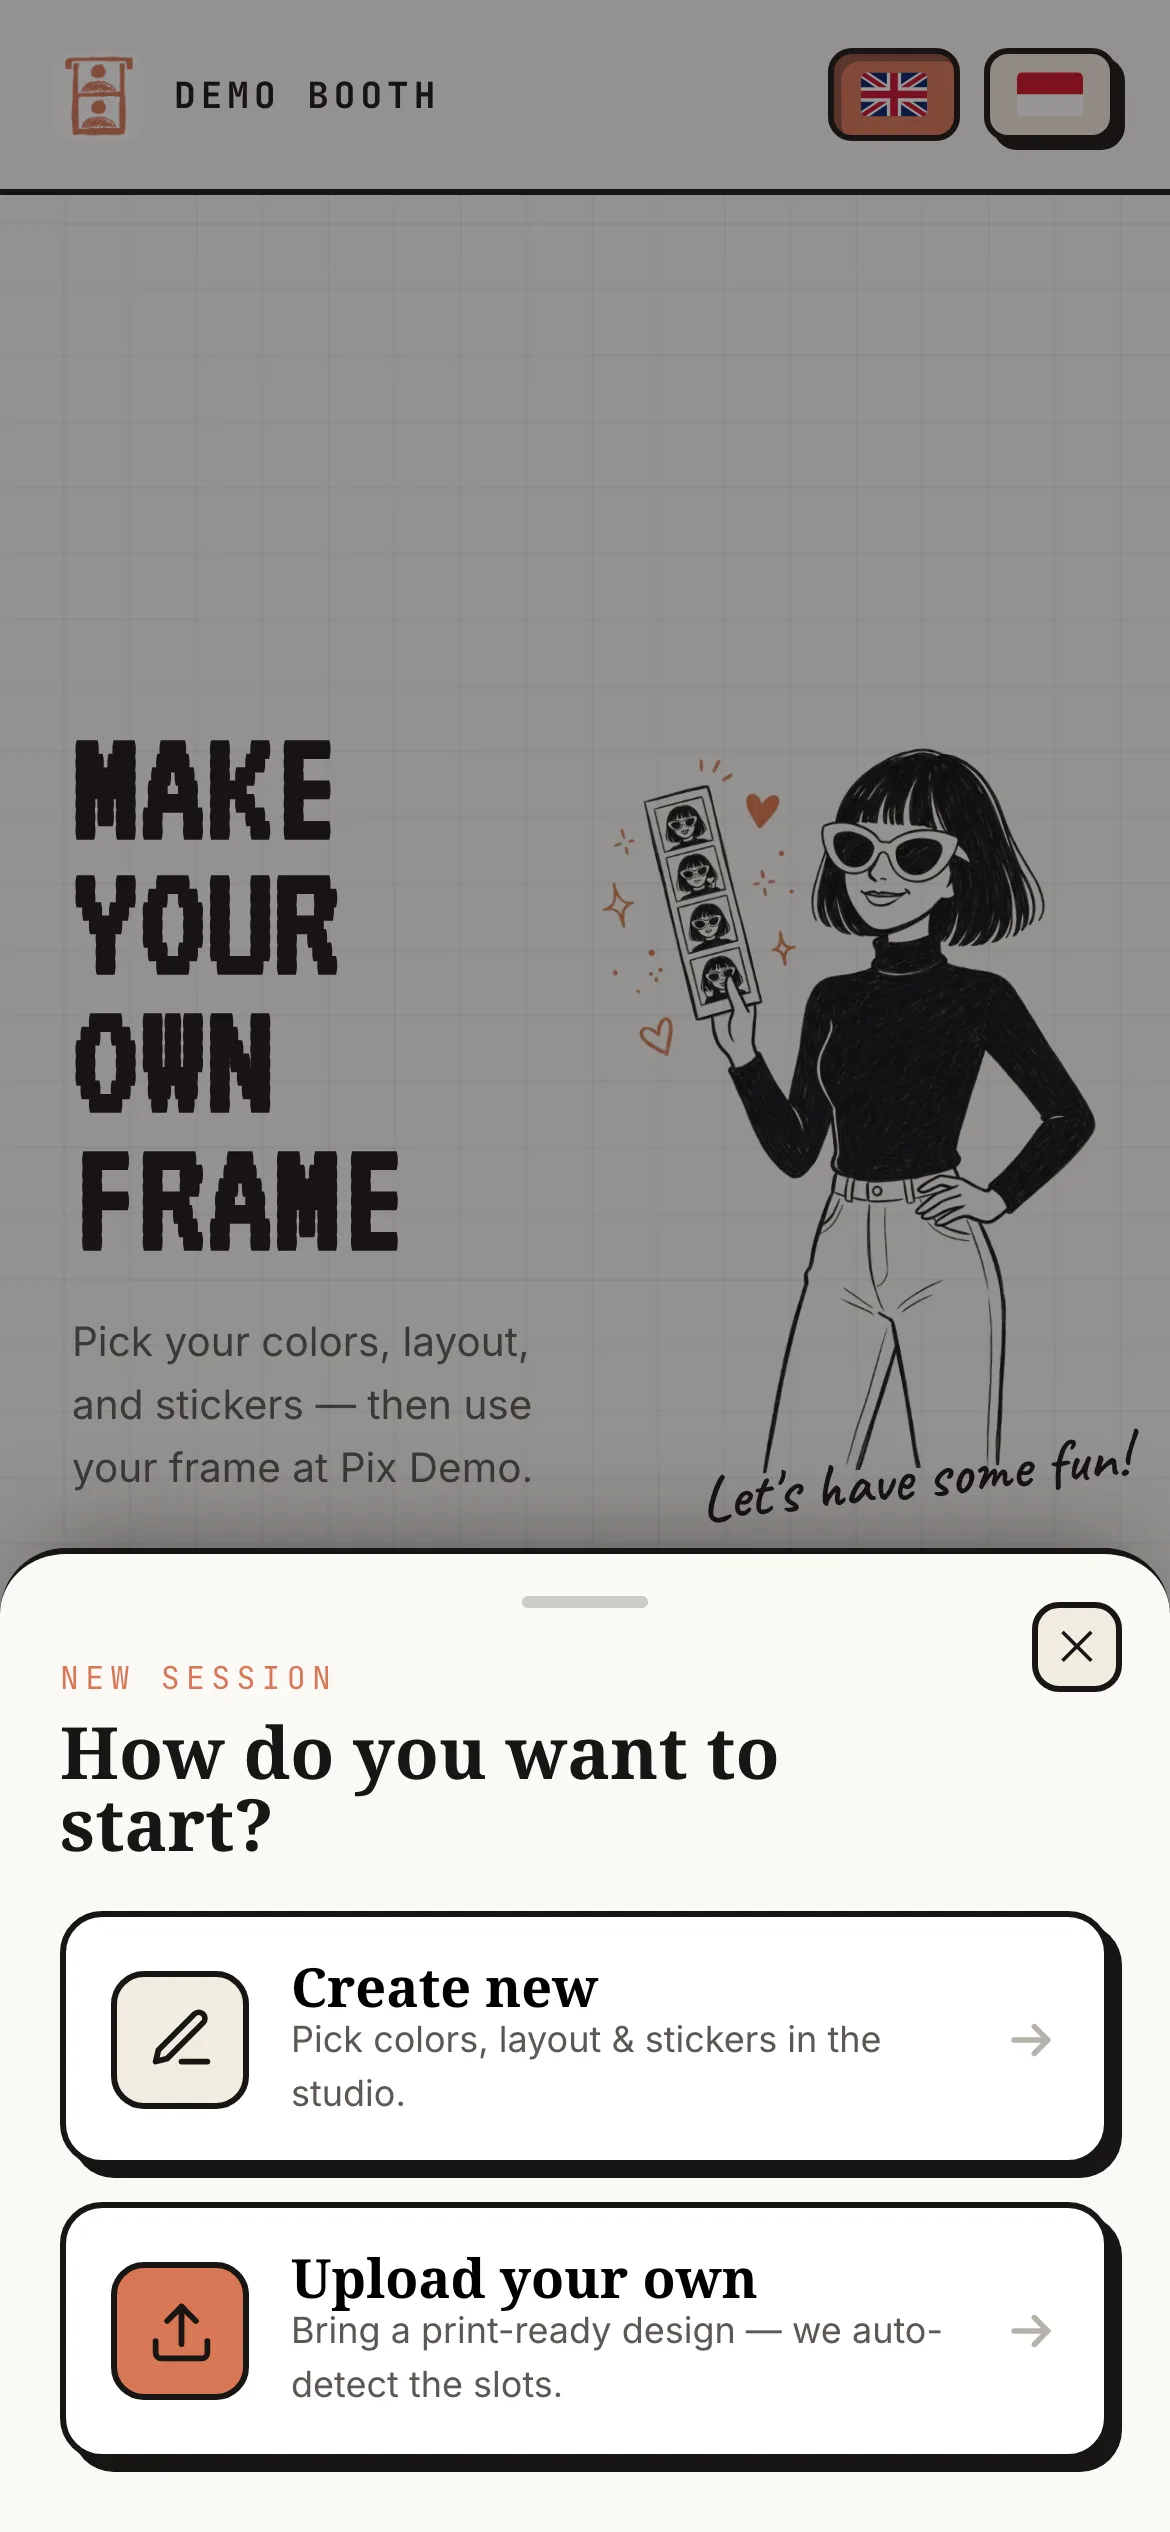
The page opens with Make your own frame and a Start Crafting button. Tapping it asks How do you want to start? with two choices: Create new (the studio) or Upload your own (a finished PNG, covered in Step 5).
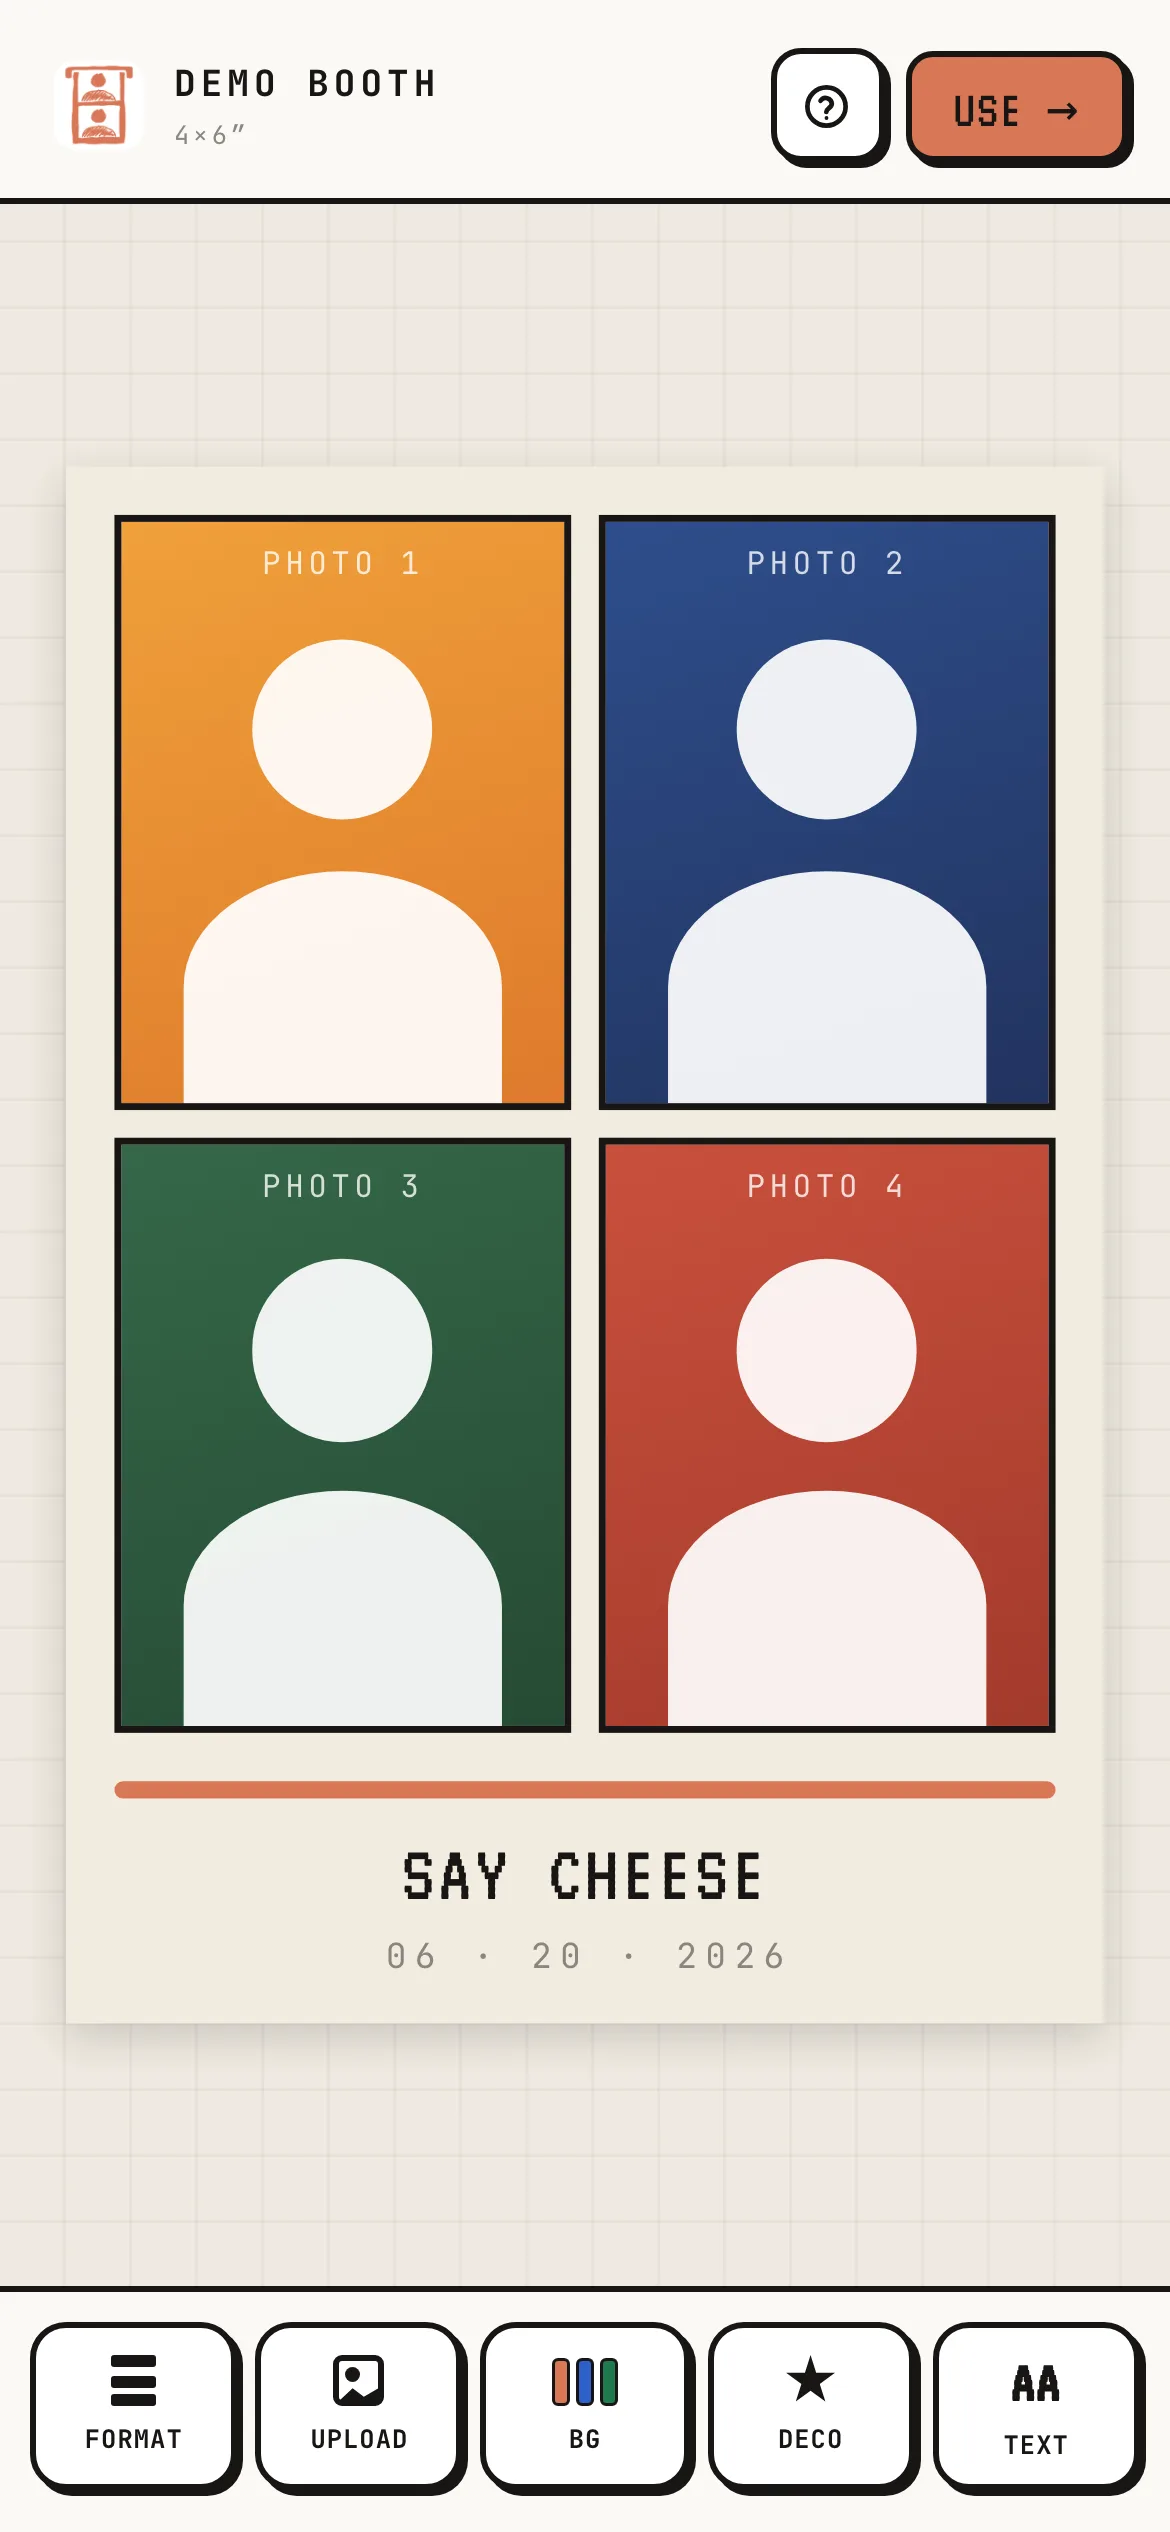
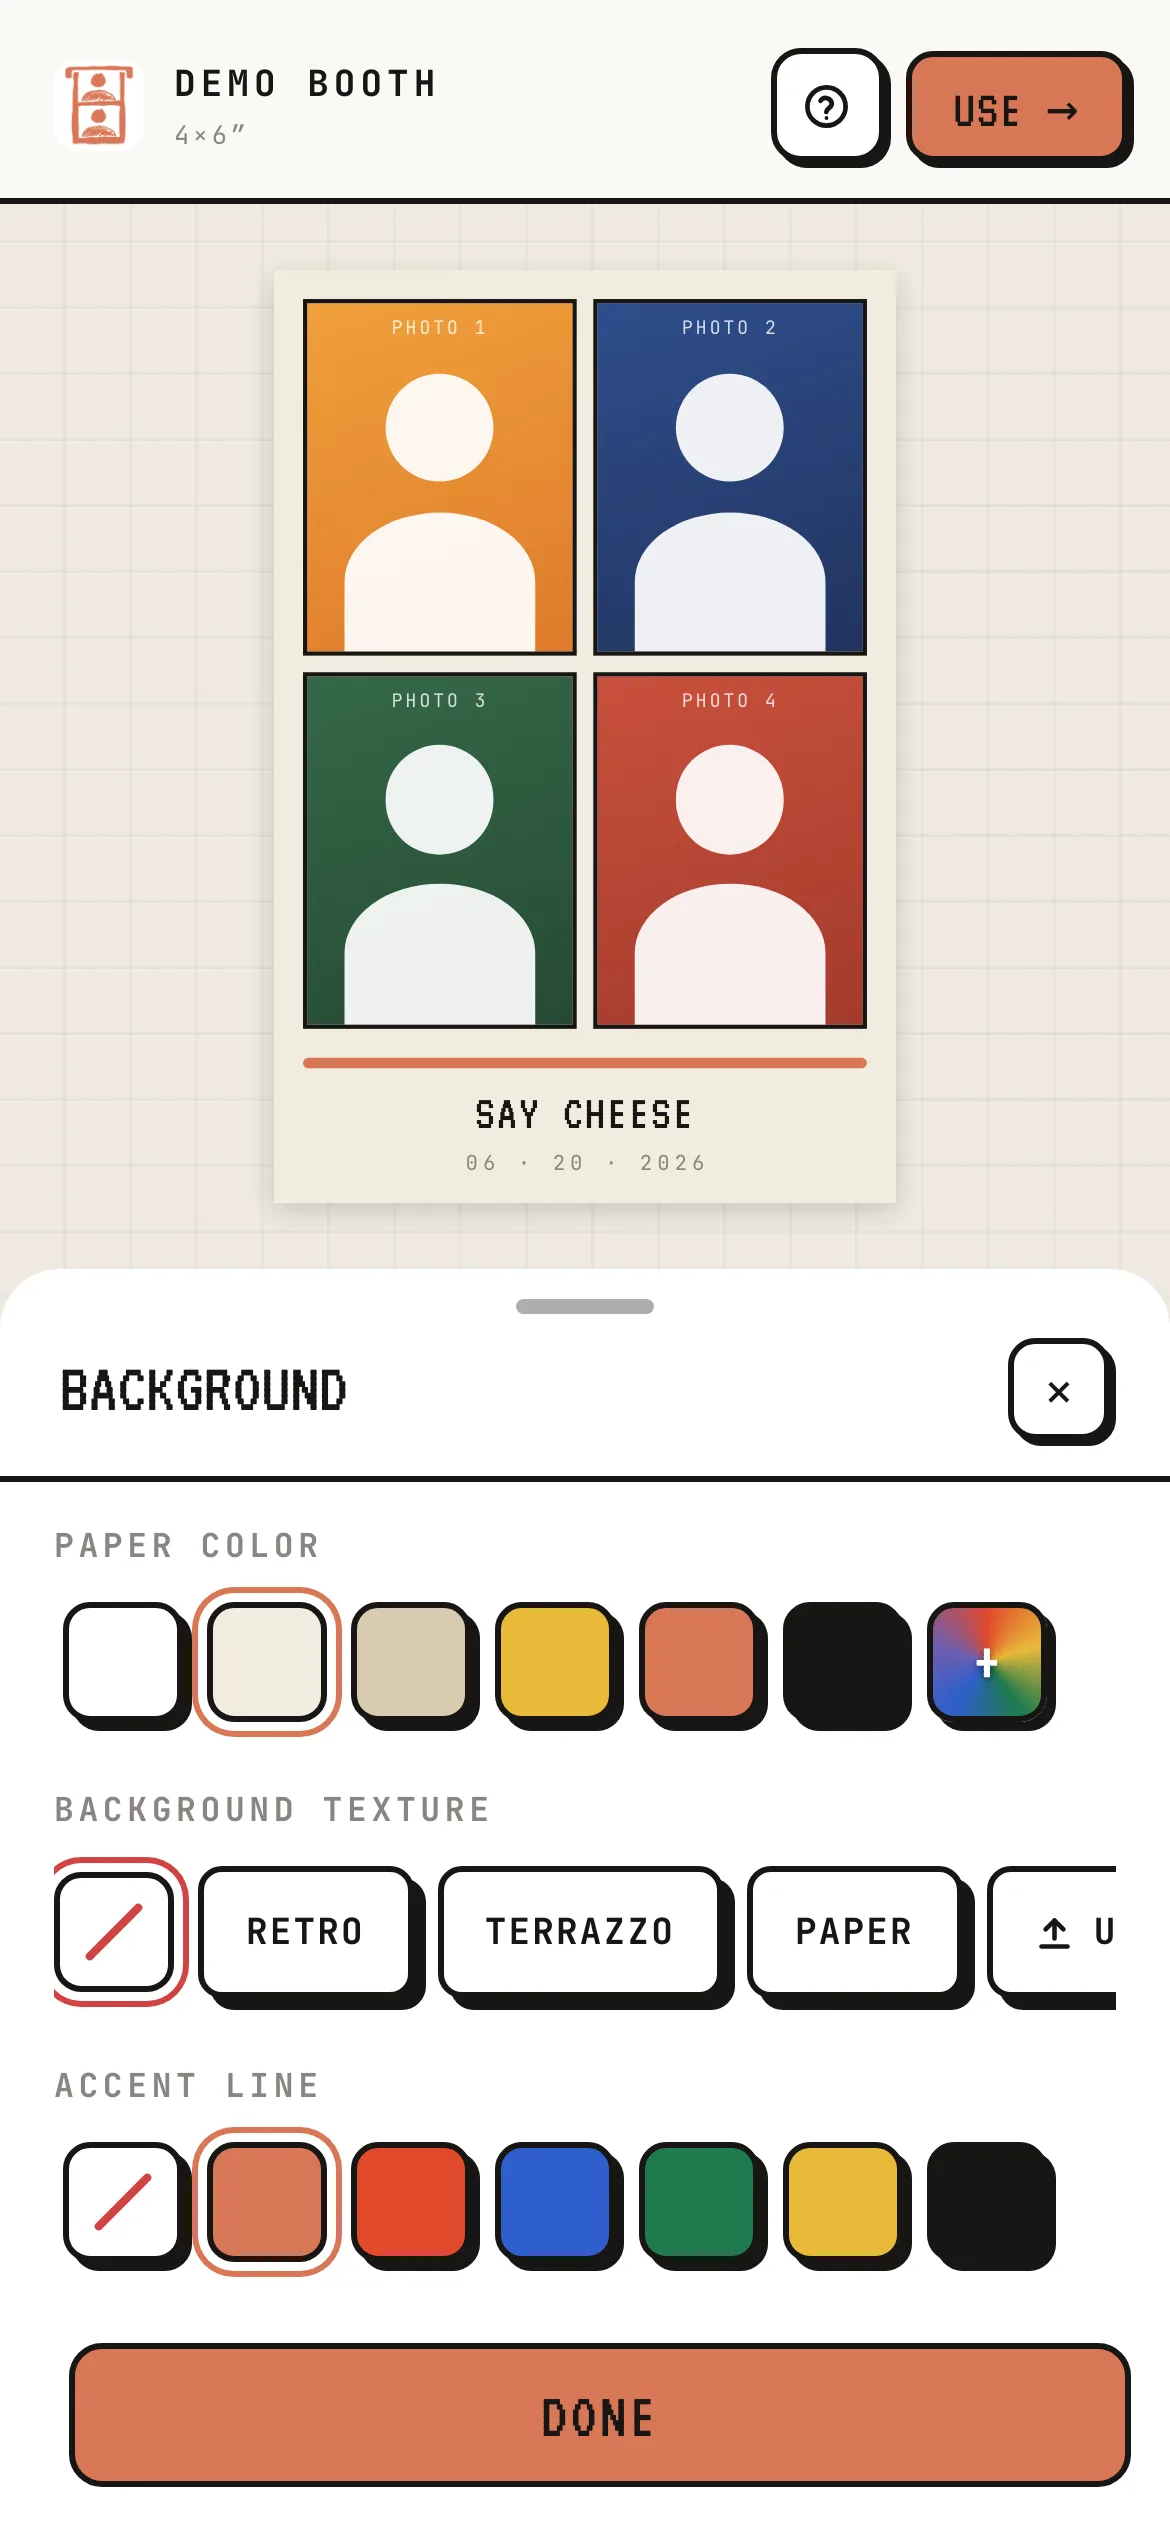
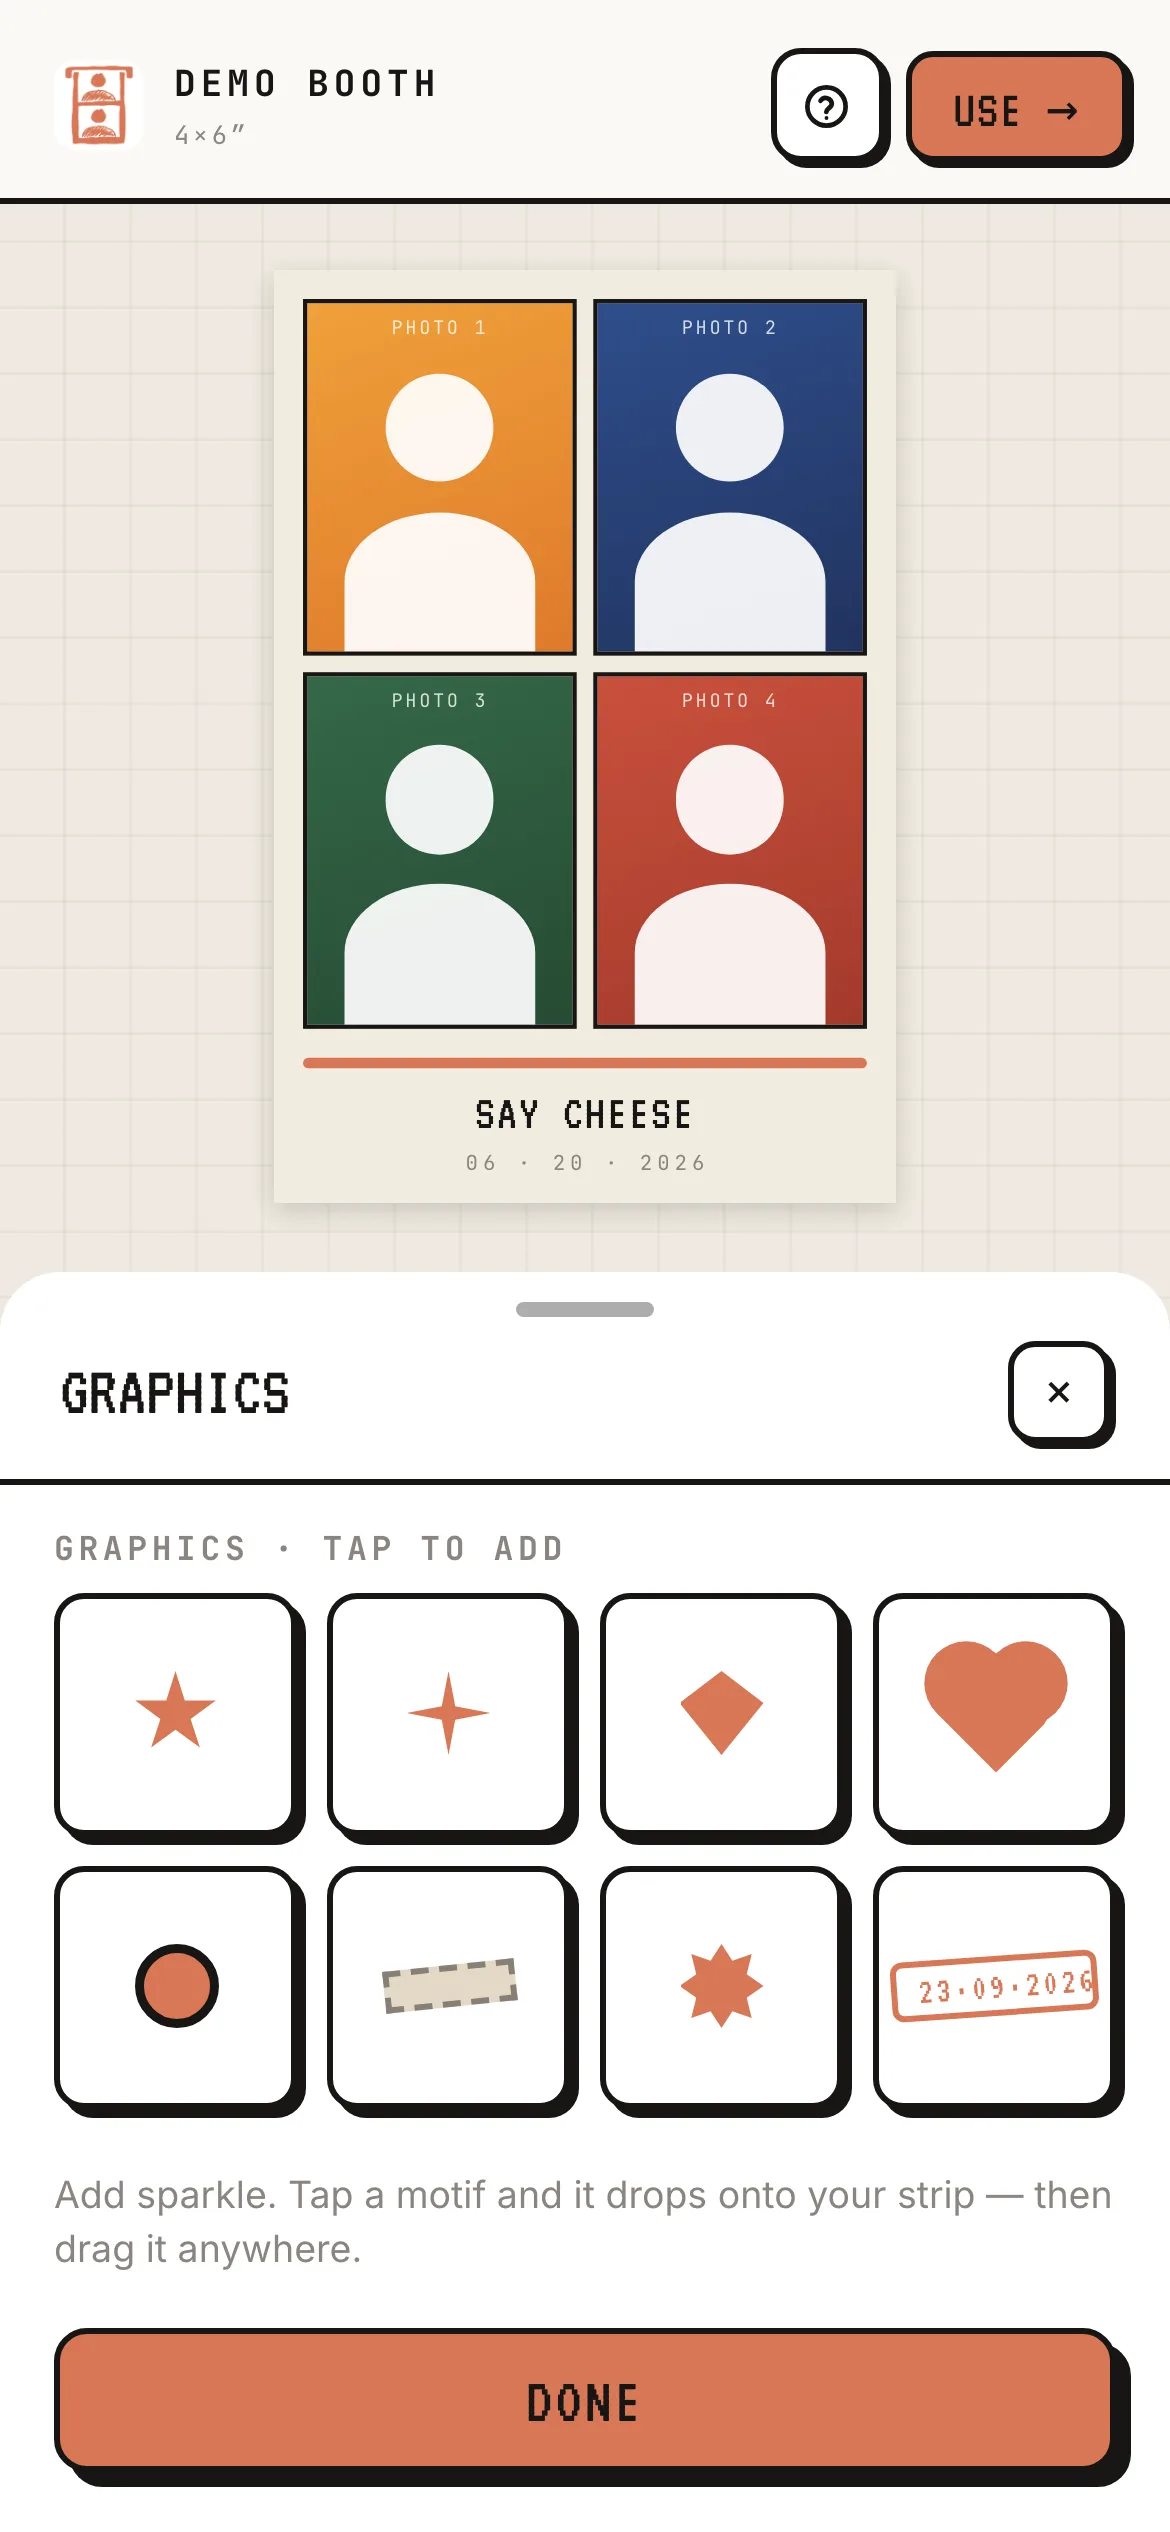
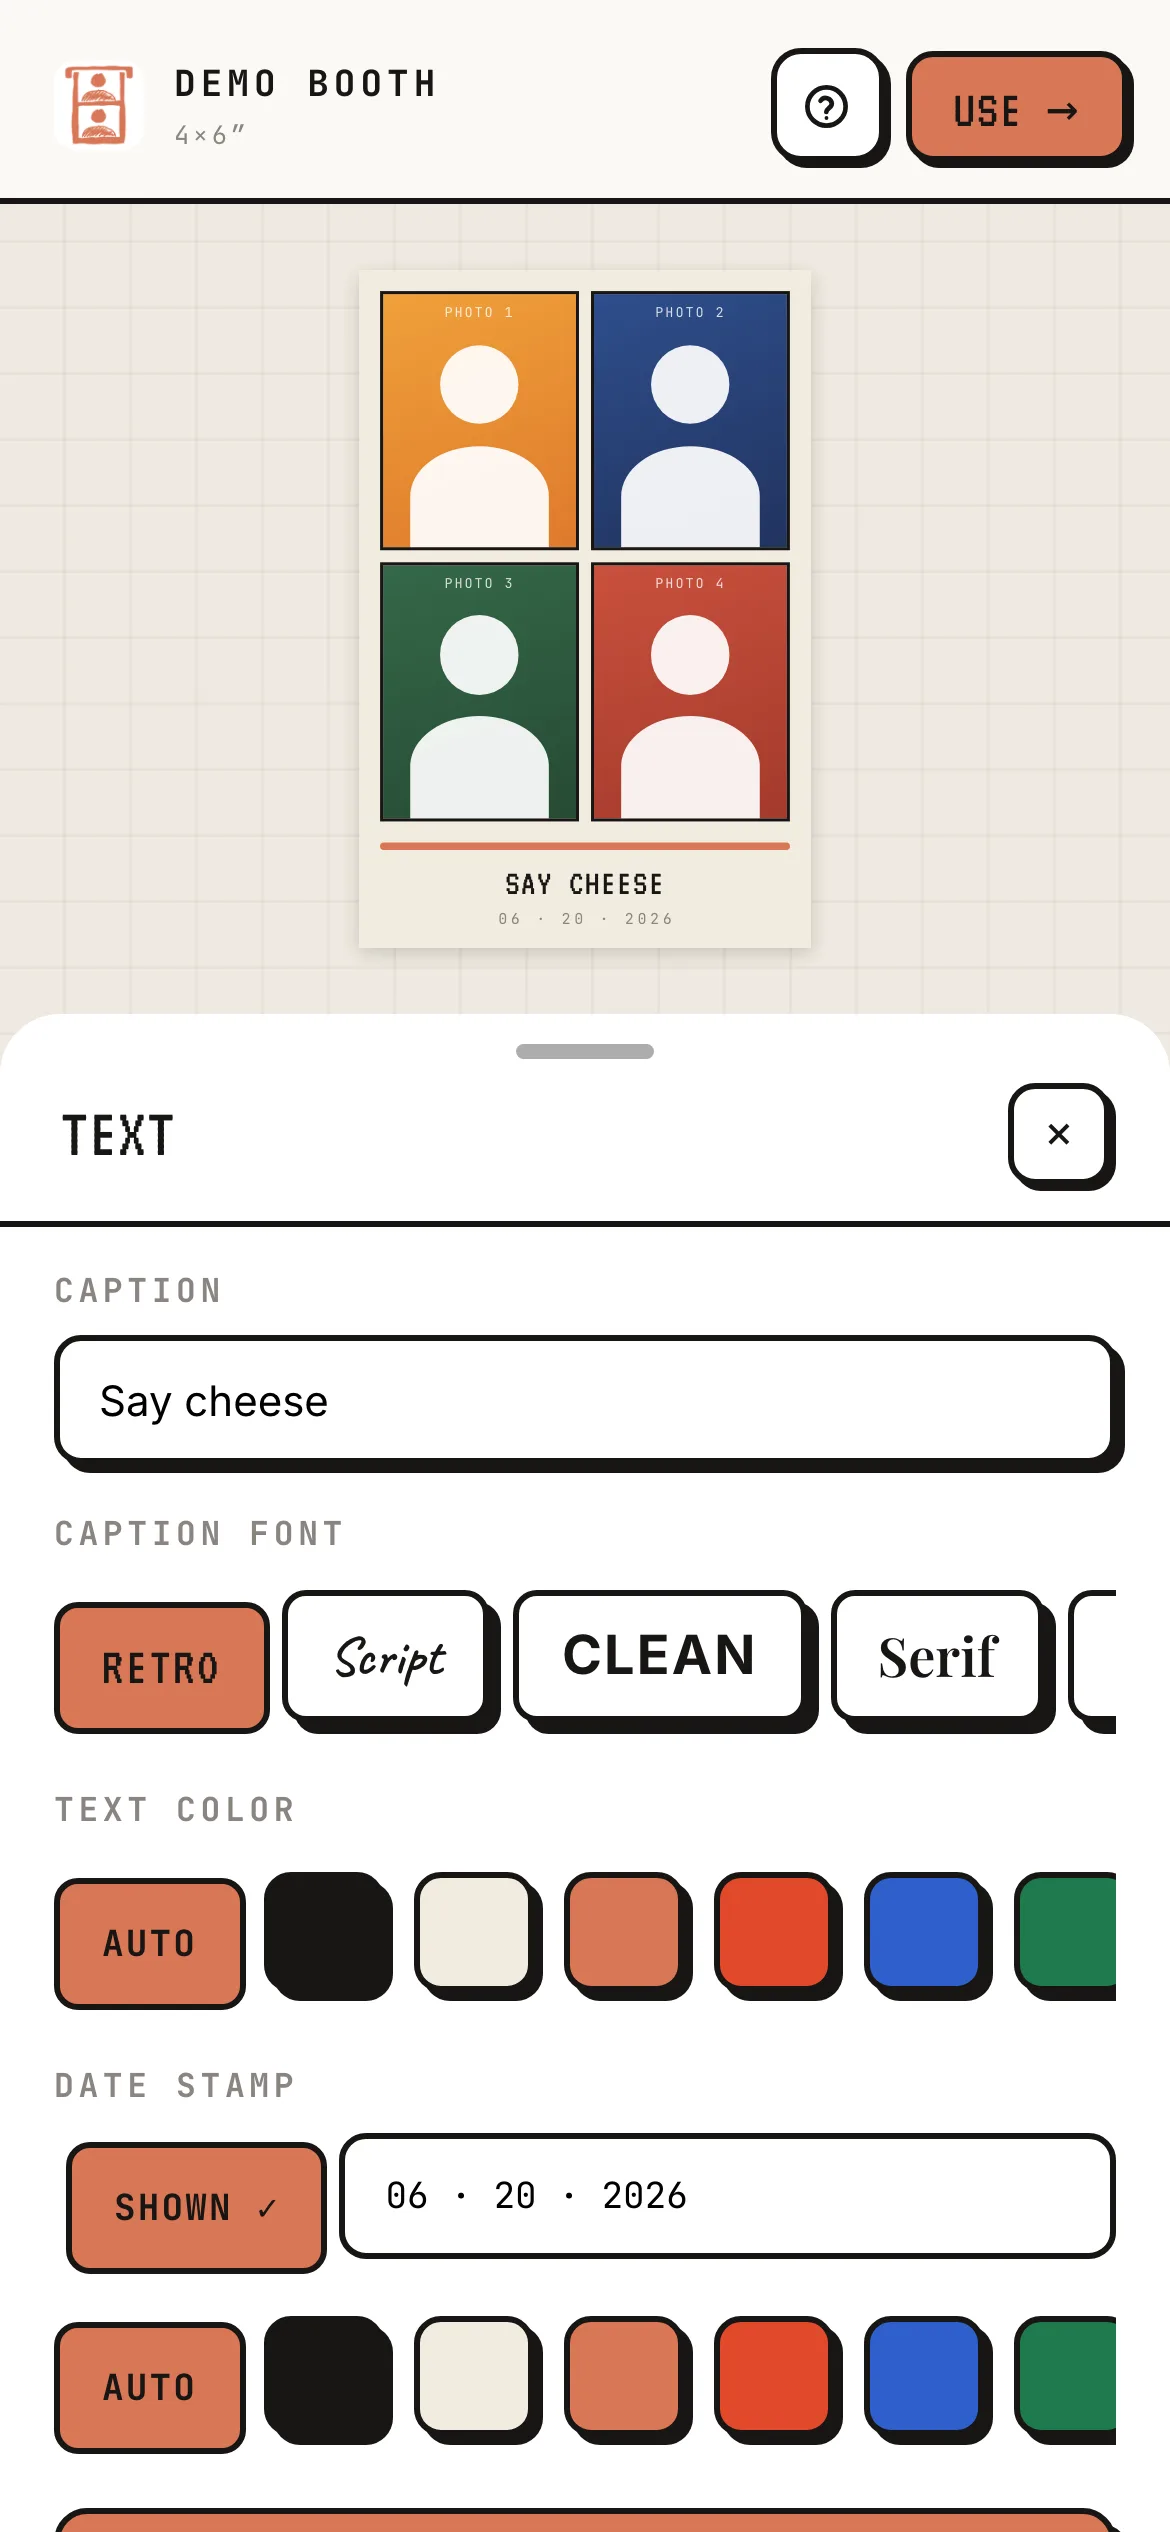
In the studio the guest works through the tools at the bottom of the screen. A short Lucy tour explains them the first time; How it works at the top replays it.
| Tool | What the guest can do |
|---|---|
| Format | Pick the print size the booth allows (a 2x6 strip with up to 3 photos, or a 4x6 with up to 8), add or remove photo slots, choose the slot shape (square, rounded, circle, heart, triangle, hexagon), and set the photo outline (on or off, thin, medium or bold, and its colour). Tapping a photo on the preview selects it; its edge handles resize it. |
| Upload | Add their own pictures or logos to the frame, then drag, pinch to zoom and twist to rotate them. |
| Background | Paper colour, a background texture (Retro, Terrazzo, Paper, or one of your uploaded textures), and an accent line. |
| Graphics | Built-in stickers, your uploaded graphics and a date sticker. Tap a motif and it drops onto the strip, then drag it anywhere. |
| Text | A caption, its font and colour, and a date stamp. |
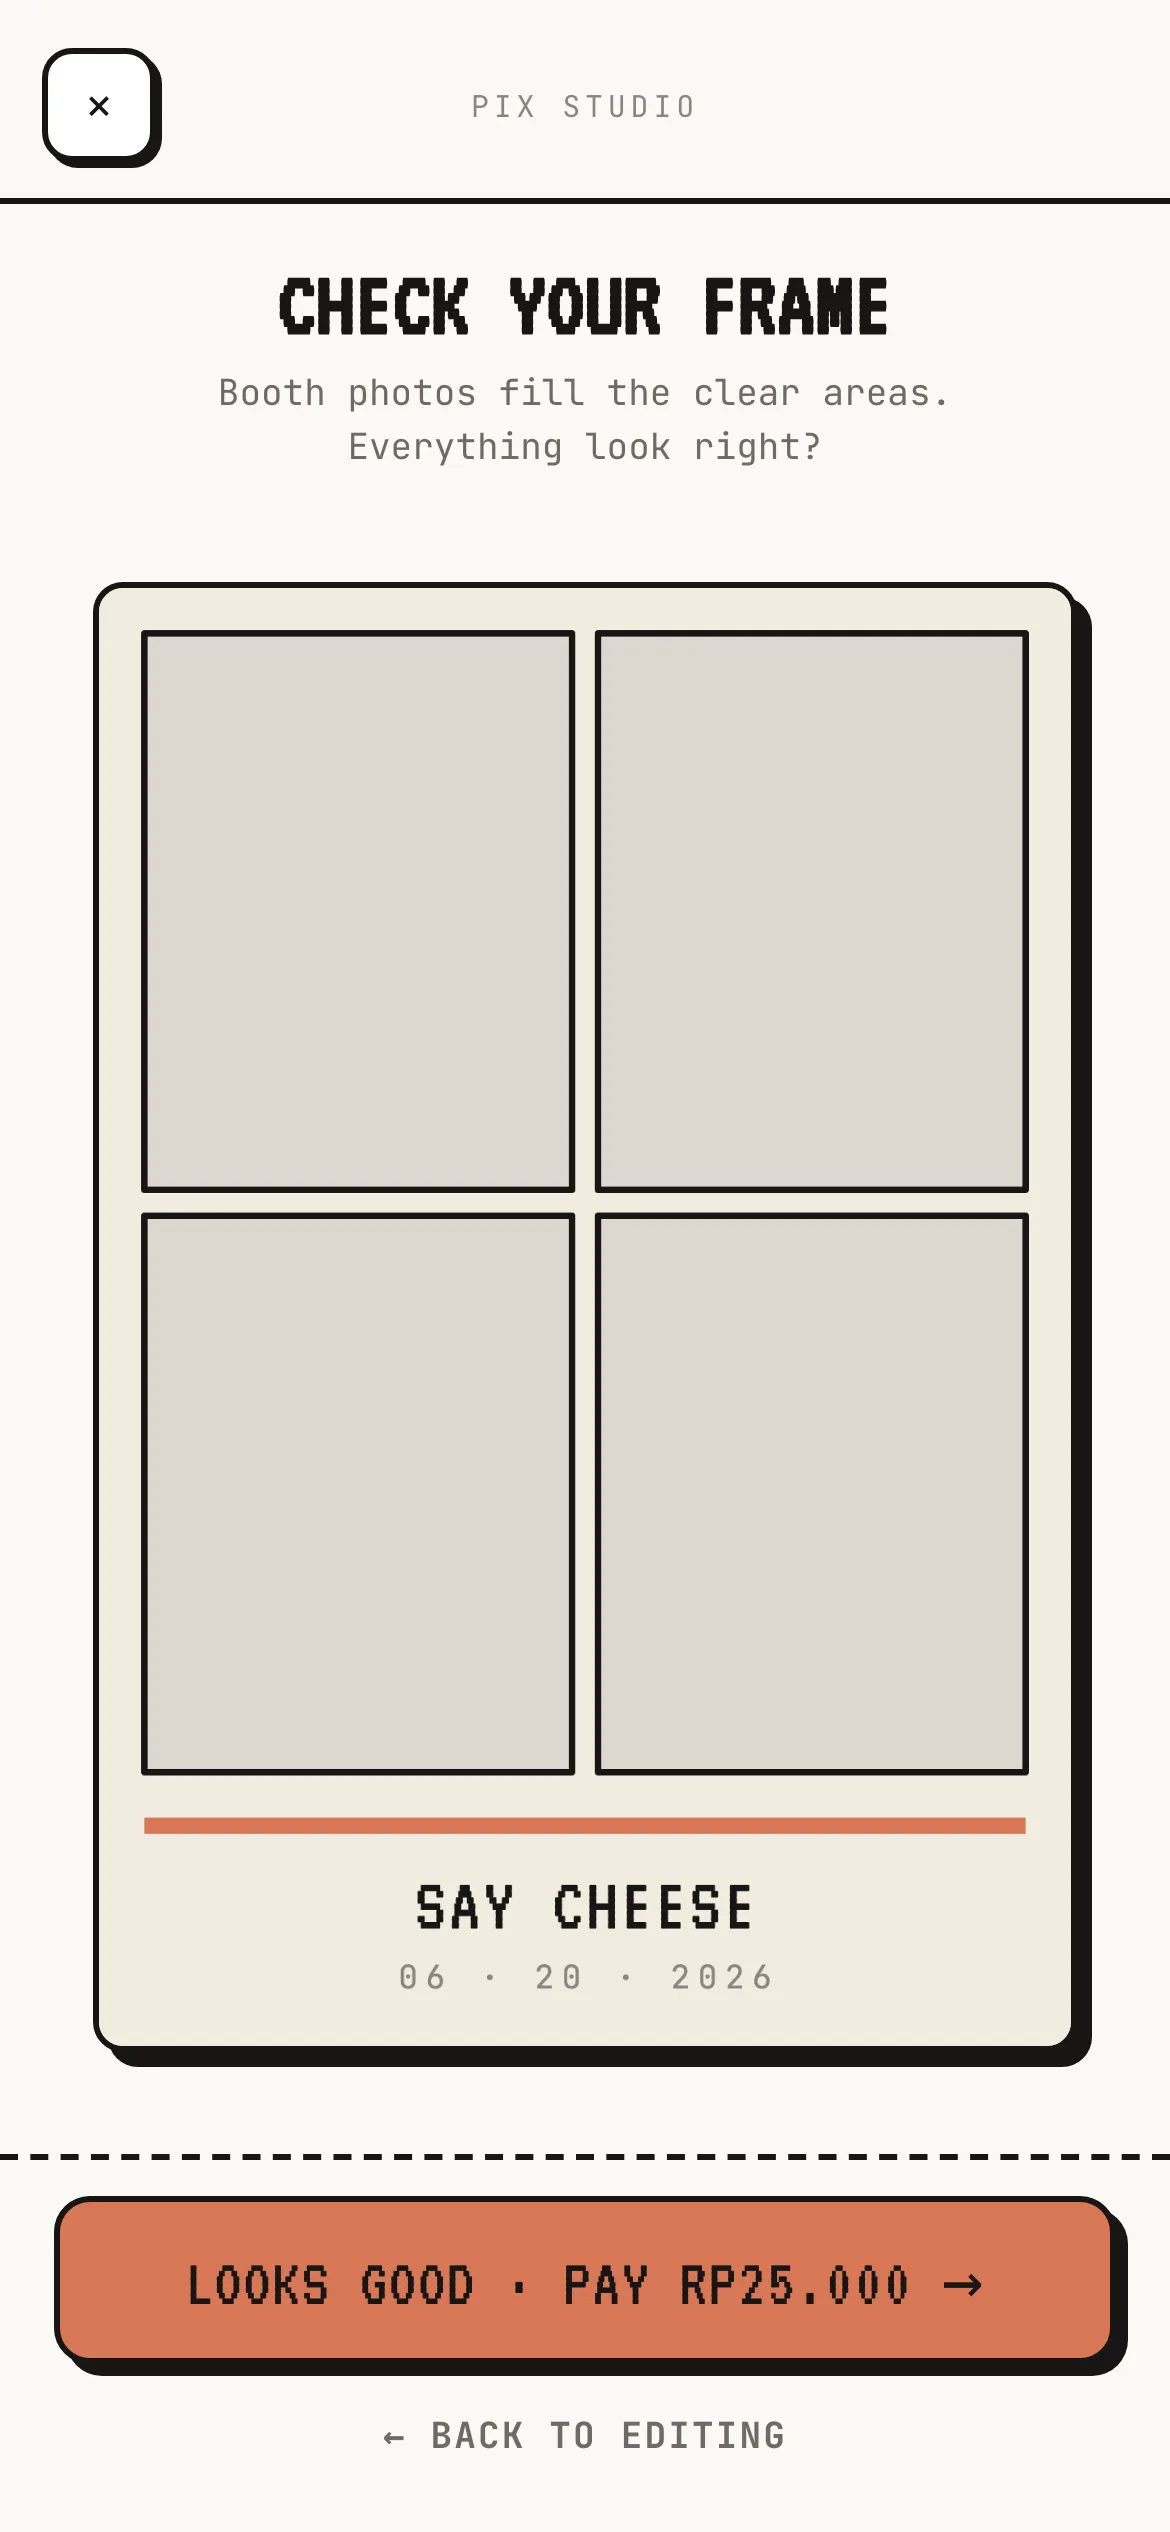
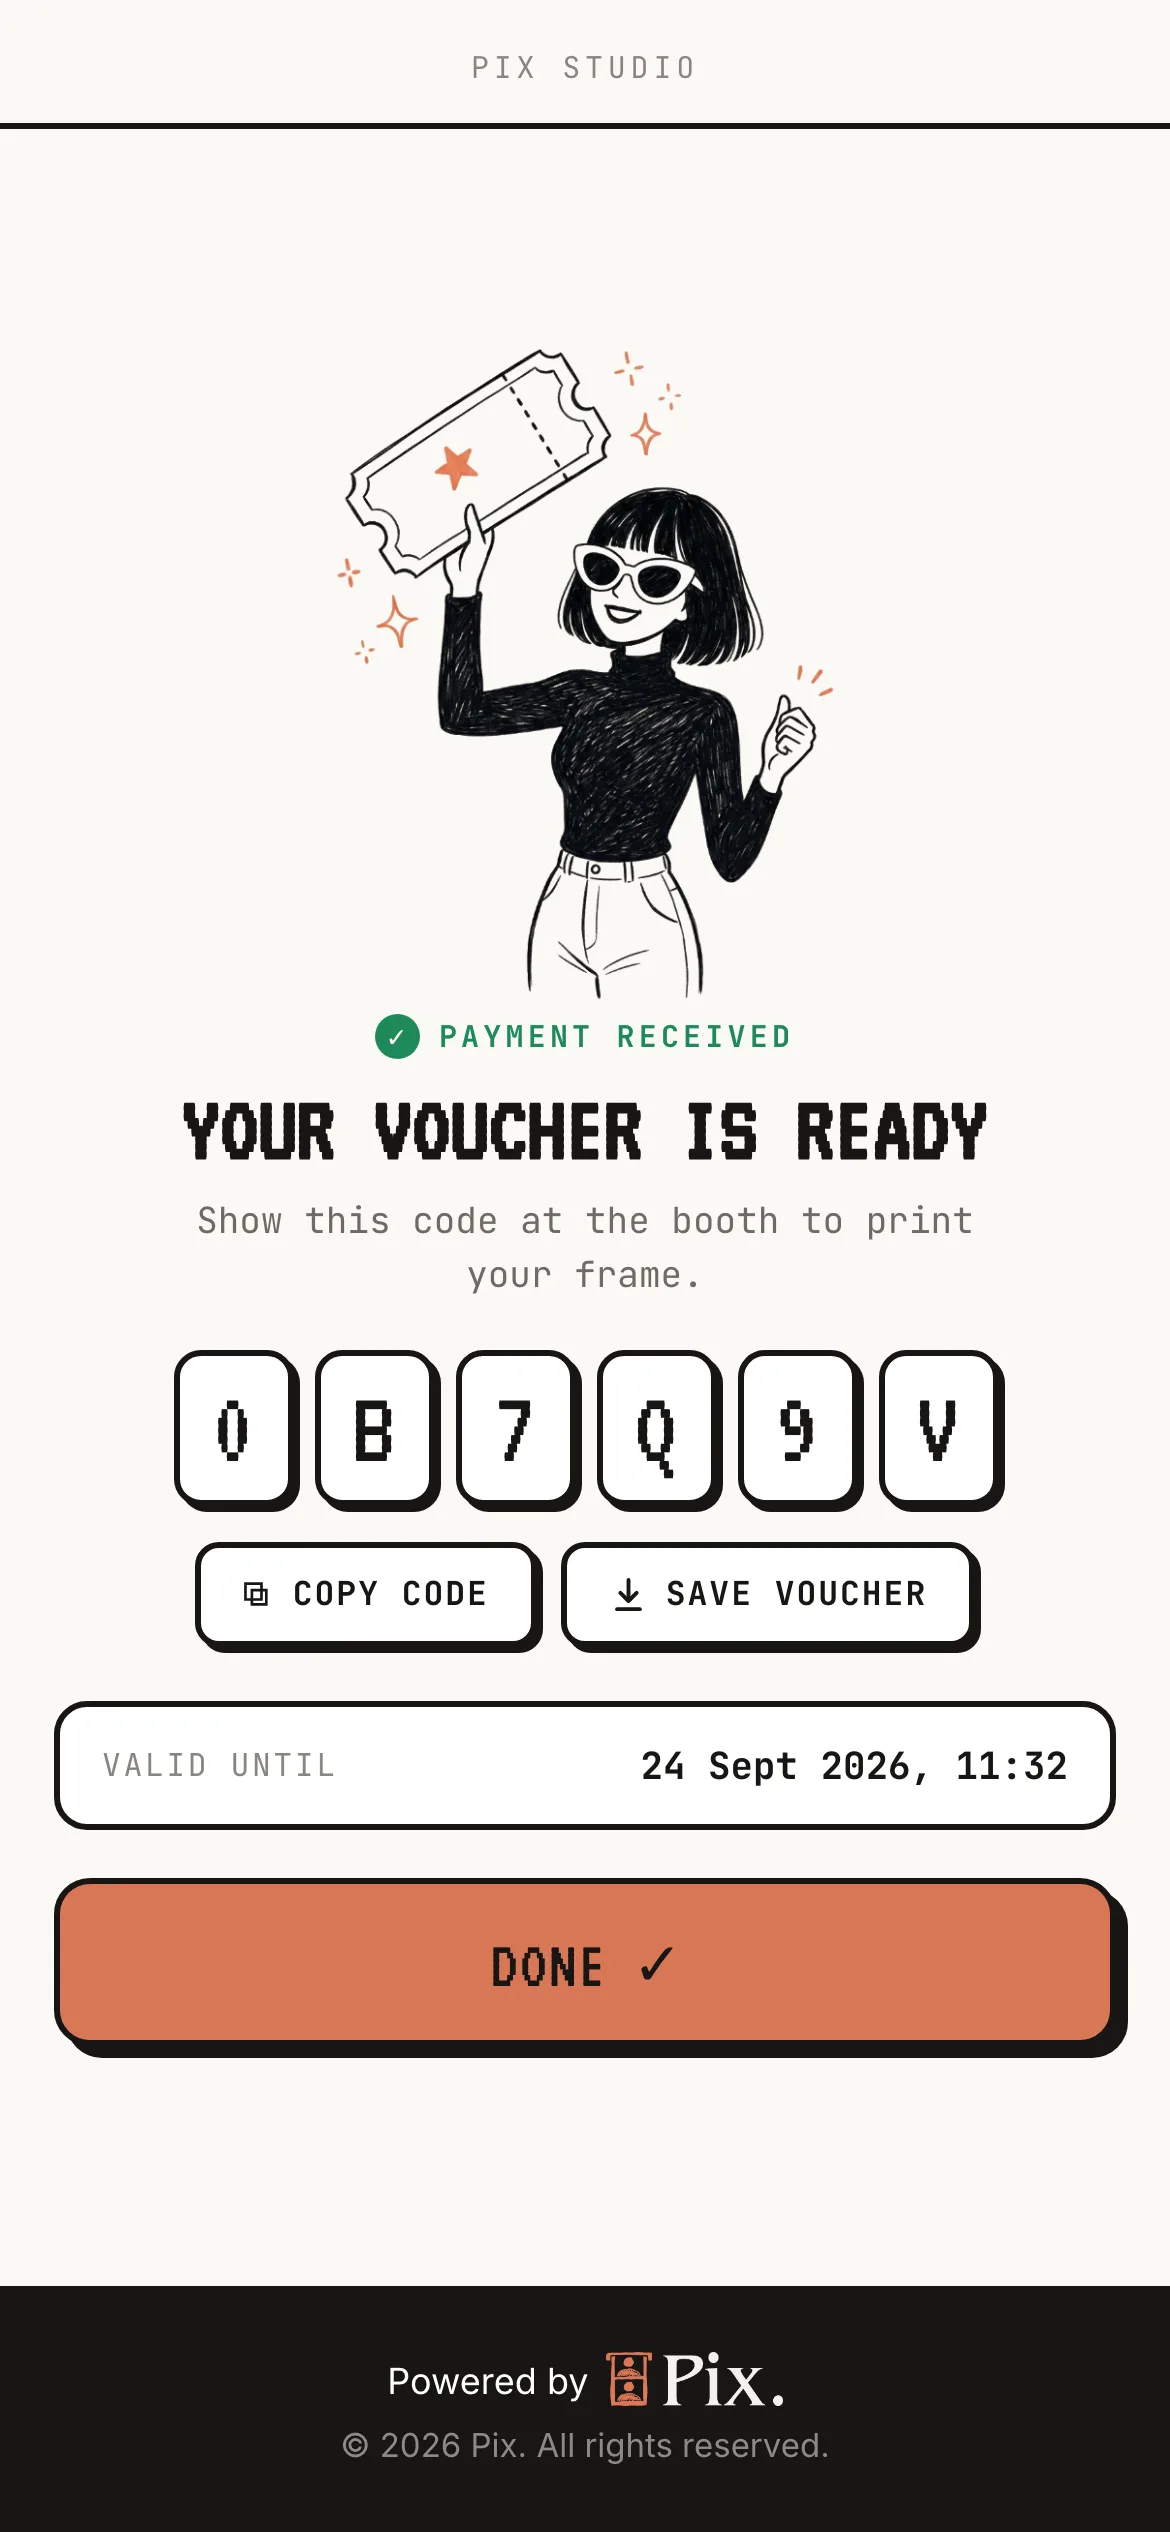
When the frame is ready the guest taps Use →:
- Check your frame shows the finished design with the photo areas clear. The guest taps Looks good · pay (the button shows the price) or ← Back to editing.
- Scan to pay shows the QR code from your gateway with the amount and a 15-minute countdown. The guest pays with their e-wallet or banking app and taps I've paid if the page has not noticed yet.
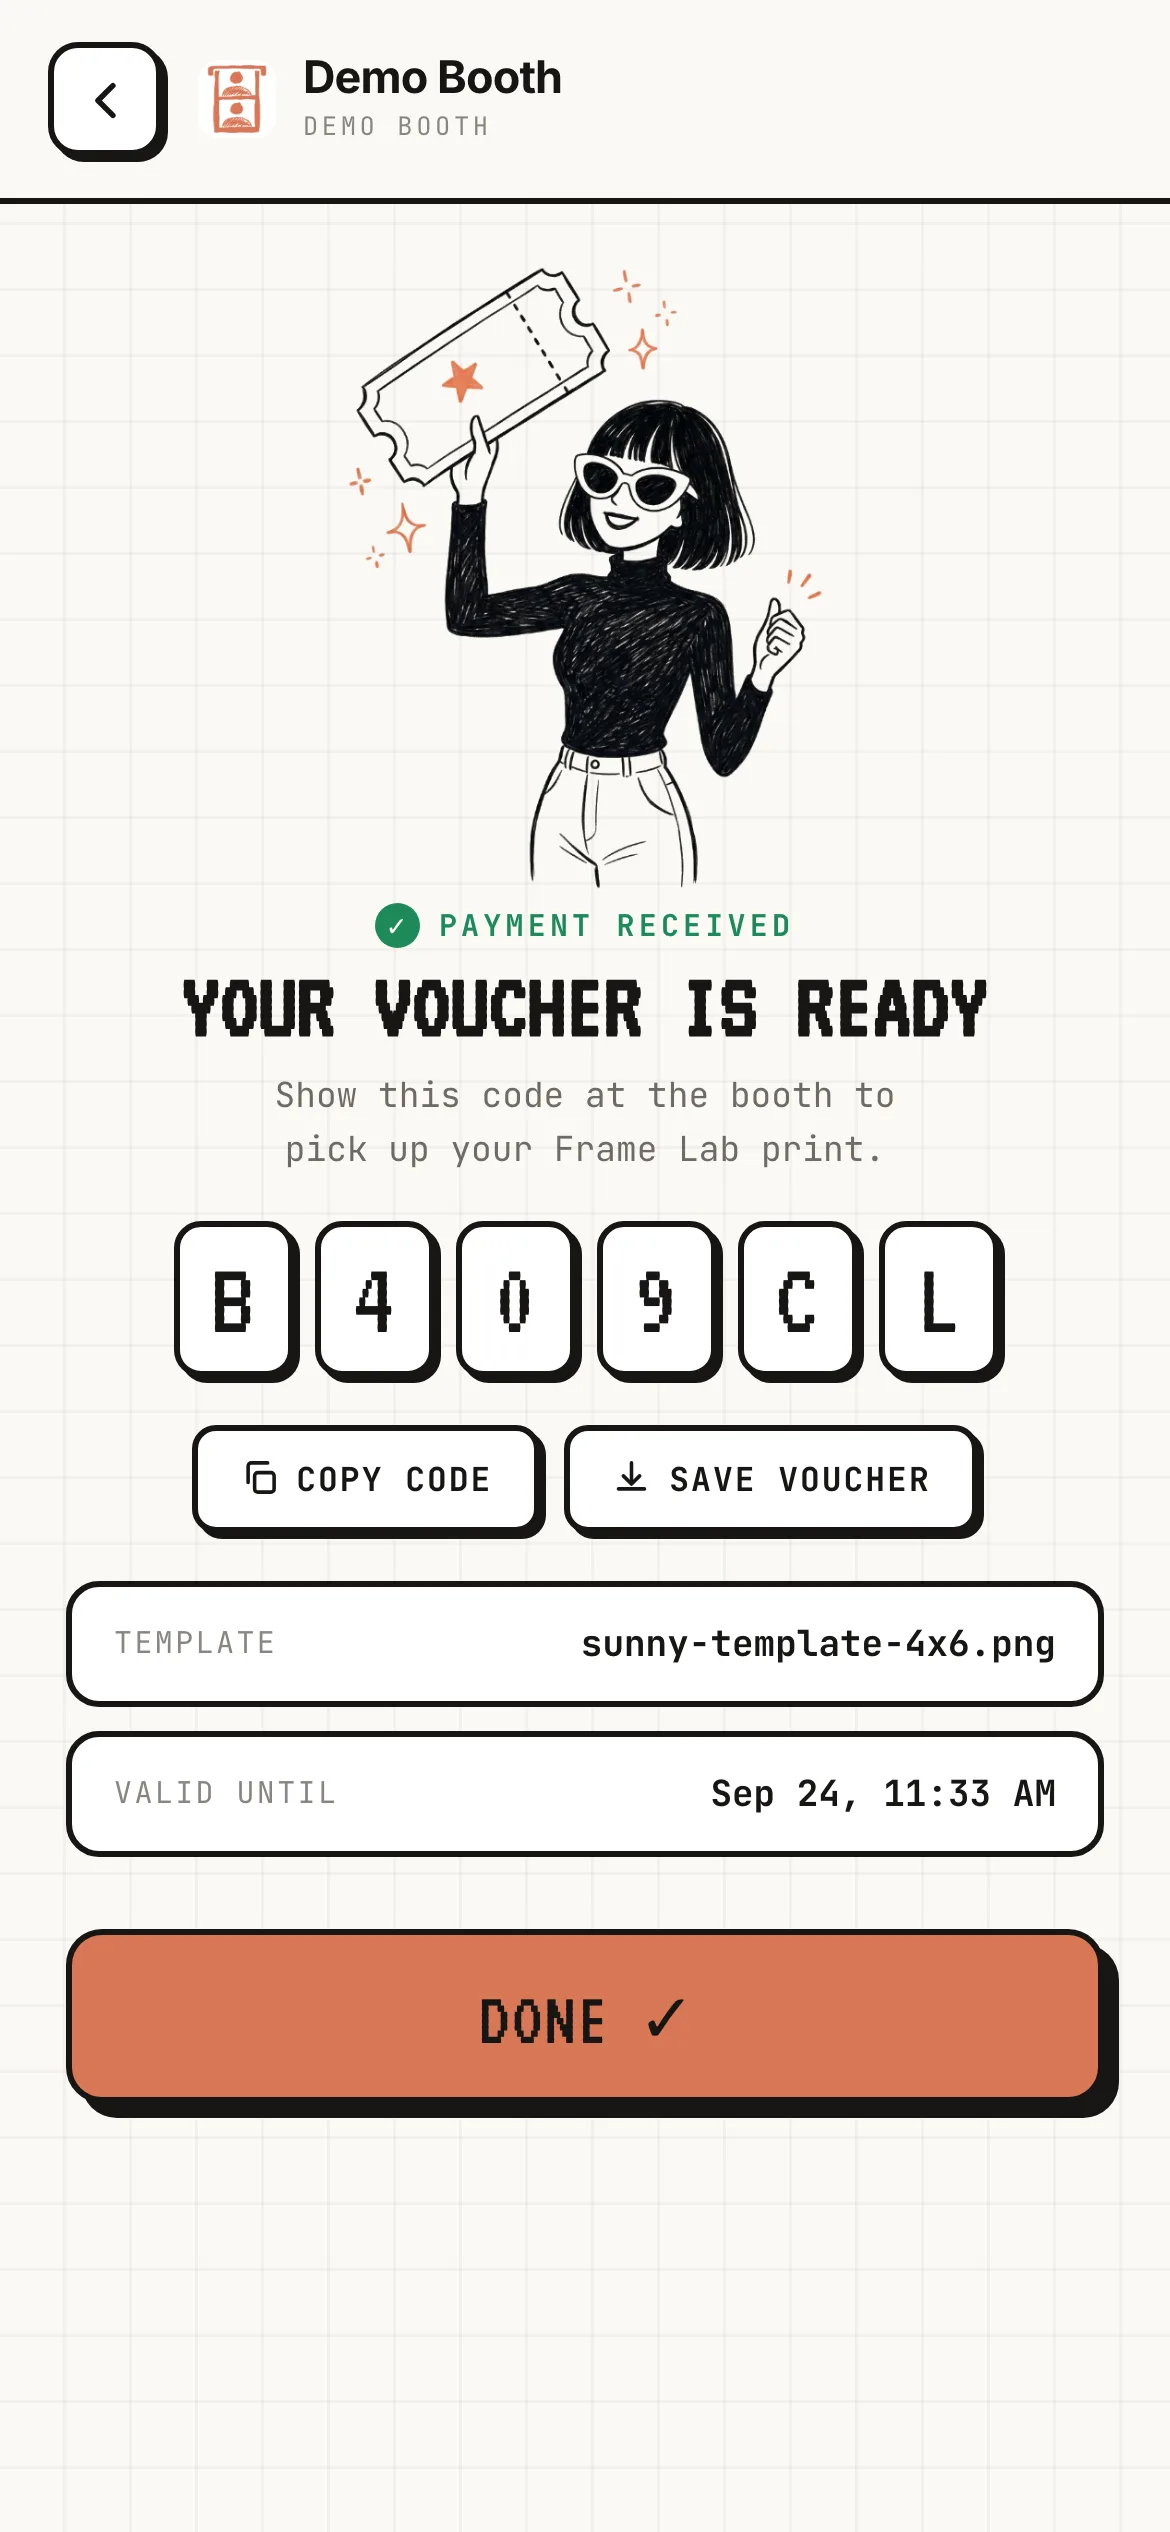
- Your voucher is ready shows the 6-character code, Copy code, Save voucher (a voucher card image for their photos) and the Valid until date and time. Done closes the page.
Step 5: What the guest does, uploading a finished PNG
Guests who already have a design choose Upload your own.
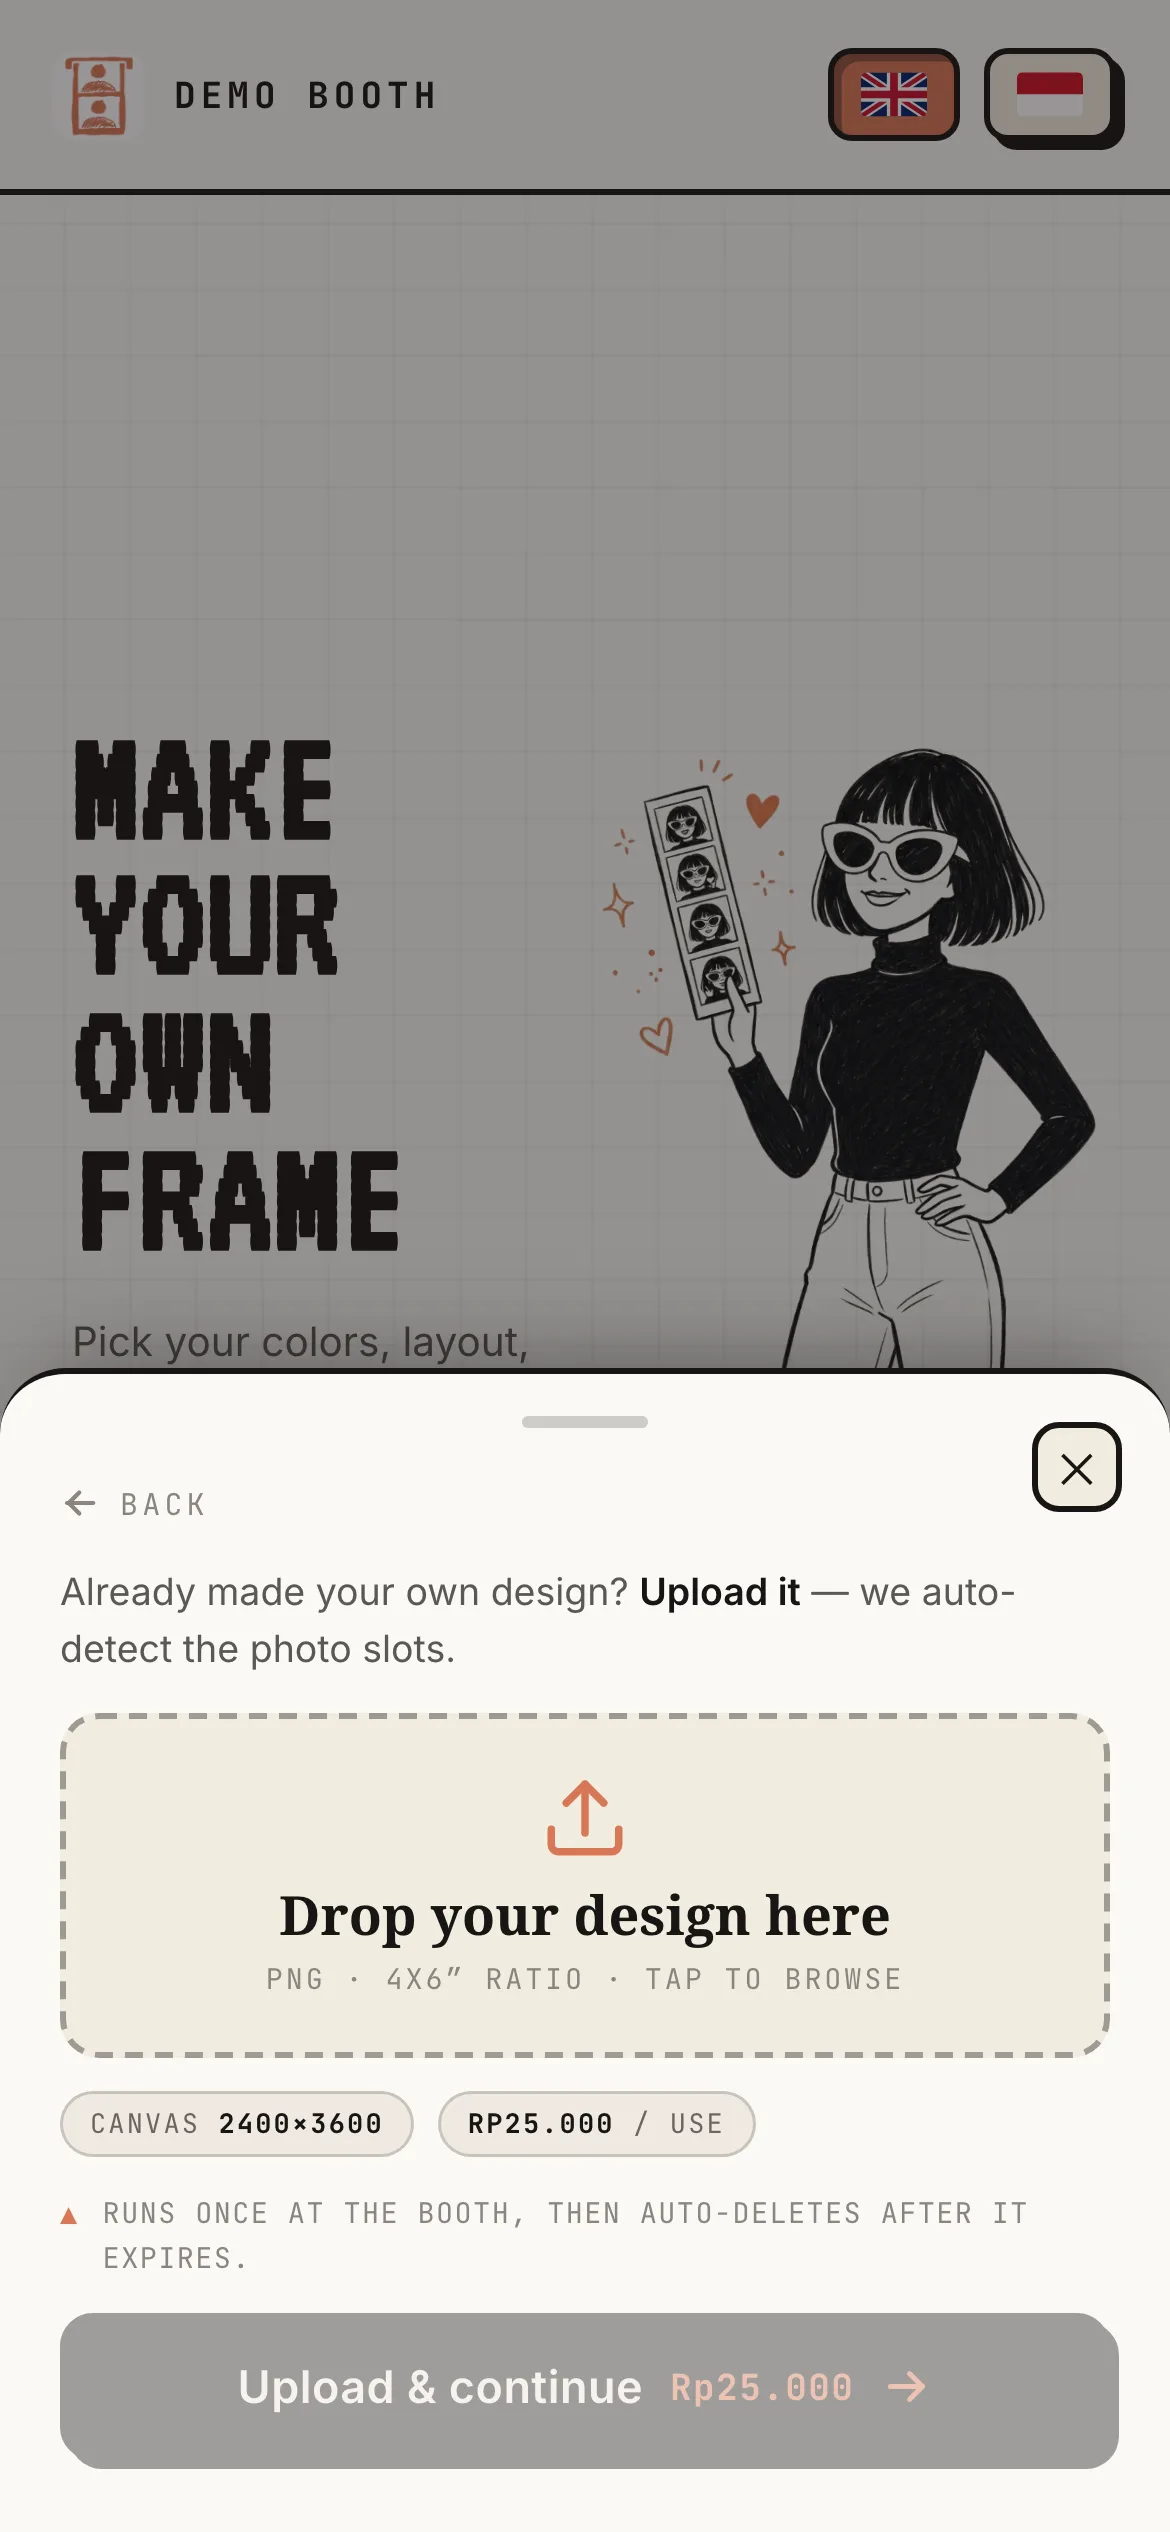
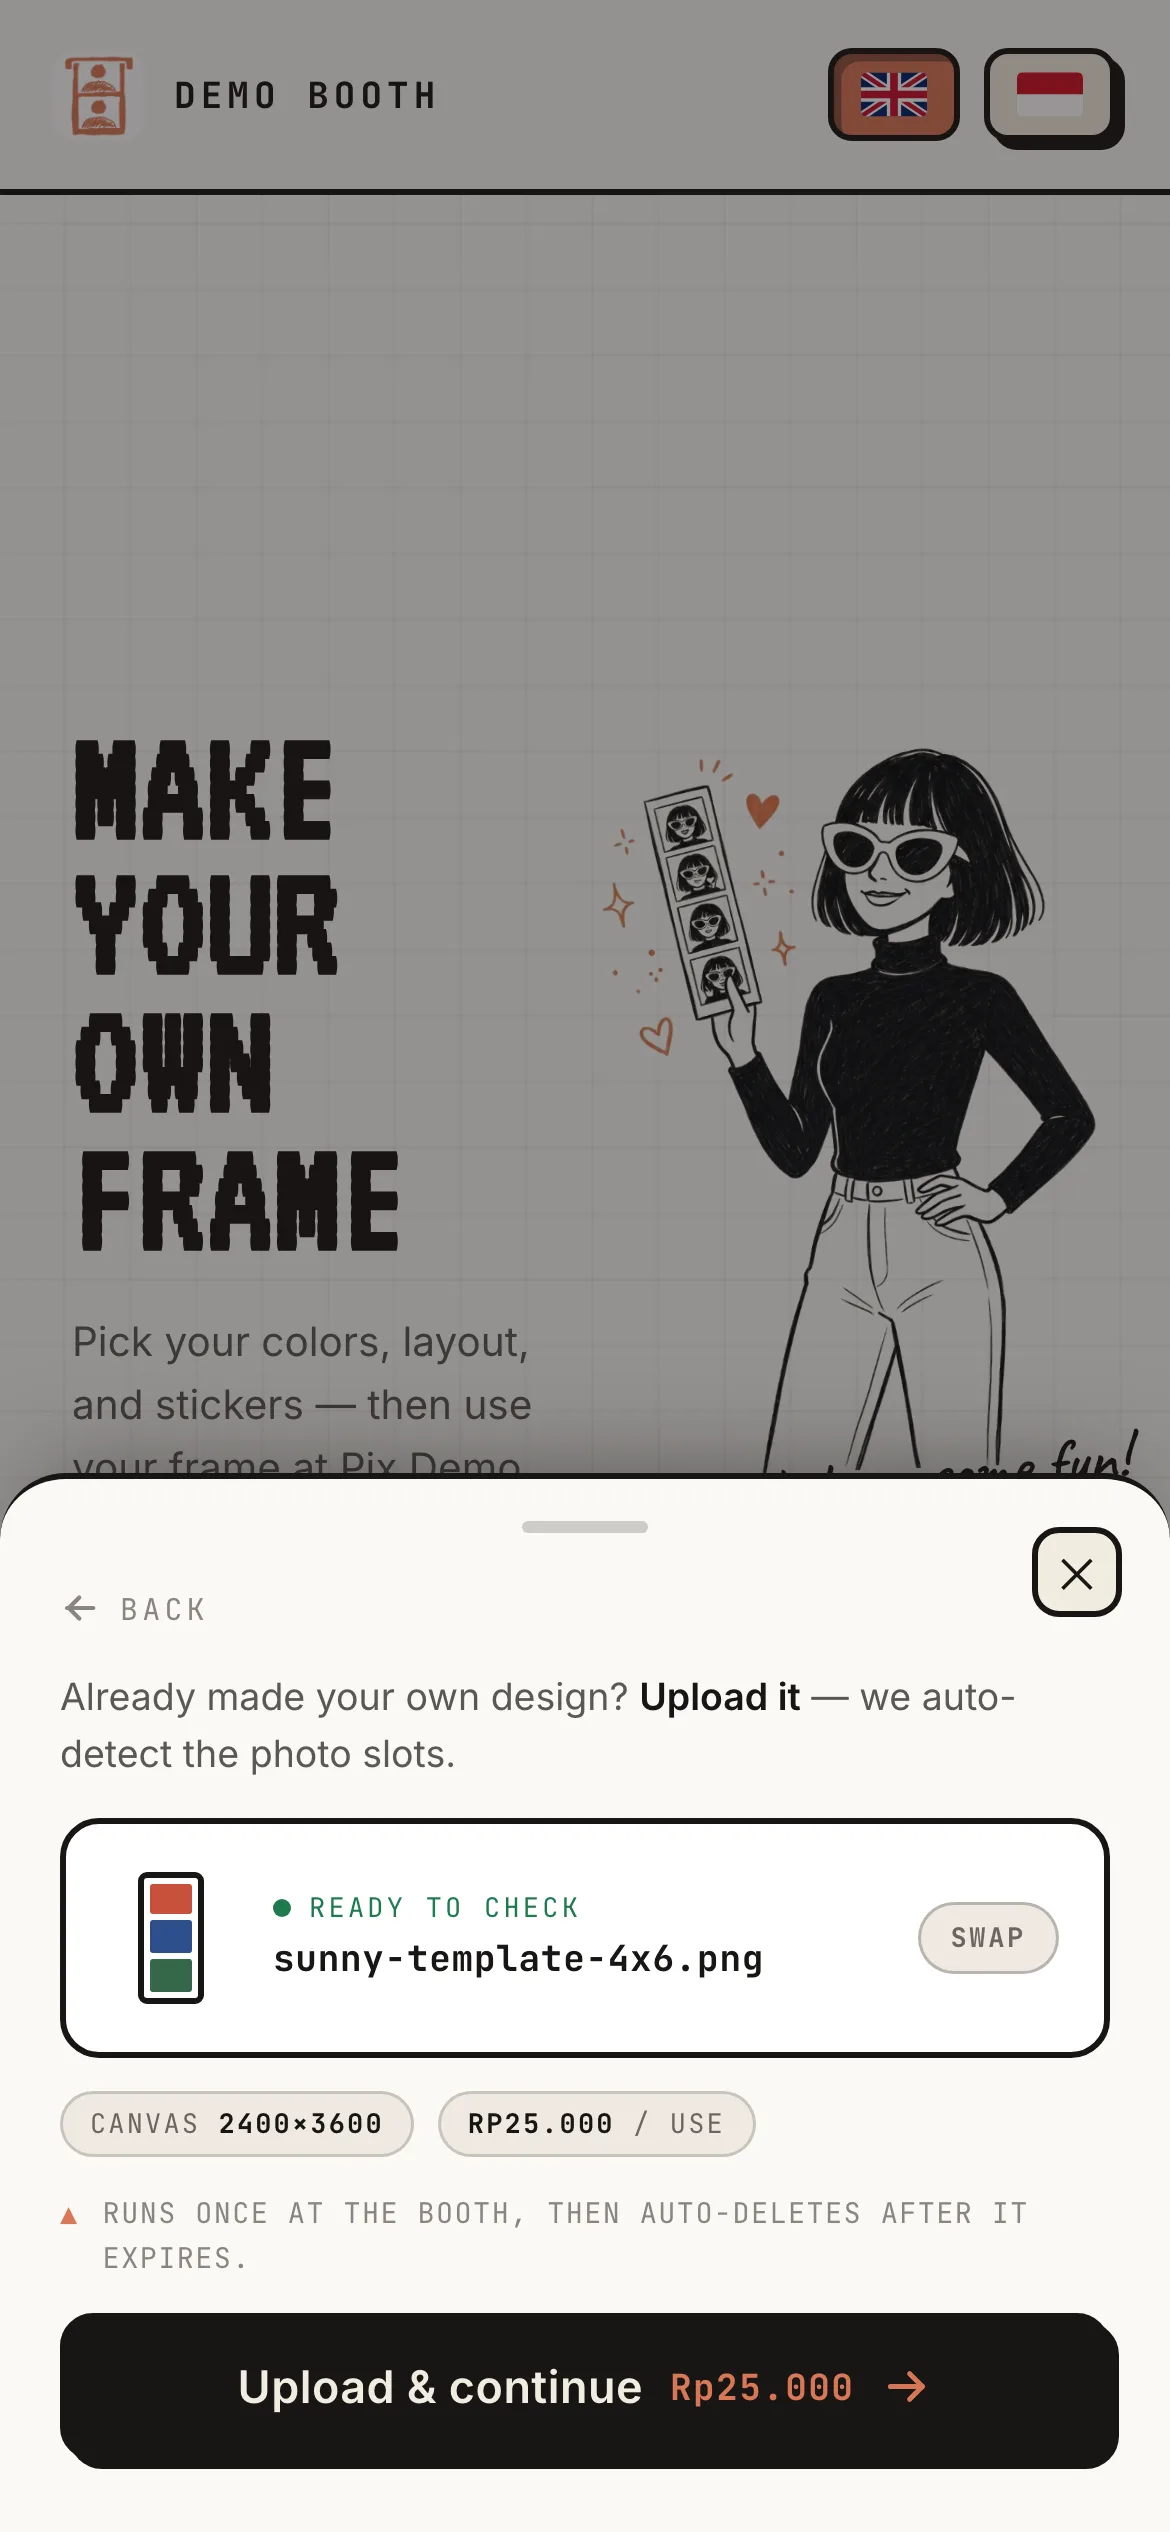
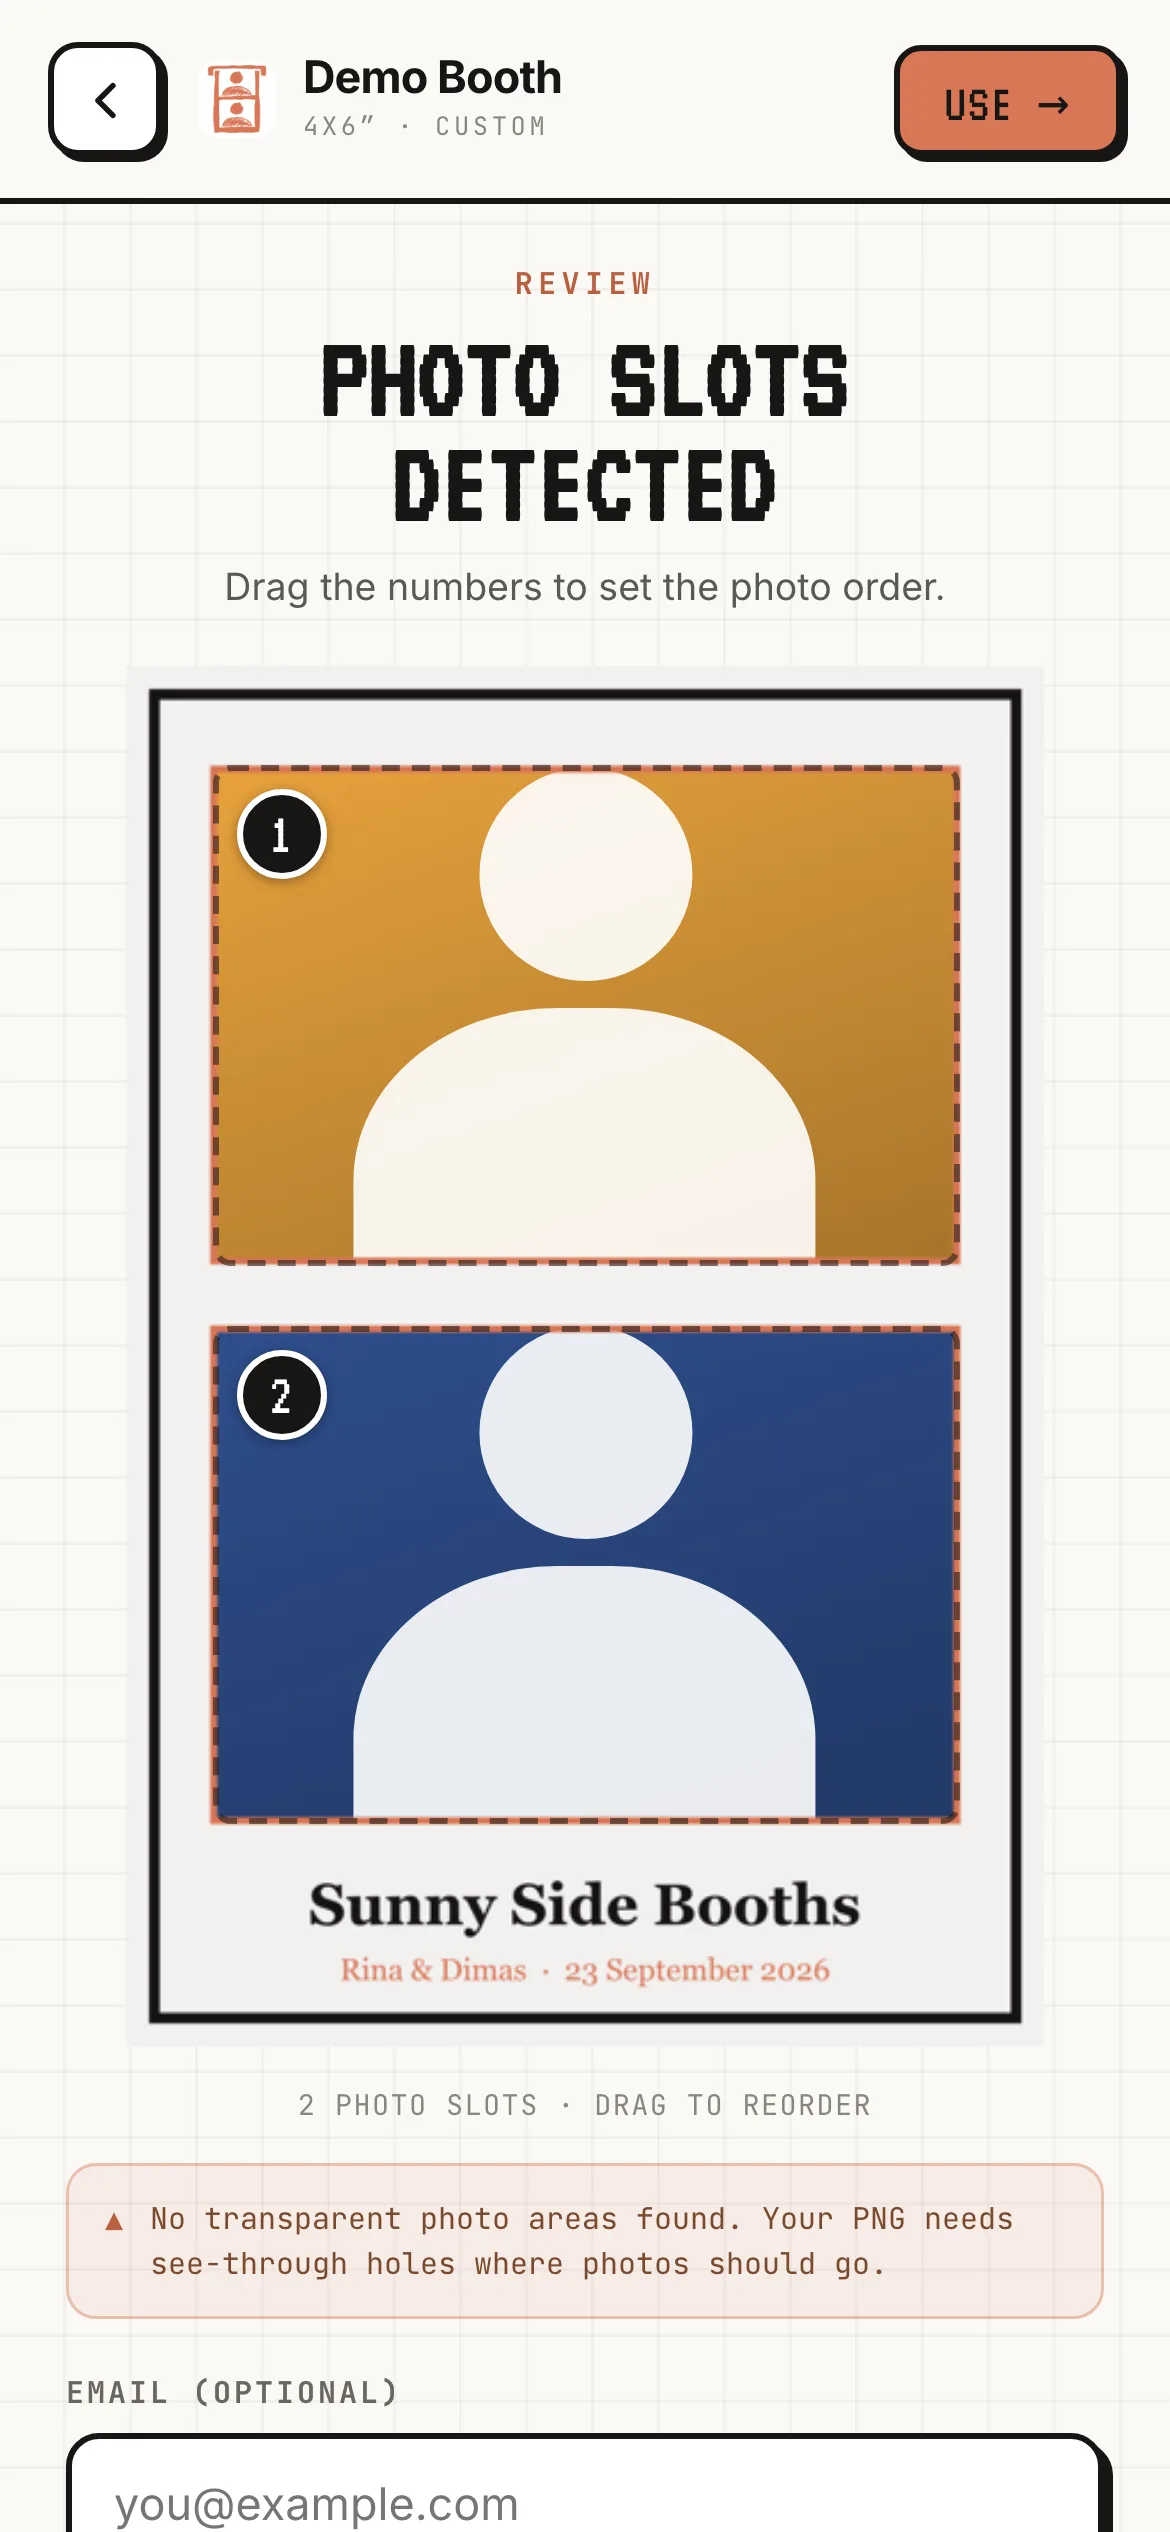
- The guest drops or picks a PNG up to 15 MB. It must have the same ratio as the booth's print size (the drop zone says which), and the photo areas must be fully transparent. The page finds the slots on its own and keeps up to 10.
- Upload & continue checks the file. A wrong ratio or a design with no transparent areas is refused with a message that says what to fix.
- Photo slots detected shows the slots numbered. The guest drags the numbers to set the order the booth photographs them in, and can add an Email (optional) so the code is also sent to them as a backup.
- Use → goes to the same Scan to pay and Your voucher is ready screens as the studio path. Here Save voucher downloads a small text file with the code, the file name and the expiry.
Step 6: Redeem the code at the booth
- The guest starts a session on the booth as usual.
- On the Payment screen they choose the voucher option and type the 6-character code.
- The booth checks the code with Pixture and shows "Frame Lab applied!". The session is paid for by the voucher, so the QR payment is skipped.
- The Templates screen shows only the guest's frame, already selected; they tap next.
- Capture, review, filters, printing and sharing run as a normal session on the guest's design.
After the Sharing screen the code is spent and the frame is removed from the booth, so the next guest never sees it.
Rules to tell your staff:
- A code works on the booth it was bought for only, once, until its Valid until time. The booth says "This voucher is not valid for this booth.", "This voucher has been fully redeemed." or "This voucher has expired." otherwise.
- Checking the code needs internet on the booth. Frame Lab codes are not offline codes, so a booth that has lost its connection answers "Failed to validate voucher. Please try again."
- The code must be entered with the standard single session selected. If the guest first adds extra prints or an extra session, the booth charges those extras and does not load the frame.
- A booth whose payment is switched off cannot accept the code, because its Payment screen is never shown.
Step 7: See the orders
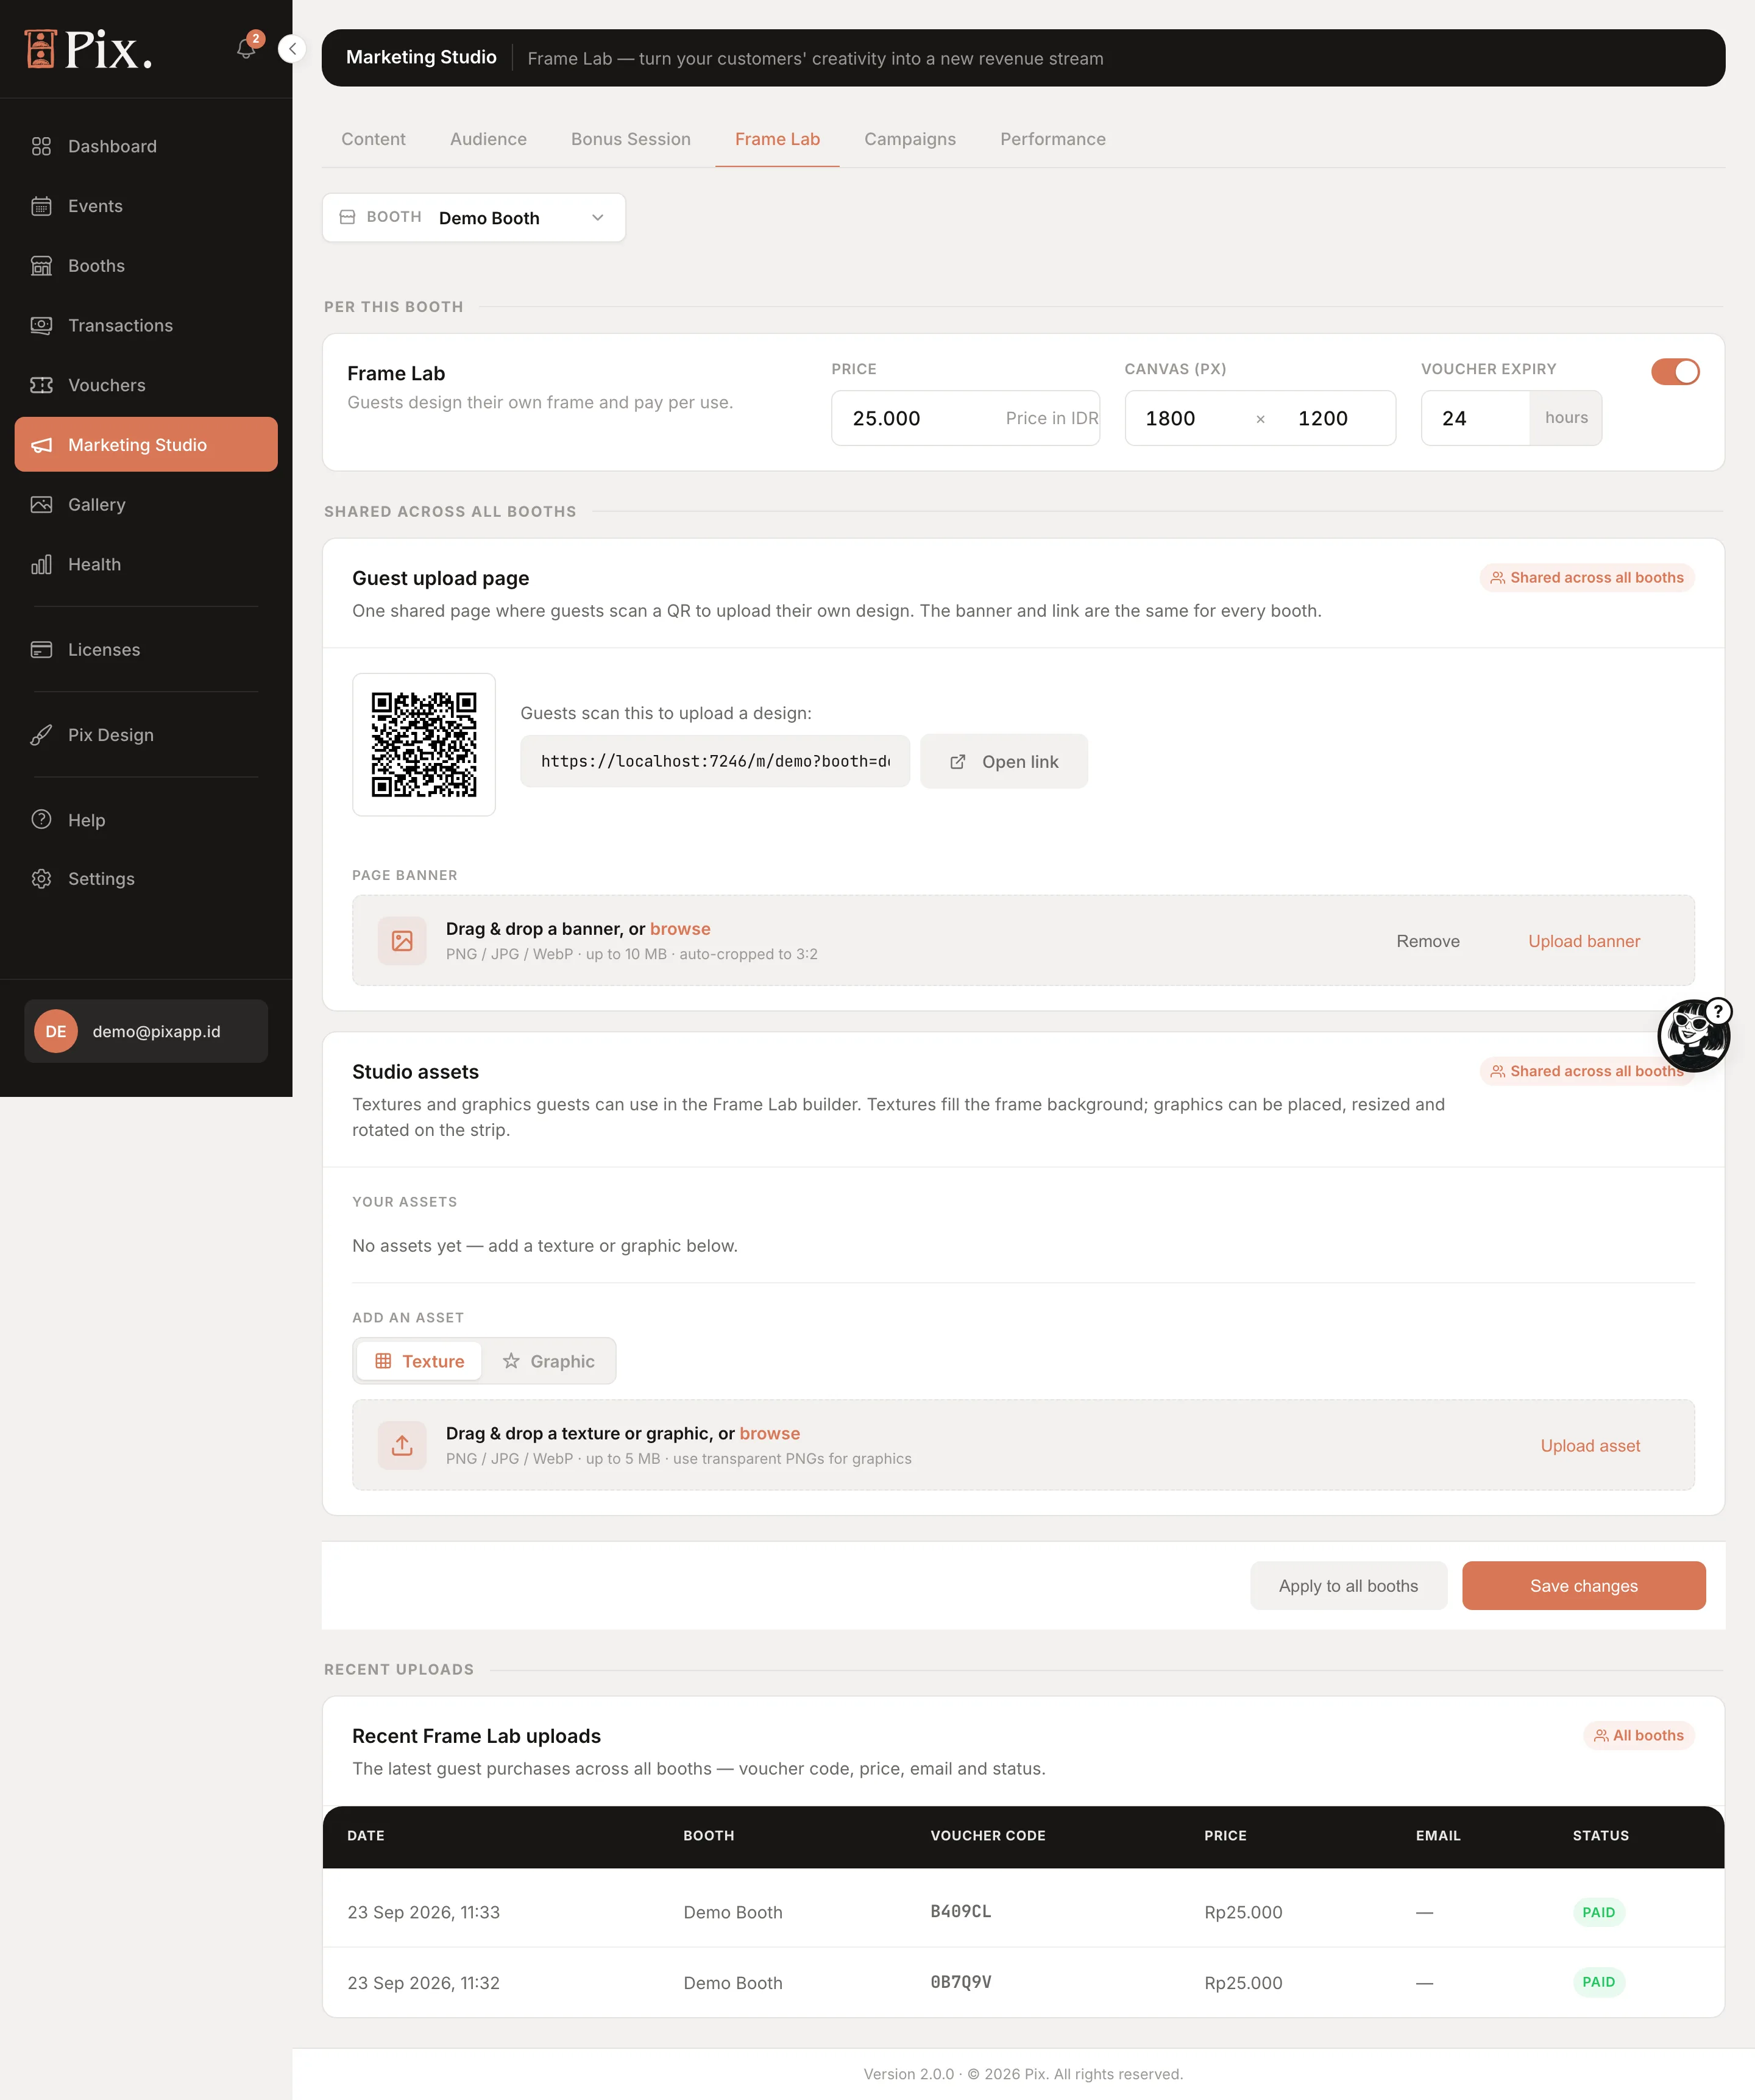
- Marketing Studio > Frame Lab > Recent Frame Lab uploads lists the last 20 orders across all booths with the date, booth, voucher code, price, email and status: Awaiting payment, Paid, Redeemed, Completed or Expired.
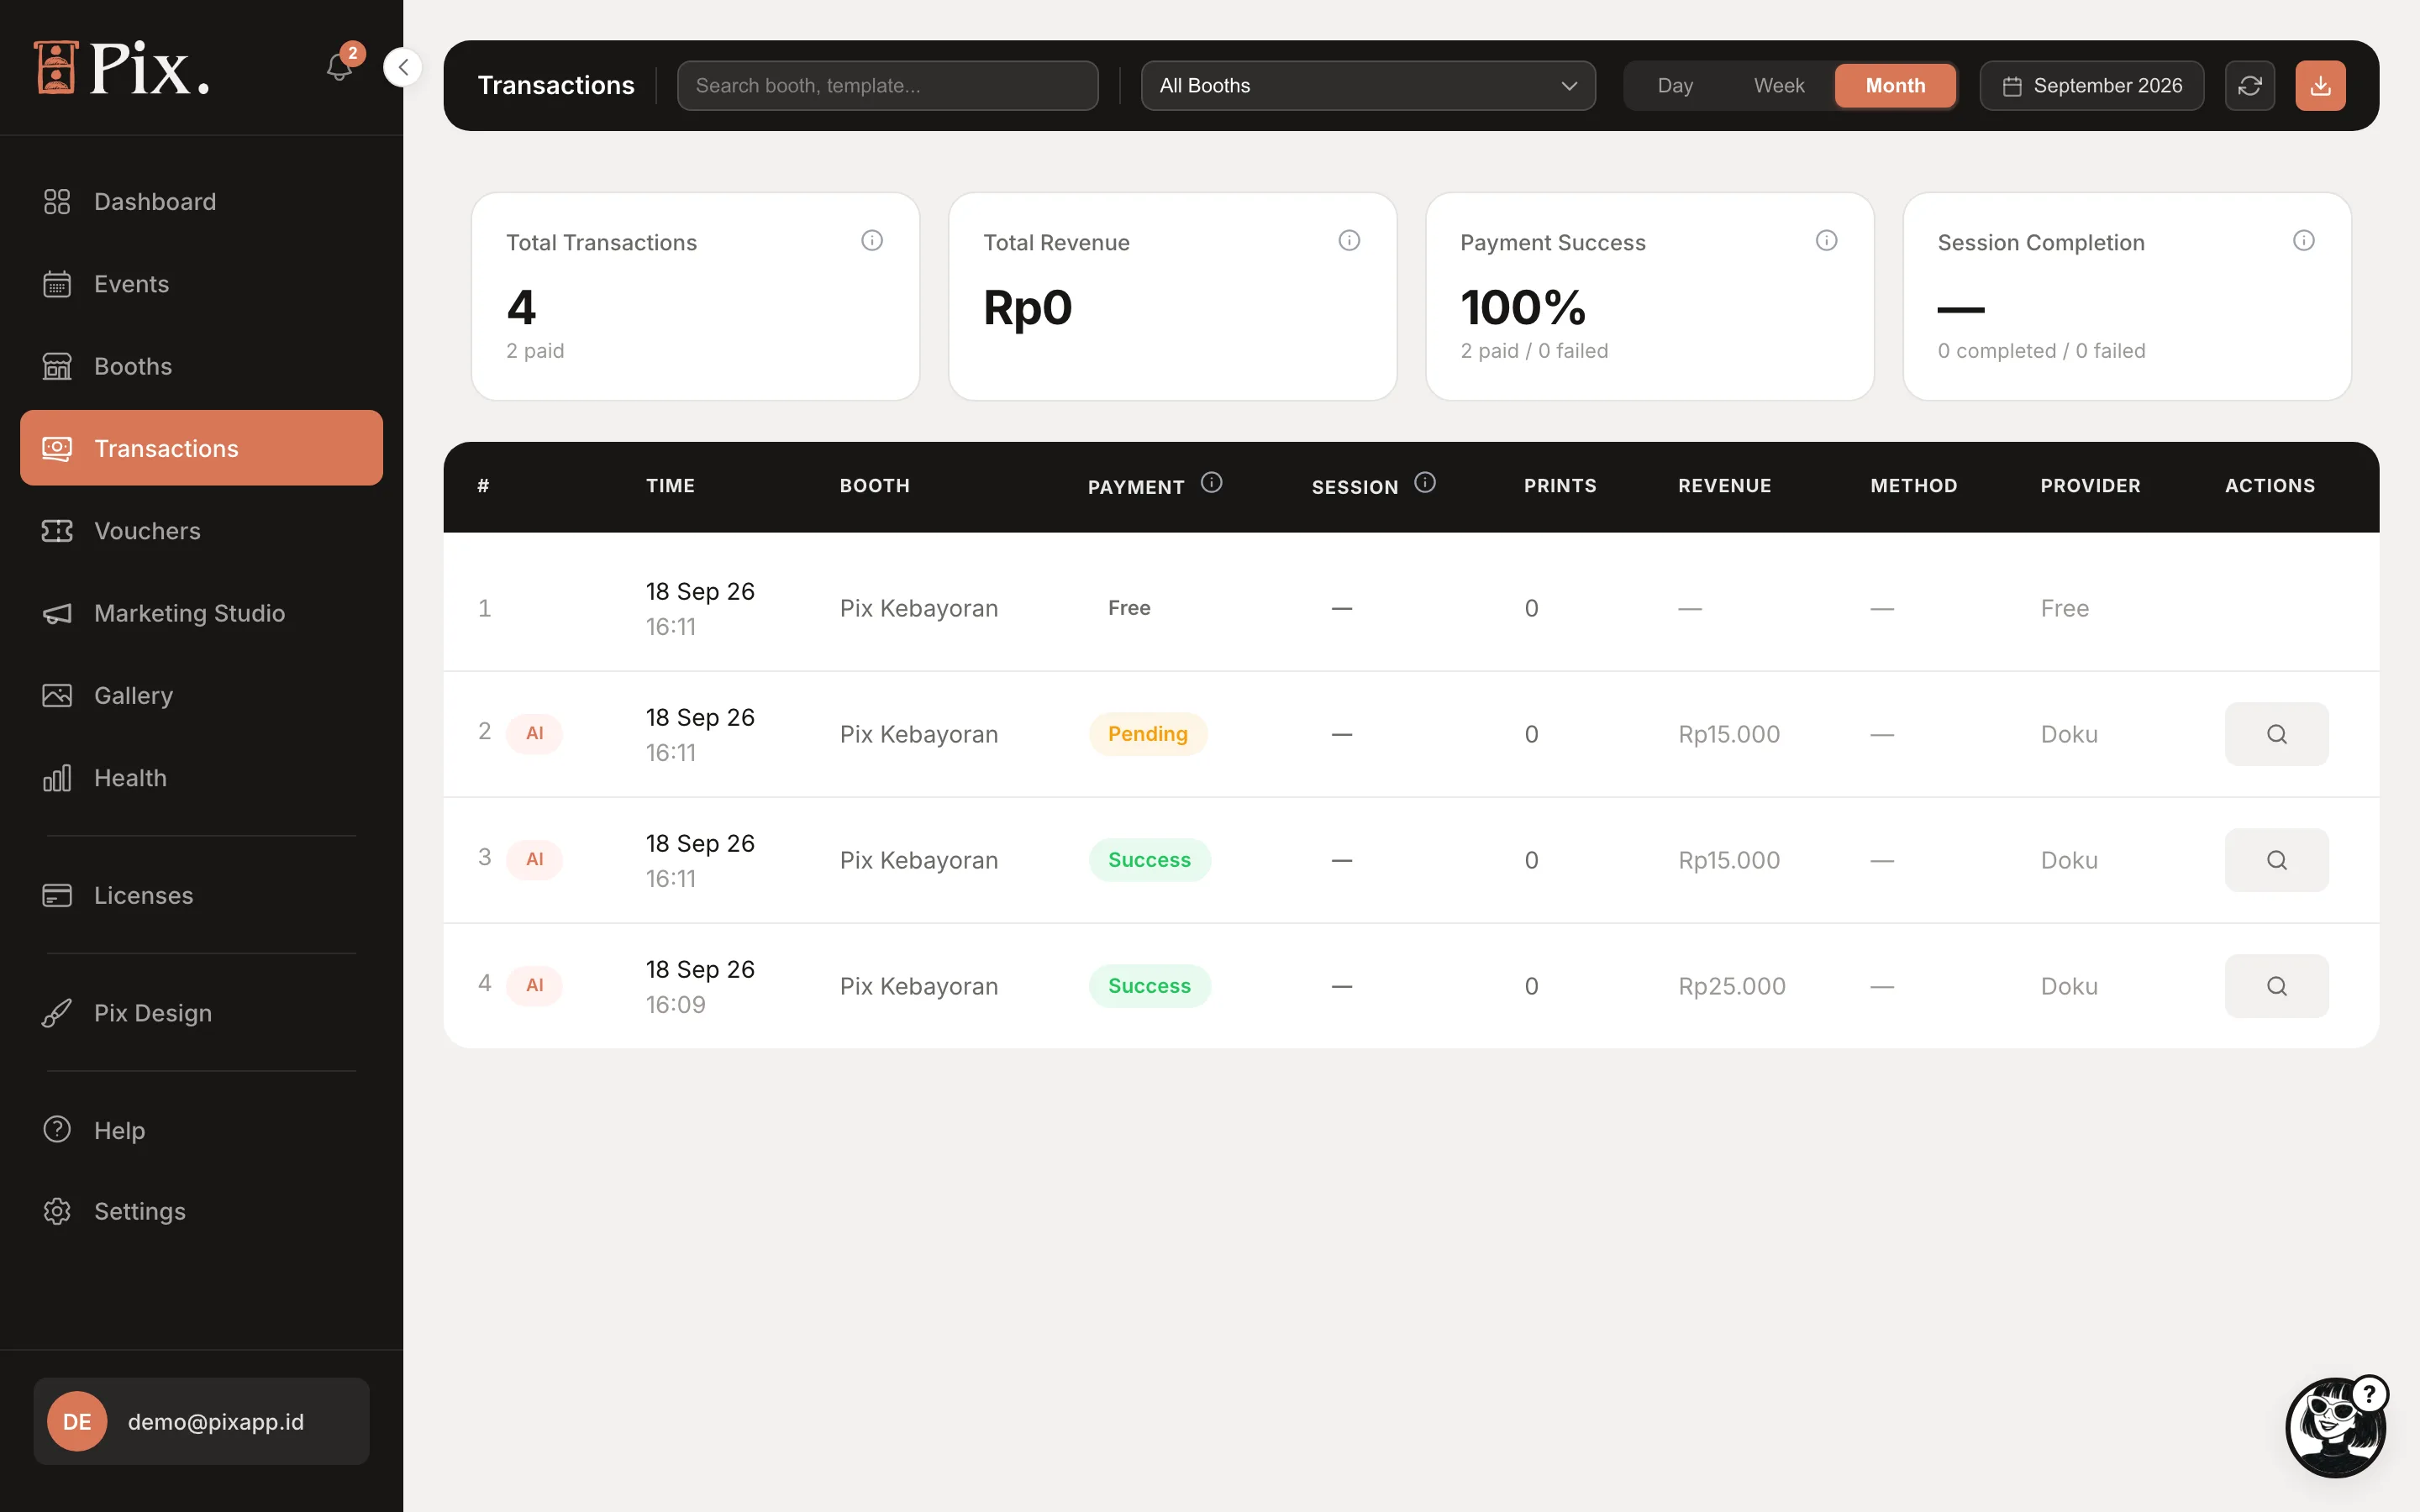
- Transactions shows each paid order as its own row with a CT badge (the export and the phone view say "Frame Lab"), and the Total Revenue subtitle separates session revenue from Frame Lab revenue. The redeemed booth session itself is recorded at zero.
- Vouchers lists the code with the other single-use codes of the account.
Check It Worked
- Open the guest link on your phone: the landing page shows the booth's name and Start Crafting, not "Not available".
- Build a frame, pay, and see Your voucher is ready with a code.
- Type the code on the booth's Payment screen: the session continues without a QR payment and the Templates screen shows only your frame.
- The order appears under Recent Frame Lab uploads as Paid, then Redeemed, and as a CT row on Transactions.
Troubleshooting
| Symptom | Cause | Fix |
|---|---|---|
| The guest page says "Not available" | Frame Lab is off for that booth, or its price is empty or 0 | Turn the switch on and set a price on Marketing Studio > Frame Lab |
| The switch will not turn on | The booth has no template, or the computer is not on Pix Pro | Assign a template on the booth's Templates tab; put Pix Pro on the computer |
| "This booth has no payment method set up yet" on the pay step | No active gateway, or the gateway cannot charge the booth's currency | Connect a gateway under Settings > Payment Gateway; keep the booth on a currency the gateway charges |
| The upload is refused for its ratio | The PNG does not match the booth's print size | Export the design at the ratio shown on the drop zone (for example 2:3 for a 4x6 print) |
| "No transparent photo slots found" | The photo areas are painted, not transparent | Delete the photo areas so they are see-through, export as PNG with transparency |
| The booth says the code is invalid | Typing error, a different booth, expired, or already used | Check the code on Recent Frame Lab uploads; a code is tied to one booth and one session |
| The code is accepted but the frame does not appear | Extra prints or sessions were added before the code | Start again and enter the code with the standard session selected |