Create a Payment Gateway
A payment gateway is the service that sits between your booth and your bank. It shows the QR code or card request, checks that the guest actually paid, tells the booth to unlock the photo session, and settles the money into your business account a day or three later. Without one, a self-service booth still needs a person to collect cash. Pixture never holds the money: it goes from the guest to your own gateway account, and Pixture only asks the gateway whether the payment went through.
In this tutorial you will open a merchant account with a gateway, collect the keys Pixture needs, connect the gateway, run the test charge and, for Stripe, add the optional webhook and card readers. The Pixture side takes about 30 minutes. The provider's own business verification takes anywhere from a day to two weeks, so start with that.
Before You Start
- A registered business and a business bank account. Gateways will not onboard you without both. In Indonesia that is a KBLI 74201 registration plus an NIB through OSS; in Malaysia an SSM registration; in the United States an LLC plus a sales tax permit is the usual minimum.
- Owner or admin access to the Pixture dashboard.
- Pix Pro on the booth's computer for the test at the booth. On Pix Starter the booth skips the Payment screen.
Step 1: Pick the Provider
| You are in | Use | Guests pay with |
|---|---|---|
| Indonesia | DOKU | QRIS from any wallet or banking app |
| Malaysia | Stripe | A card on their phone through a QR code, or a tap on a Stripe Terminal reader. For DuitNow QR, add a Transpire QR terminal at the booth, see Setup B4 |
| Anywhere else | Stripe | A card on their phone through a QR code, or a tap on a Stripe Terminal reader at the booth |
Midtrans and Xendit are also on the provider list for merchants who already have an account there; both are QRIS in Indonesia only. Midtrans, Xendit and DOKU charge in rupiah only, so a booth priced in any other currency needs Stripe.
Step 2: Open the Merchant Account
- DOKU: register as a business at doku.com, complete the verification with your business registration, the owner's ID and the bank account, and ask for QRIS to be activated. You start in the sandbox and receive live keys once verification is done.
- Stripe: create an account at stripe.com and complete Activate your account with the business details and the payout bank account. Test keys are available at once; live keys appear when the account is activated.
While you wait for verification, everything below works with the provider's test keys. Just remember to swap them for the live keys before opening to guests.
Step 3: Collect the Keys
DOKU needs four values. The first three come from the DOKU Dashboard; the fourth is made in Pixture.
| Field in Pixture | Where to find it | Looks like |
|---|---|---|
| Secret Key | DOKU Dashboard > Settings > Account > API Keys > Active Secret Key. Click Reveal Key, pass the OTP, copy | SK-RG... |
| Client ID | DOKU Dashboard > Settings > Account > API Keys > Client ID | BRN-0216-1770968840103 |
| Merchant ID | DOKU Dashboard > Settings > Checkout Appearance > QRIS Credential Settings tab. A number, not your Client ID | 18545 |
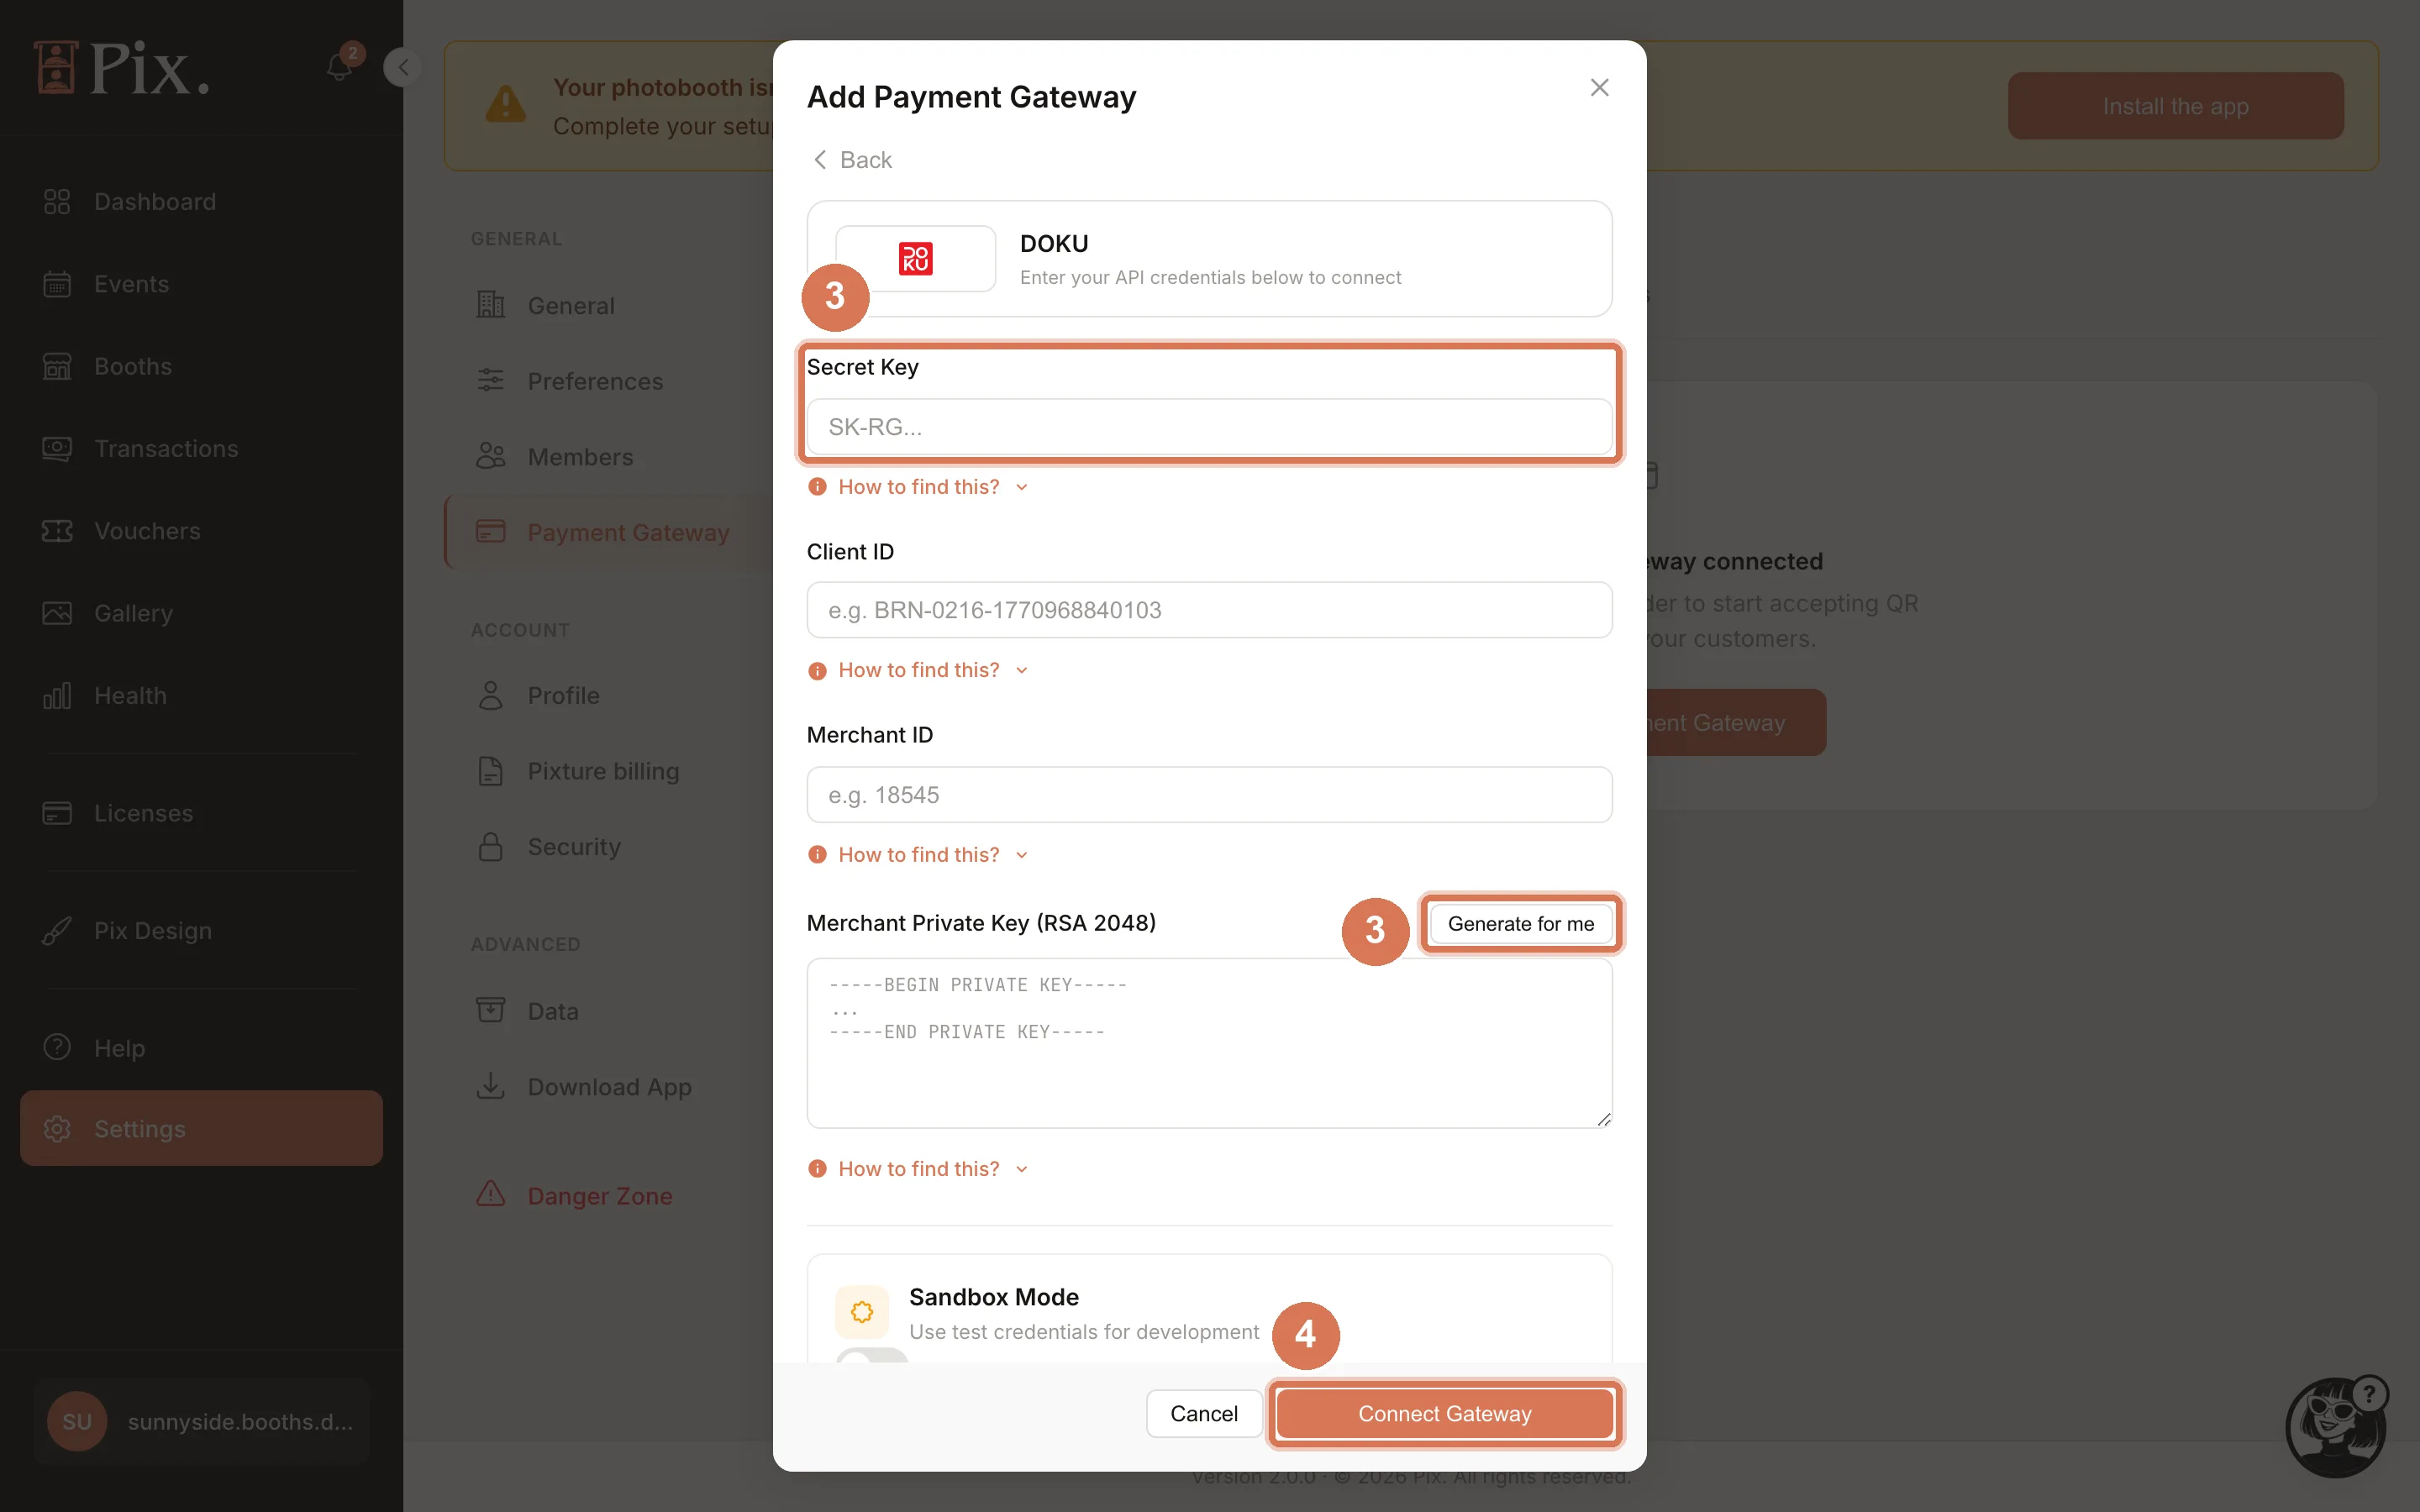
| Merchant Private Key (RSA 2048) | In the Pixture form, click Generate for me. Pixture creates the key pair in your browser and shows the public key; paste that public key in DOKU Dashboard > Settings > Account > API Keys > Edit Merchant Public Key | -----BEGIN PRIVATE KEY----- |
Stripe needs one value.
| Field in Pixture | Where to find it | Looks like |
|---|---|---|
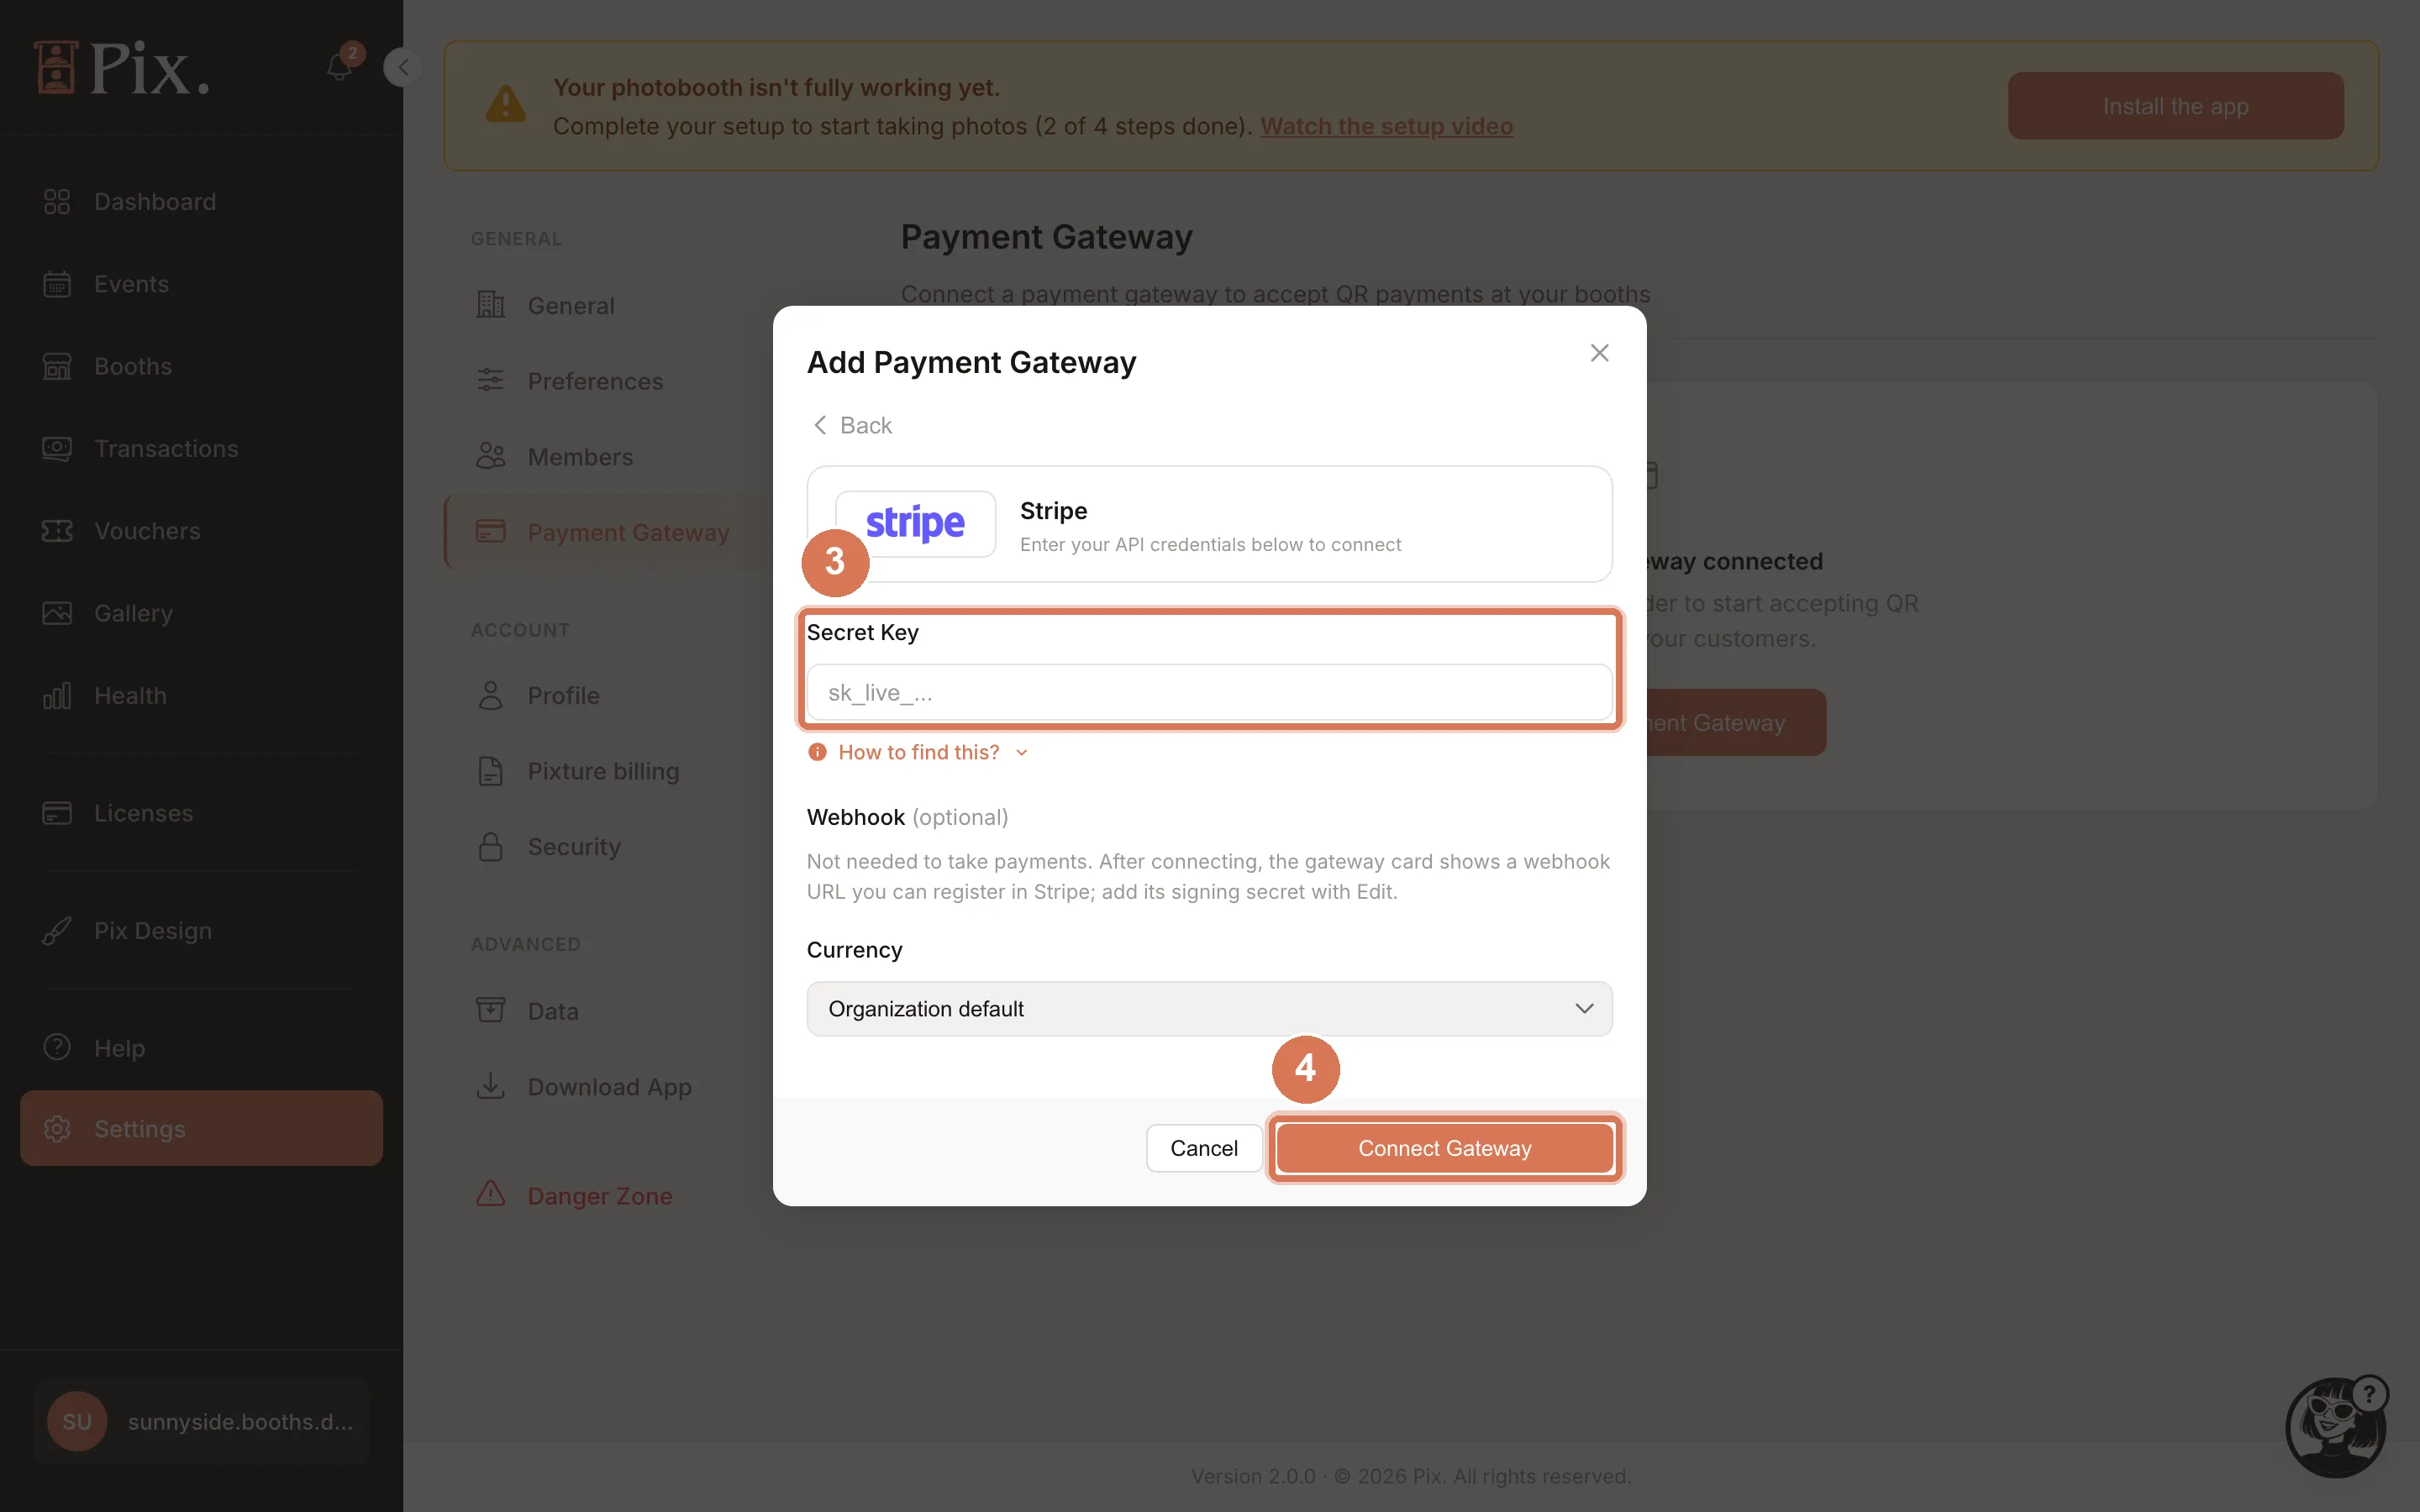
| Secret Key | Stripe Dashboard > Developers > API keys. Copy the secret key itself | sk_live_..., or a restricted key rk_... |
Stripe shows a secret key only once. If yours is gone, click Create secret key and copy the new one. Two things that look right but are not the key: the publishable key (pk_...) and the Copy API key ID entry in the key's menu, which gives an mk_... string. An sk_test_... key connects fine and looks fine in Transactions, but it charges Stripe's test mode and never pays out.
Midtrans needs the Server Key and Client Key from its Settings > Access Keys page. Xendit needs the secret API key from its Settings > API Keys page.
Step 4: Connect the Gateway in Pixture
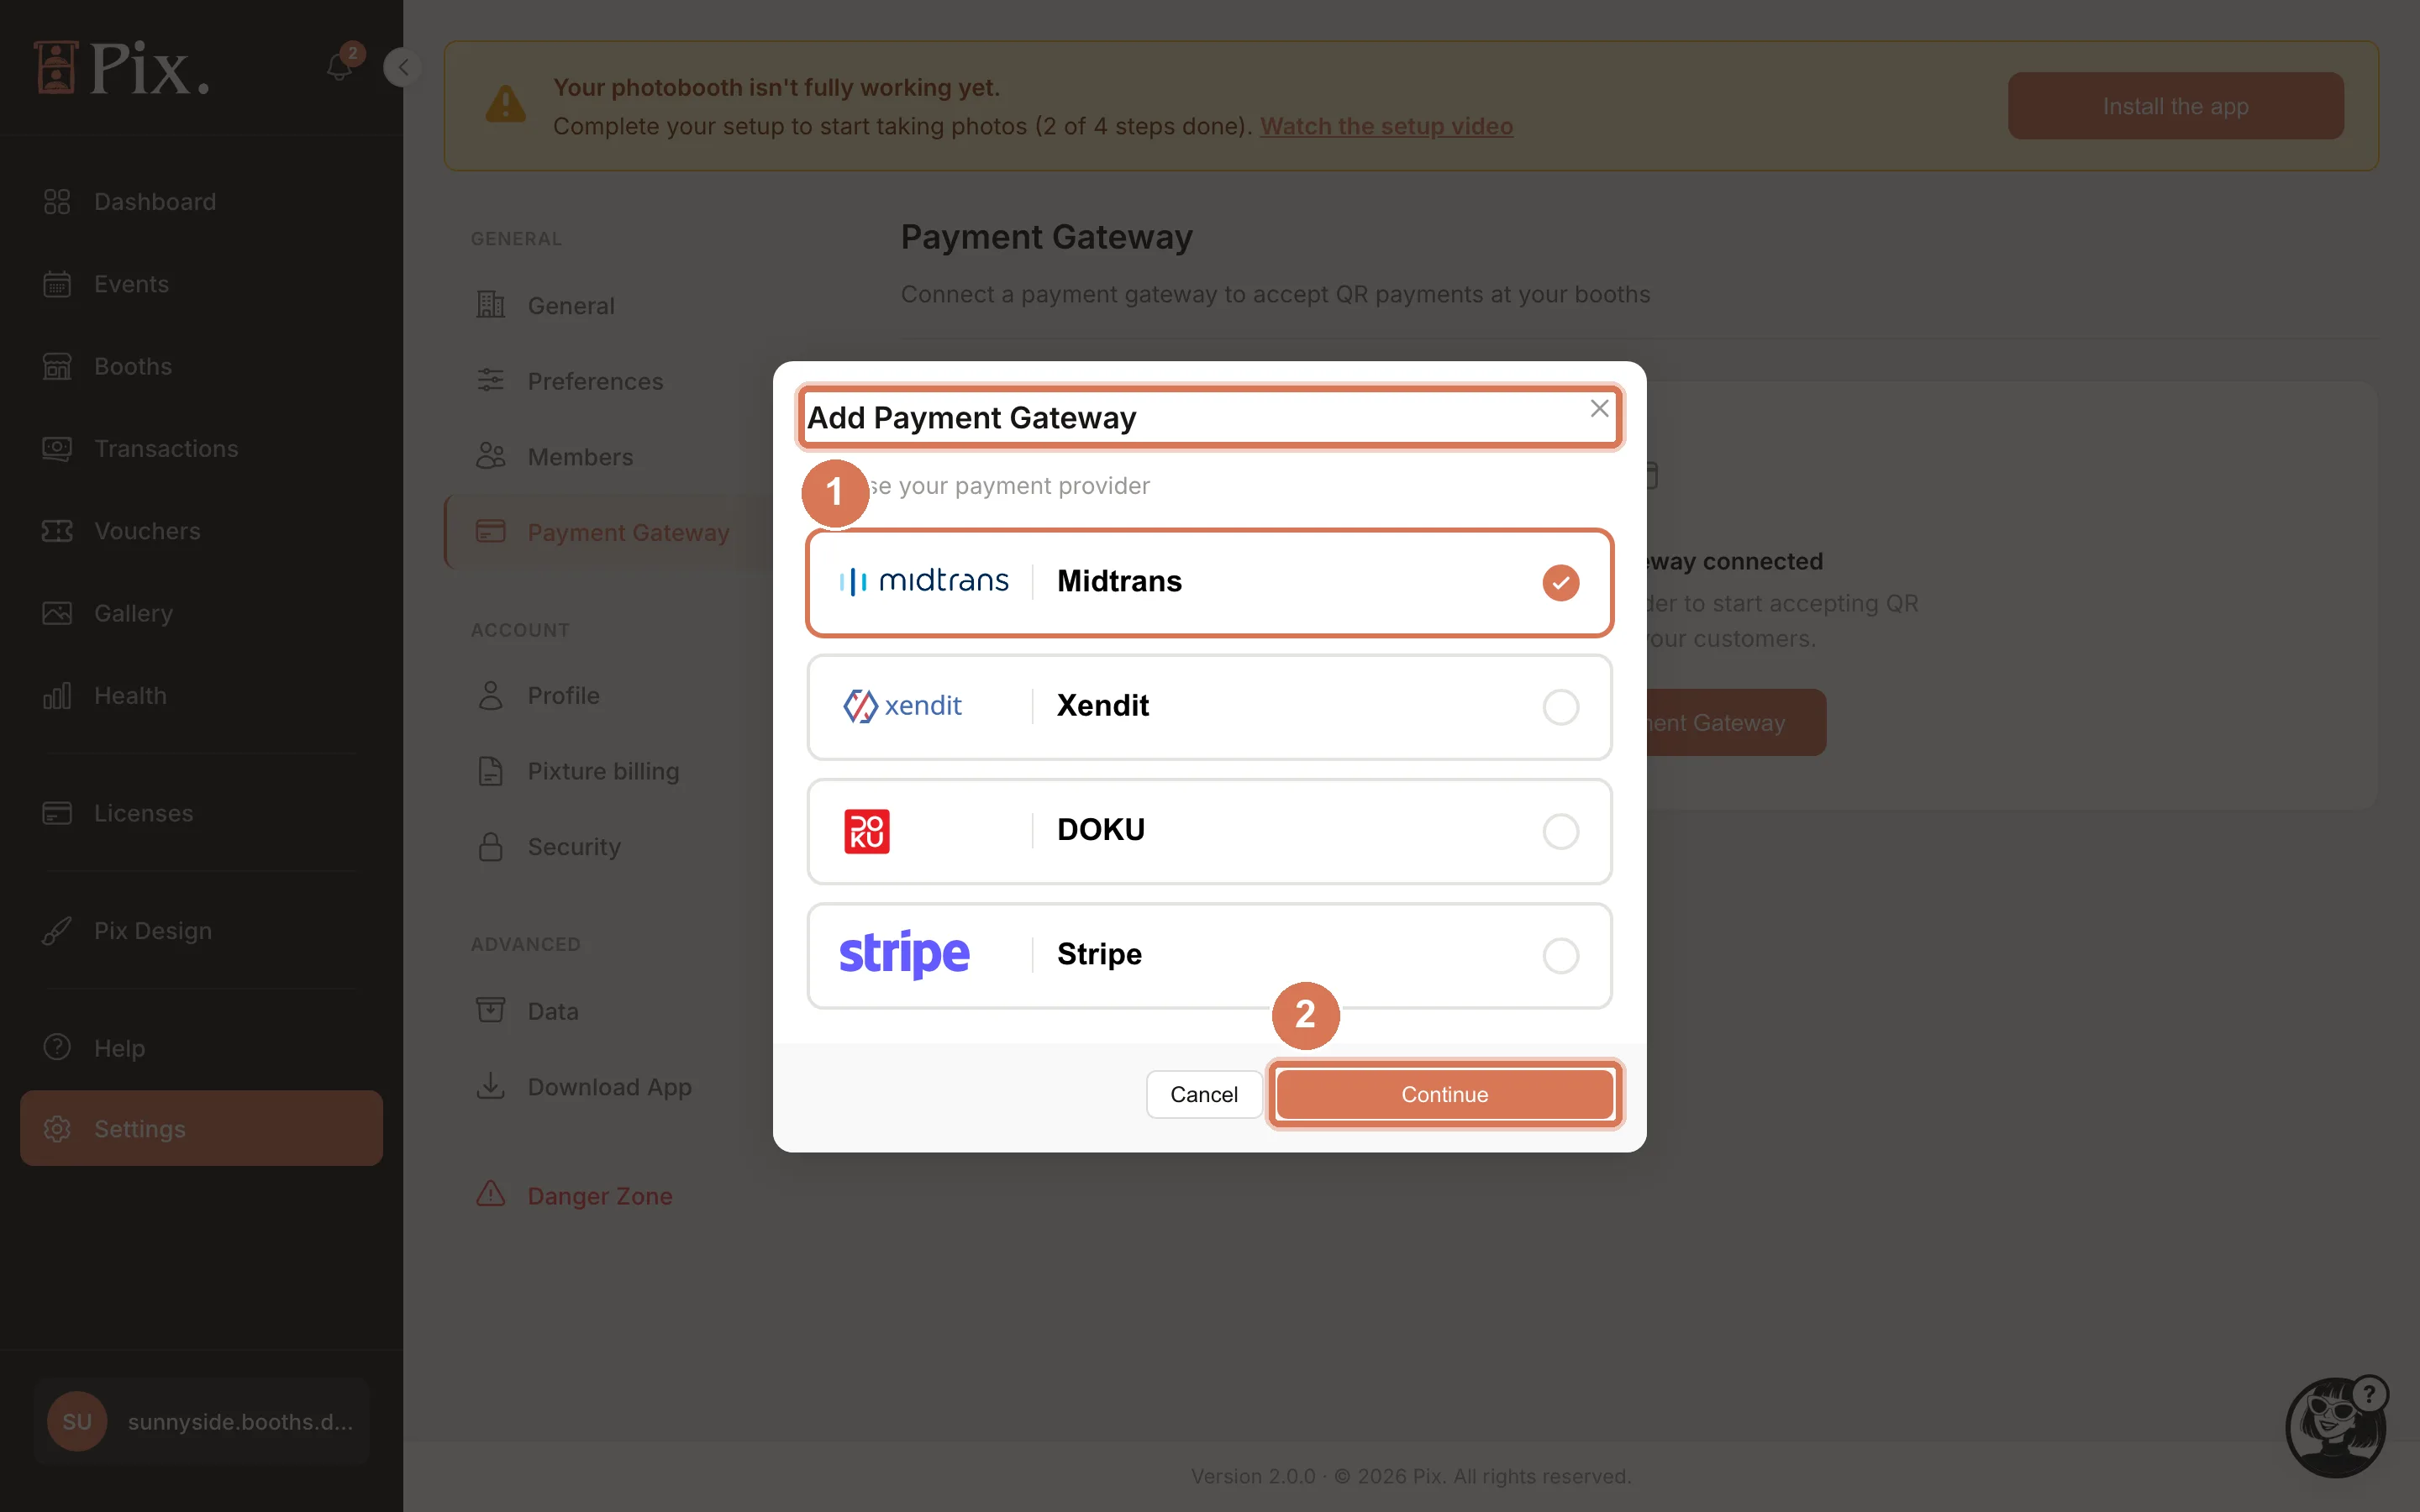
- Open Settings > Payment Gateway and click Add Payment Gateway.
- Under Choose your payment provider, pick the provider and click Continue.
- Paste the values from Step 3. Each field has a How to find this? expander with the same path as the table above.
- DOKU: Secret Key, Client ID, Merchant ID and the Merchant Private Key (click Generate for me, then copy the public key it shows into the DOKU Dashboard before you continue). Turn Sandbox Mode on while you use sandbox keys, and off with the live keys.
- Stripe: the Secret Key. Currency stays on Organization default unless this gateway charges in a different currency from your account. There is no Sandbox switch for Stripe: the key decides test or live. Leave the Webhook section alone for now; it is not needed to take payments.
- Click Connect Gateway. Pixture checks a Stripe key with Stripe as it saves; a wrong or incomplete key is refused here rather than at the booth.
The gateway appears as a card with Edit and Test. Your first gateway is the Organization Default, the one every booth uses unless you say otherwise in Step 8.
Step 5: Run the Test Charge
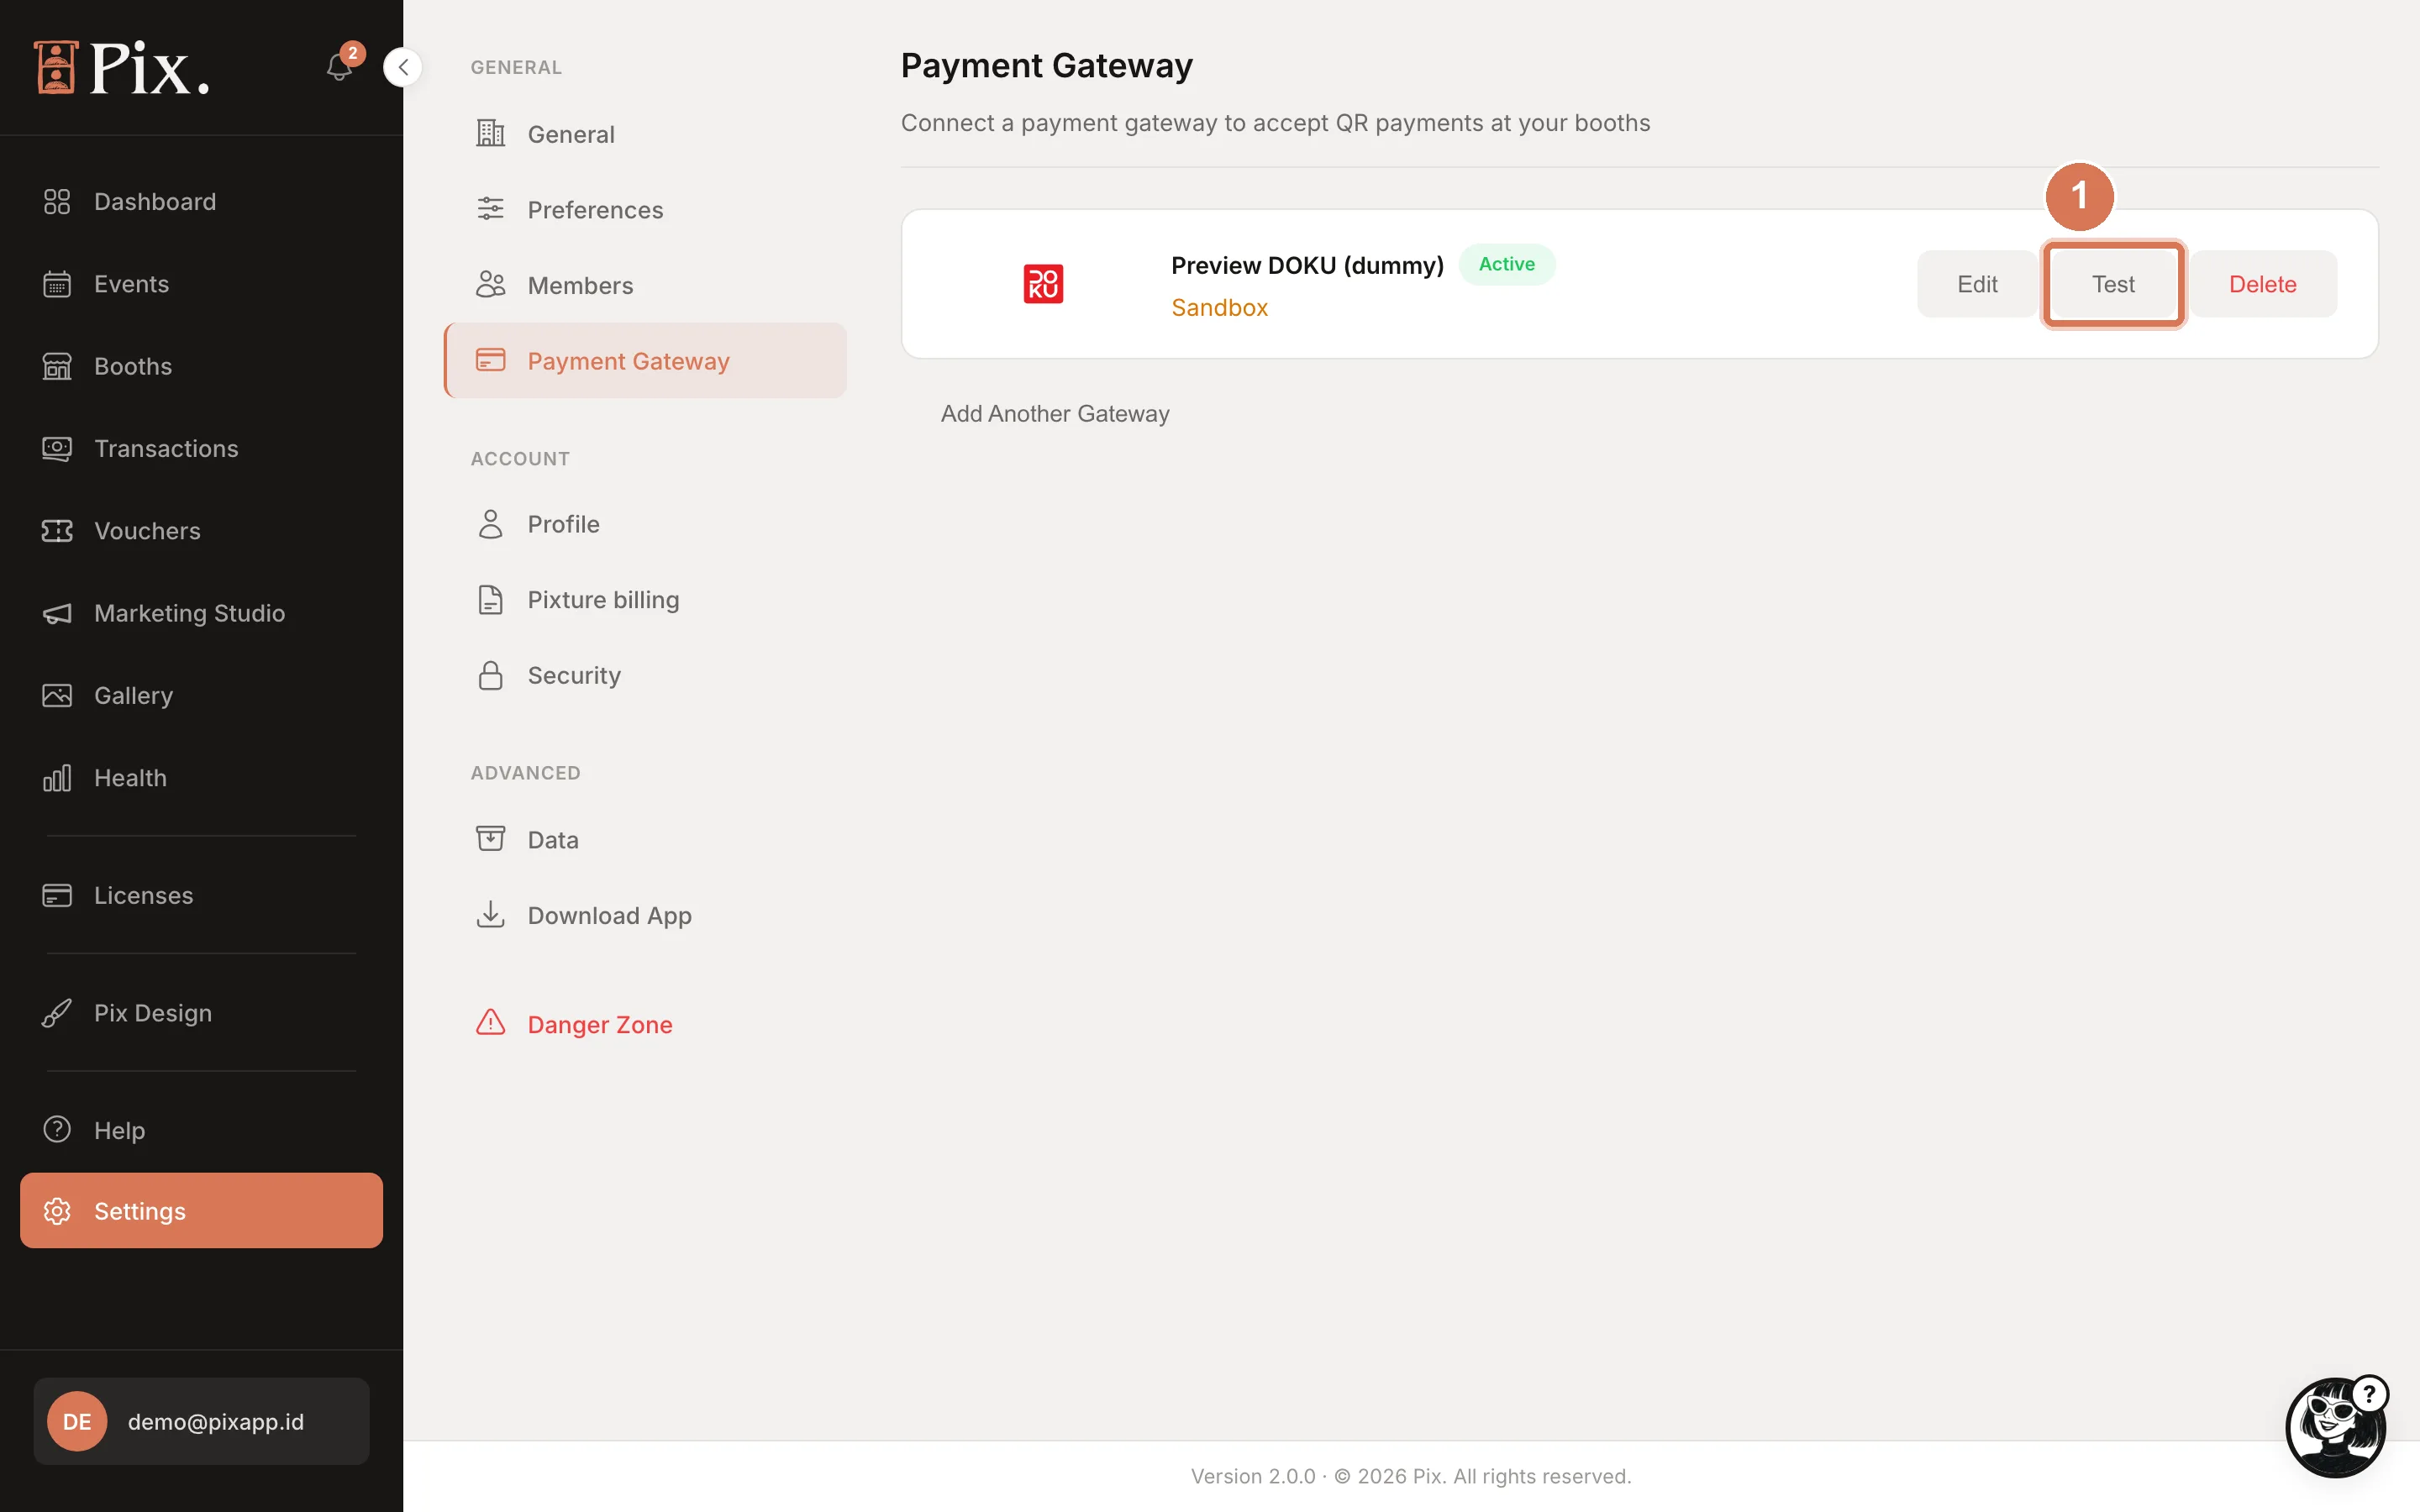
- On the gateway card, click Test. Pixture asks the gateway for a small test charge.
- The result window shows whether the gateway accepted it and how to check on the provider's side. For a QRIS gateway, scan the QR it shows with a wallet that matches the mode: a test wallet in sandbox, a real wallet live.
- If it fails, the window reads "Connection failed. The provider did not accept the test charge" with the HTTP code the provider returned. Click Edit gateway, paste the keys again, check that the channel (QRIS, or card payments on Stripe) is active on the provider's dashboard, and test once more.
Run the test again after any change to keys or mode, and once more when you switch from sandbox to live.
Step 6: Add the Stripe Webhook (Optional)
Payments are confirmed without a webhook: the booth polls Stripe until the payment is through. A webhook lets Stripe push the confirmation as well, which shaves a few seconds off the wait.
- On the Stripe gateway card, find Webhook URL (optional) and click Copy.
- In the Stripe Dashboard, go to Developers > Webhooks > Add destination, paste the URL and pick the
checkout.sessionevents. - Copy the Signing secret (
whsec_...) Stripe shows. - Back in Pixture, click Edit on the card, paste the secret into the webhook secret field and save.
Step 7: Add Stripe Terminal Card Readers (Optional)
With a Stripe Terminal reader at the booth, guests tap or insert a card instead of scanning a QR code. The reader belongs to your Stripe account and is assigned to a booth in Pixture.
- Register the reader in the Stripe Dashboard under Terminal, at the location of the booth, and connect it to the booth's Wi-Fi.
- On the Stripe gateway card in Pixture, open Card readers (Stripe Terminal). Every booth has a dropdown that reads No reader (QR payment) until you pick a reader. Readers that are not connected show their status in brackets.
- Pick the reader for the booth. Its Payment screen now says tap to pay on the reader instead of showing a QR code. Choose No reader (QR payment) to go back.
Step 8: Decide Which Booths Use It
- Every booth: nothing to do. The Organization Default gateway applies.
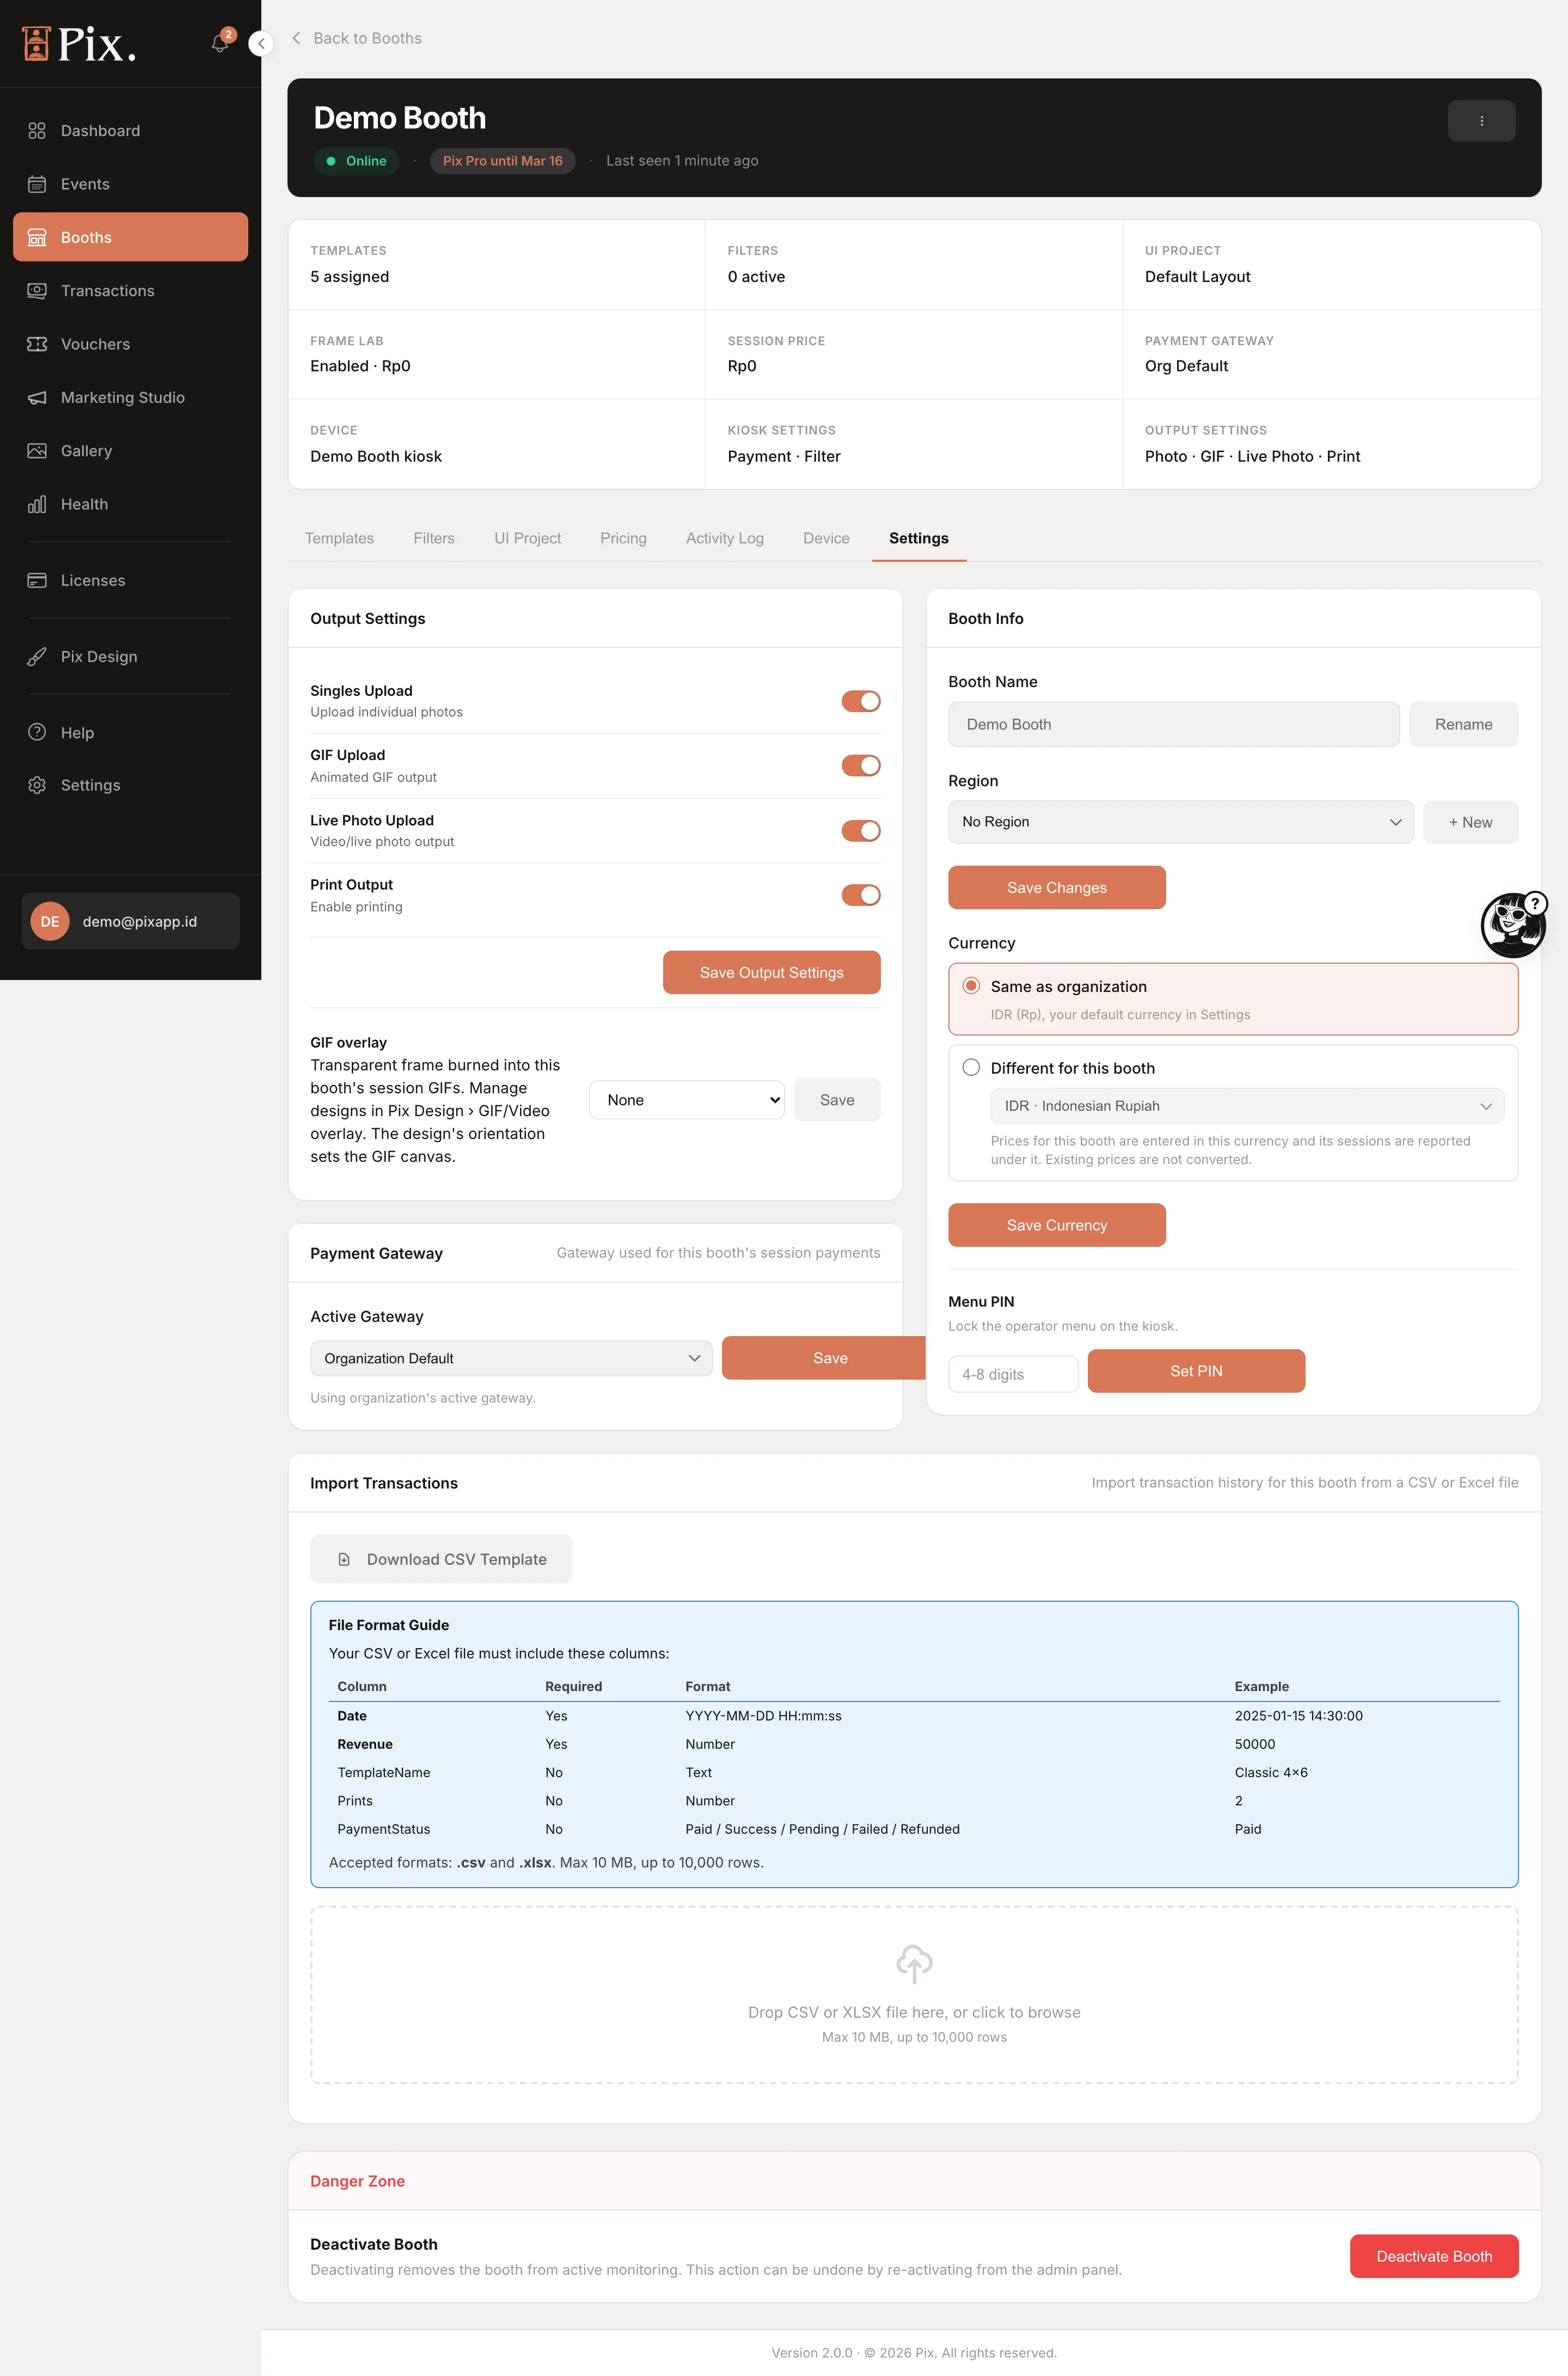
- One booth on a different gateway (a venue or client that must receive the money directly): open Booths, click Configure on the booth, then the Settings tab. Under Payment Gateway, set Active Gateway and click Save. The same tab holds the booth's Currency; the gateway must be able to charge in it.
- One event on a different gateway: in Events, open the event, click Edit, and pick the gateway under Payment gateway. Sessions captured during the event charge through it.
The gateway only decides where the money goes. What a photo session costs is set per booth on the Pricing tab; that is Step 3 of Accept Payments at the Booth.
Check It Worked
- The gateway card shows the provider name and Test reports success.
- A booth with Payment on this booth switched on shows a QR code (or the reader's prompt) on its Payment screen.
- A payment made with your own phone appears on the provider's dashboard and as a row in Transactions.
Troubleshooting
| What you see | What to check |
|---|---|
| "Connection failed" with HTTP 401 or 403 | A key is wrong or from the other mode. Re-copy each key from the provider's dashboard and match Sandbox Mode to the keys you pasted. |
| Stripe refuses the key when you save | You pasted a publishable key (pk_), an API key ID (mk_) or a truncated key. Create a new secret key in Stripe and paste the whole sk_live_... string. |
| The DOKU test says the signature is invalid | The public key in the DOKU Dashboard does not match the private key in Pixture. Click Generate for me again, paste the new public key into Edit Merchant Public Key, save both sides, and test. |
| Stripe payments succeed but nothing pays out | The saved key is sk_test_.... Edit the gateway, paste the live key, test again. |
| The booth shows a QR code although a reader is assigned | The reader is offline in Stripe, or the booth's dropdown still reads No reader (QR payment). |
| A payment shows on the provider's dashboard but not in Transactions | Open Transactions, click Sync with payment gateway, and run it for that date. |
Related
- Accept Payments at the Booth for prices, packages, tax and the first paid session
- Take Card, Coin and Cash Payments for readers and cash systems that do not go through a gateway
- Payment Setups by Use Case for which setup fits an event booth, a mall booth, a studio or a pop-up
- Payment Gateway Reference
- Settings