Create Your Account
By the end of this page you have a Pixture account, an organisation named after your business, your first booth, and a dashboard that is waiting for the Pix Desktop App to be installed. Signing up takes about five minutes and asks for no card.
Before You Start
- An email address you can open right away.
- A phone number on WhatsApp, for the 6-digit verification code. There is an escape hatch if your number does not use WhatsApp.
Sign Up
-
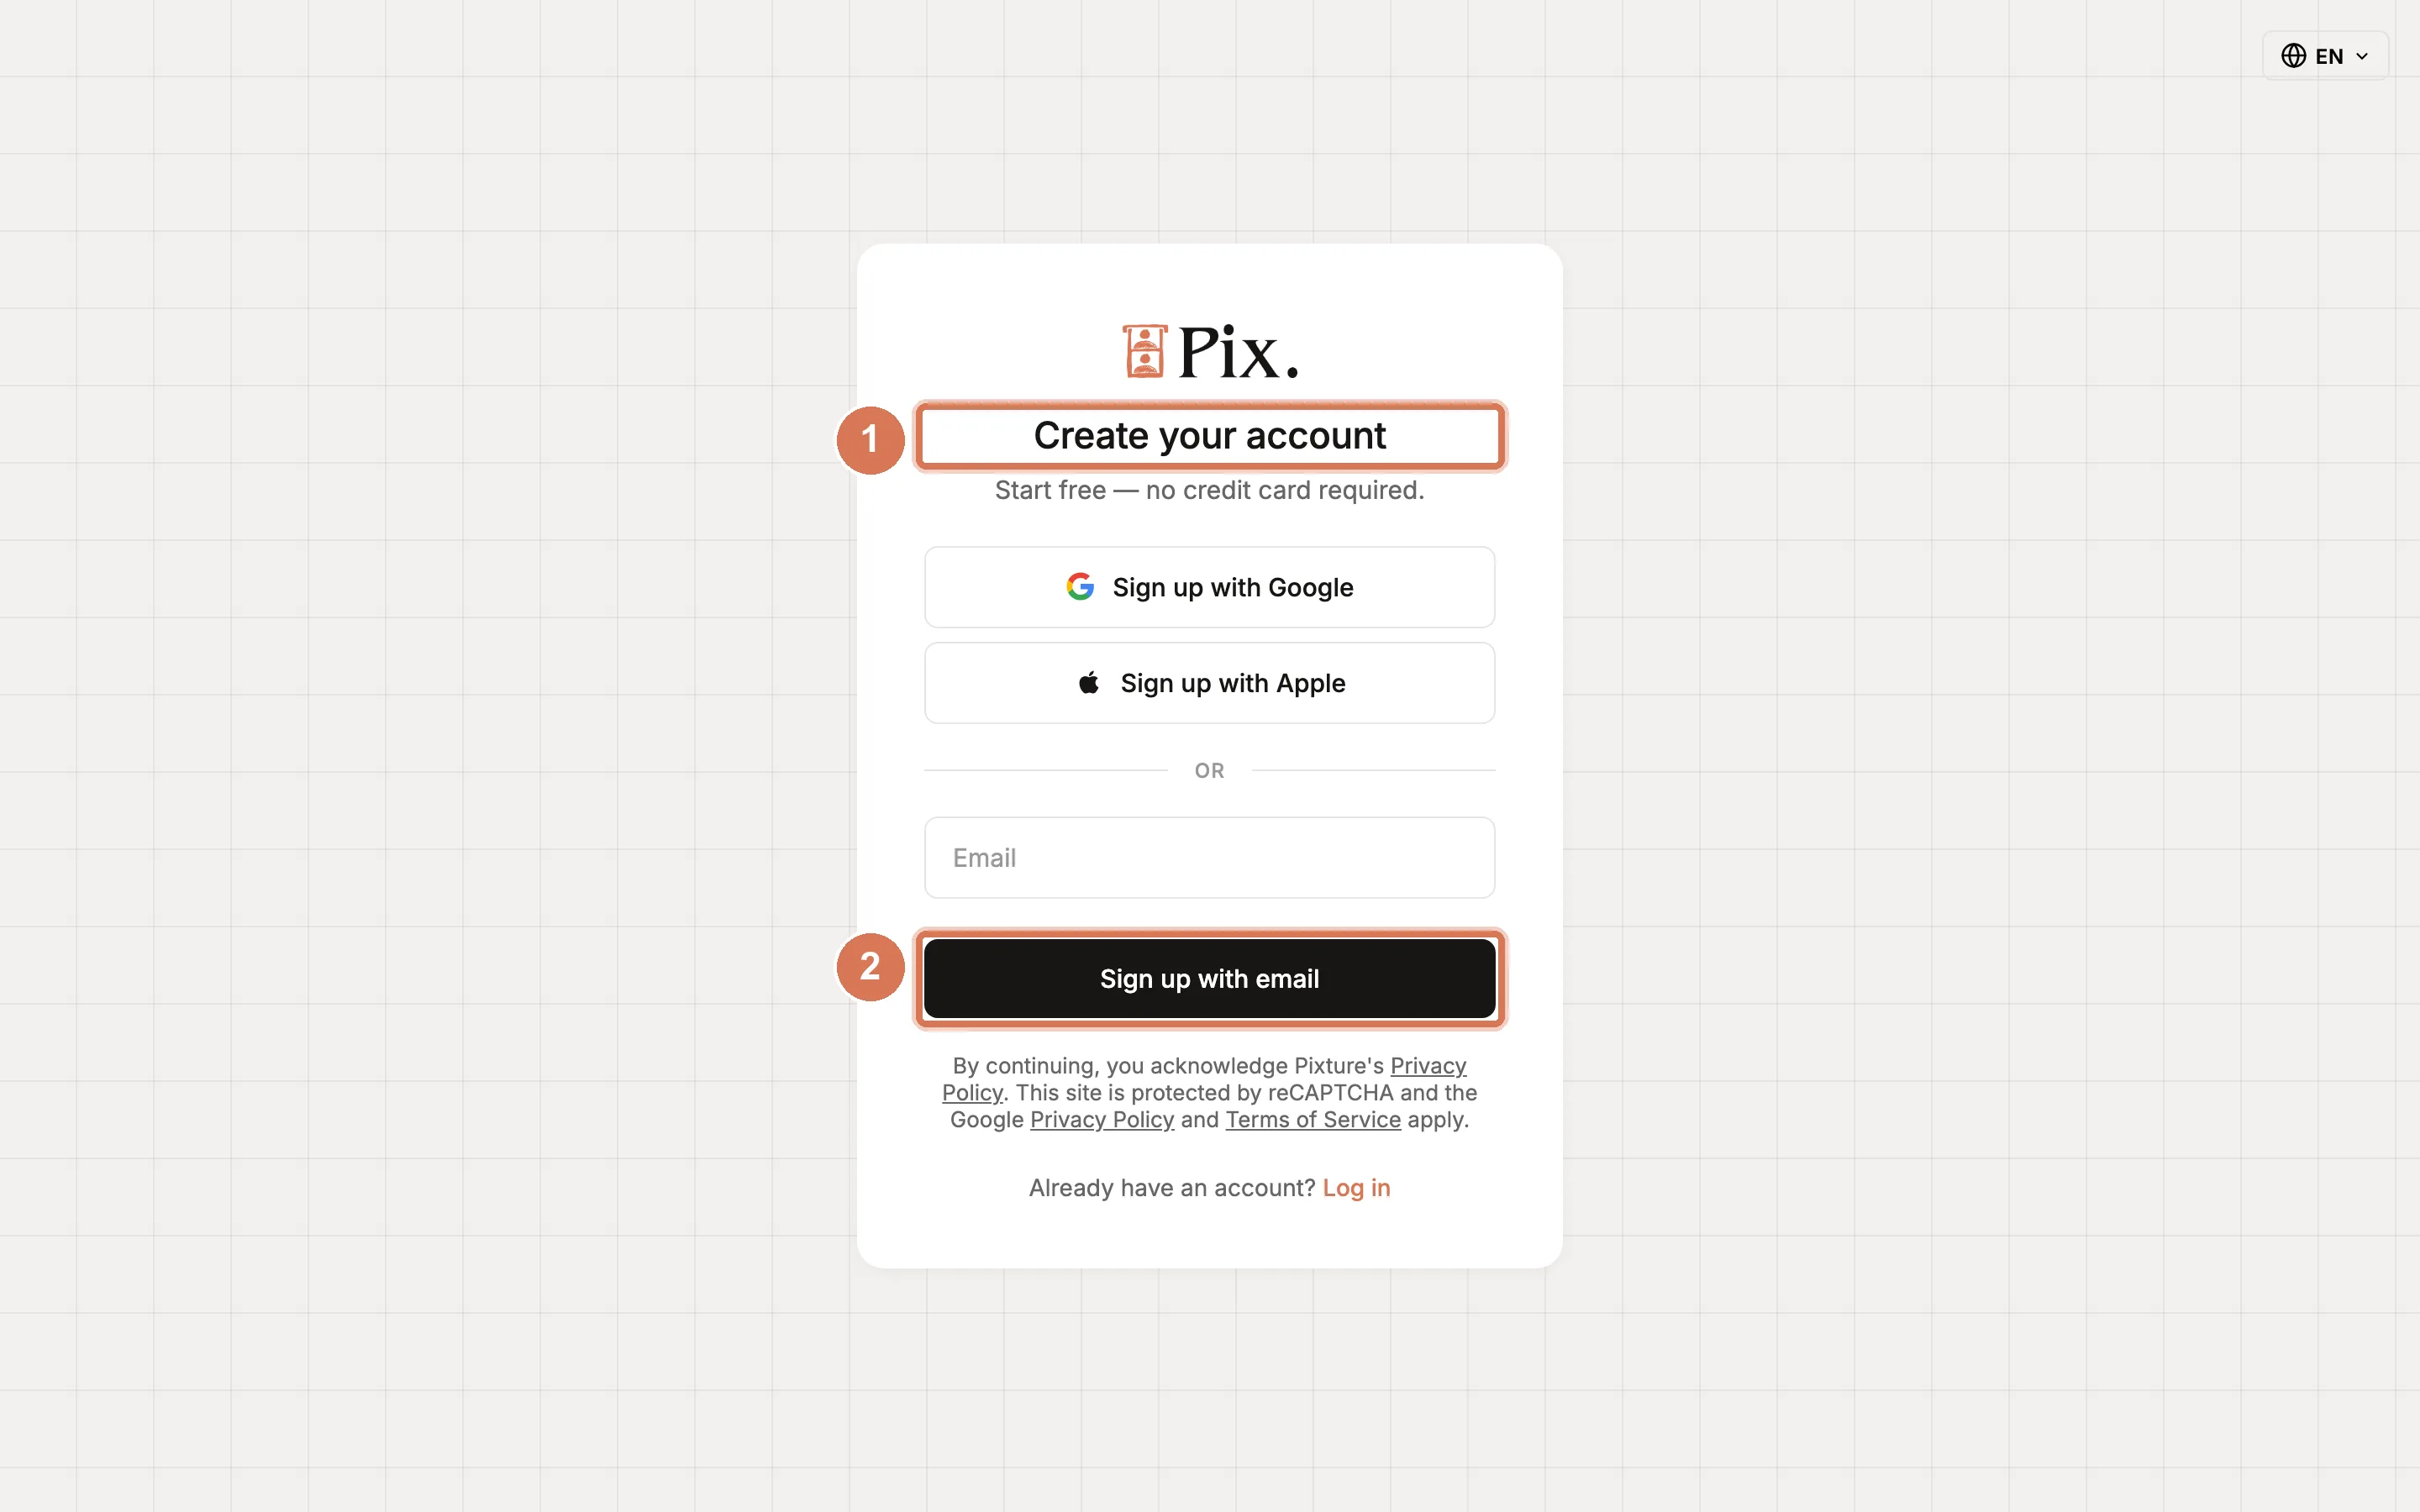
Go to pixture.io/signup. The page is titled Create your account and reminds you that no credit card is needed.
-
Pick one way in: Sign up with Google, Sign up with Apple, or type your email address and click Sign up with email.
-
If you used email, the page says Check your email. Open the message from pixture.io and click the link. It opens the Complete your account page. If nothing arrives within a few minutes, check your spam folder.
Complete Your Account
-
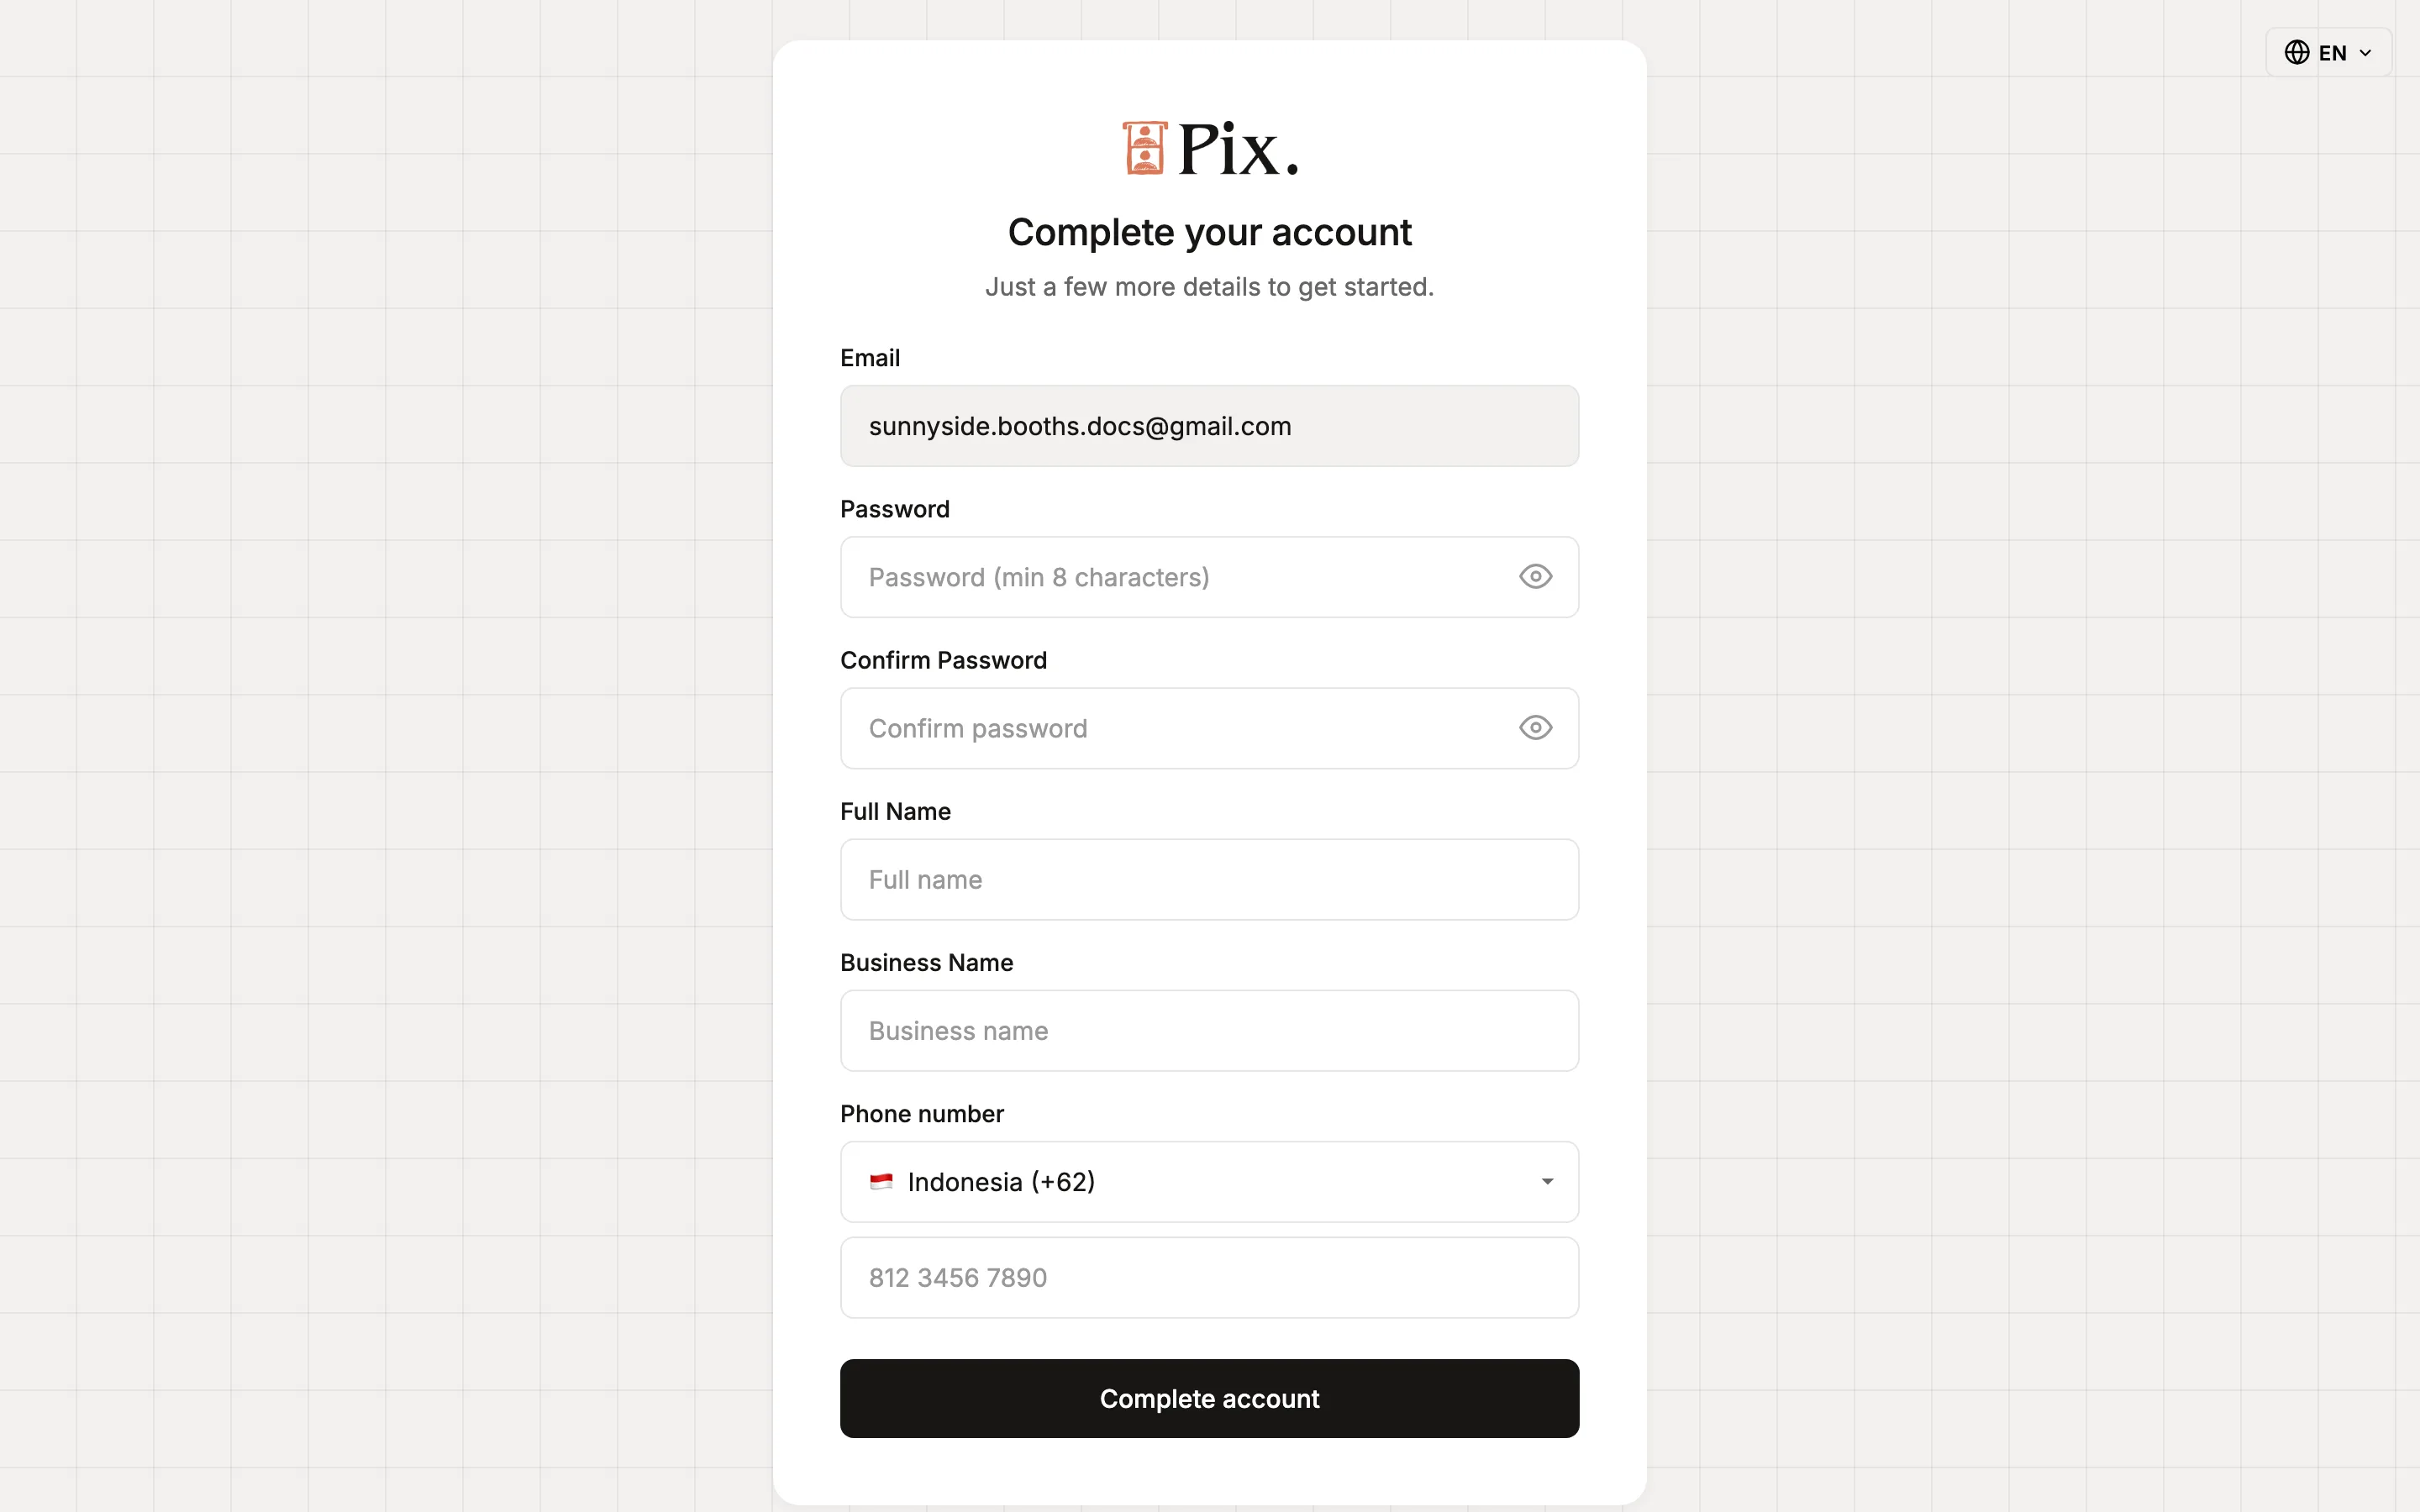
On Complete your account, your email is already filled in. Set a Password and repeat it under Confirm Password. The password needs at least 8 characters with an upper-case letter, a lower-case letter, a number and a special character.
-
Enter your Full Name and your Business Name. The business name becomes the name of your organisation in the dashboard; you can change it later.
-
Enter your phone number and click Send code via WhatsApp. Type the 6-digit code from WhatsApp and click Verify. If your number does not use WhatsApp, click My number doesn't use WhatsApp instead.
-
Click Complete account.
If you signed up with Google or Apple, you see a shorter Set up your account page instead: enter your Business name, verify your phone number the same way, and click Get started.
Quick Setup
The first thing the dashboard shows is onboarding. It has two steps.
-
On 1 · Quick setup, check the fields:
Field What to enter Organization Name Your business name, already filled in from sign-up Timezone Detected from your browser and shown as "Detected: …". Change it if the booth lives somewhere else Currency The currency your booths charge in. Any ISO currency Booth Name The name of your first booth. The hint says: "Give it a name that helps you identify this booth's purpose or location." Location Optional, for example the mall or venue 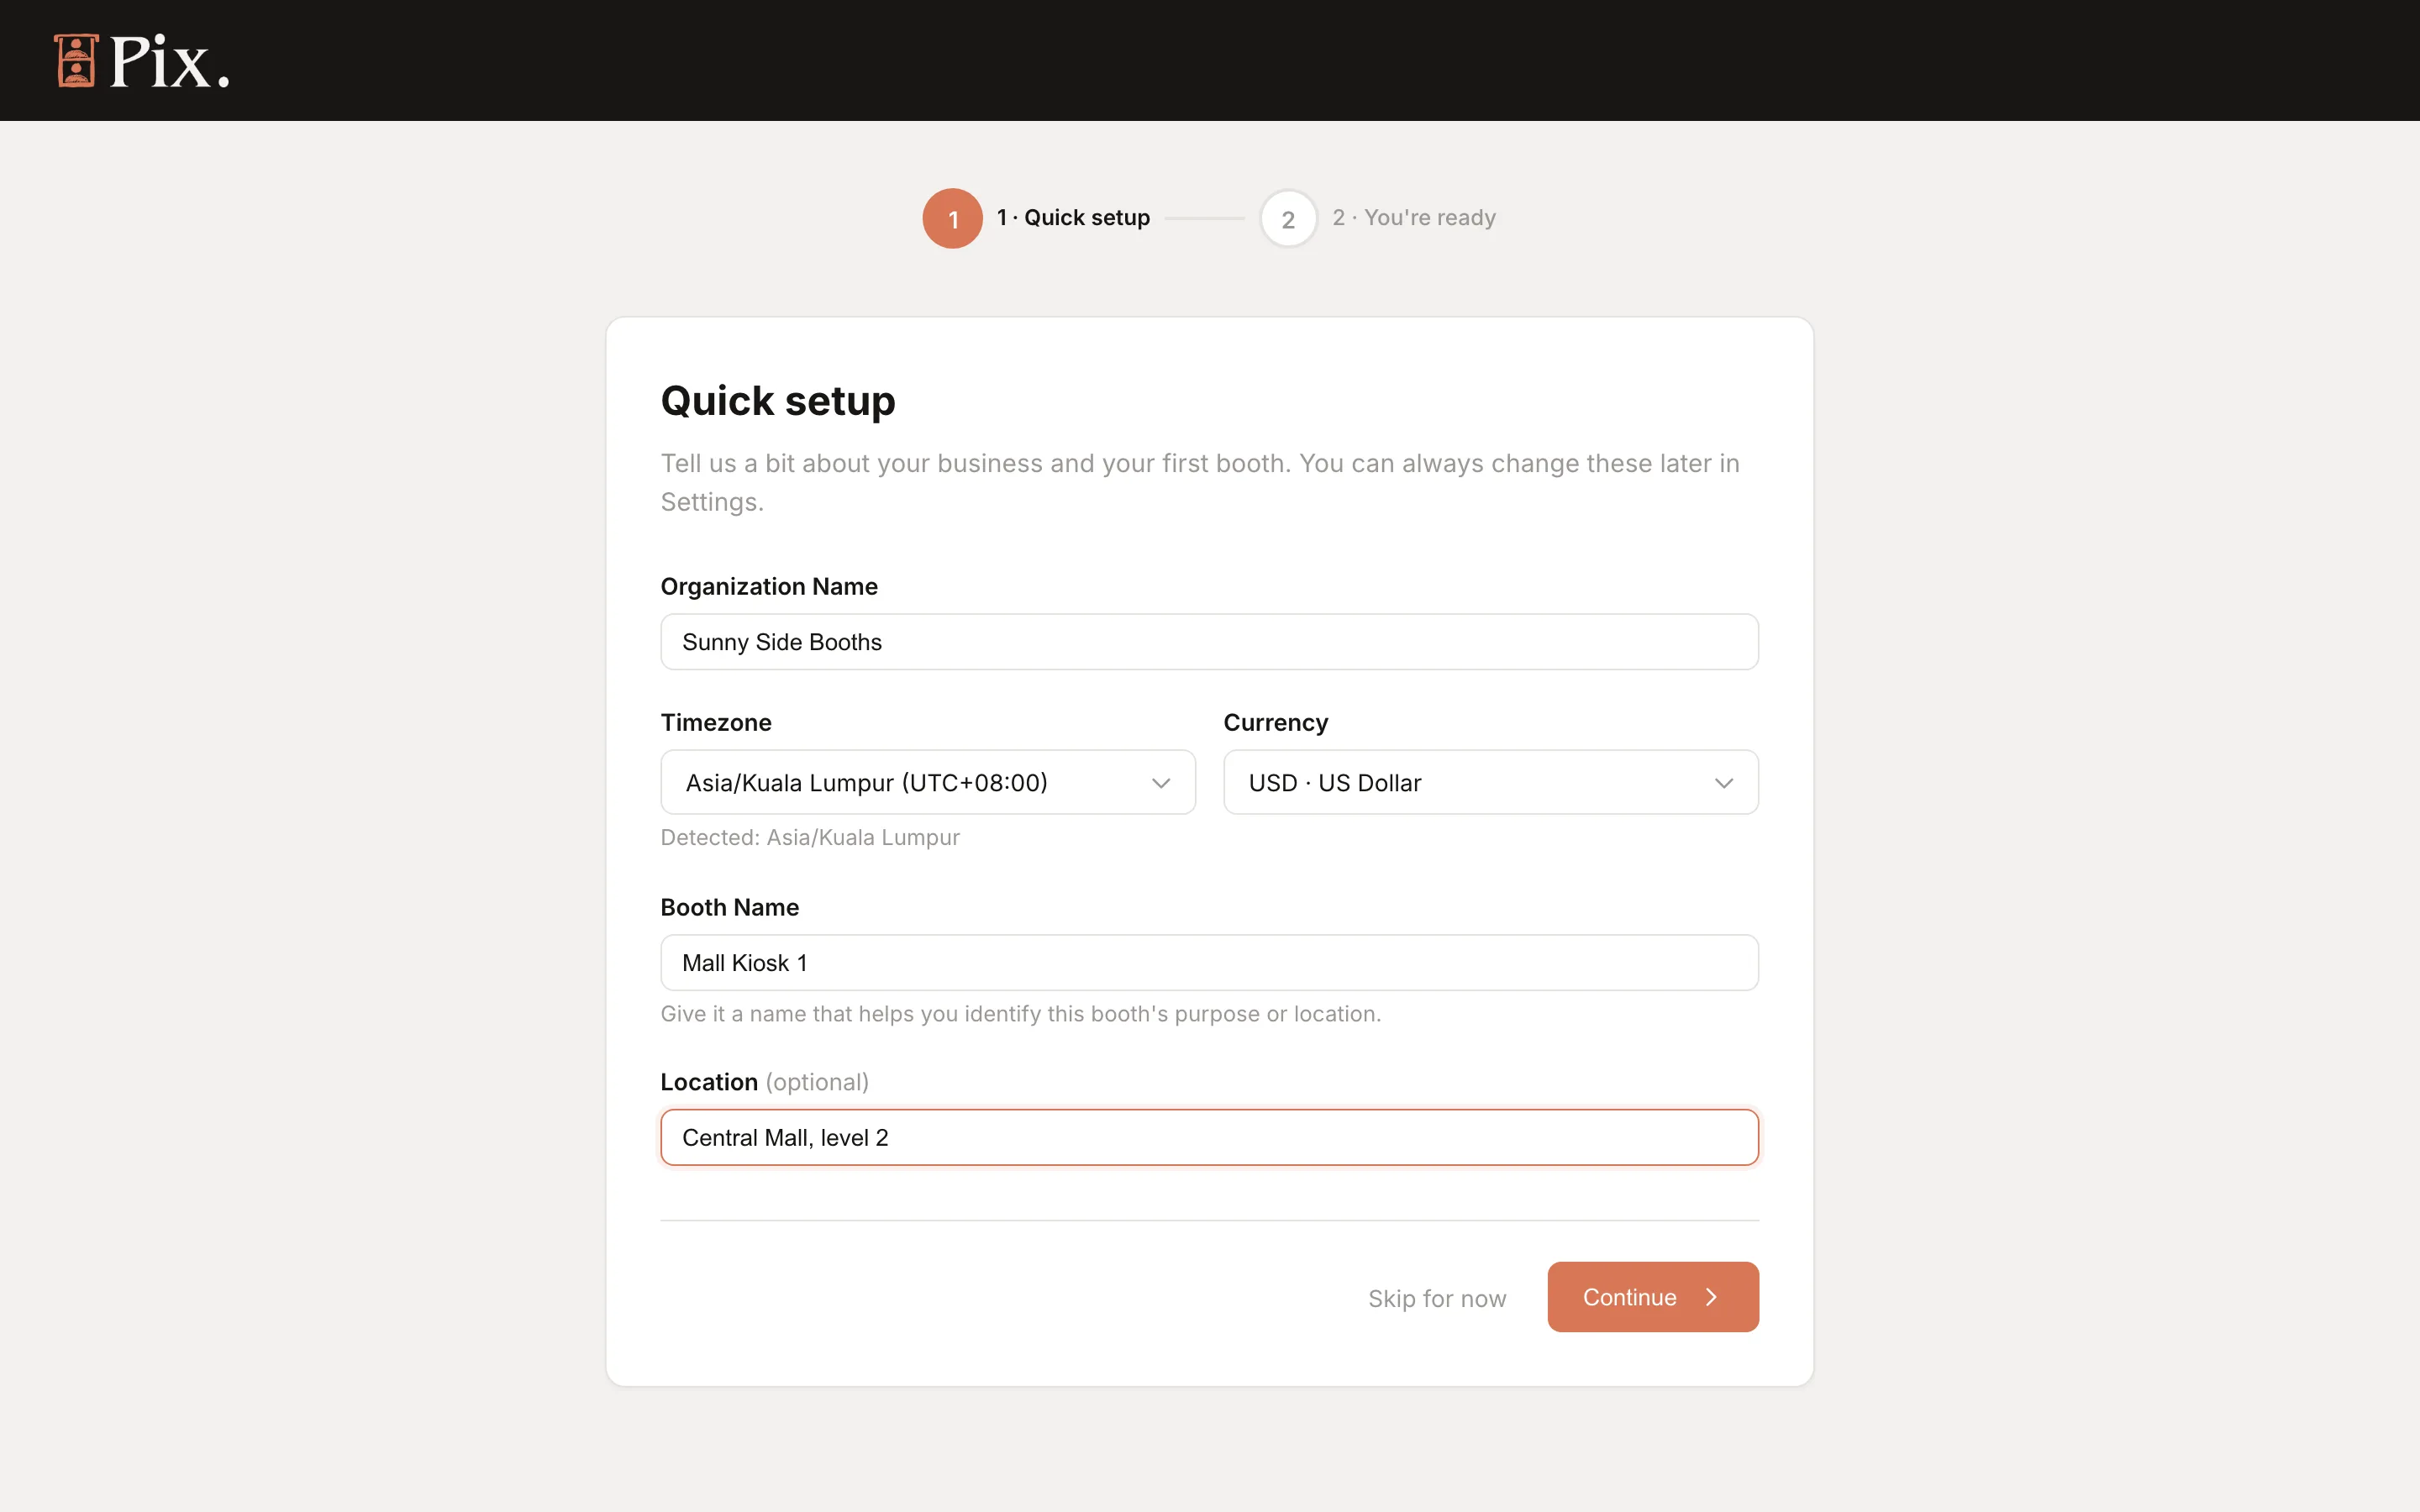
-
Click Continue. Skip for now also works; you can rename the organisation later under Settings > General and set the timezone and currency under Settings > Preferences.
-
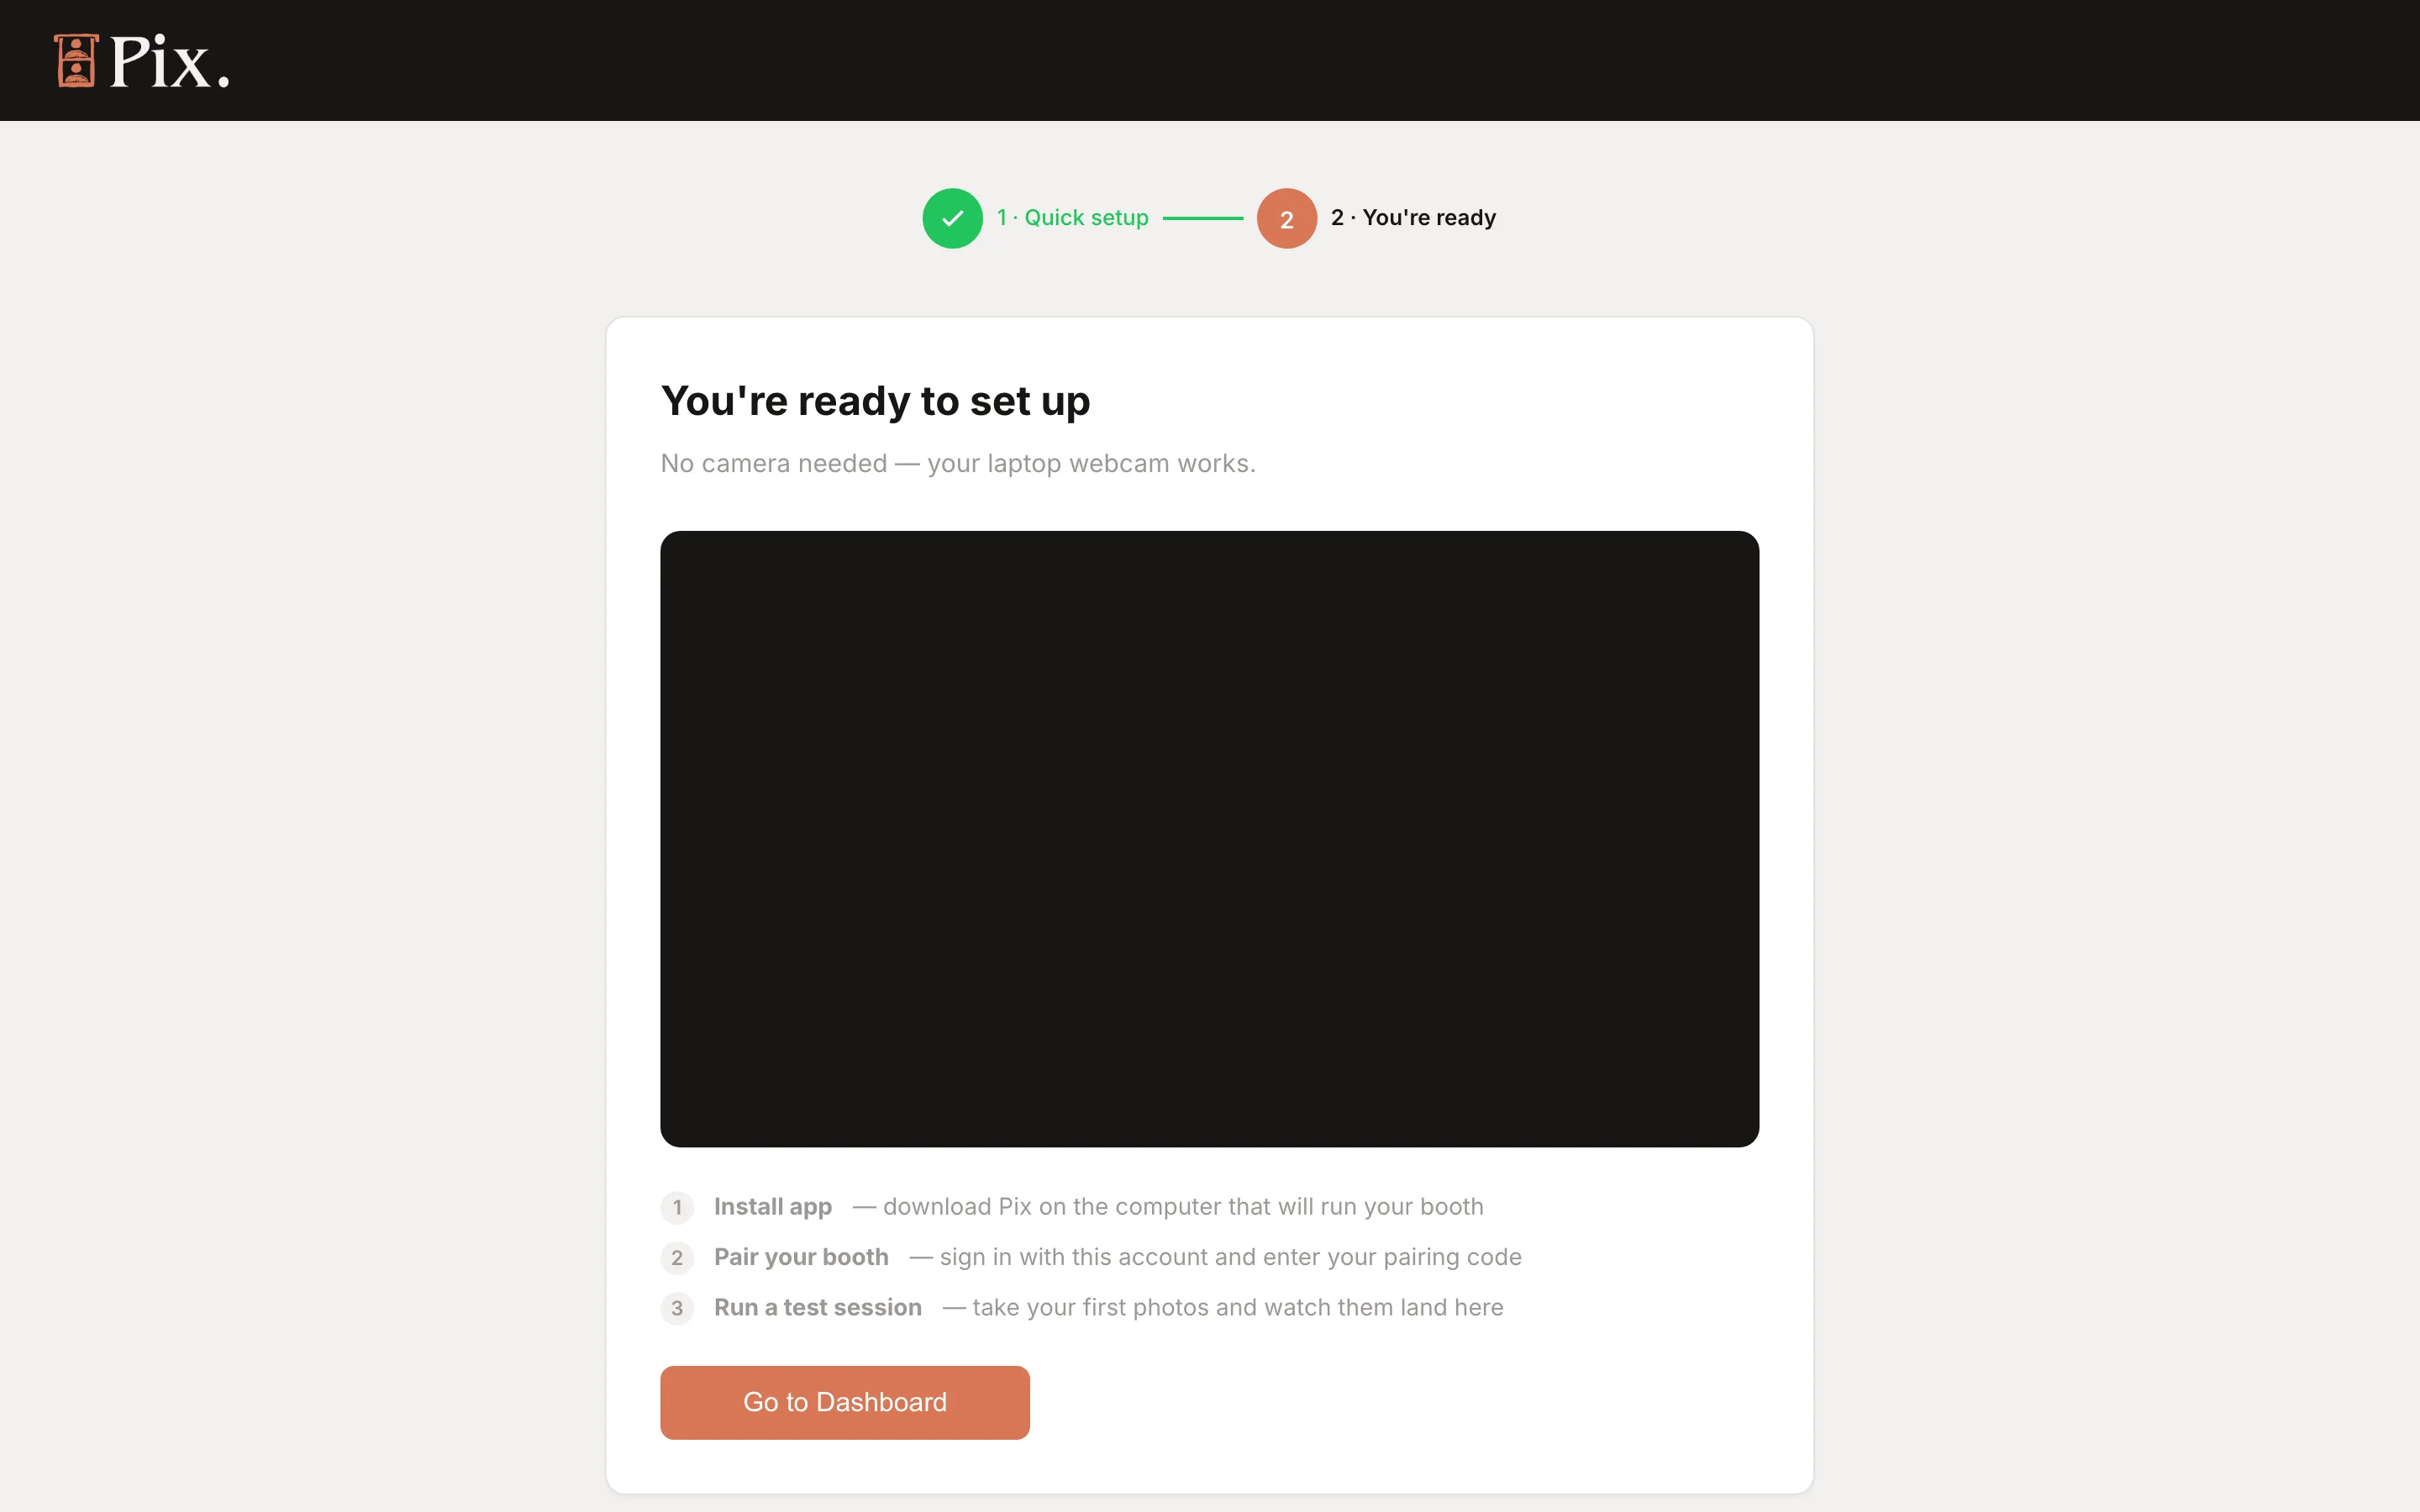
On 2 · You're ready, the dashboard lists what comes next: install the app, pair your booth, run a test session. Click Go to Dashboard.
Your New Dashboard
You land on the dashboard home. Until the booth is paired and has run a session, every page shows a setup banner: "Your photobooth isn't fully working yet. Complete your setup to start taking photos (2 of 4 steps done)." with Watch the setup video and Install the app. The banner goes away on its own once setup is complete.
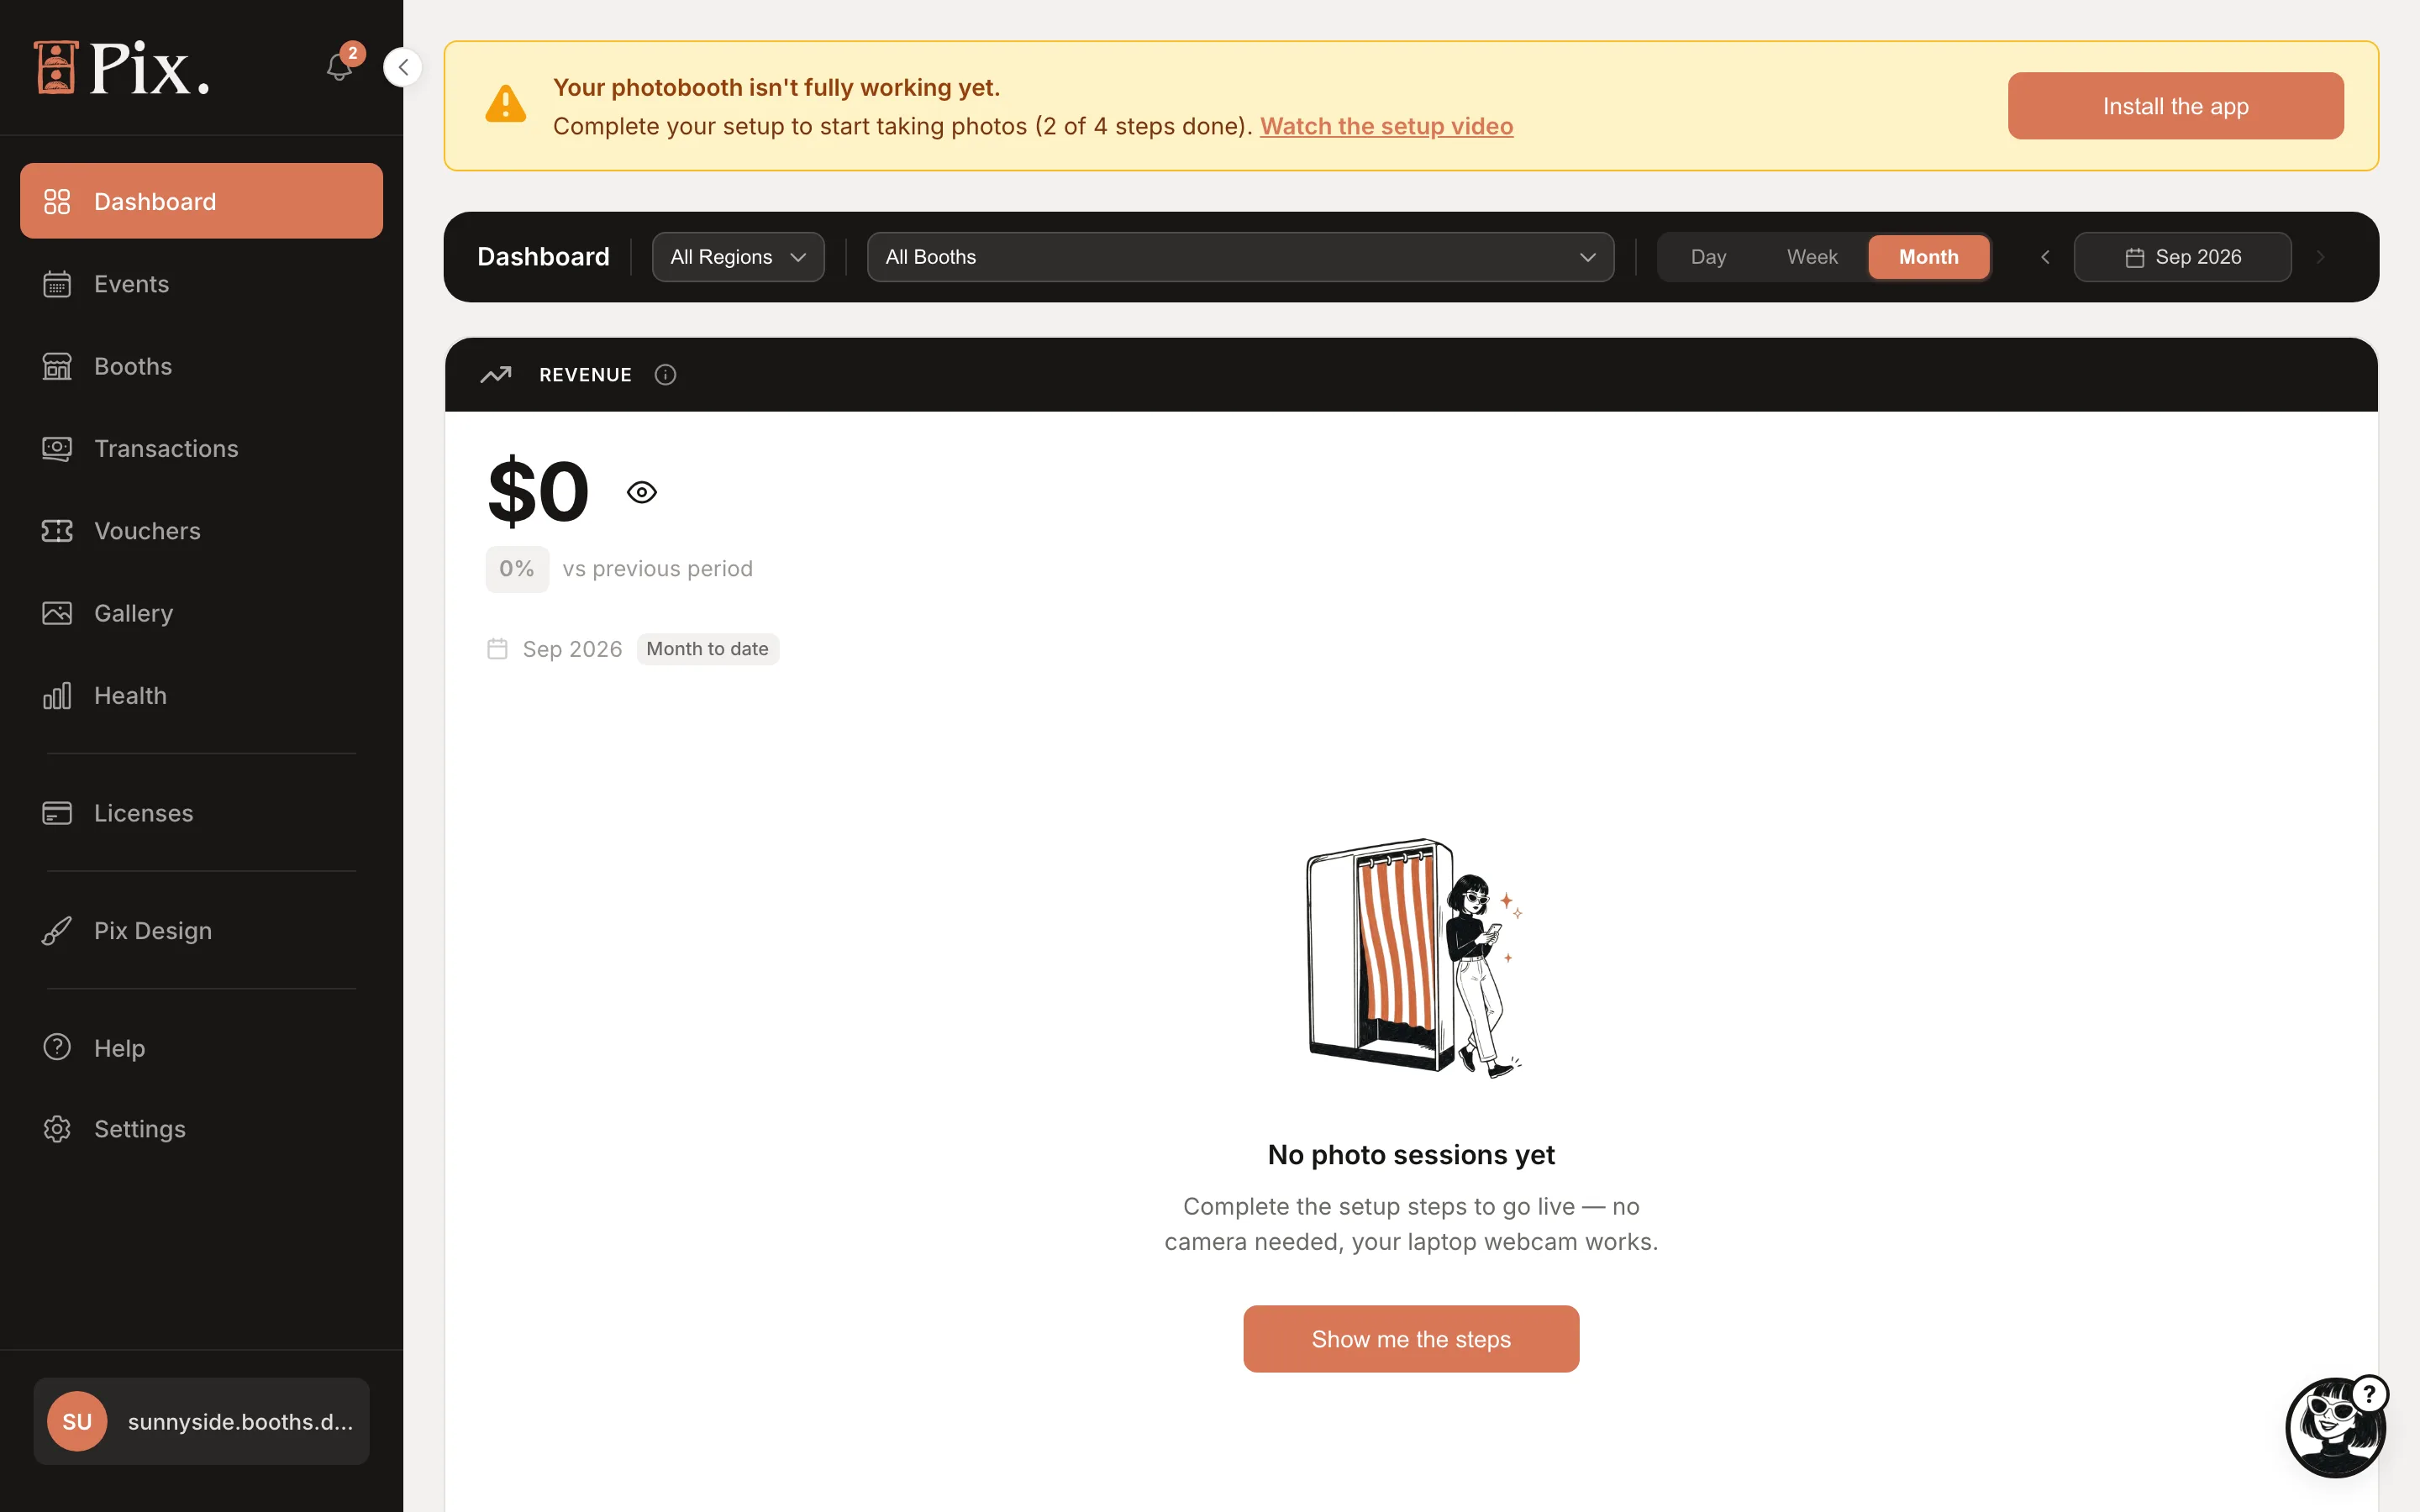
A few things worth knowing on day one:
- One account, one organisation. Signing up creates one organisation for your business. Everything you make, booths, templates, events and transactions, belongs to it.
- Staff do not sign up separately. Invite them from Settings > Members > + Invite with an email address and a role. They accept the invitation by email and join your organisation.
- Booths are free. Create as many as you like under Booths. What you pay for later is Pix Pro on the computers that run them.
- The account starts on Pix Starter. One computer, watermarked output, two ready-made templates and the default screen design. See Choose Your Plan.